
The purpose of this tutorial is to demonstrate what a completed My Home page looks like. Also, to identify the areas within the dashboard (backend) and the My Home App (front end) to fill in information in order to populate the content for the My Home page. If there is no information added to certain sections, then the My Home page will have blank spaces.

- This section appears complete after the user signs in. A sign-in/registration prompt will appear when the user tries to download or share this page (see step 2). Our system utilizes a password-less sign in to make this process quick and easy.
- This section allows users to download a pdf copy of their brochure, share their brochure via email or Facebook, or favorite this brochure with the heart icon. The user can also click “Contact Us” if they would like – this information will be sent to the agent(s) assigned to the community they chose in their brochure.
- This section is an overall summary of the users selections. (More detail about this content later in the tutorial)
- Community Name
- Plan & Elevation Name
- Elevation Information
- Lot Selection & Information
- Pricing & Monthly Mortgage Calculation
- The color of the blocks & the company logo can be edited in the backend dashboard Admin section. See steps 3 & 7 of this tutorial: https://docs.dashboard.anewgo.com/2019/11/11/edit-general-info/
- This is the main/default agent assigned to the community the user selected.
- This is the community information that can be added/edited in the backend dashboard. We recommend adding at least one image – the image helps anchor the display of this section. No image will make the text run and look off. This particular community has an image, description, and logo. https://docs.dashboard.anewgo.com/2020/01/20/edit-community-info/
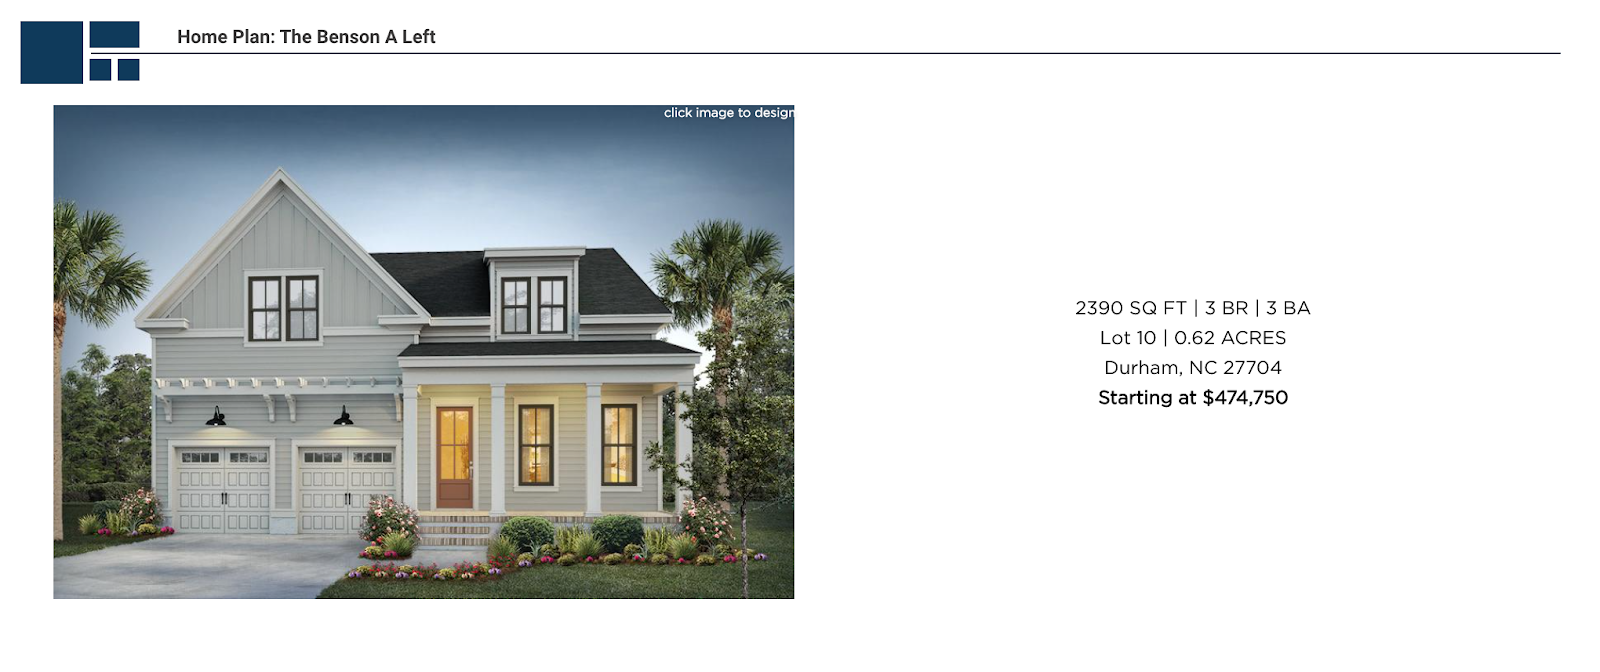
This section of the My Home page is populated when a user selects a plan on the front end of the My Home App. The details listed for this plan can be added/edited in the backend dashboard. For Build On Your Lot builders, we will hide the location information.
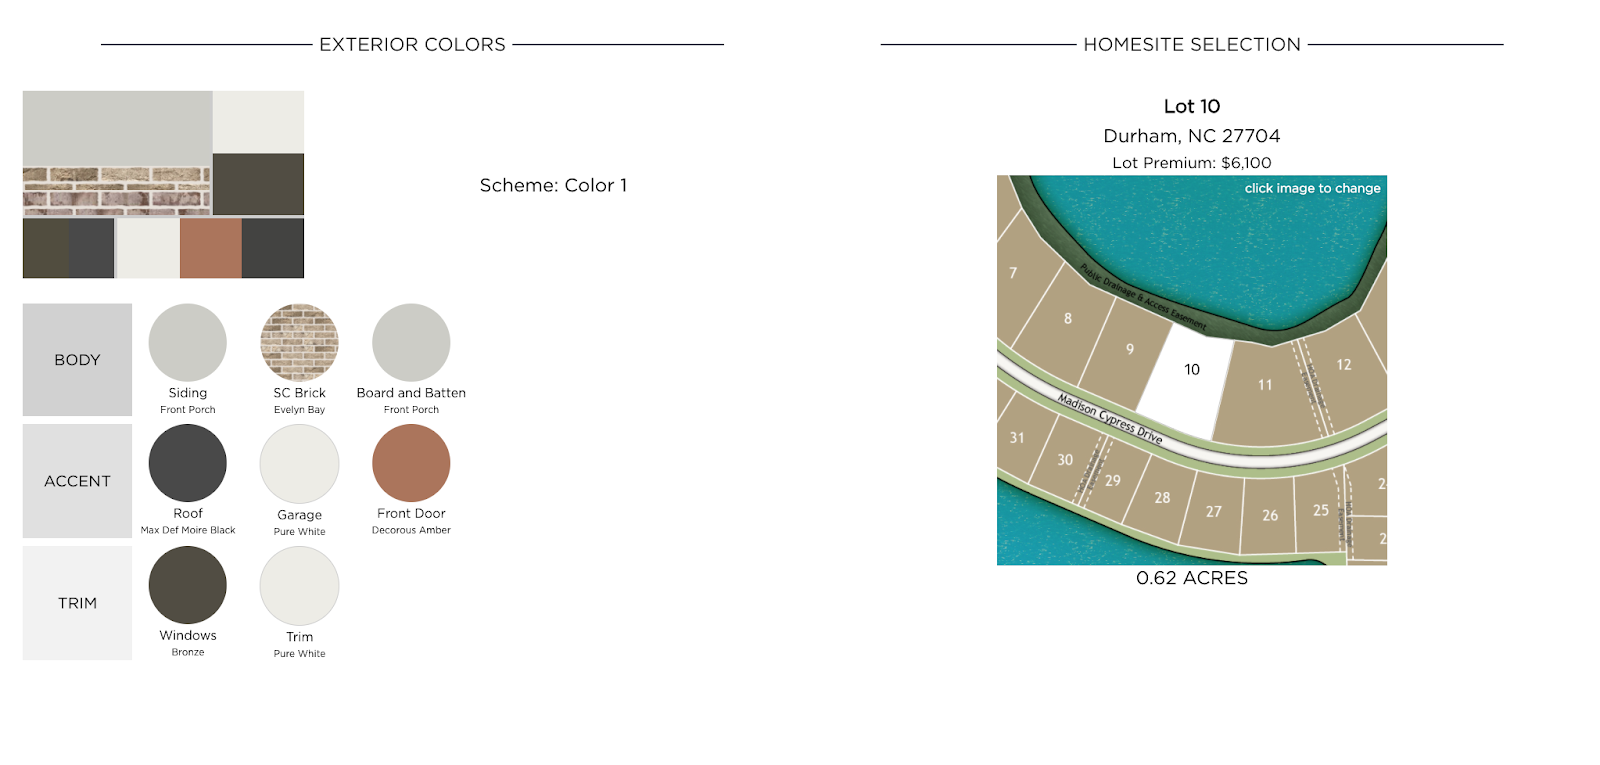
The next sections – Exterior Colors & Homesite Selection – will appear when users select colors for the home and when they select a lot on the siteplan on the front end of the My Home App. Click here and scroll down to see the “Design Exterior” section and “Select Homesite” section.
Check out these links to learn more about adding/editing colors and editing your siteplans in the backend dashboard. For Build On Your Lot builders or for builders that choose to hide siteplans altogether, the “Homesite Selection” area will not appear.
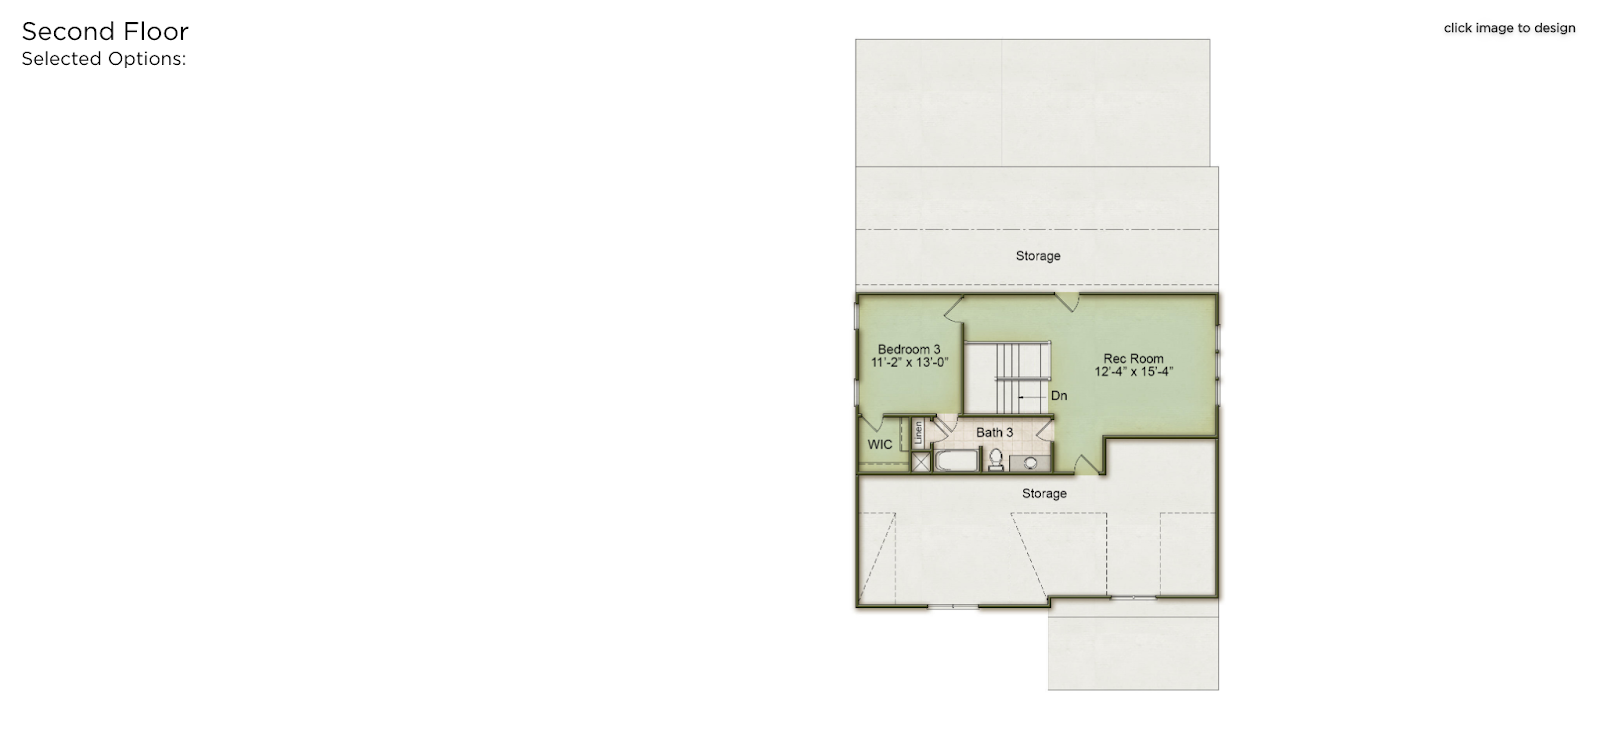
If you have floorplans in your app, these will appear on the My Home page when a user selects the correlating plan and elevation. Users can also select floorplan options on the front end that will be listed to the left of the floorplan images. Click here and scroll to the “Design Floorplan” section.
See this tutorial on how to edit floorplan details and options in the backend dashboard.


If you have interior options in your app, these will display when a user clicks and selects options for the specific interiors. If they do not select anything, this area will be blank. Click here and scroll down to the “Design Interior” section. In this example, we only selected the Master Bath interior option.
For more information about adding or editing interiors to your My Home App, please contact your Account Manager.

Lastly, we have the Standard Features which are assigned to specific communities and the Disclaimer (see step 8) that displays throughout your entire My Home App. These can both be edited in the Admin section of the backend dashboard. Note: Standard features will also display on the front end Community Info page and on the downloaded brochure.
Here is an example of this completed My Home page downloaded as a PDF.