Check out this doc to see what is needed to plan a new community.
The Anewgo team has loaded your plans/elevations and added your communities to your app – now what? Here are the next steps to ensure your community is completely set up and ready to be active. We recommend doing these steps in the order listed below…
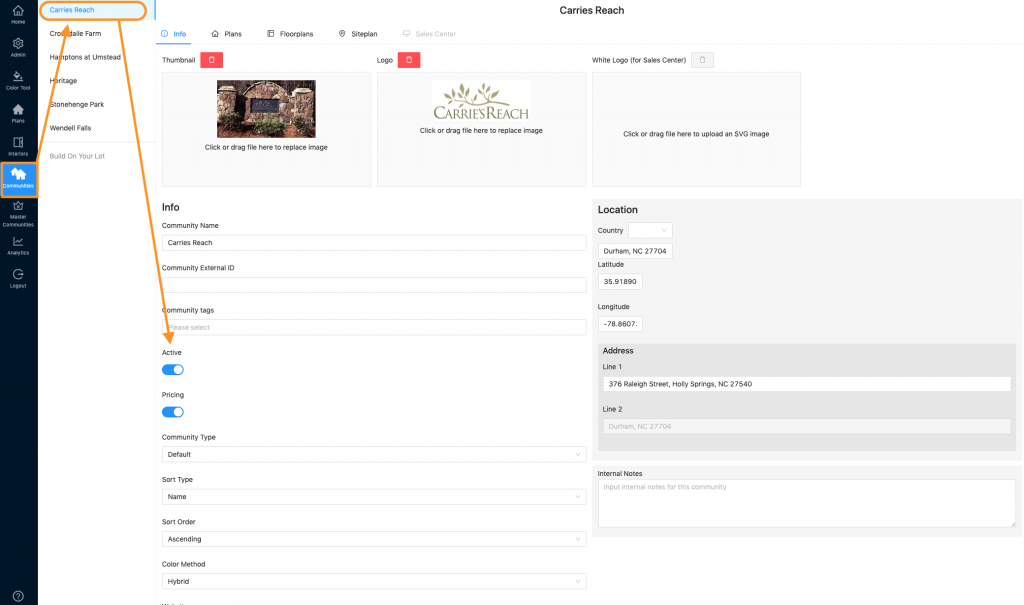
1. Edit Community Info
- Update community images & logos (need to add at least 1 community image for optimal formatting on the front end!)
- Add descriptions, captions or links to website
- Assign agents to the community
- Update location if needed
- Manage Standard Features
2. Set Exterior Design Colors for the Community
Palette Color Method
– Assign Palettes to community
– Set Community Color Method to Palette
Scheme Only Color Method
– Assign Schemes to community
– Assign Schemes to elevations (this can also be done one elevation at a time in the plan repository)
– Set Community Color Method to Scheme
Hybrid Color Method
– Assign Palettes to community
– Assign Schemes to community
– Assign Schemes to elevations (this can also be done one elevation at a time in the plan repository)
– Set Community Color Method to Hybrid
3. Update Plan Information
- Add square footage, cost, bed & bath counts (min/max ranges available as well)
- Include Video URL
- Update description
- Add Plan Assets if needed
4. Assign Plans to Communities
5. Update Community Siteplan
- Edit Lot details
- Update Sales Status of Lots
- Specify Lot Exclusions
- Add Hotspots if needed
- Create Inventory Lots if needed
6. Once everything is set, you can turn on the community with the Active toggle on the Info page of the community.

