
This guide explains how to sync your Anewgo custom website forms with Lasso CRM by mapping Lasso Question IDs and Lasso Answer IDs directly within your Anewgo Console. Mapping these unique identifiers ensures that information submitted by prospective buyers on your website maps accurately into your Lasso CRM database via webhooks.
Step 1: Locate Your Question and Answer IDs in Lasso CRM
To link your Anewgo form fields to Lasso, you must first extract the proper ID codes from your Lasso registration page configuration.
- Log into your Lasso CRM account and navigate to the project dashboard.
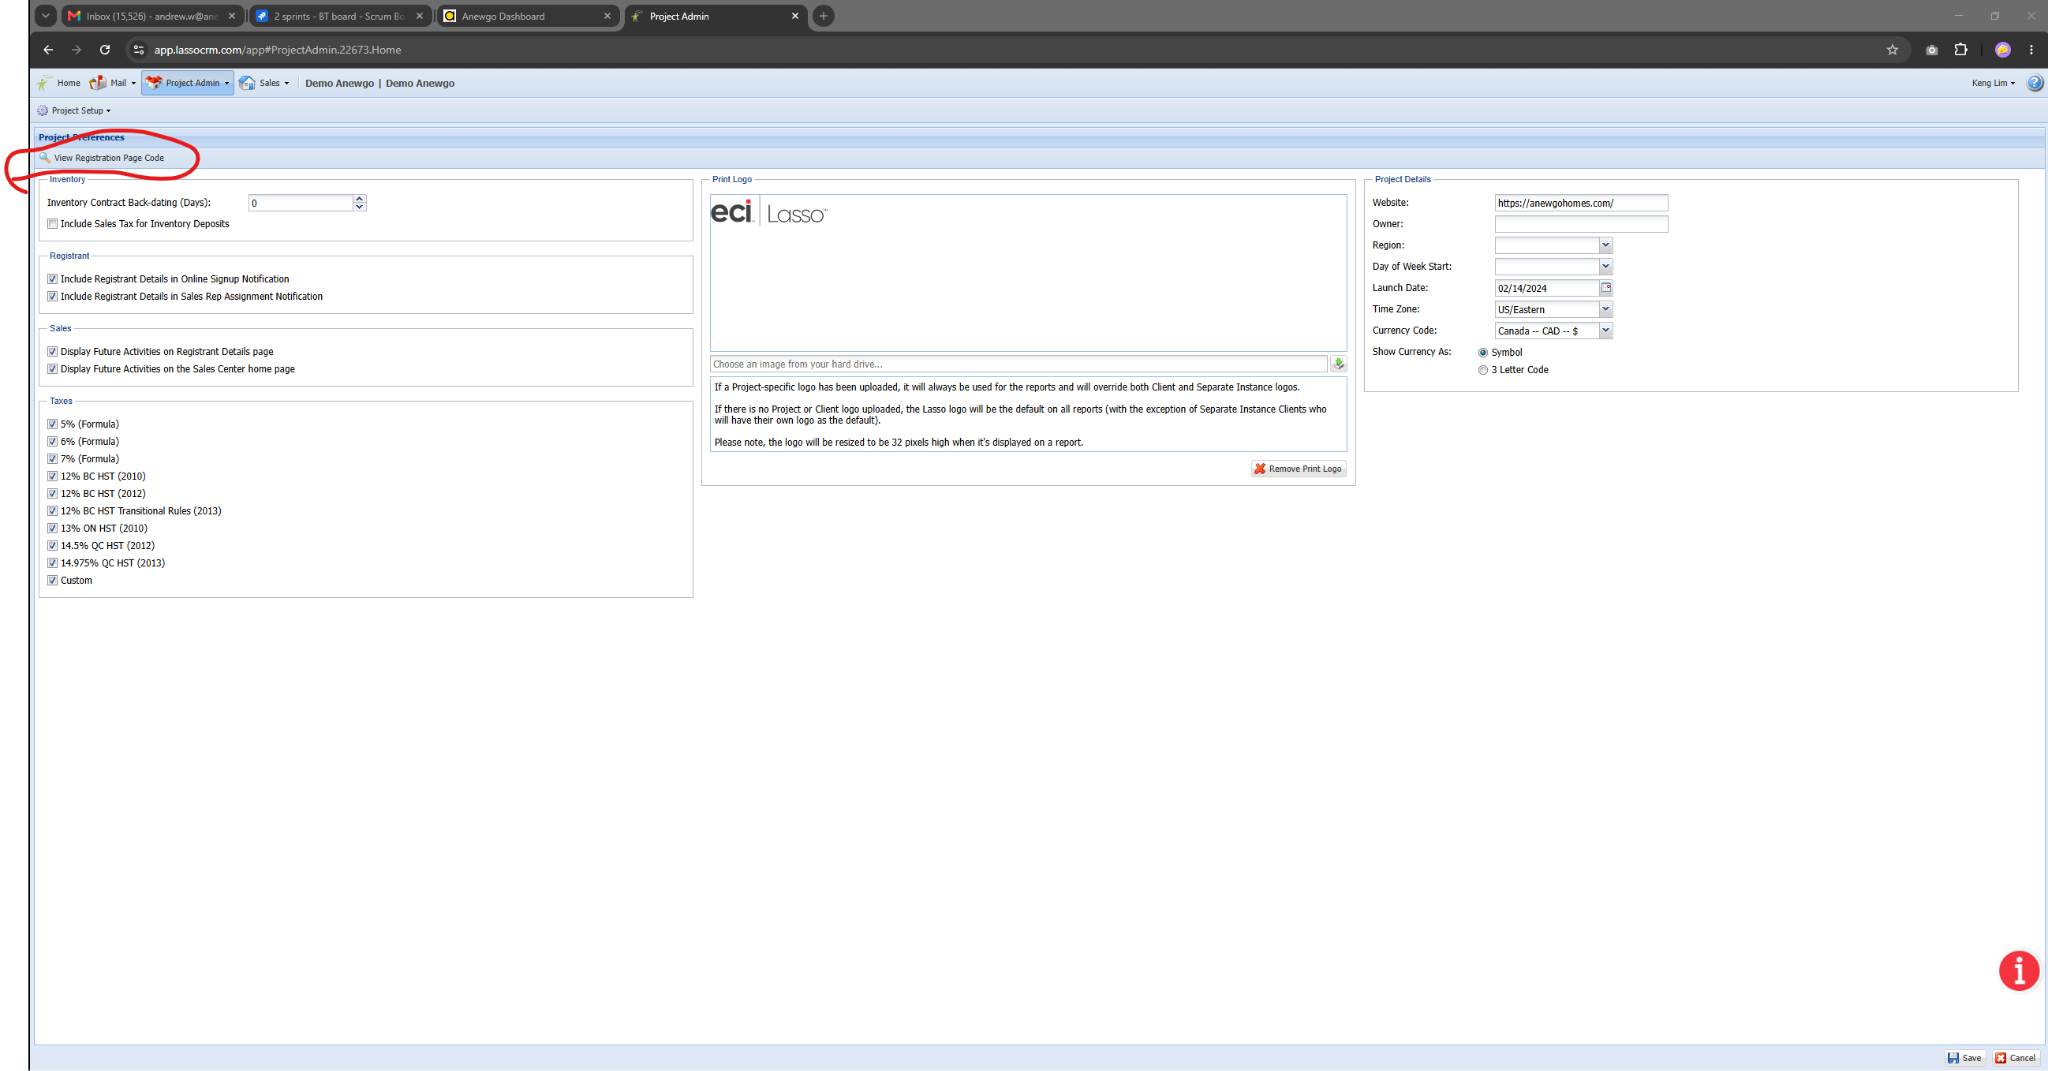
- From the top navigation bar, click on Project Admin.
- Under the Project Preferences section on the upper left, click the View Registration Page Code link.
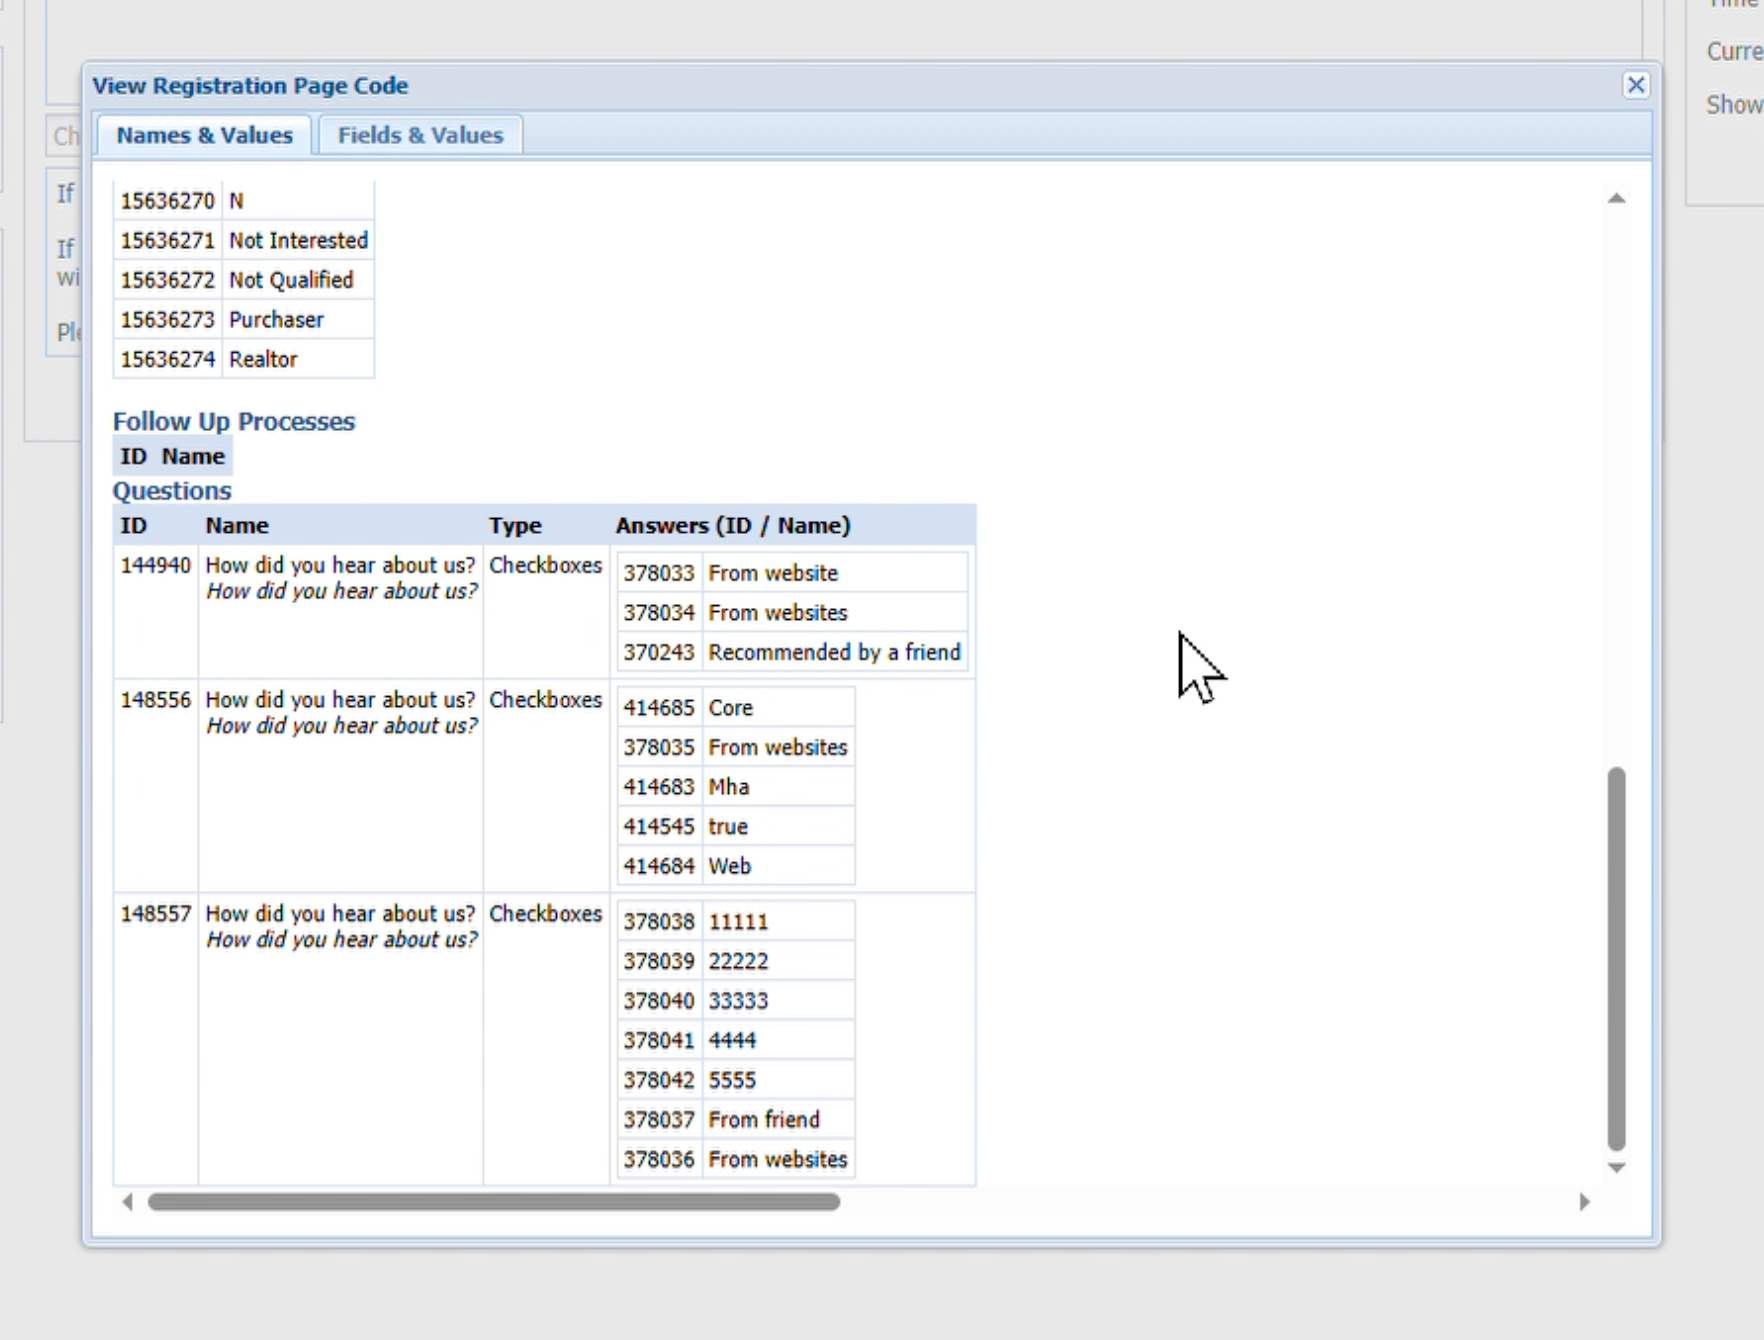
4. A popup window titled “View Registration Page Code” will appear. Locate the target form field section (e.g., “How did you hear about us?”).
5. Identify and write down the necessary codes:
Question ID: The 6-digit number listed right next to the main field question label (e.g., 249016).
Answer ID: For dropdown/select fields, each choice has a unique 5 or 6-digit ID number listed directly next to the specific option name (e.g., 62333 for Email, 62334 for Search).
Step 2: Map Lasso Question IDs in Anewgo Dashboard
You can configure a Lasso Question ID for any field type in your custom form.
1. Log into your Anewgo Console and go to the custom forms editor inside your Website Module.
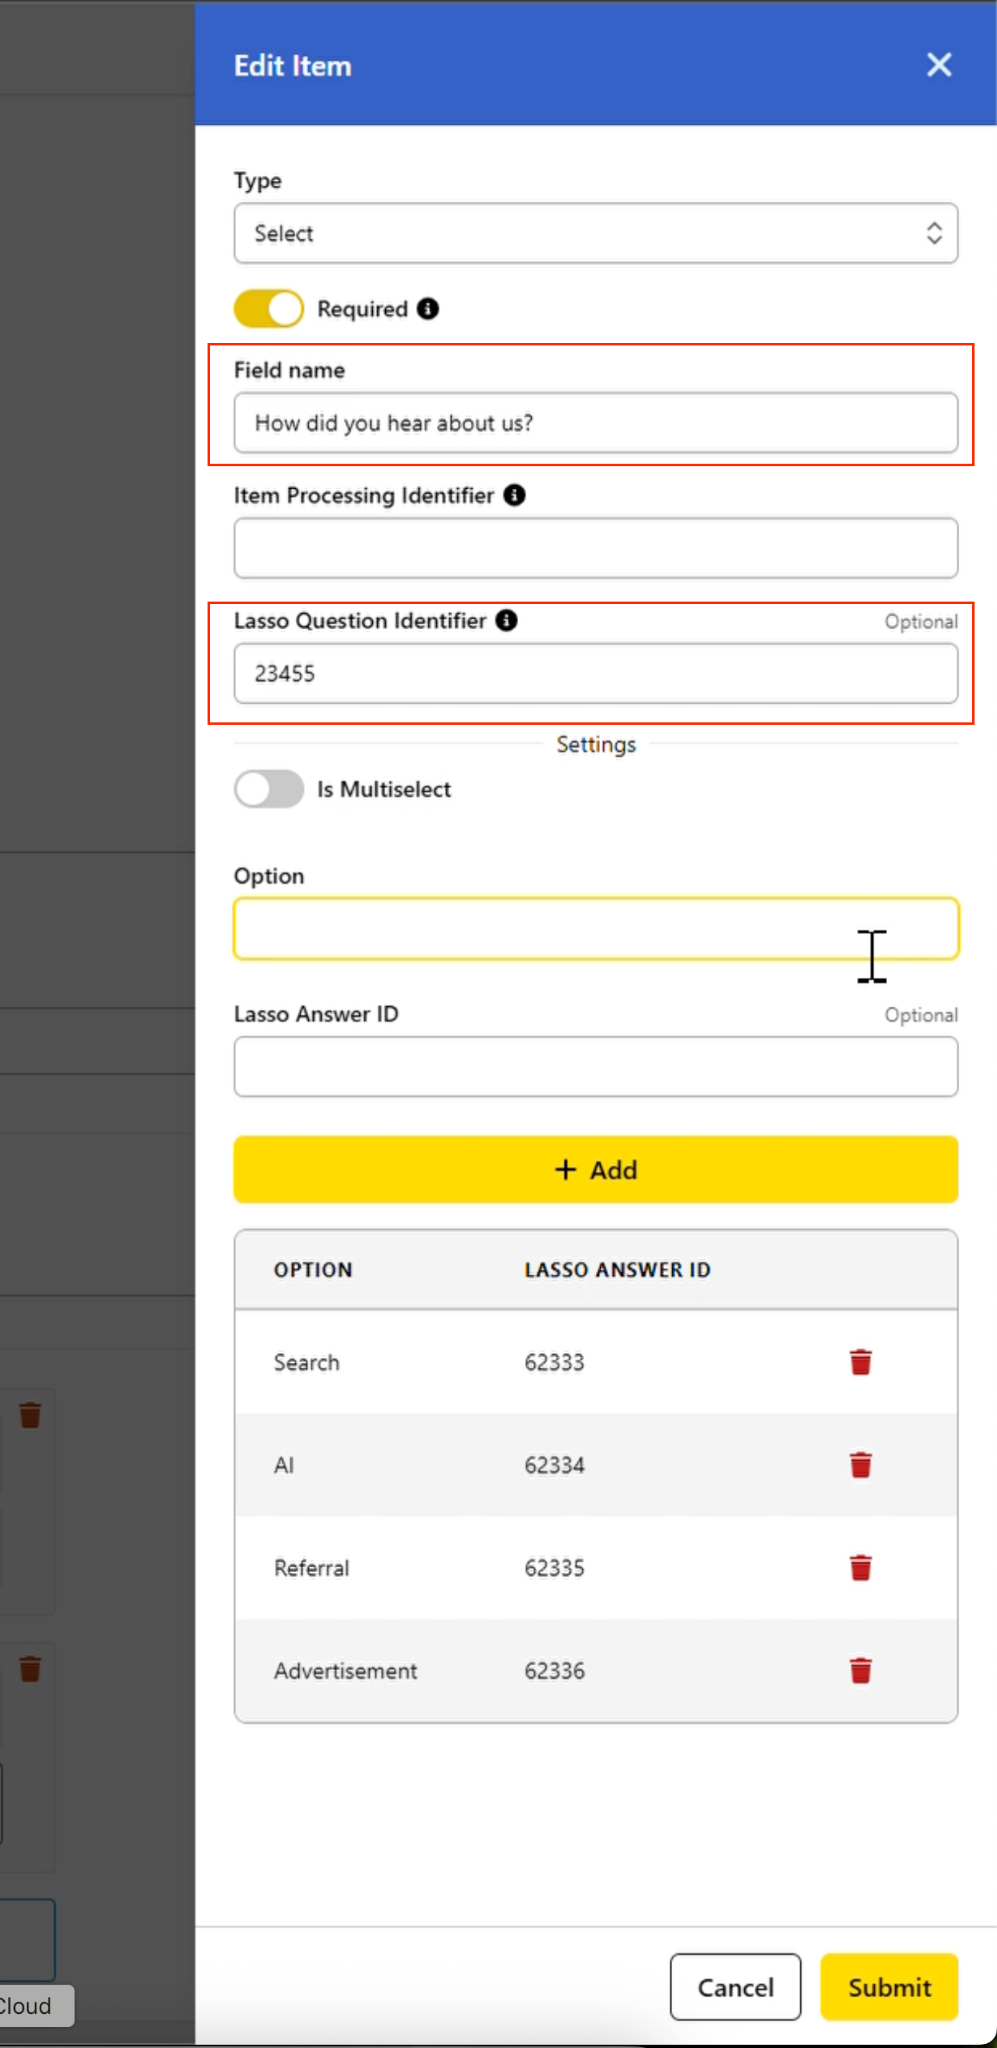
2. Click on the form field you want to edit to open the Edit Item sidebar menu on the right side of the screen.
3. Locate the Lasso Question Identifier text field.
4. Type or paste the corresponding 6-digit Question ID code you copied from Lasso.
Step 3: Map Lasso Answer IDs (For “Select” Field Types Only)
⚠️ Note: You only need to configure Answer IDs for fields set to the Select (dropdown/multi-choice) field type. For standard text, email, or phone fields, you will leave the Lasso Answer IDs blank and only map the Question ID.
- Inside the Edit Item sidebar for your Select field, scroll down to the Options management area.
- In the Option text box, type out the clean display name your website visitors will see (e.g., Email Campaign).
- In the Lasso Answer ID text box immediately below it, enter the exact corresponding ID code for that choice from Lasso.
- Click the yellow + Add button to save that option to the checklist table.
- Repeat this process for all your choice variations (e.g., Search, AI, General, Advertisement).
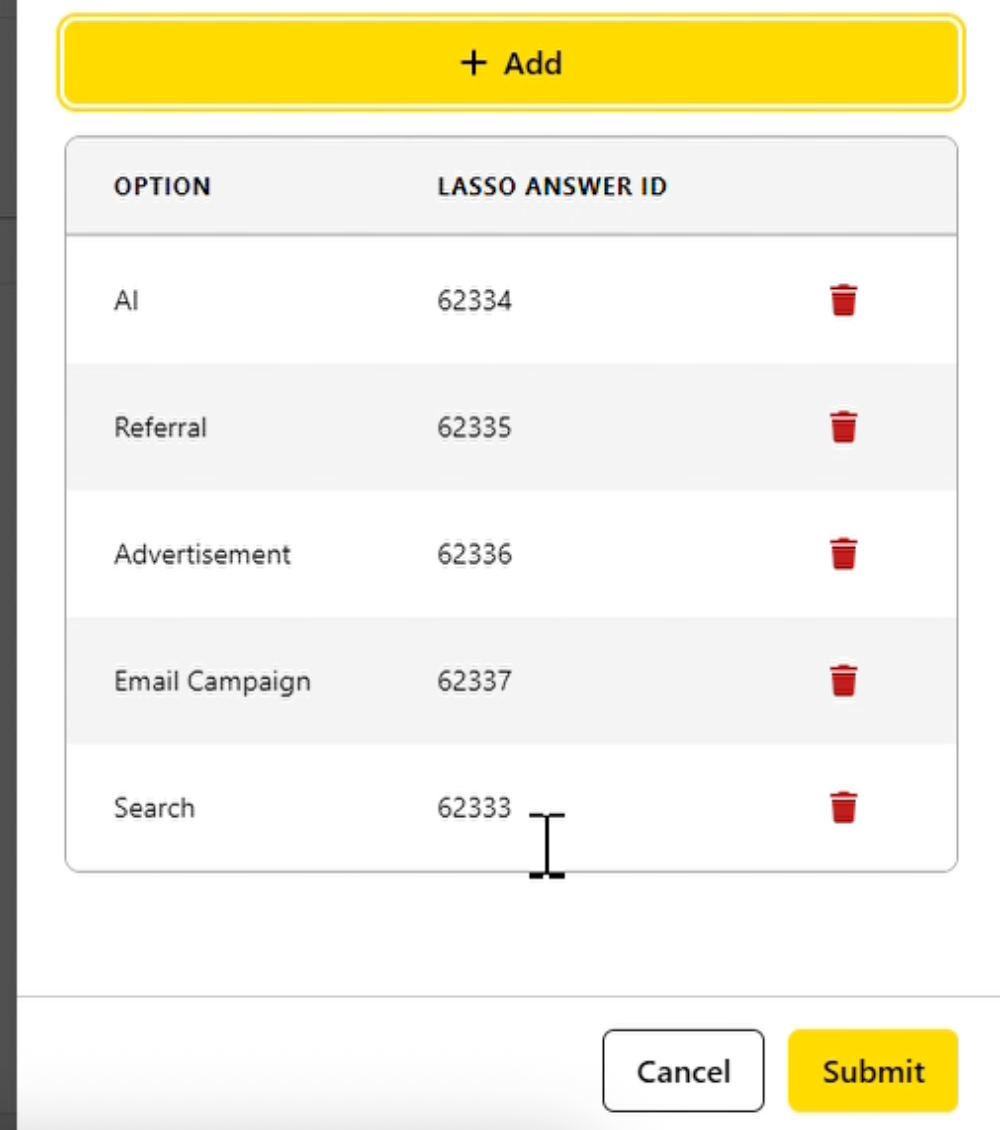
6. Once all fields and choices are mapped correctly, click the Save button at the bottom of the sidebar.
A green notification banner reading “Successfully updated from item” will confirm your changes are live. Your website form events will now route correctly straight into your Lasso CRM database.