
*Make sure any palettes needed are organized & assigned correctly (especially if you use the hybrid color method)
- Navigate to Color Tool and then go to Schemes
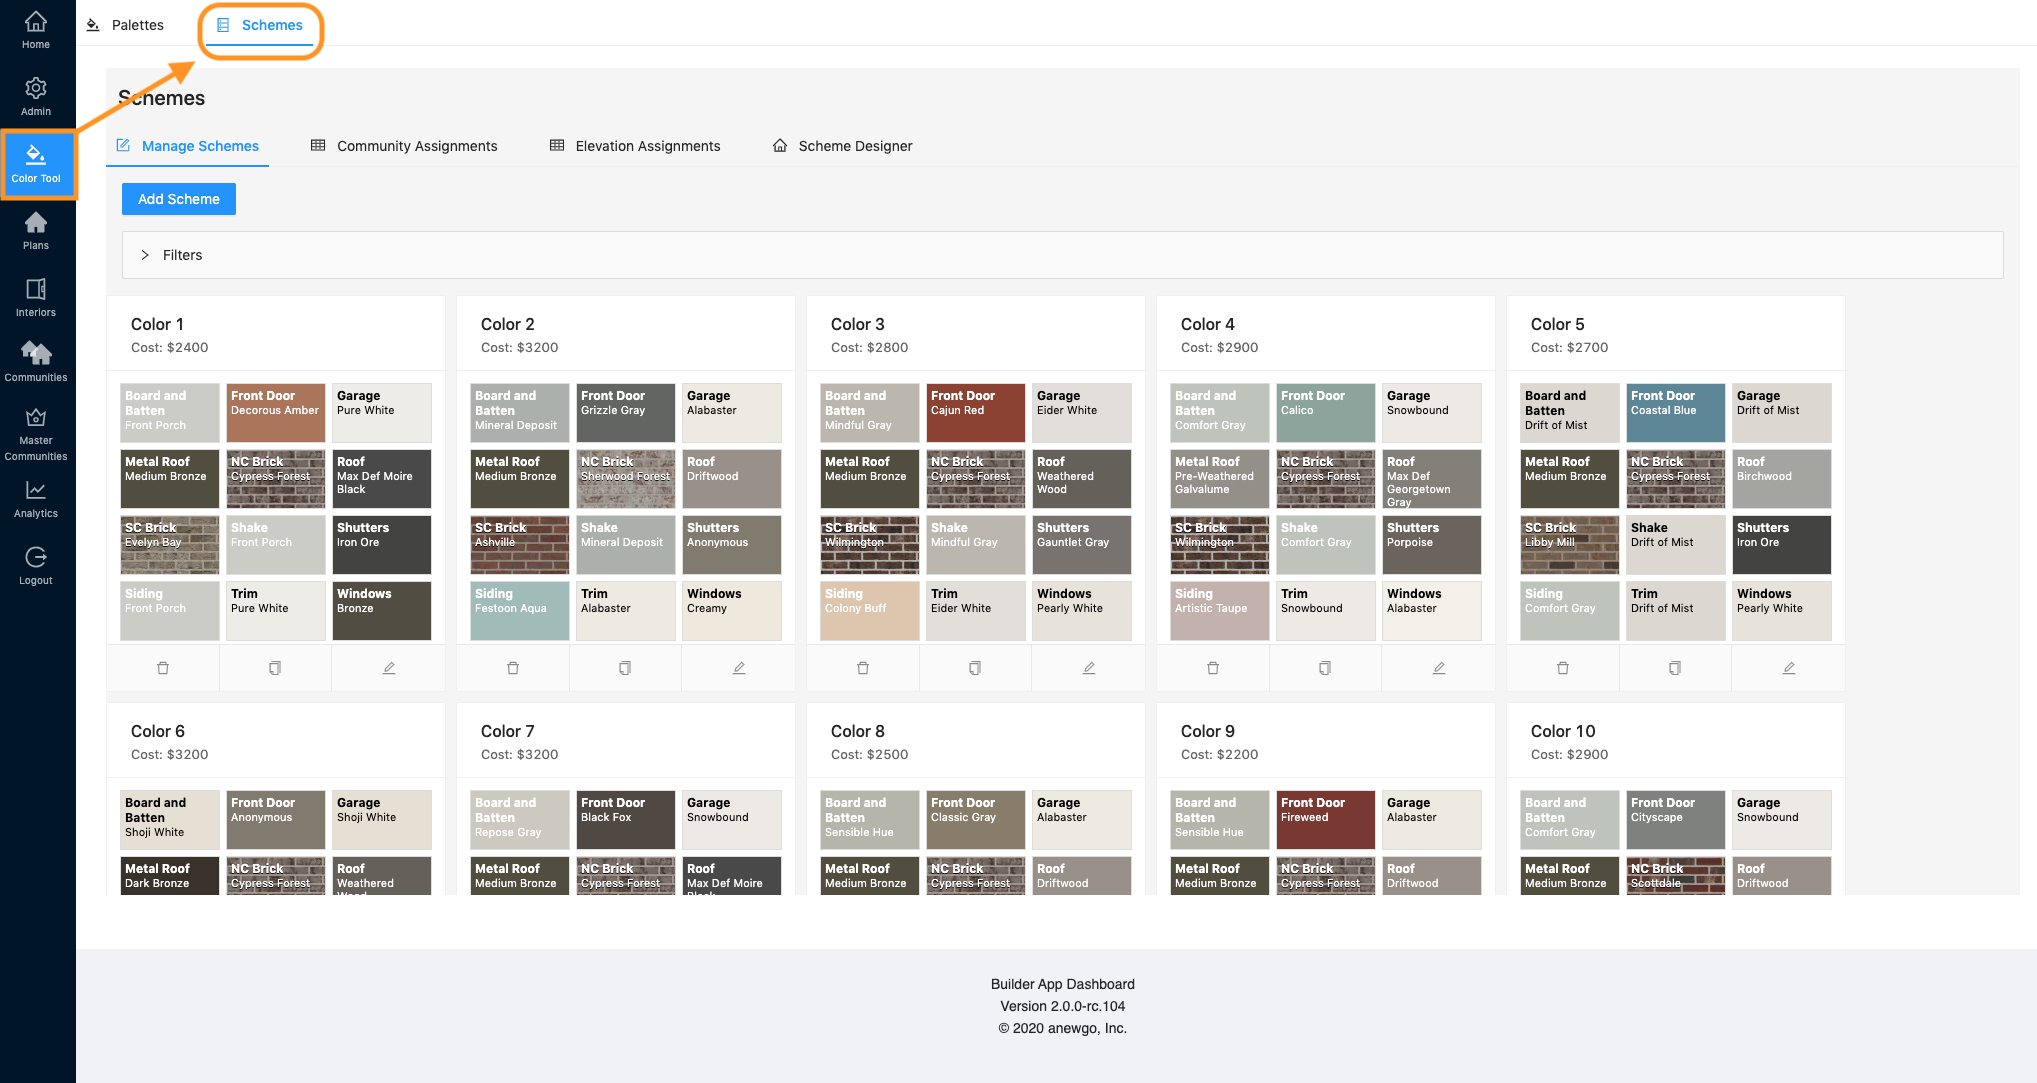
2. This will bring you to the Manage Schemes section.
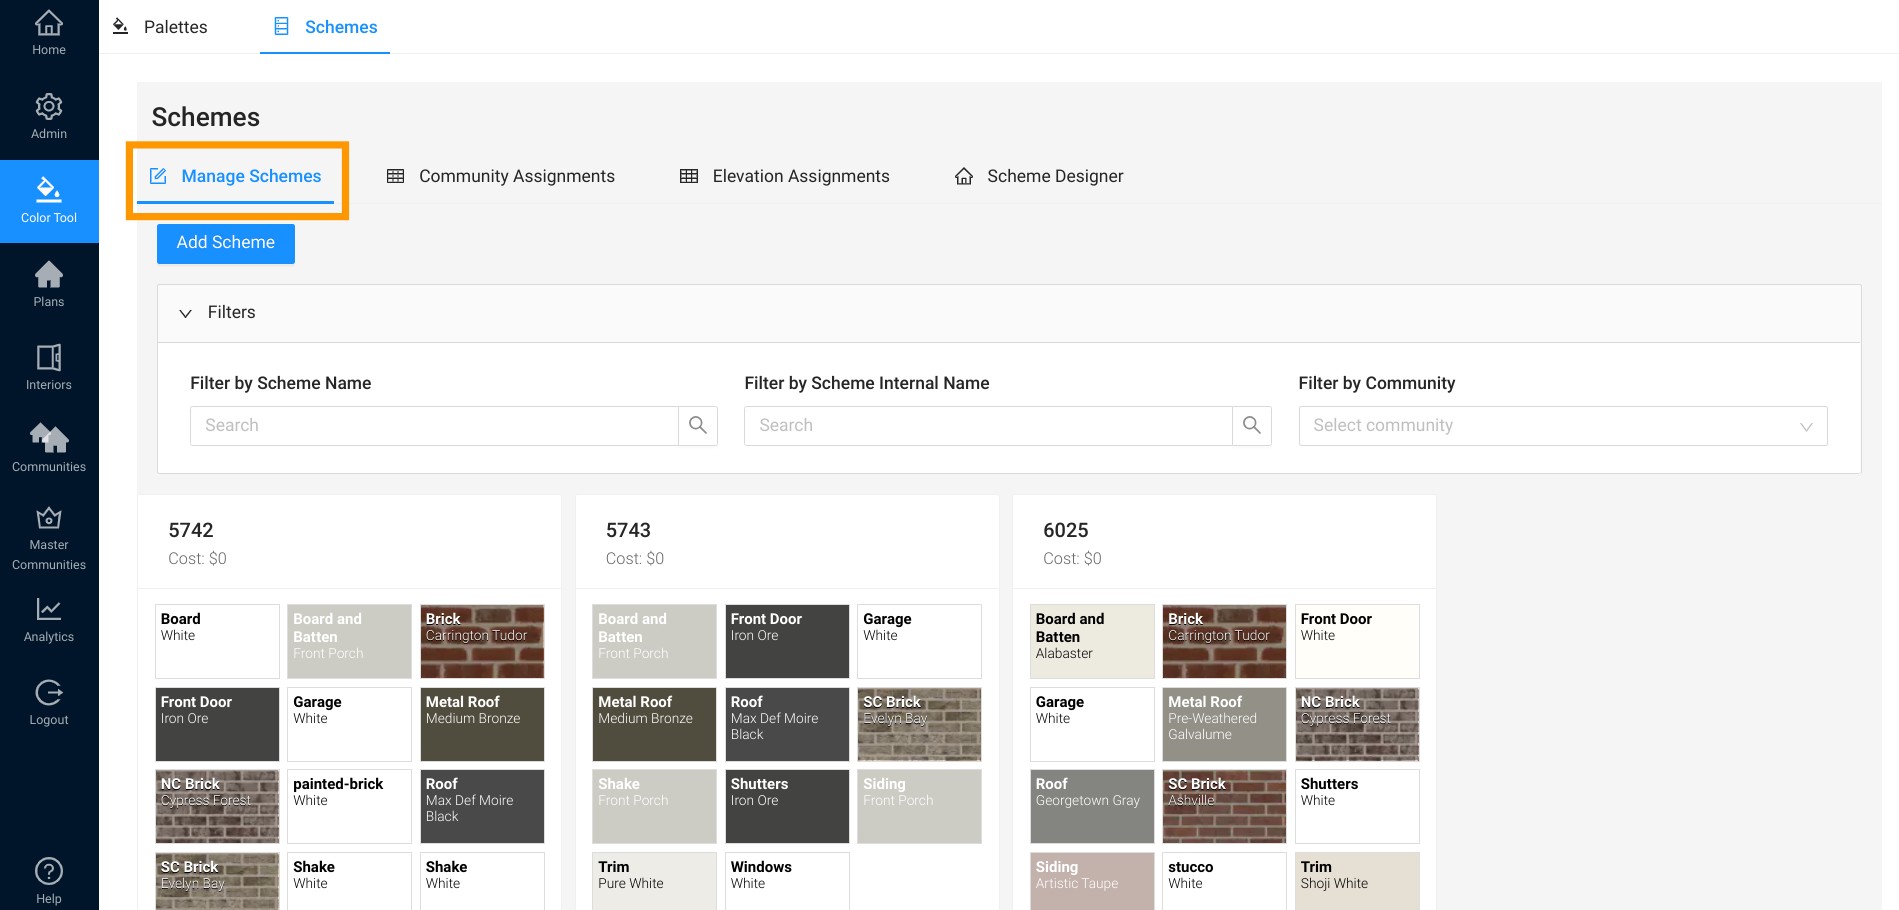
3. Here you can filter by Scheme Name, Internal Name, or Community to easily find the scheme you need to edit.

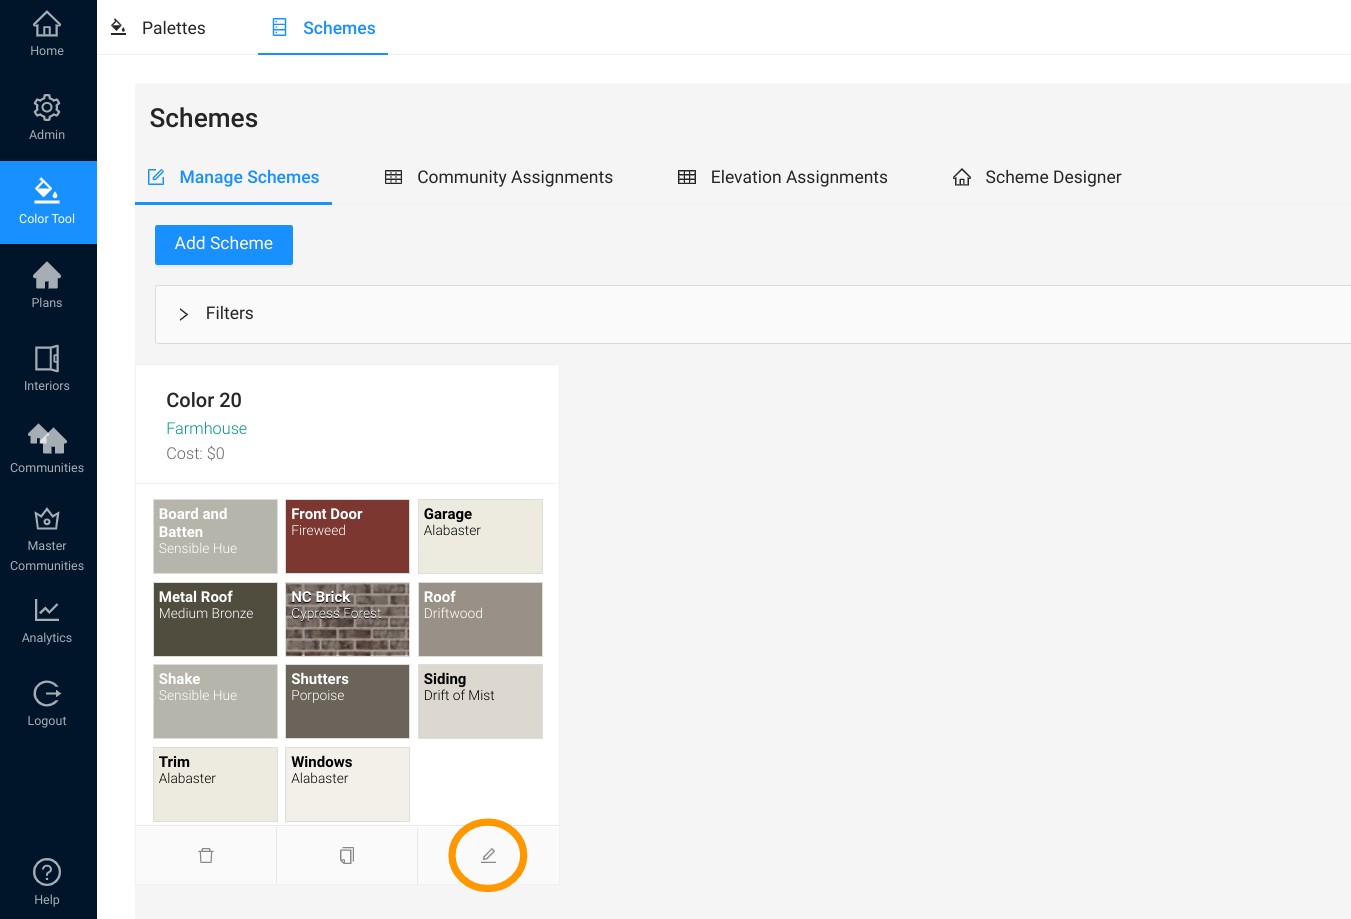
4. Once you find the correct scheme, click the Pencil icon (edit) and this will open the Edit Scheme window.
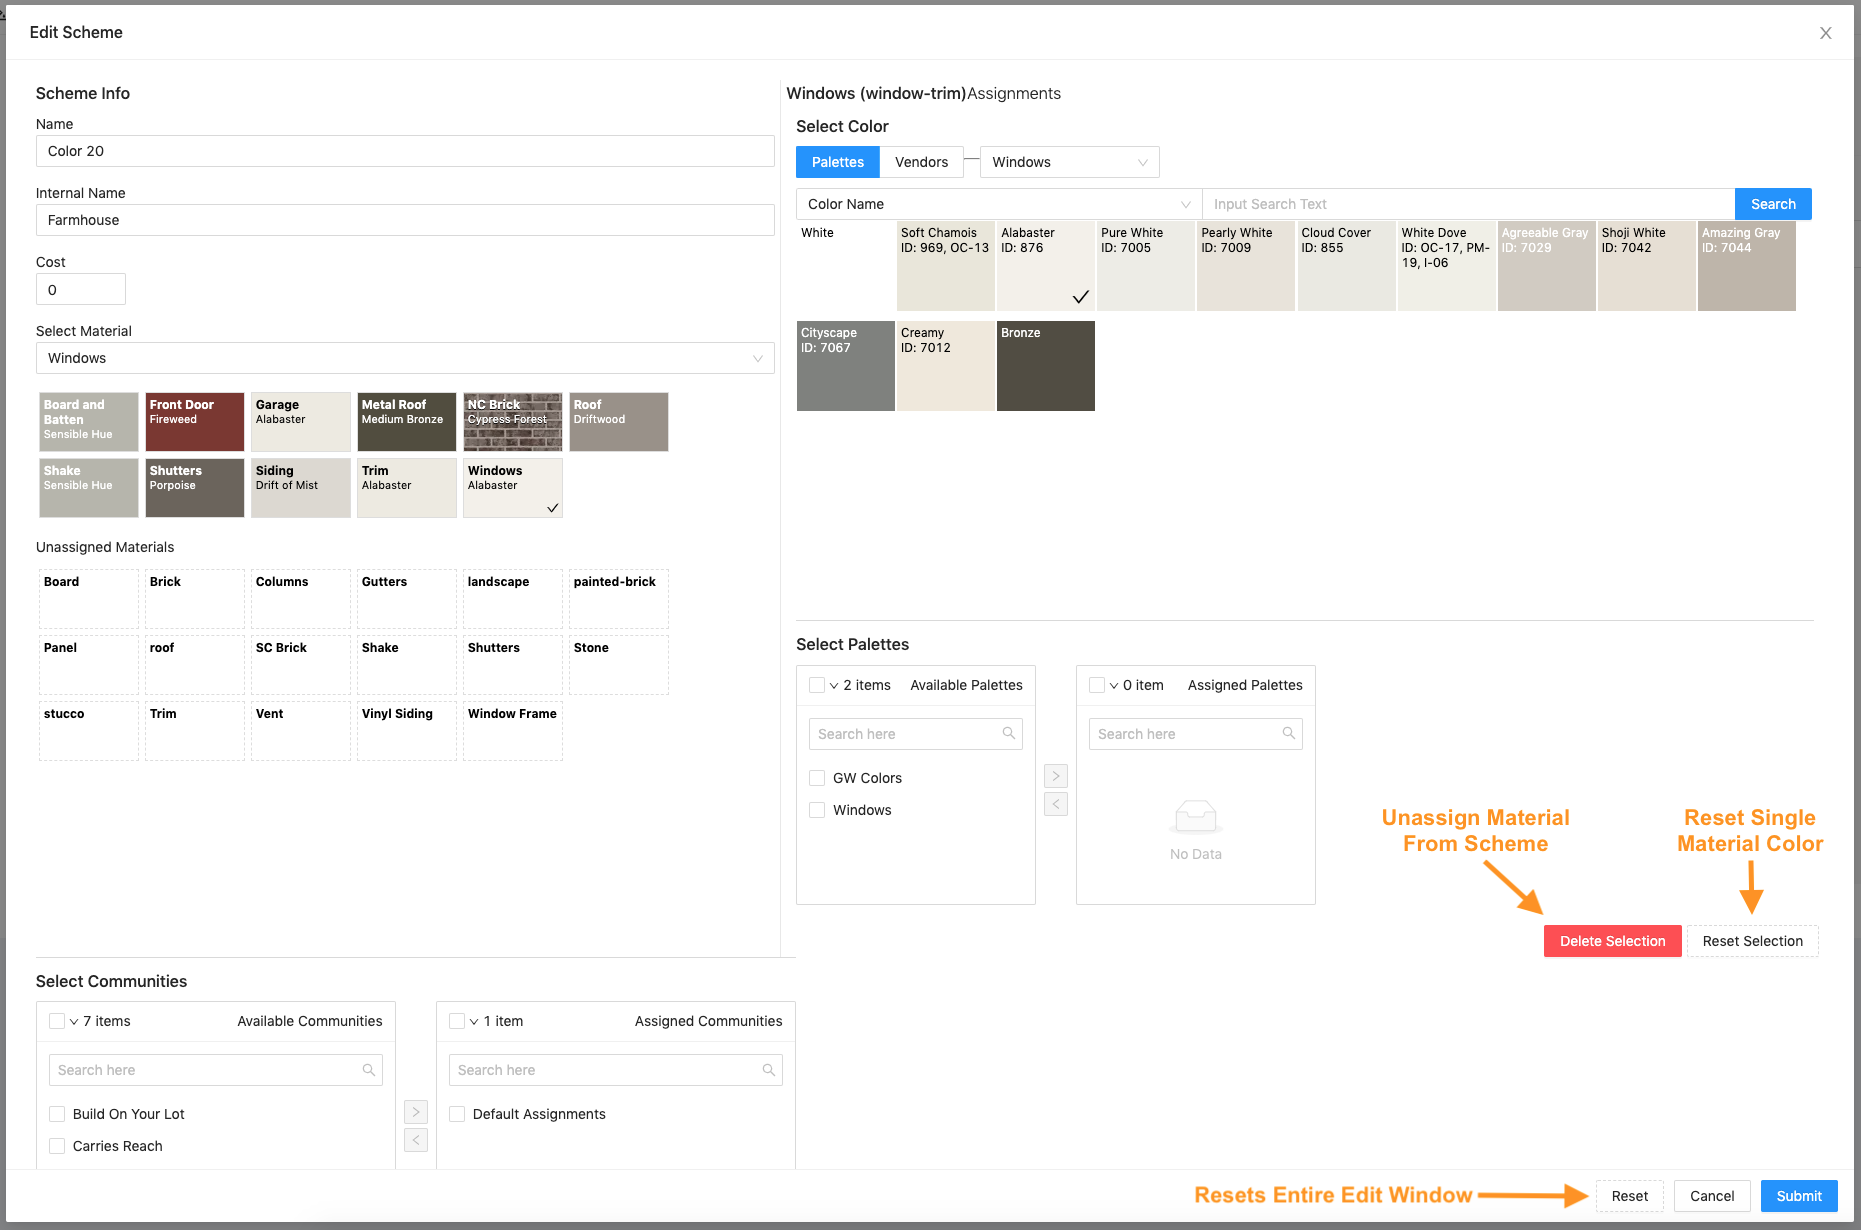
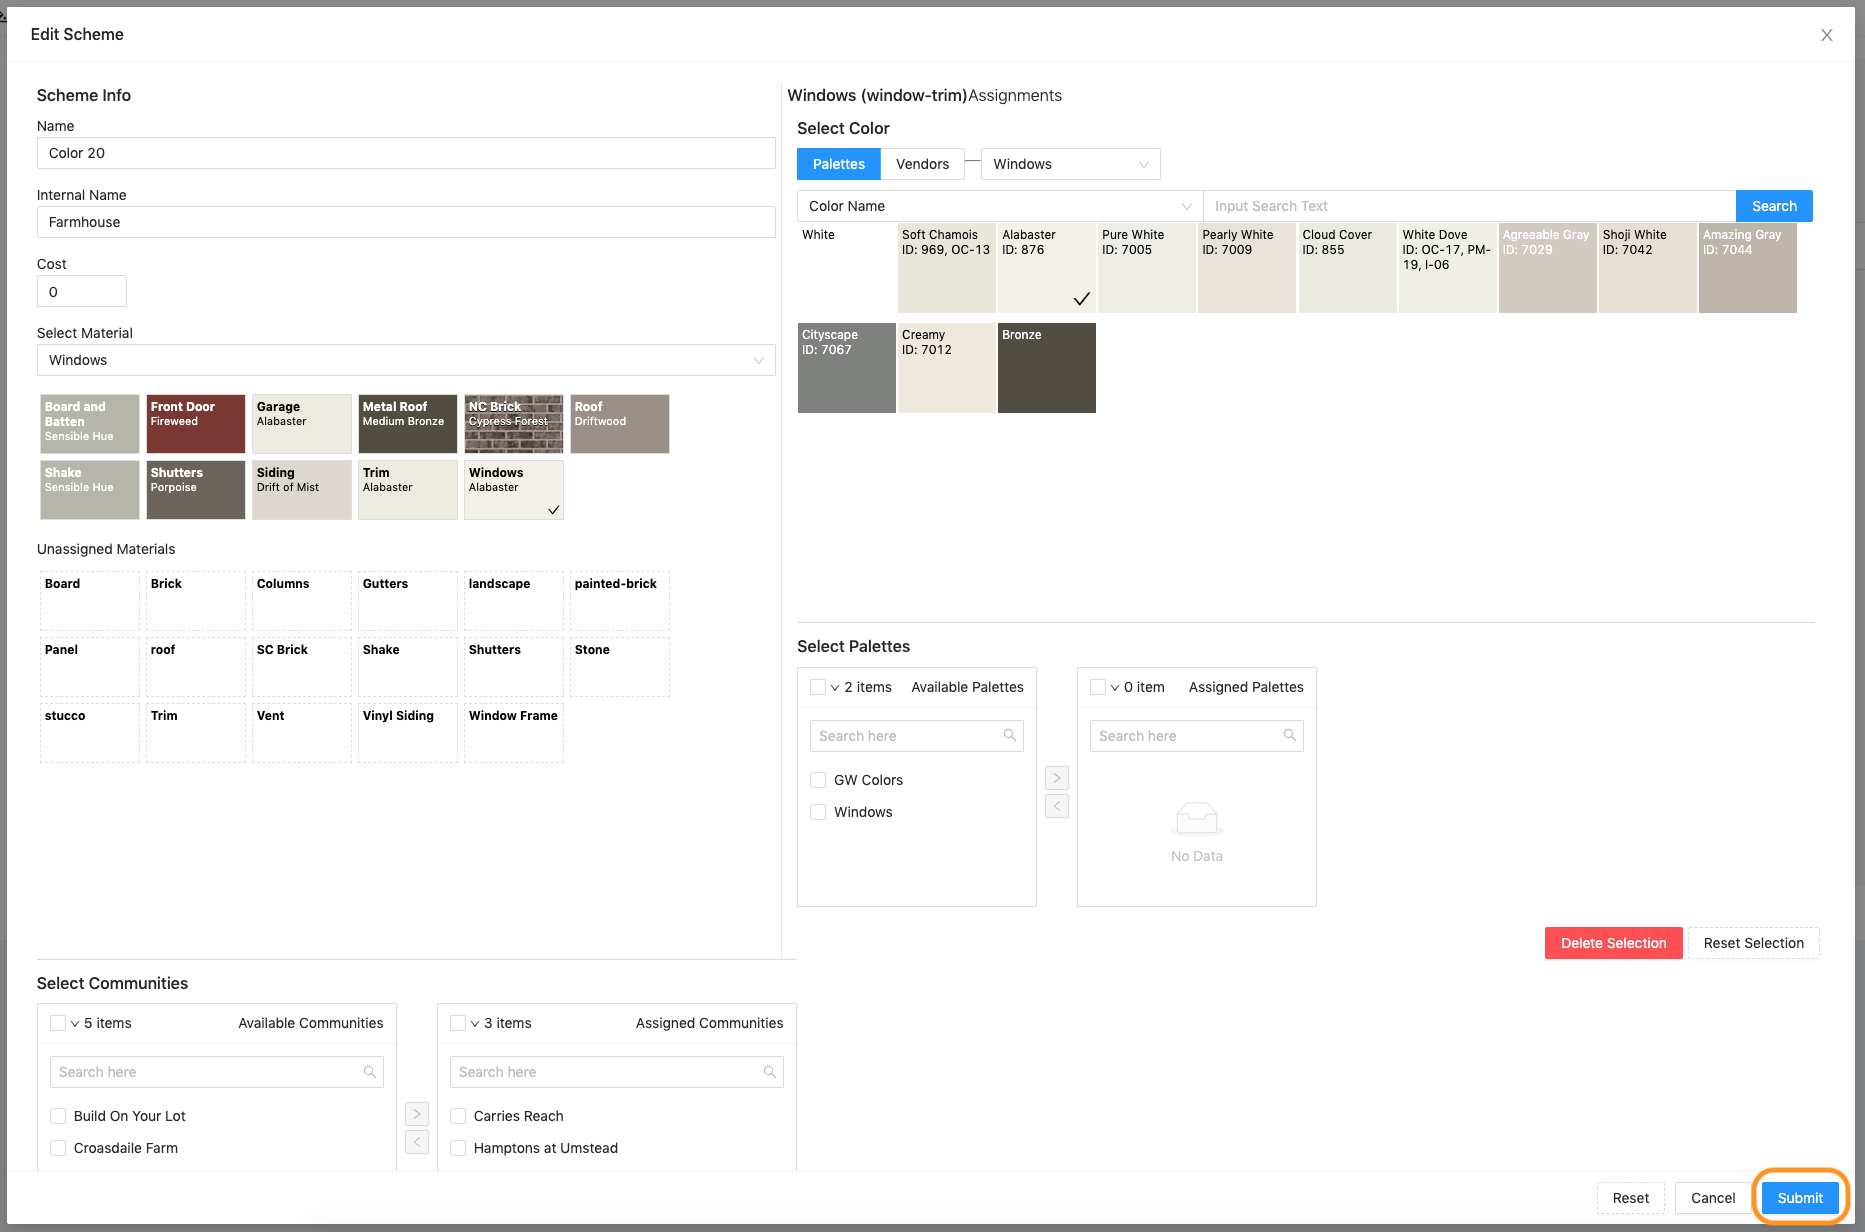
5. Edit information in the following fields if needed:
- Name – the scheme name will display on the front end of the app
- Internal Name – the internal name is only visible in the backend dashboard
- Cost
*Note: do not use slashes “/” in the Name field. However, you can use them in the Internal Name field.

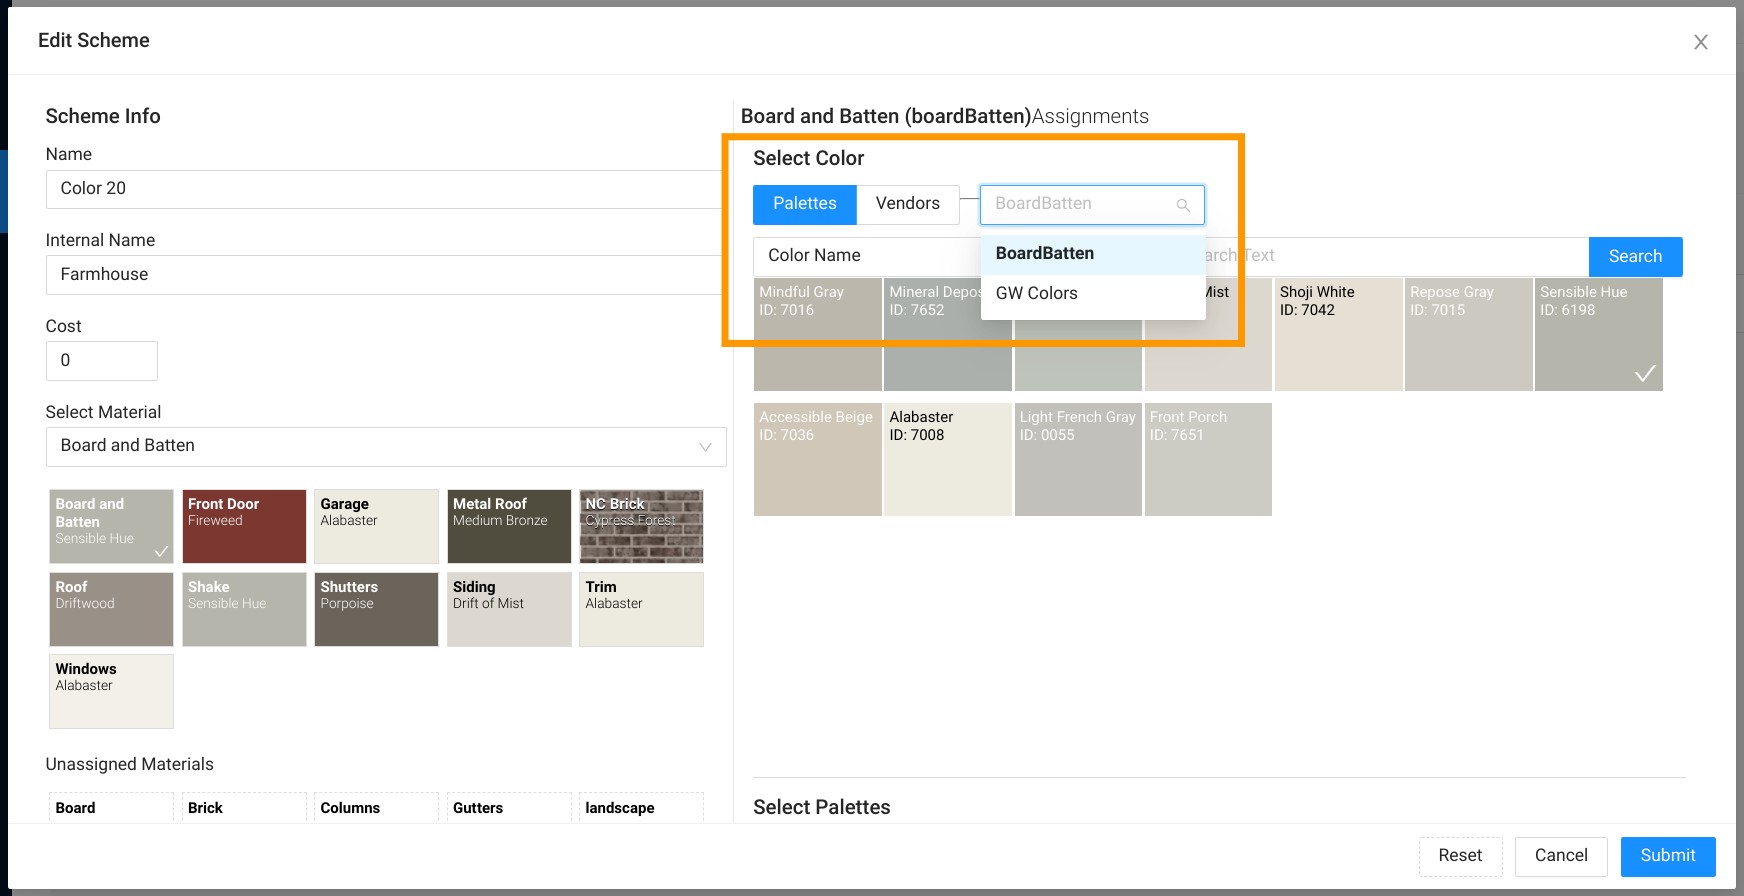
6. In “Select Material” you can see each material in your scheme and its currently assigned color or texture. Simply select the material you wish to update and then choose the color from the “Select Color” section.
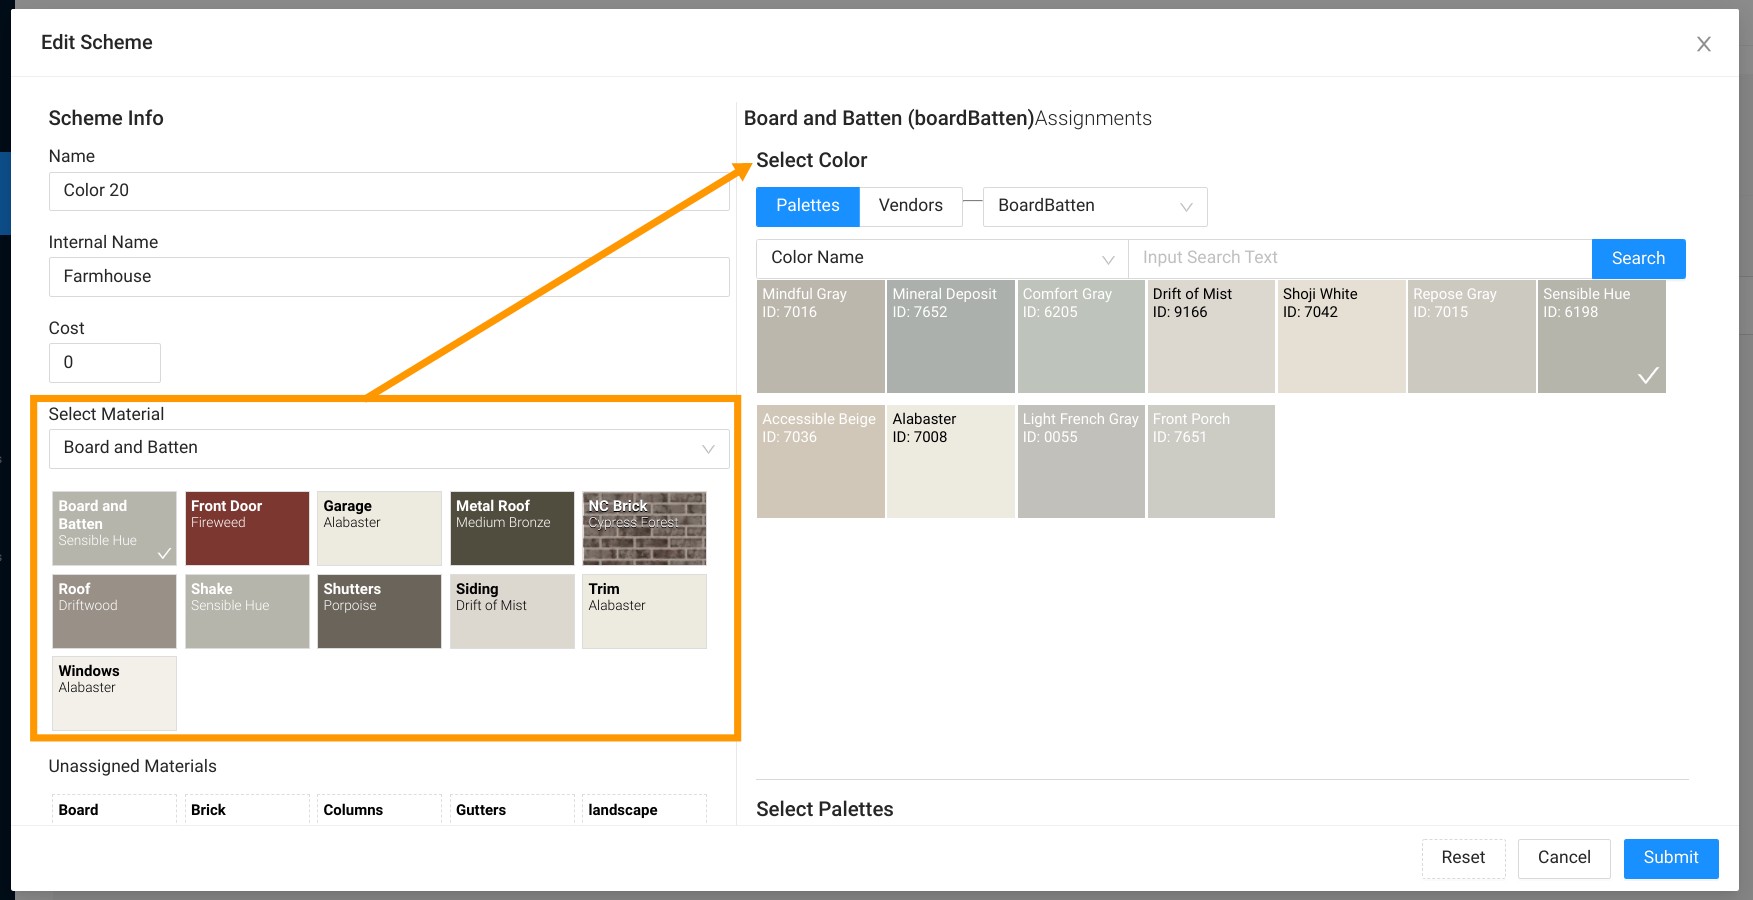
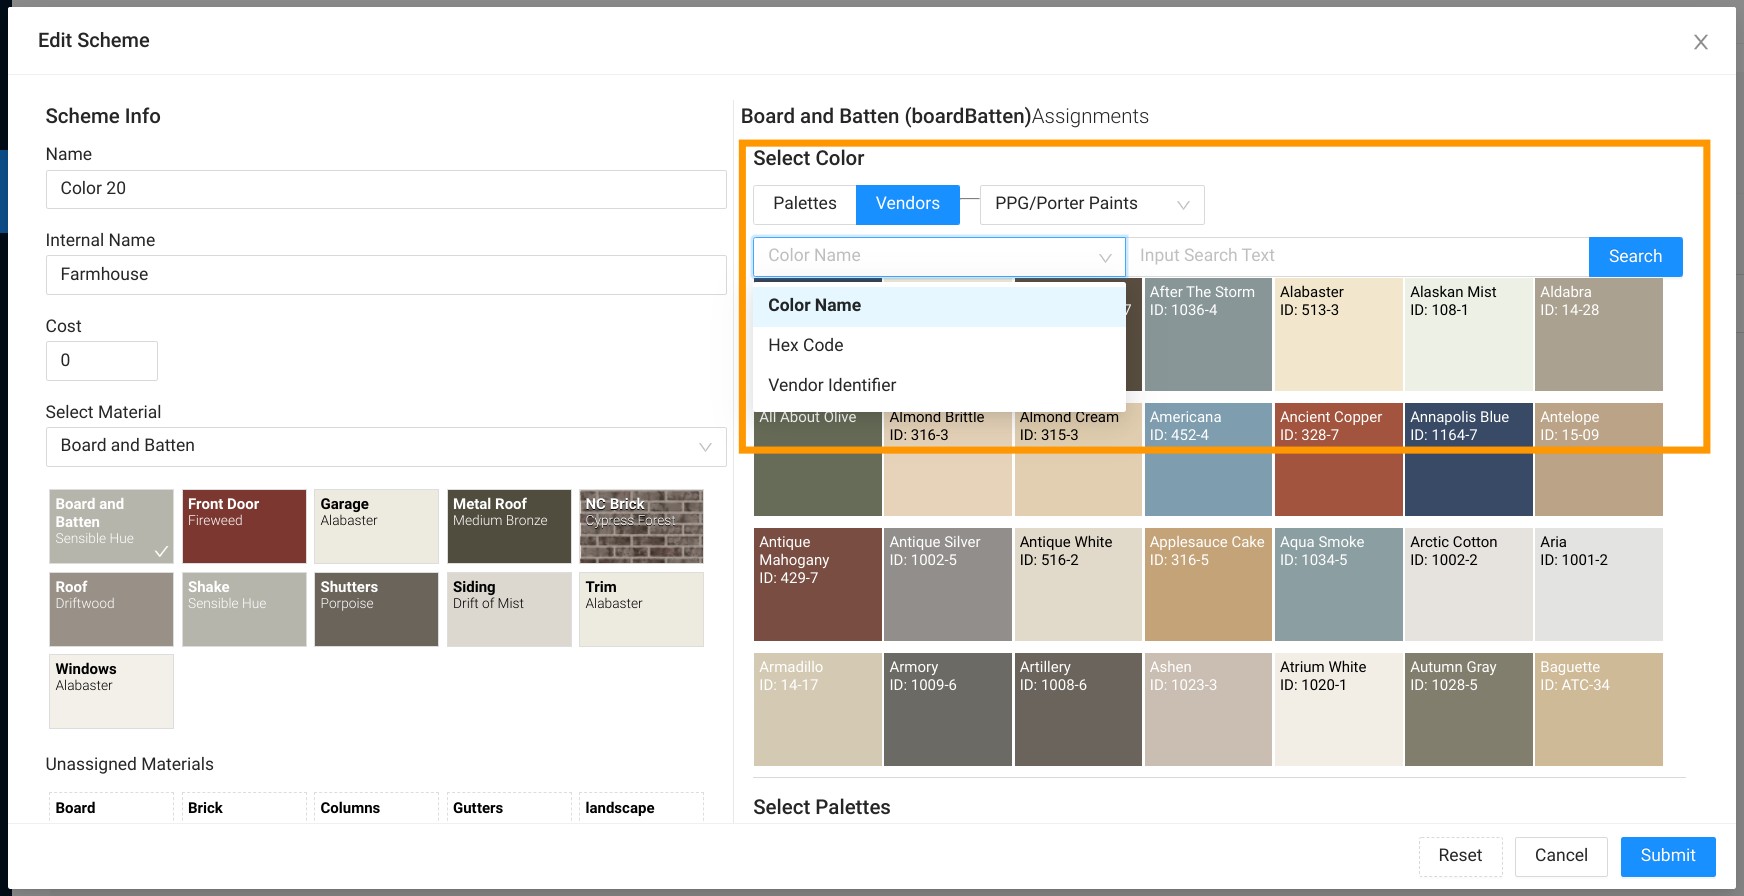
7. Within the “Select Color” section, you can navigate to all of your palettes and vendors by using the correlating tabs and drop down menu. You can also search for colors by name, hex, vendor identifier.

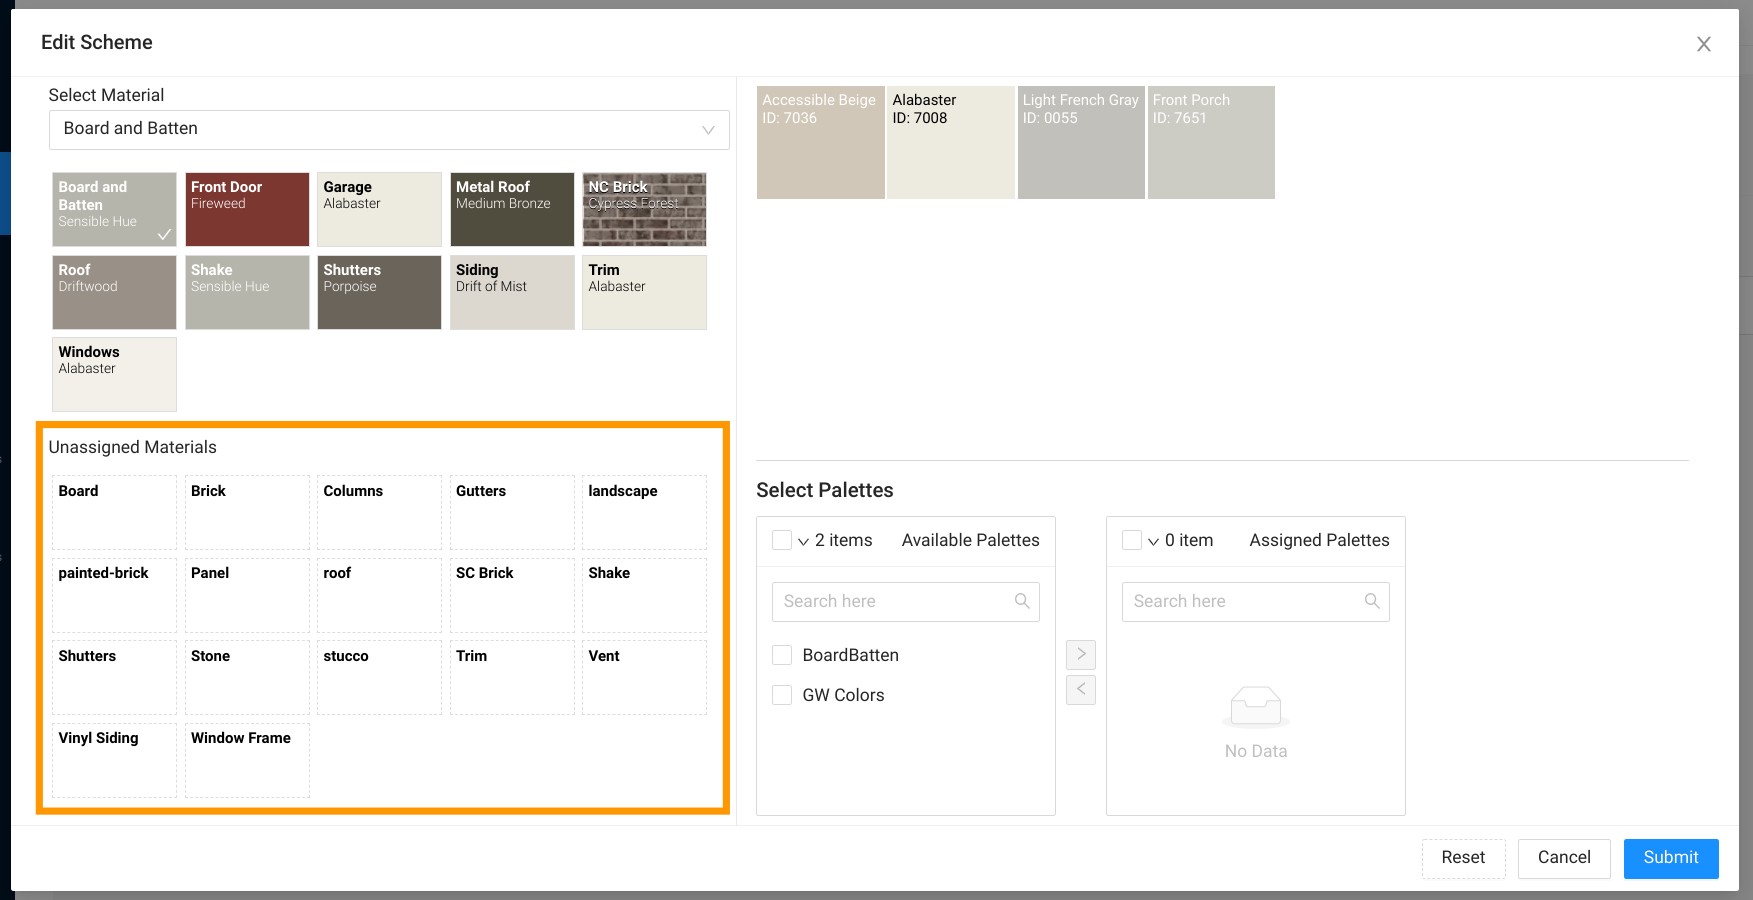
8. You can also add any “Unassigned Materials” to the scheme if needed. Click the material and assign a color as outlined in the previous steps.
9. To edit hybrid materials, first select the material (in this example we use Front Door). Then go to the “Select Palettes” section and select the correct palettes you would like to be available for this material as color options on the front end (you can select more than one palette if needed). Using the check boxes & arrows, move the correct palette(s) from “Unassigned Palettes” to “Assigned Palettes” – or vice versa.
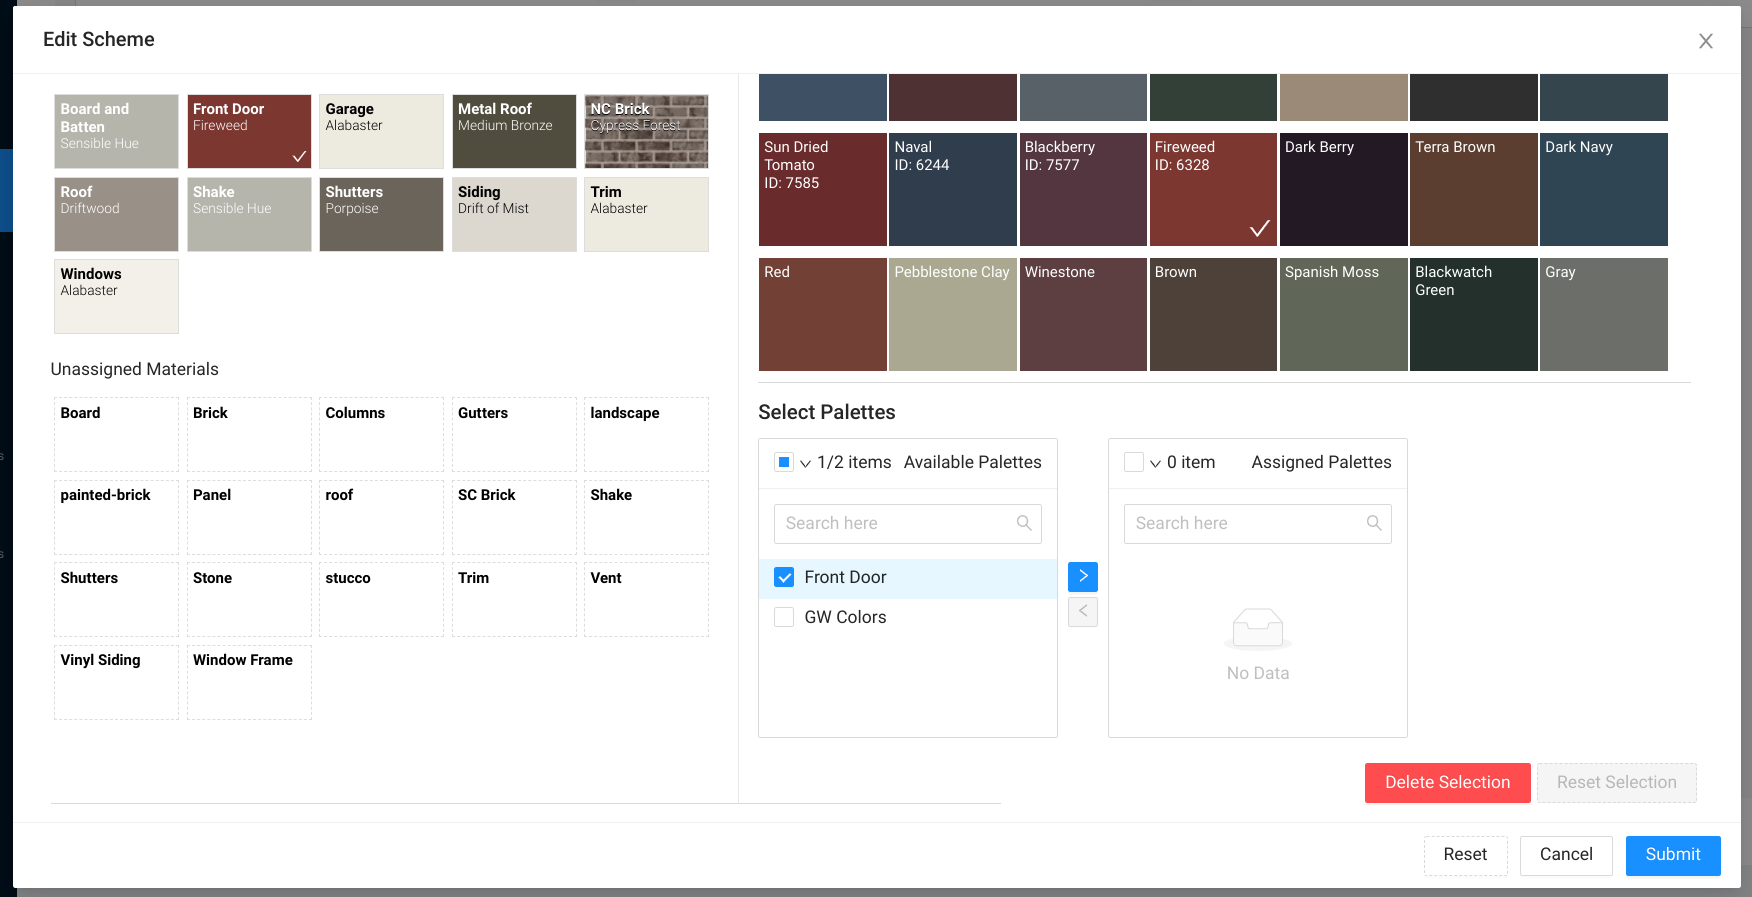
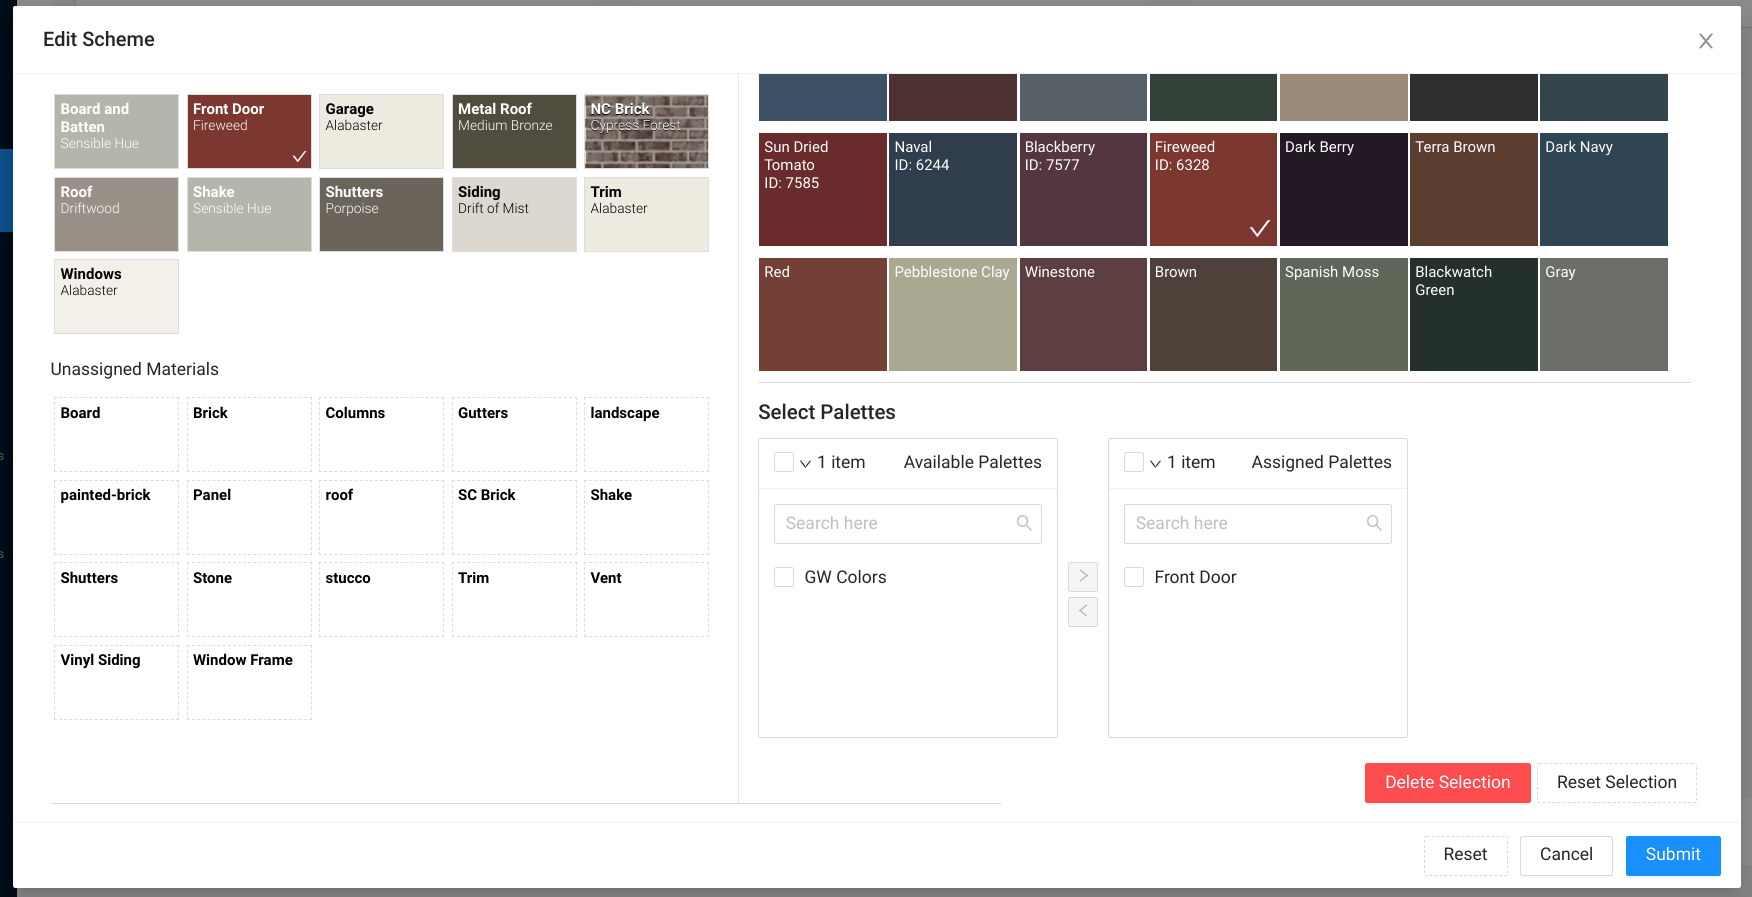
10. If you wish to reset the color choice for a material in the scheme, click “Reset Selection” or if you want to unassign a material from the scheme, click “Delete Selection” (this will move the selected material back to “Unassigned Materials”). If you want to reset all of your changes and start over, click “Reset”
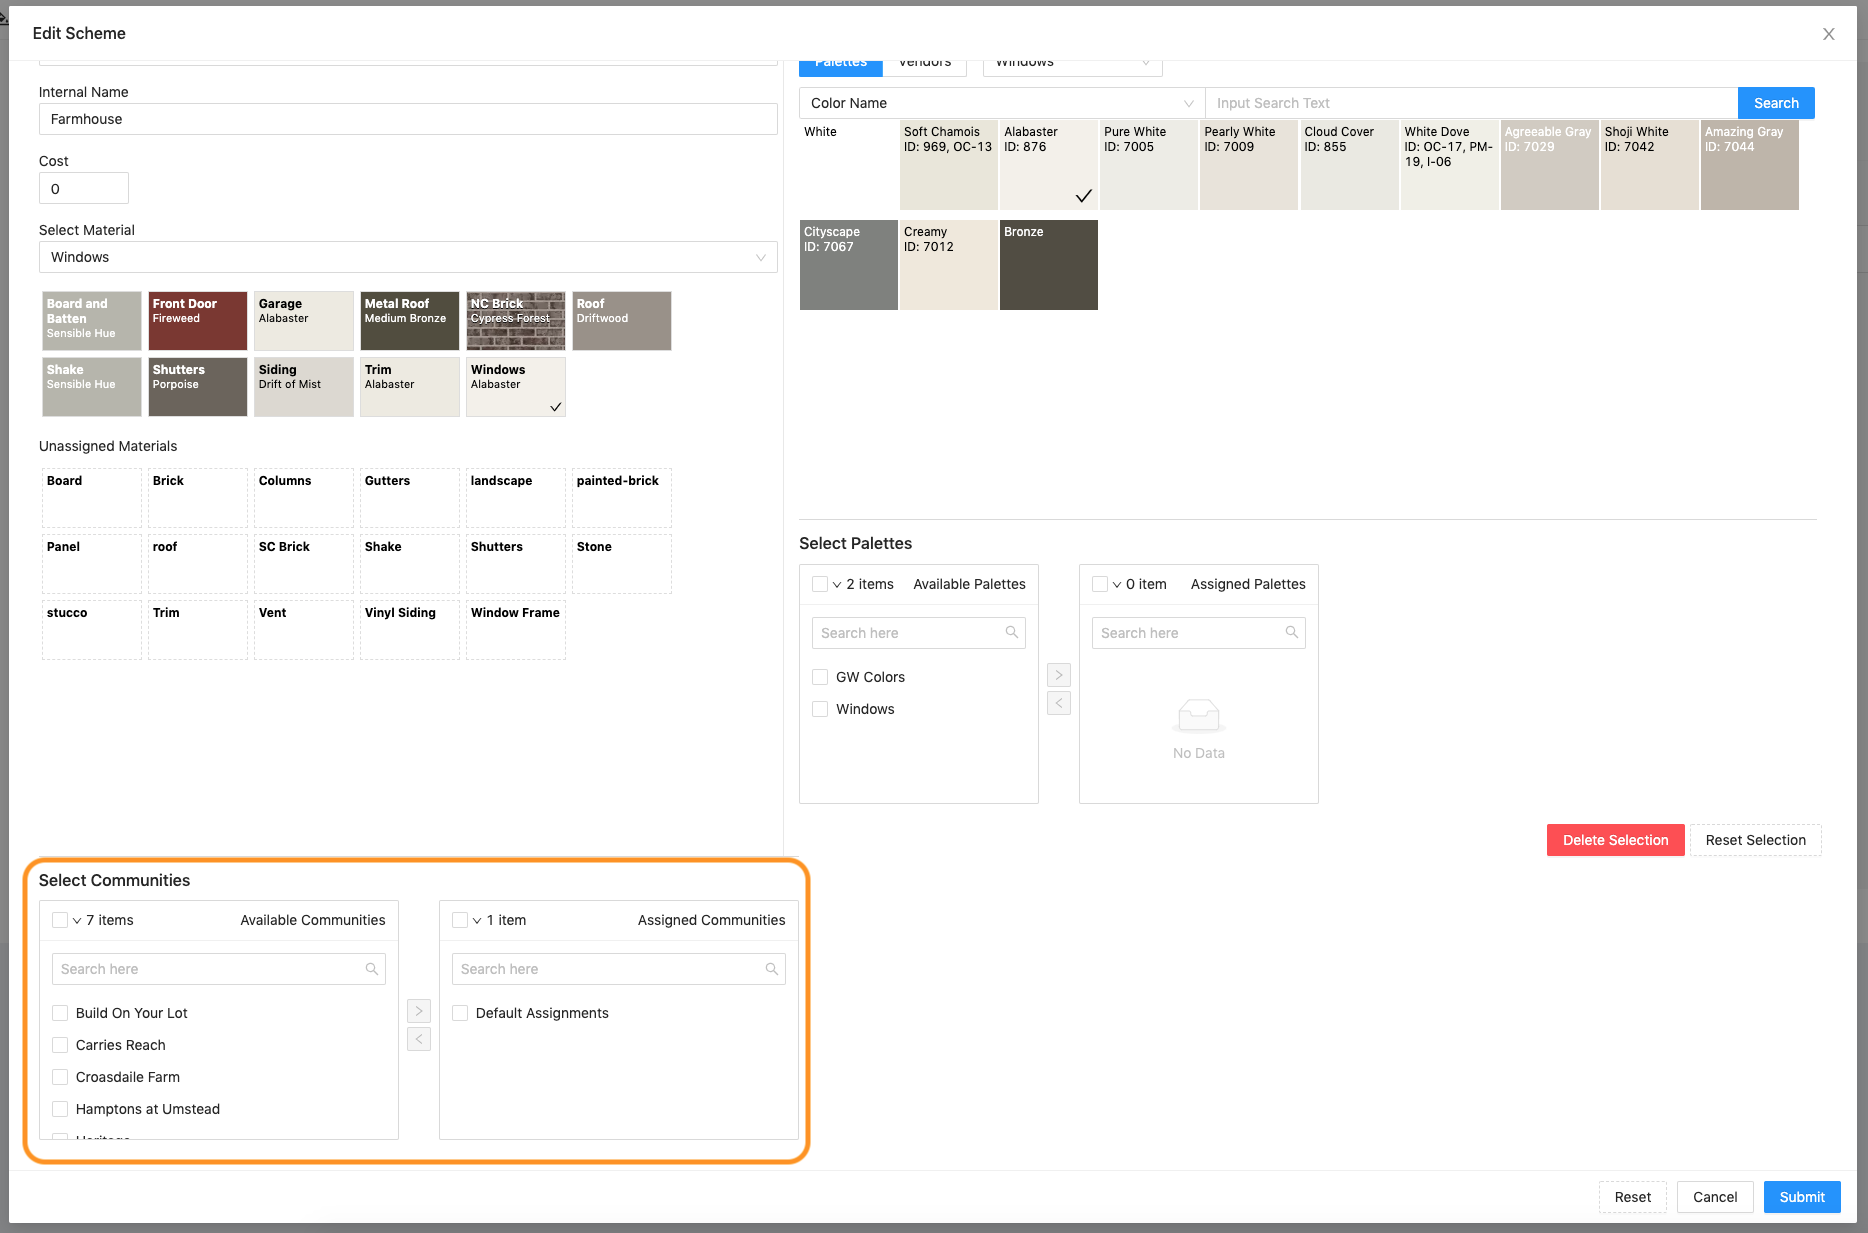
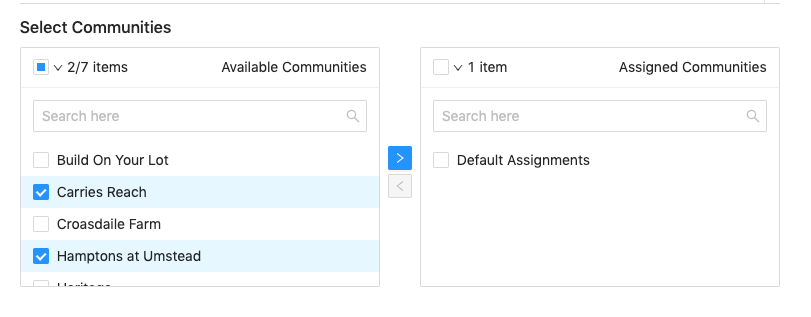
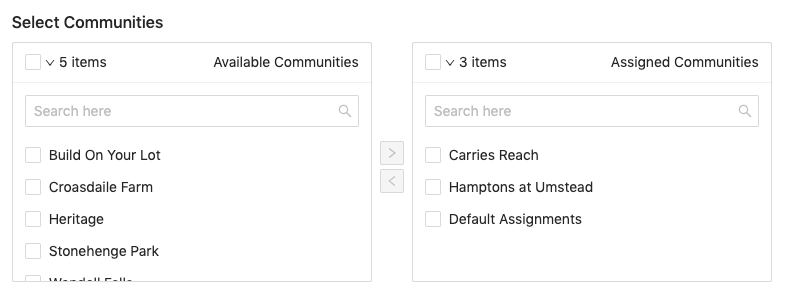
11. You can choose which communities this scheme will be active in below in the “Select Communities” section. Move selections from “Available Communities” box to “Assigned Communities” box.
This can also be done in the larger Community Assignments table.
*Be sure to always select “Default Assignments” – this makes the scheme available to view in the backend dashboard. It does not affect anything on the front end.
12. When done, click “Submit” to save everything.
13. Possible next steps:
- Make sure your scheme is assigned to the correct communities
- Assign the scheme to elevations within each community
- Check out your scheme in the Scheme Designer
- Edit your scheme if needed
- Update thumbnails or download images if needed