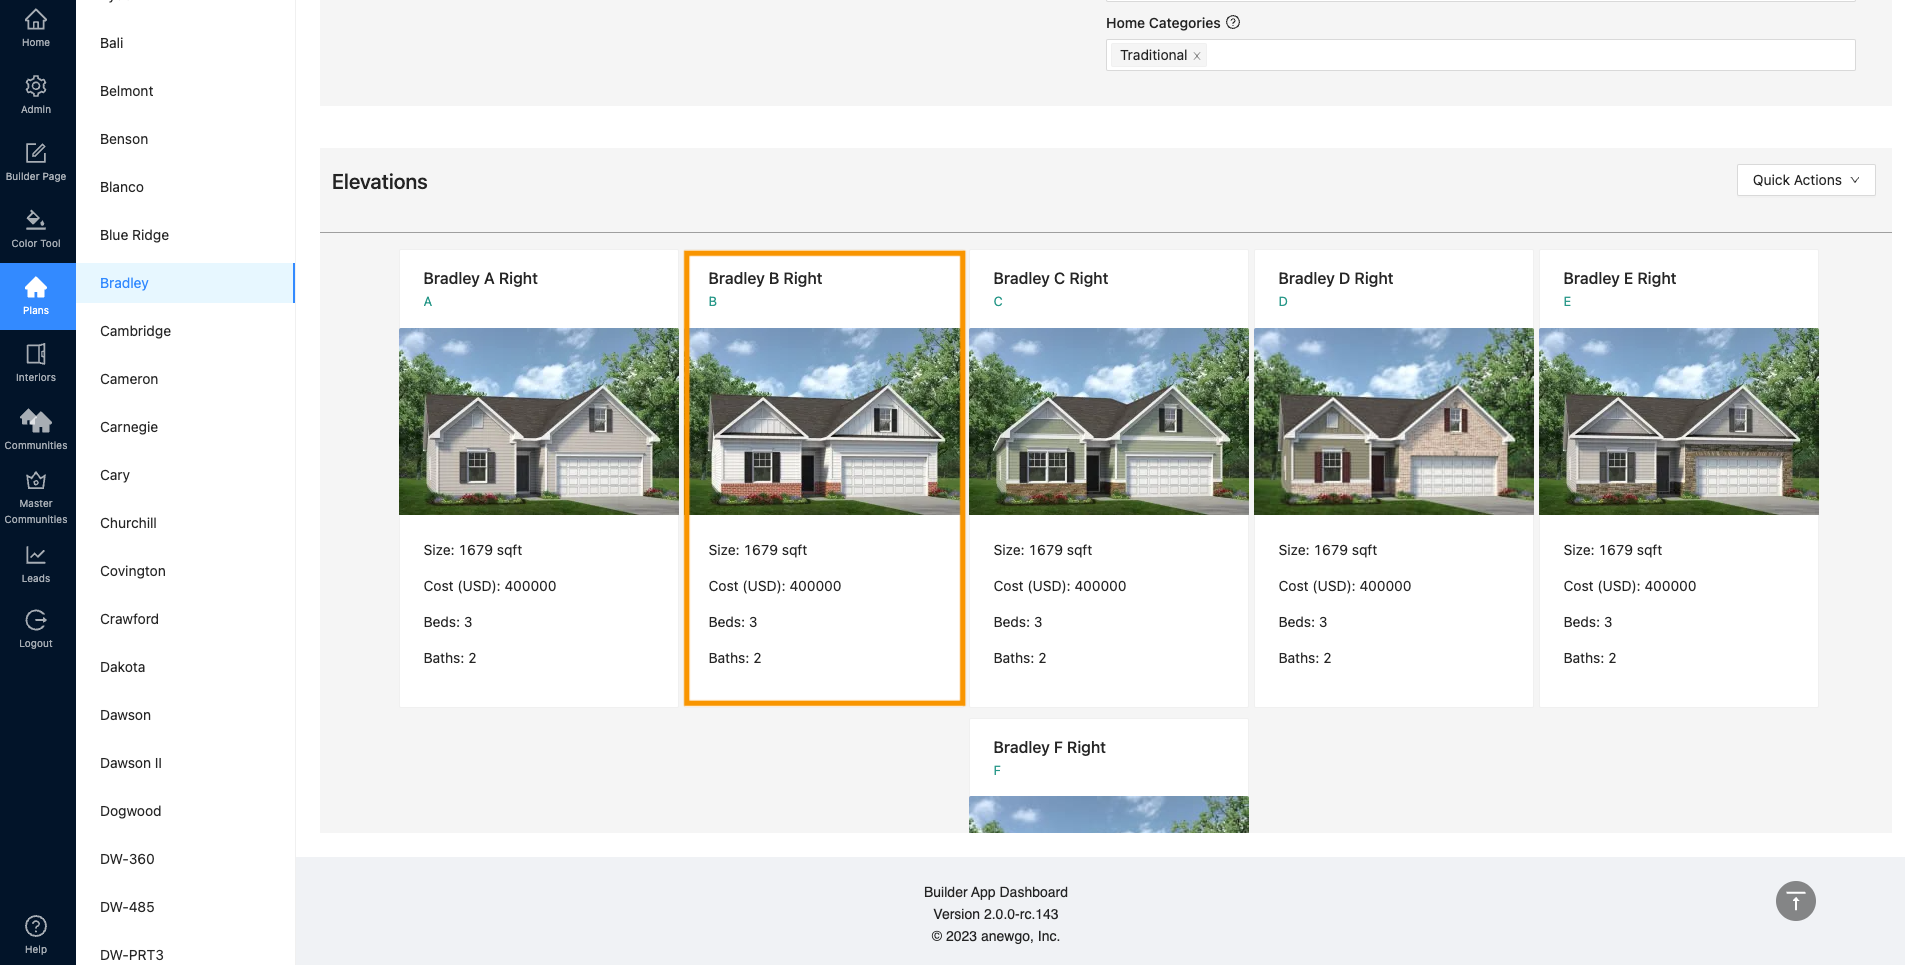
1. Navigate to Plans and select the plan needed. Then scroll down to see the elevations.
2. Find and click the elevation needed.

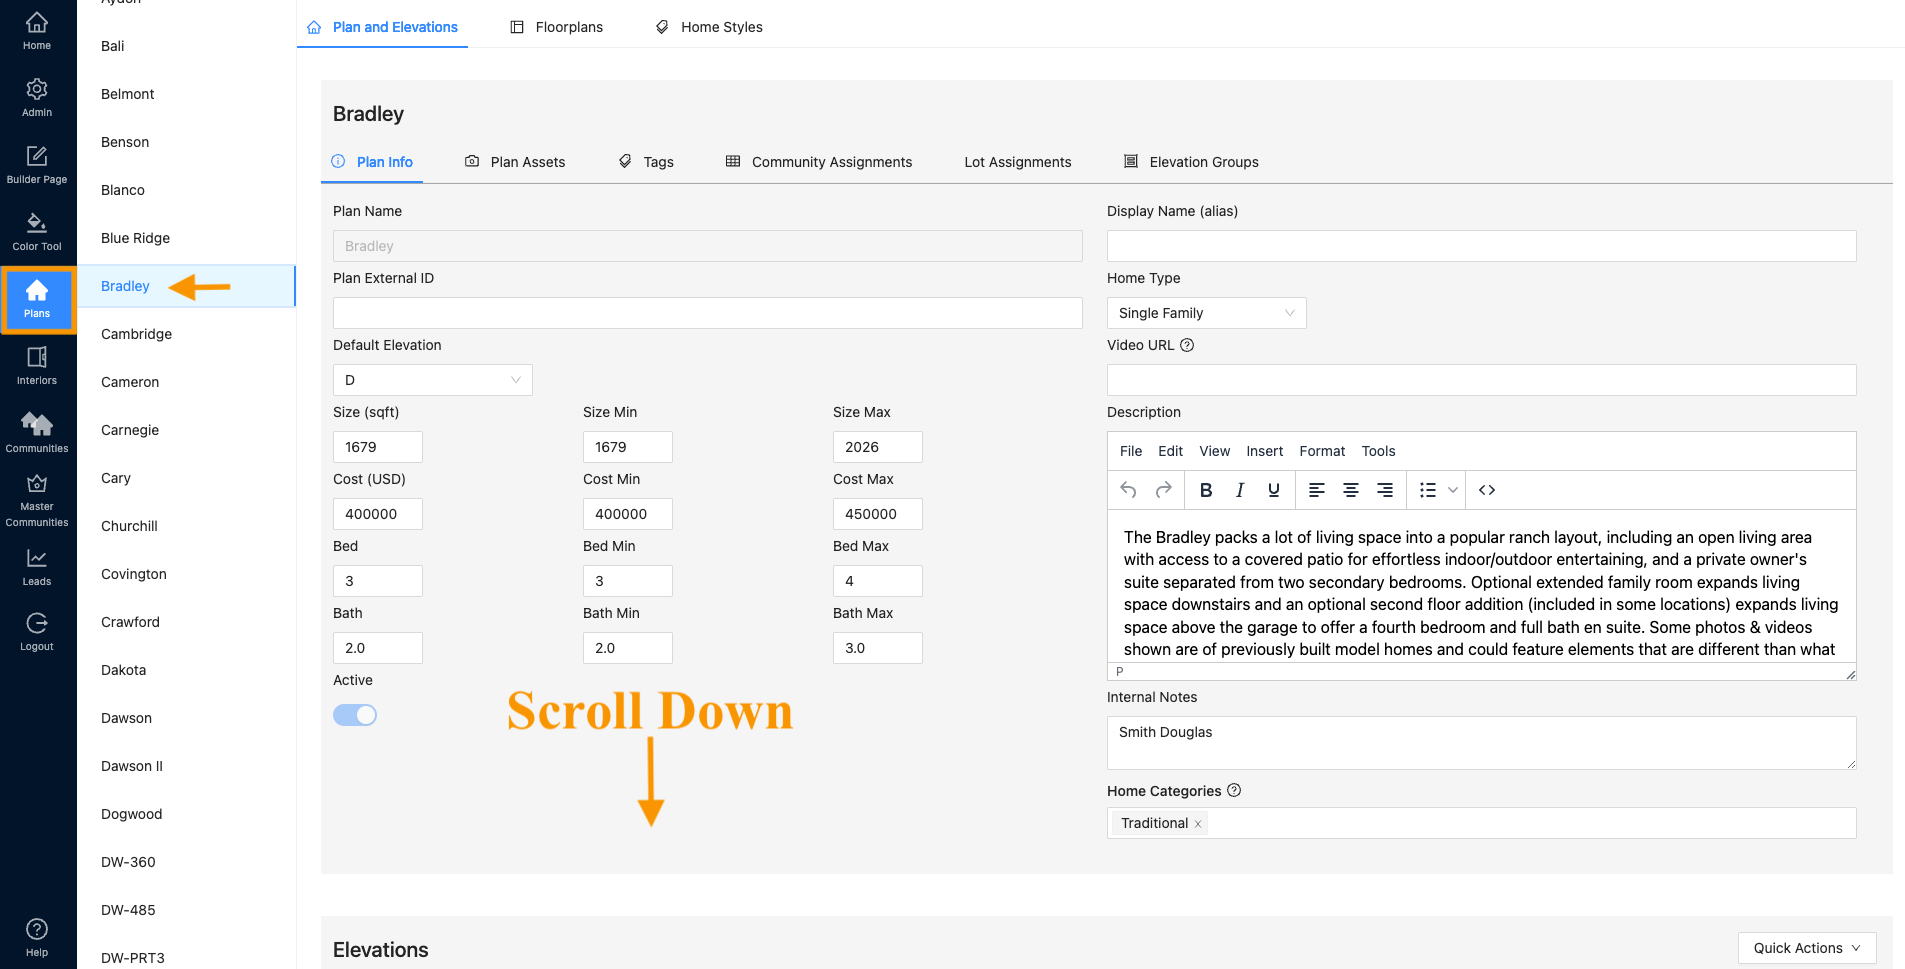
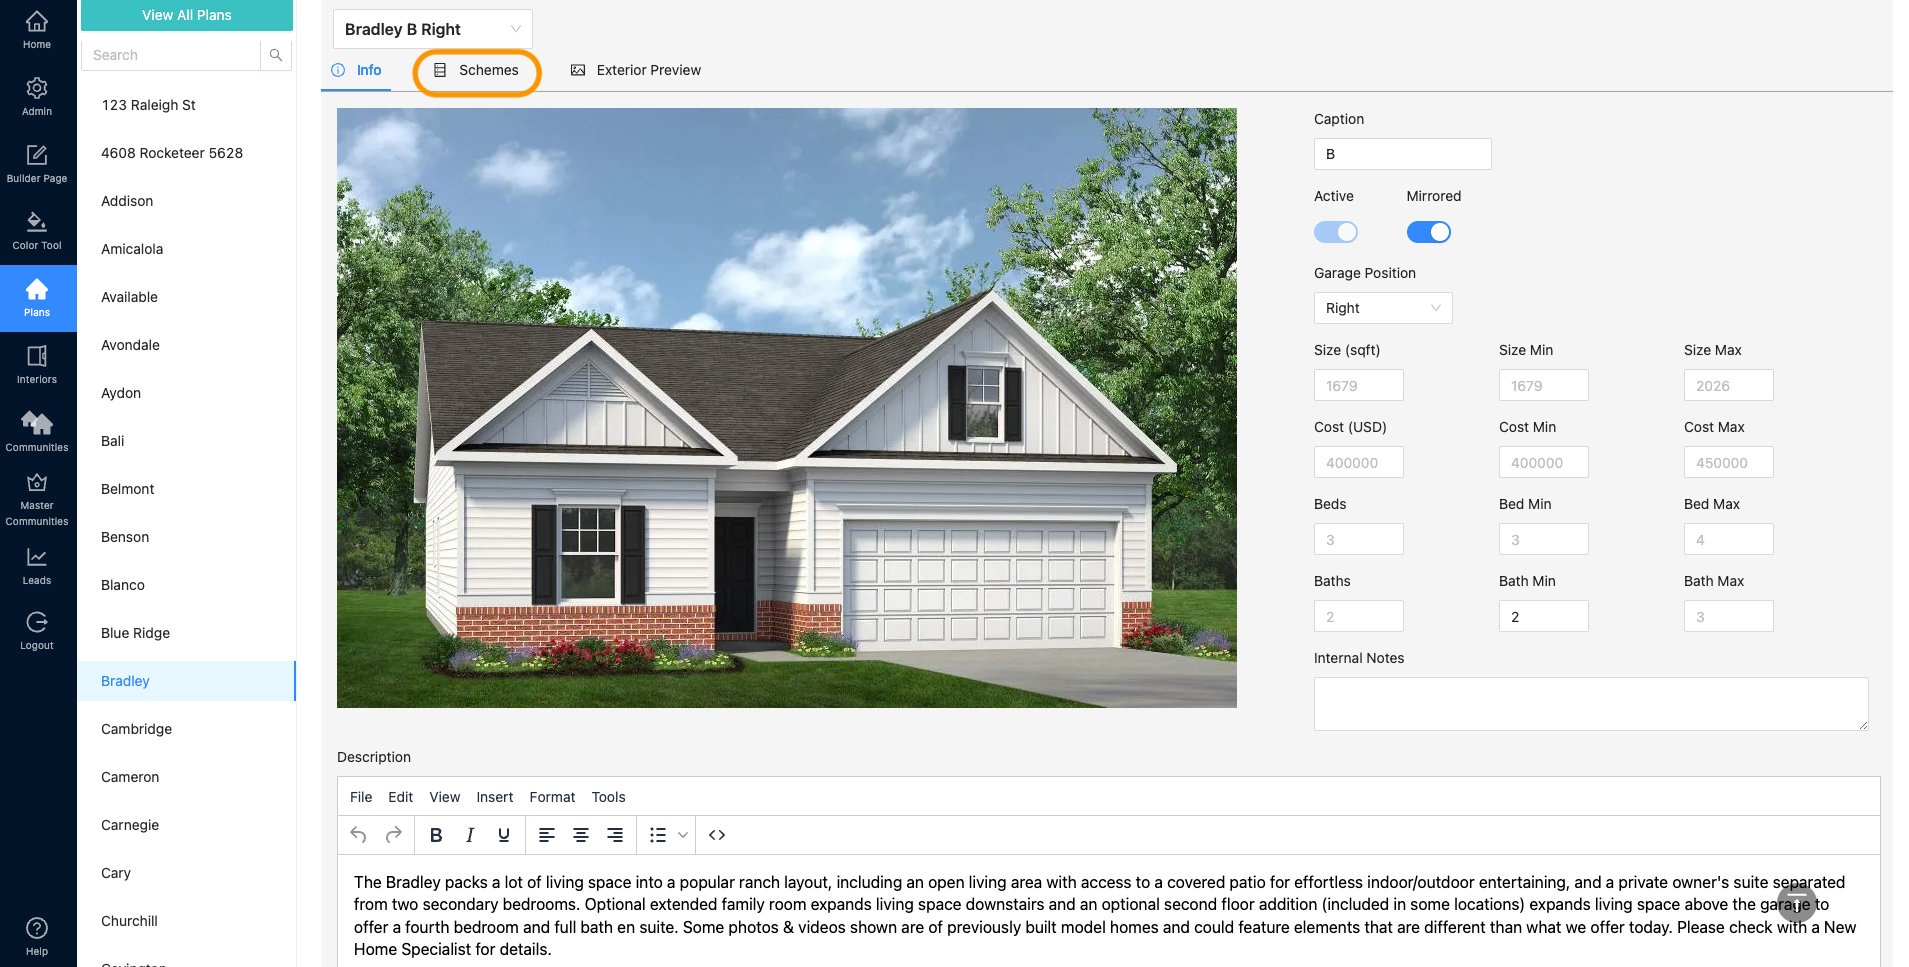
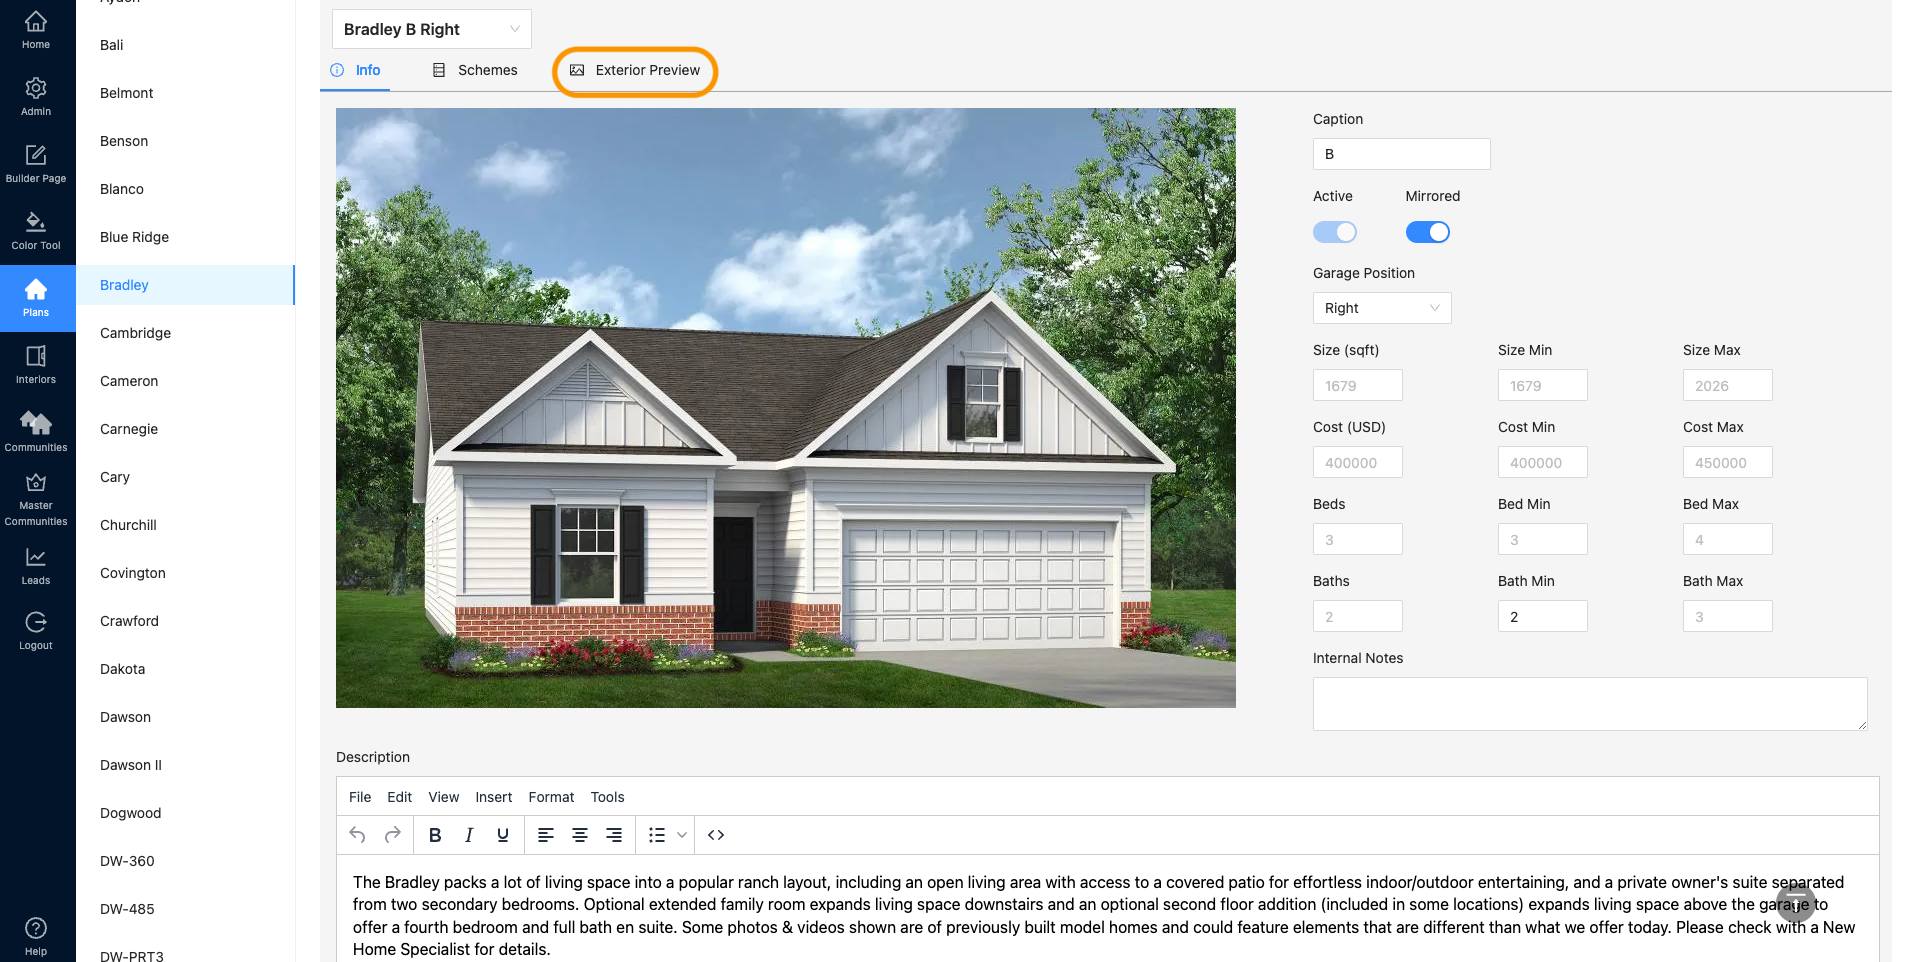
3. Once you click on the elevation you wish to edit, your screen will shift down to show the details for that elevation. Click on the Schemes tab.
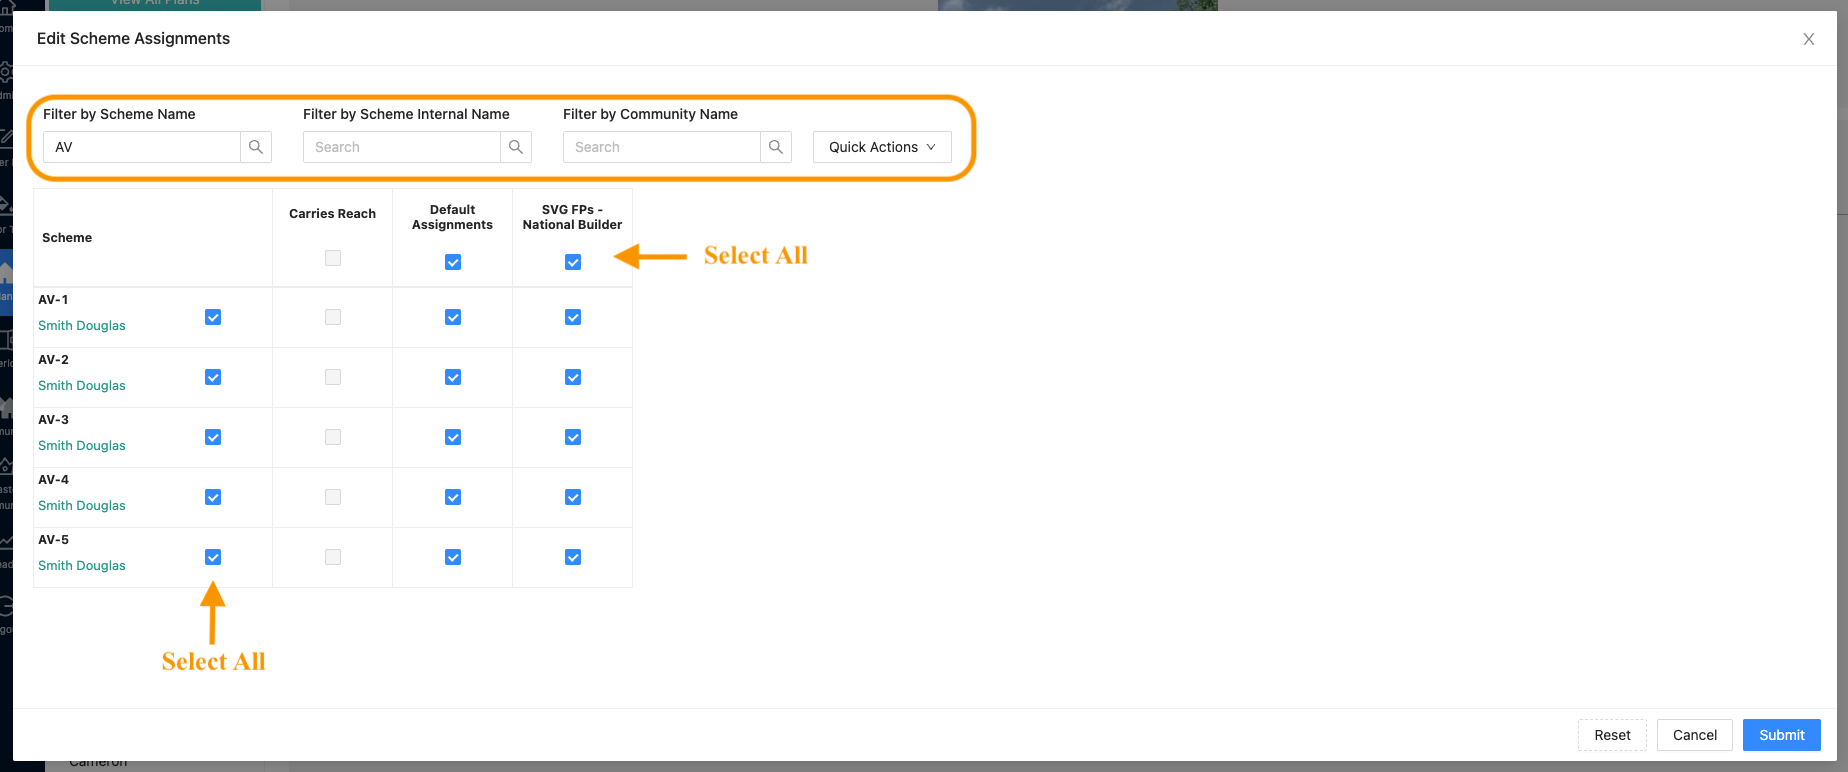
4. Here you will see all of your schemes and which communities they are assigned to. To edit or add a new/different scheme to your community, click Edit Scheme Assignments
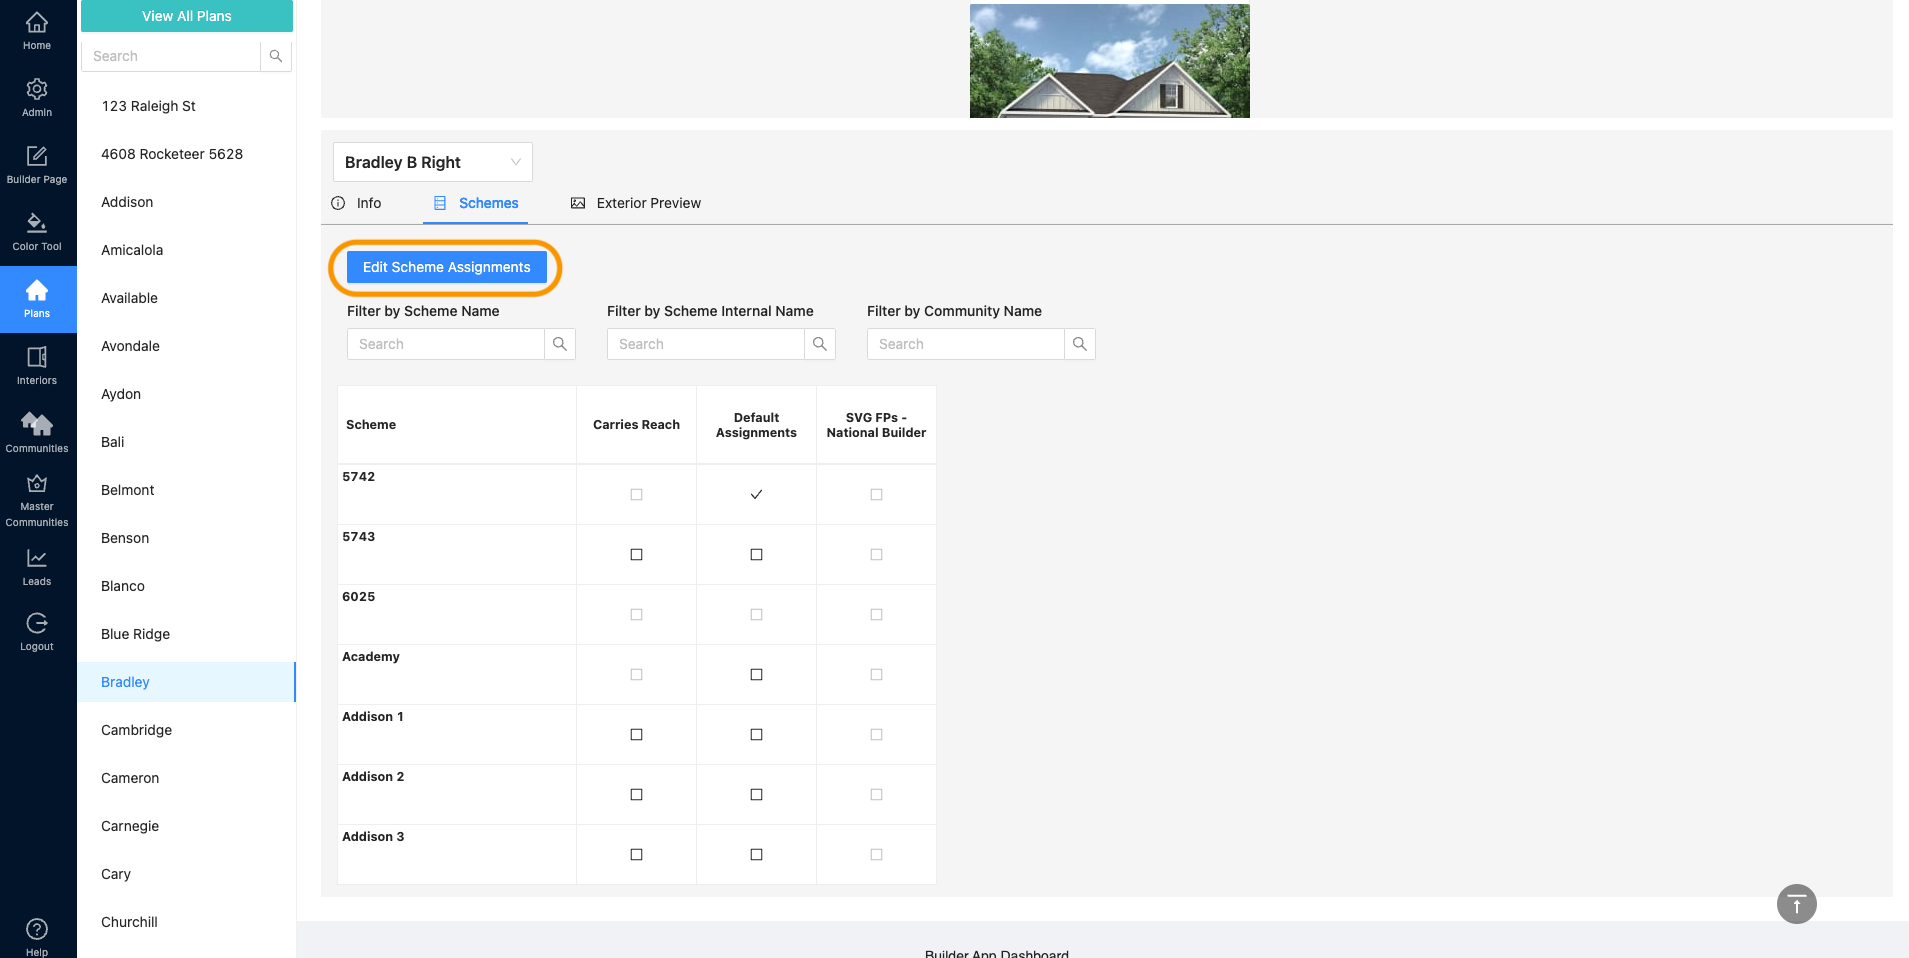
5. Here you can select or deselect schemes. Use the filters as needed to help find specific schemes and/or communities. Quick Actions can be used to select the entire table view at once (including a filtered table view). The boxes next to the scheme names and under the community names are select all. When you are happy with your selections, click Submit to save your changes.
To see schemes in the Exterior Preview (and the Scheme Designer) – make sure the schemes are selected under “Default Assignments”

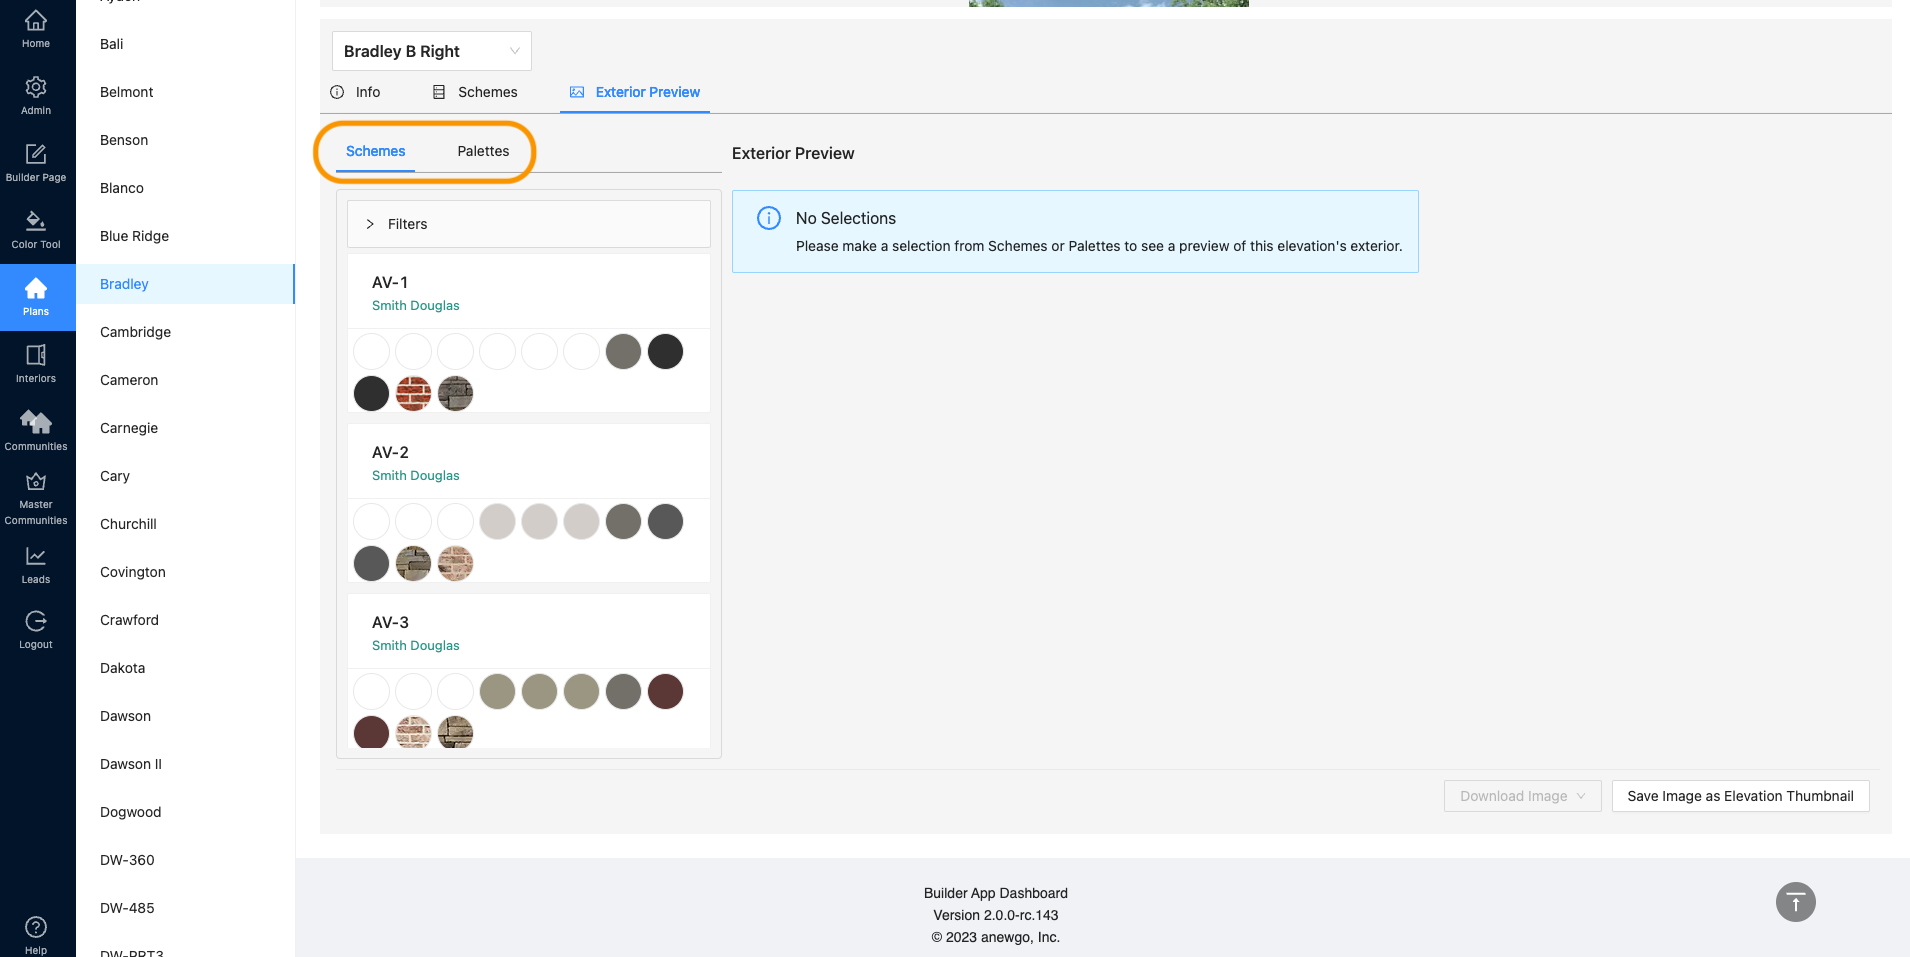
6. Next click Exterior Preview
7. Here you can see all of your schemes. As the warning states, you must click on a scheme to see a preview. Note: you can also access your color palettes if needed.
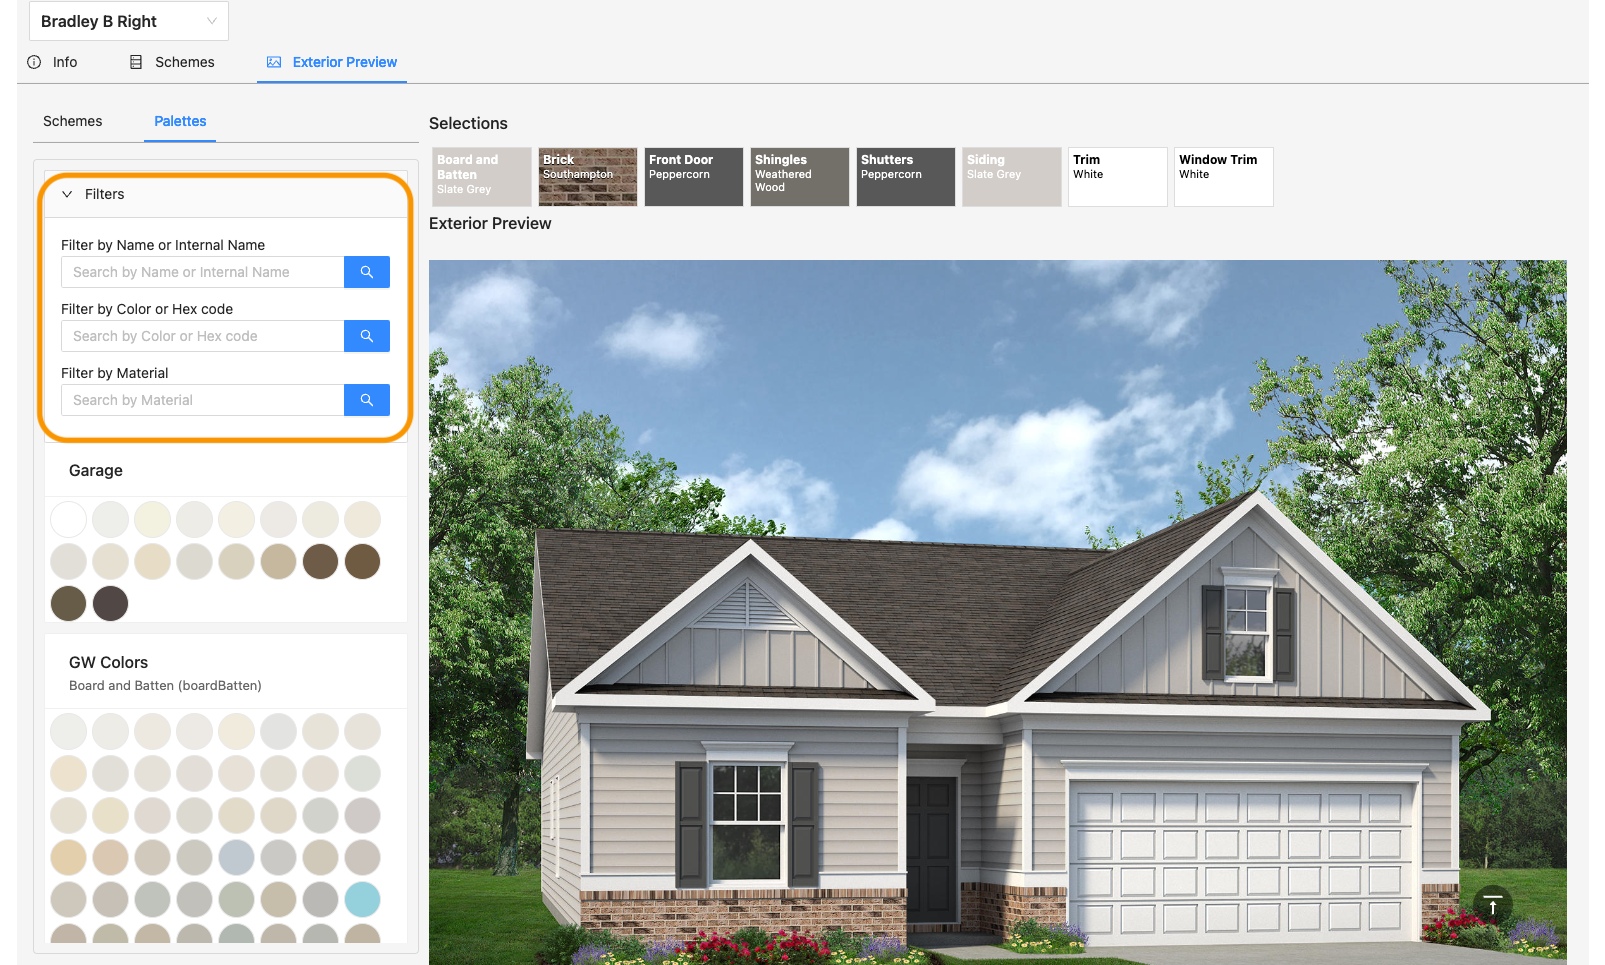
8. Now you can play around with your preview. You can select different schemes/colors to view. Use the filters to help find anything in particular.
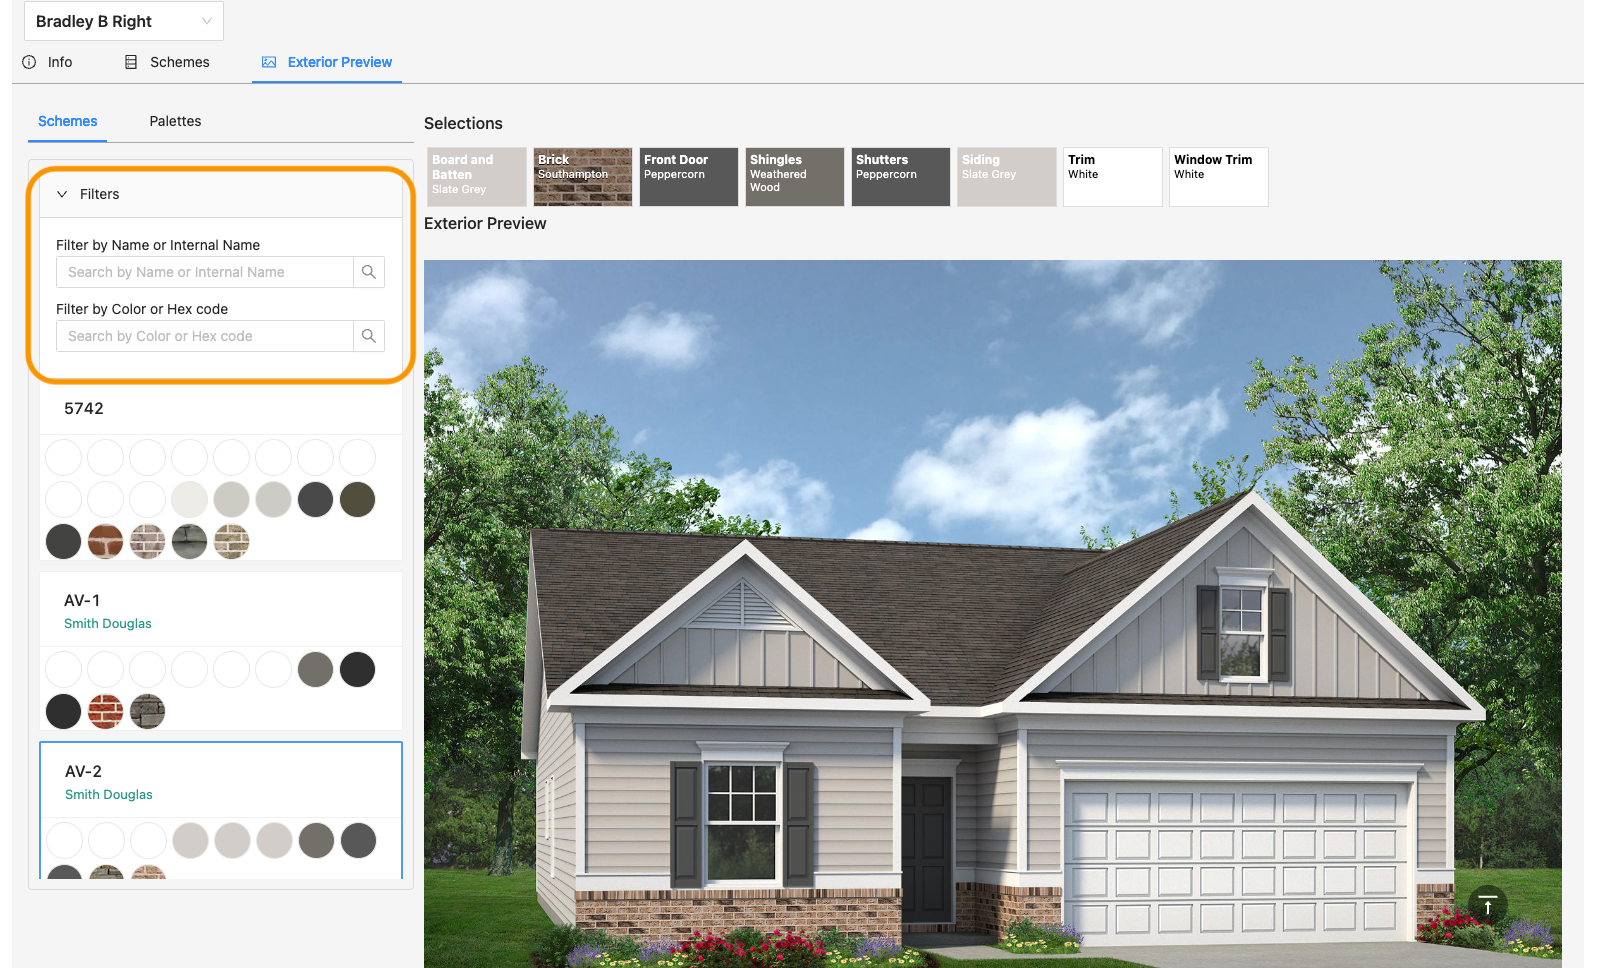
9. You can also use the palette menu to choose different paint colors for each material and see an immediate preview of your choices. Use the filters here to help find something specific. Note: You cannot edit and save schemes here. To do that, you must go back to the Color Tool – Manage Schemes or the Scheme Designer.
10. Once you have decided on your scheme, you have the options to Download Image and Save Image as Elevation Thumbnail
Note: If you need a high-resolution jpeg (3600×2400), please contact your Account Manager.
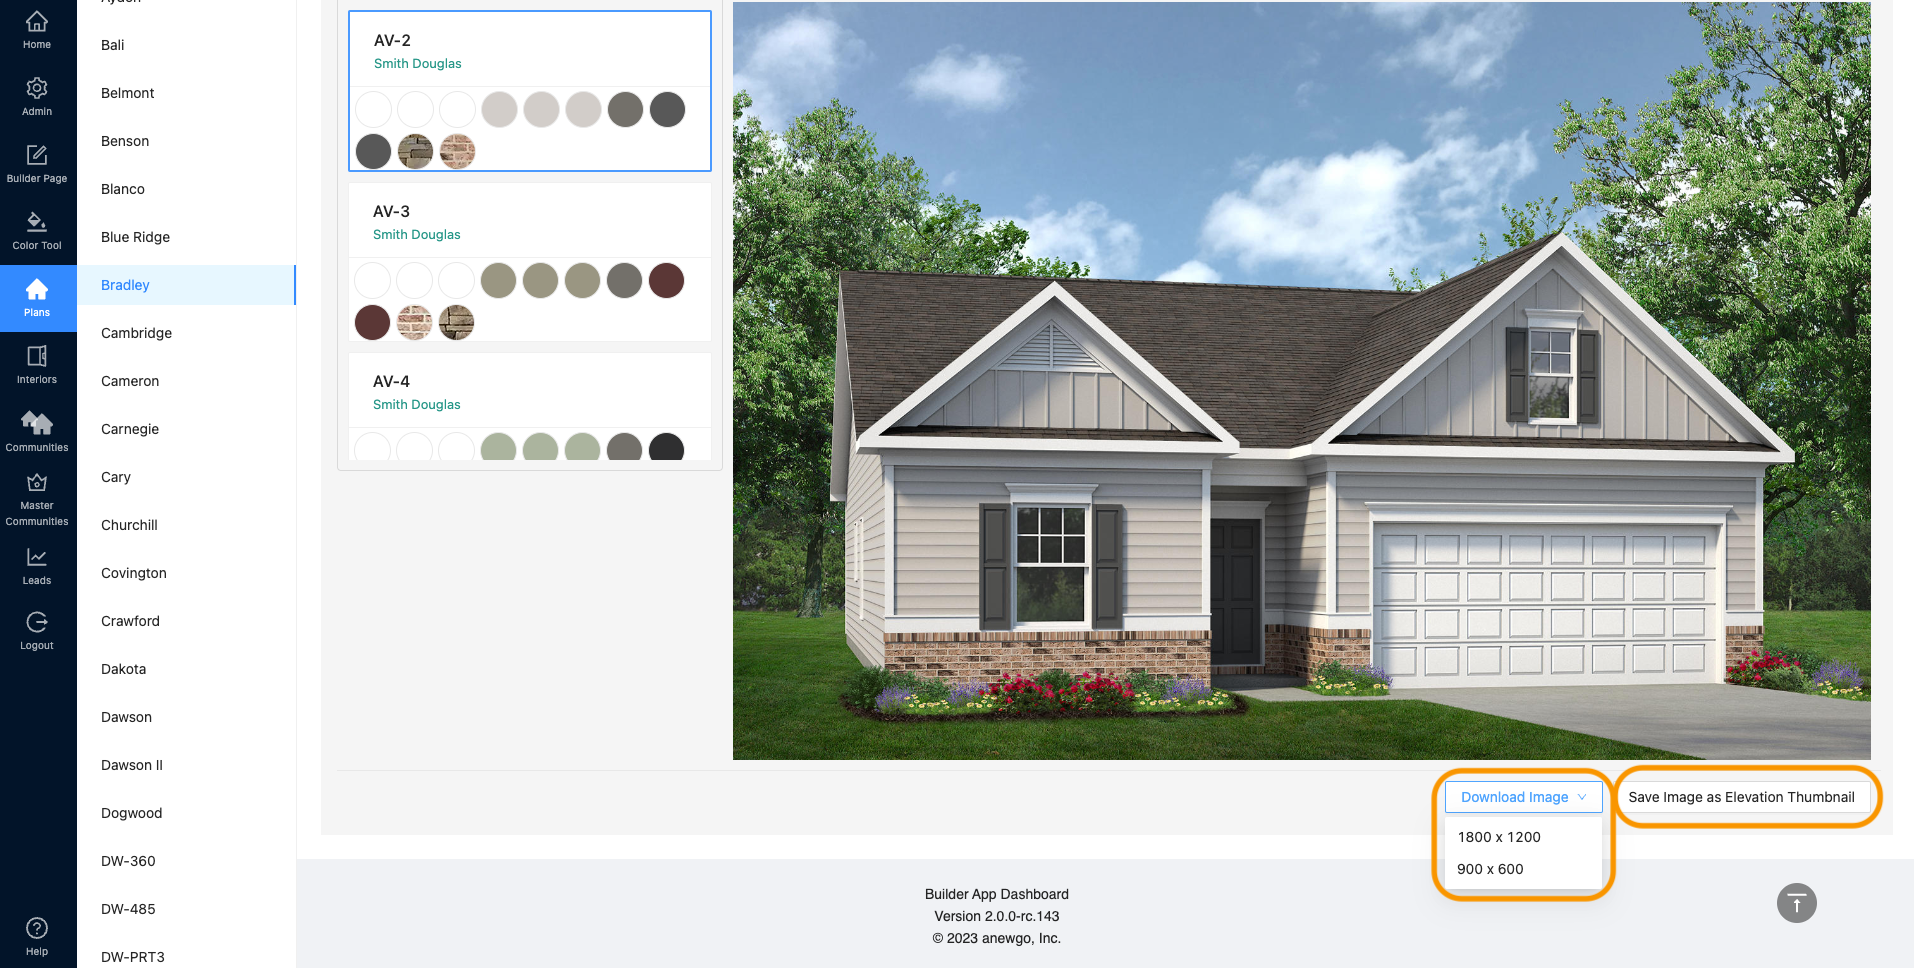
11. Clicking Save Image as Elevation Thumbnail will save that preview image to the elevation and become the image used to represent that elevation throughout the My Home App.