
Our team will set up the siteplan for you initially. Please send your Account Manager the name of your siteplan and the geographical location (a screenshot would be great!).
How to Edit the Map View on an Infill Siteplan.
How to Edit the boundary line on an Infill Siteplan.
- Navigate to Communities & select the correct community. Then click “Siteplan”
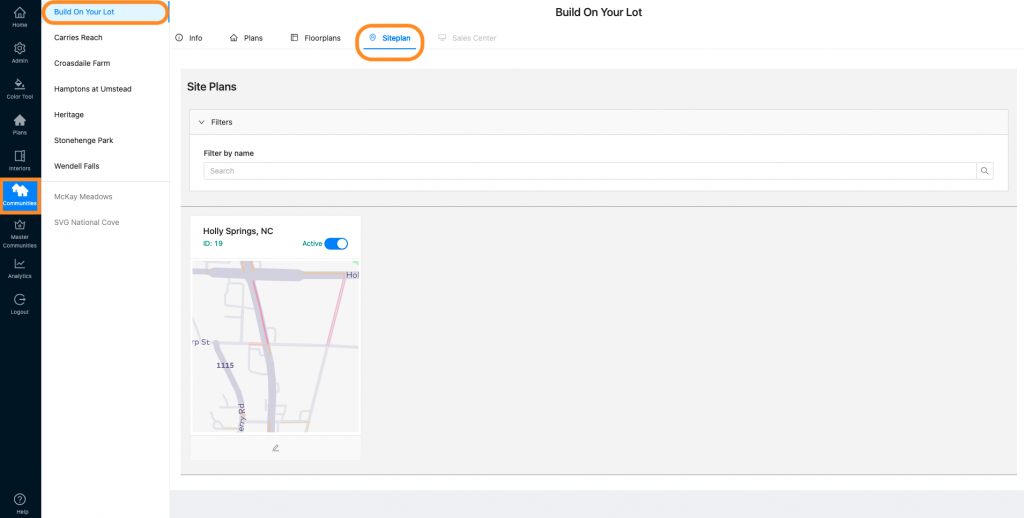
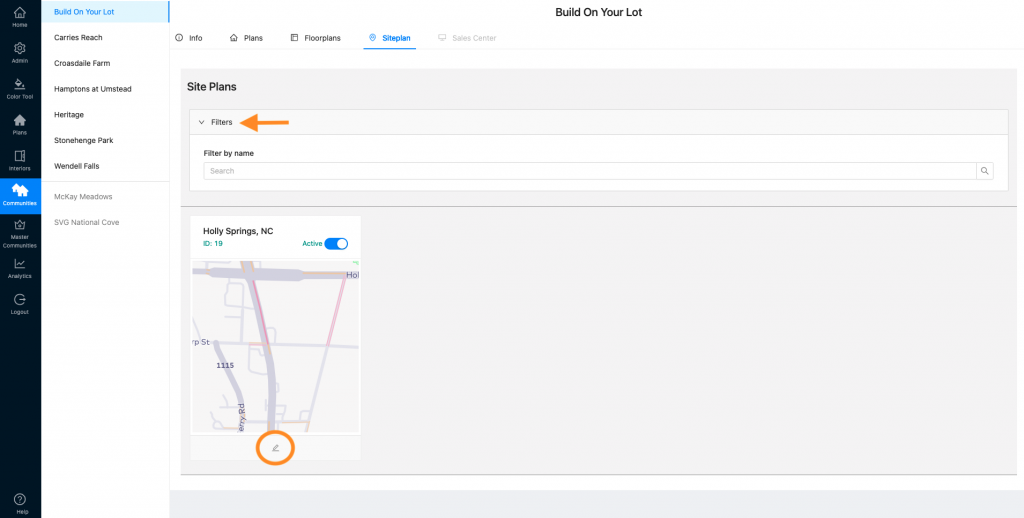
2. Find the correct siteplan you need to edit (use the filter if needed) and click the pencil icon.
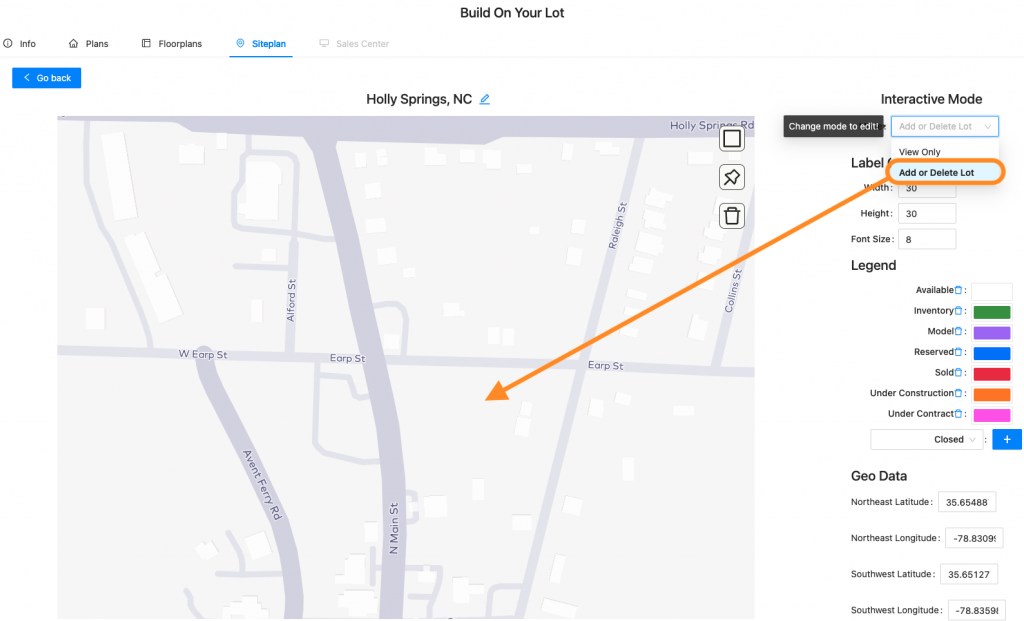
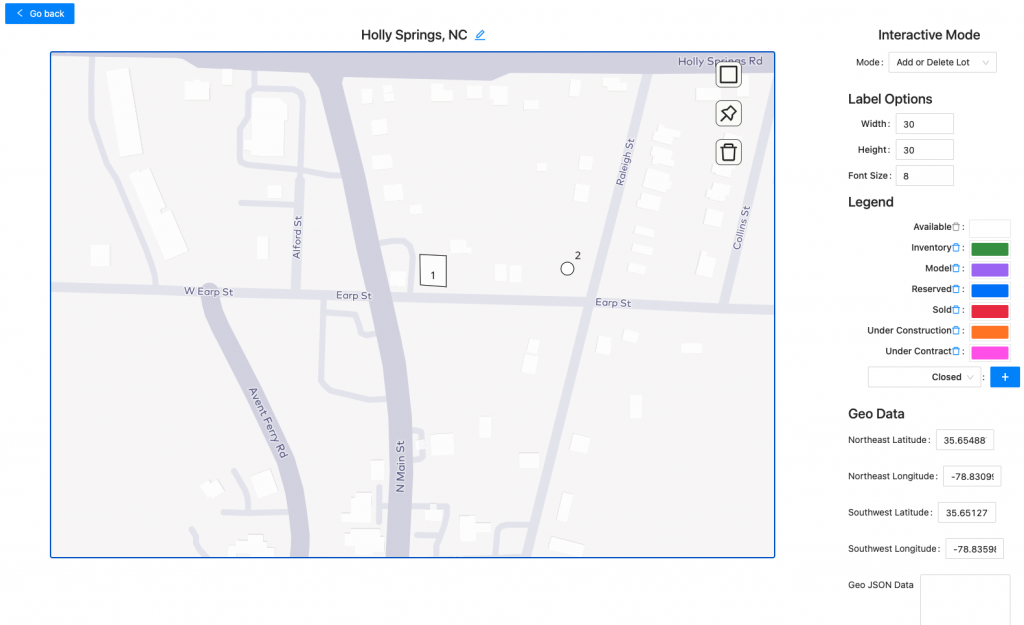
3. Choose the mode in which you want to be in – “View Only” or “Add or Delete Lot”

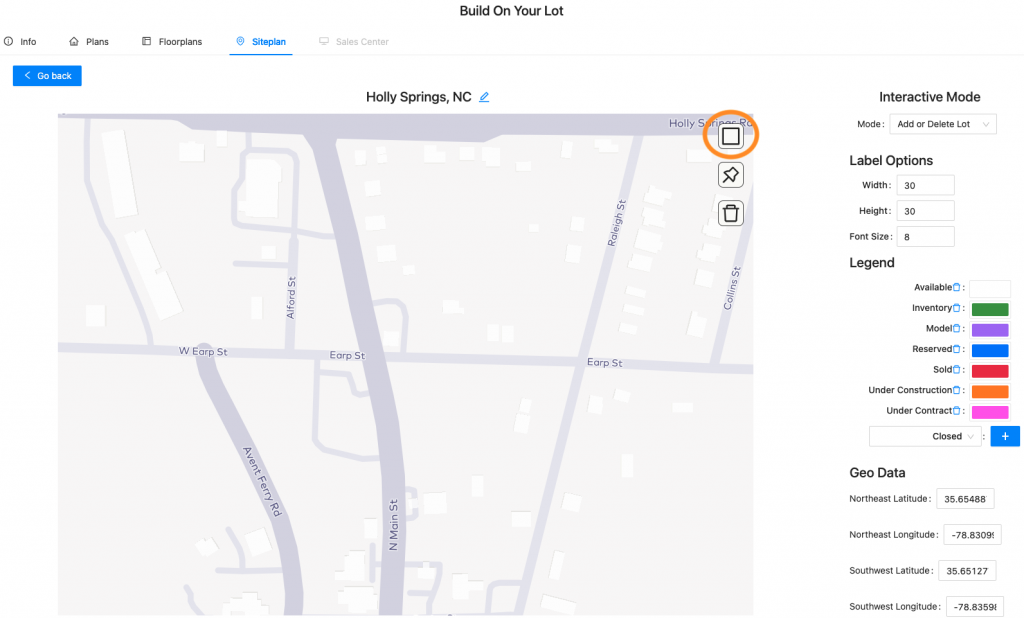
4. When in “Add or Delete Lot” mode, you can select anywhere on the map image to add a lot. Alternatively, you can select an existing lot to delete it.
5. To add a lot, you have 3 options.
- Select the square icon to draw your own shape.
- Select the thumbtack icon to pin a small dot.
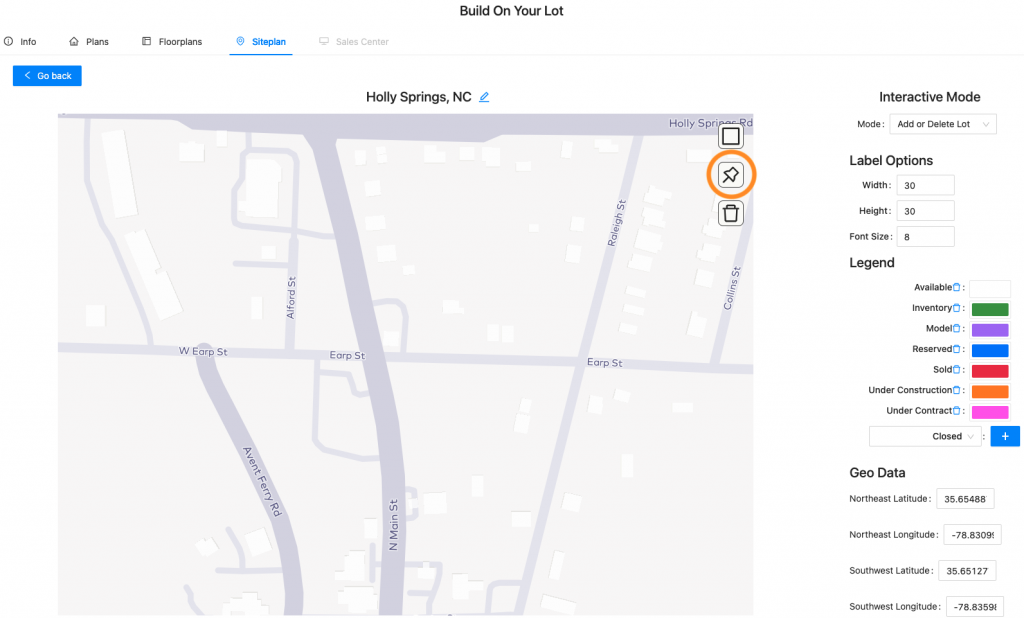
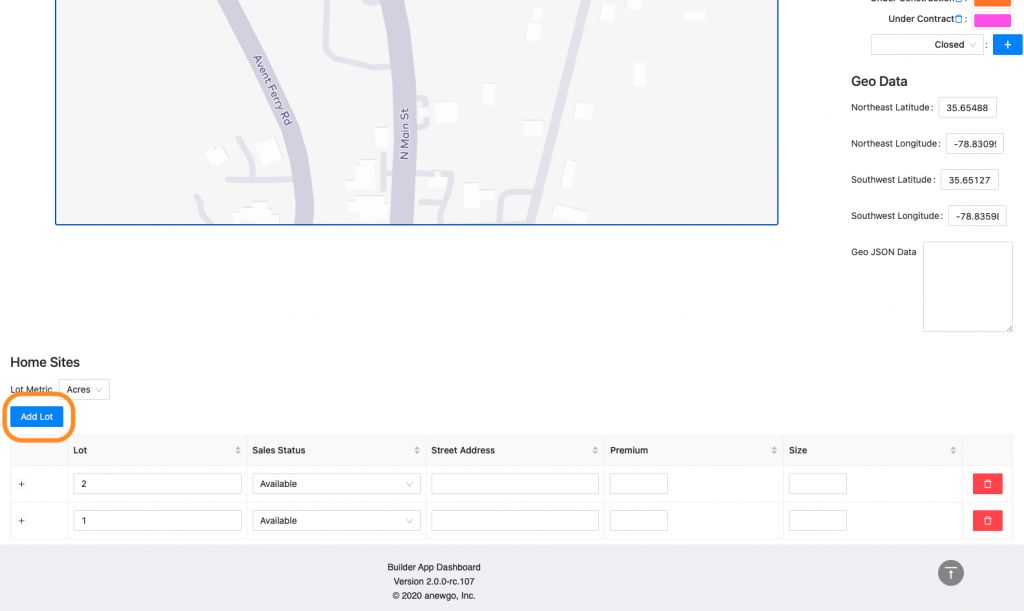
- Click the blue “Add Lot” button in the lot list section below.
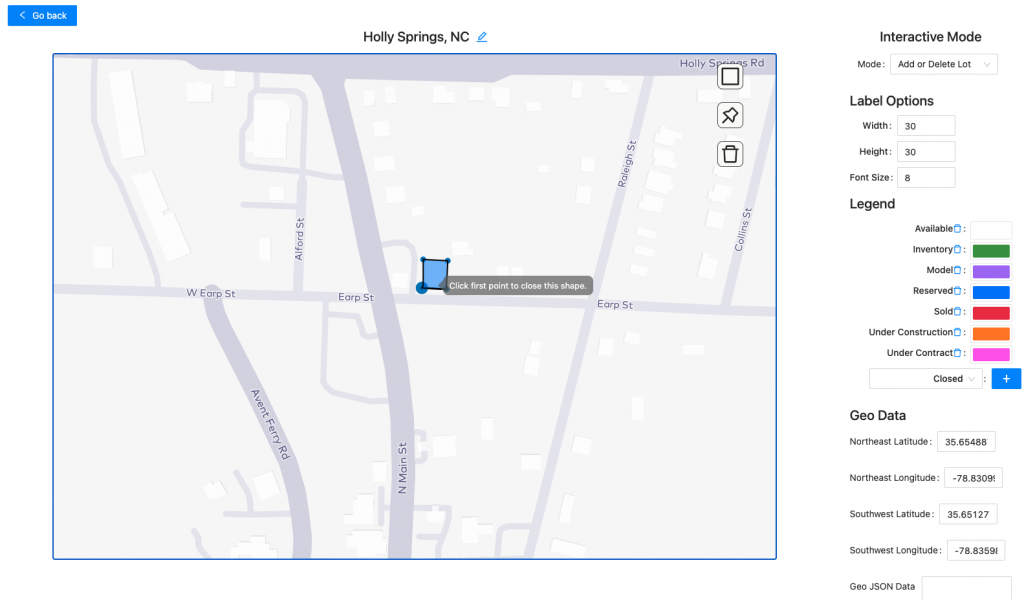
6. To draw your own shape:
- Start drawing by clicking the area on the map you would like your lot to appear.
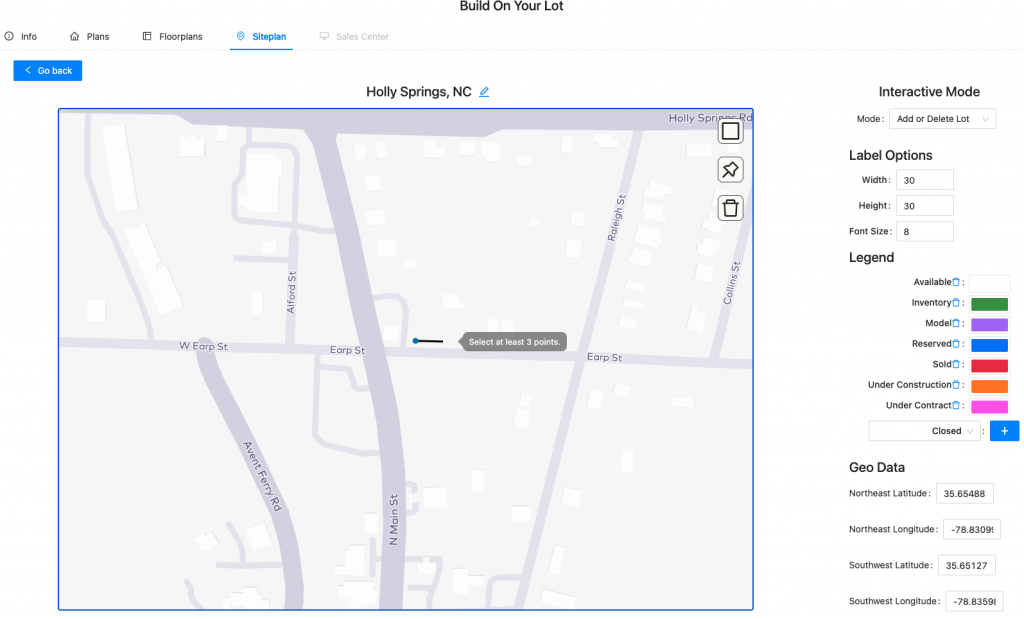
- Continue to click to create your shape/outline a lot.
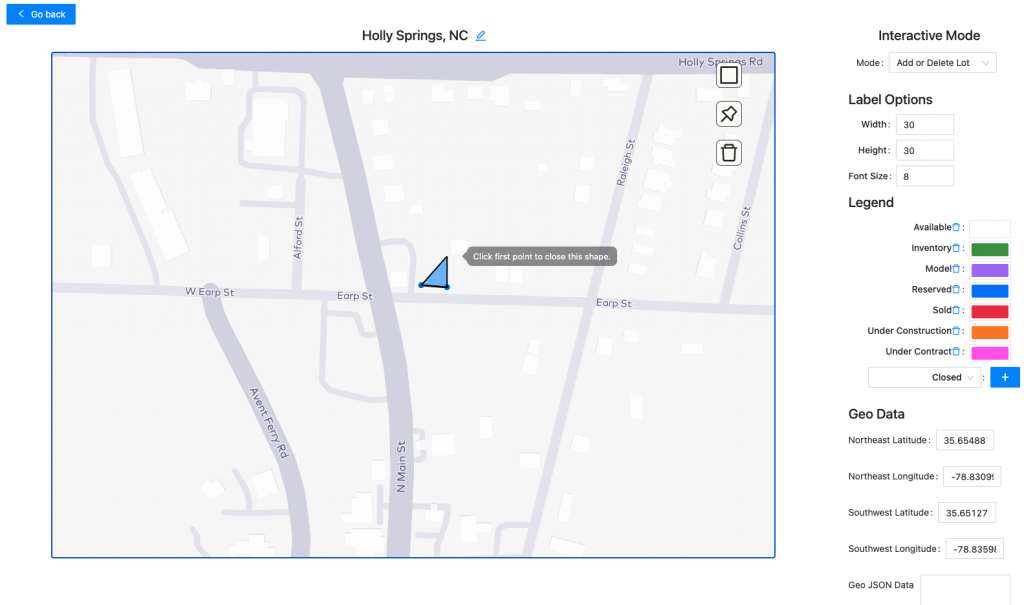
- Click the first dot where you started in order to complete the shape.
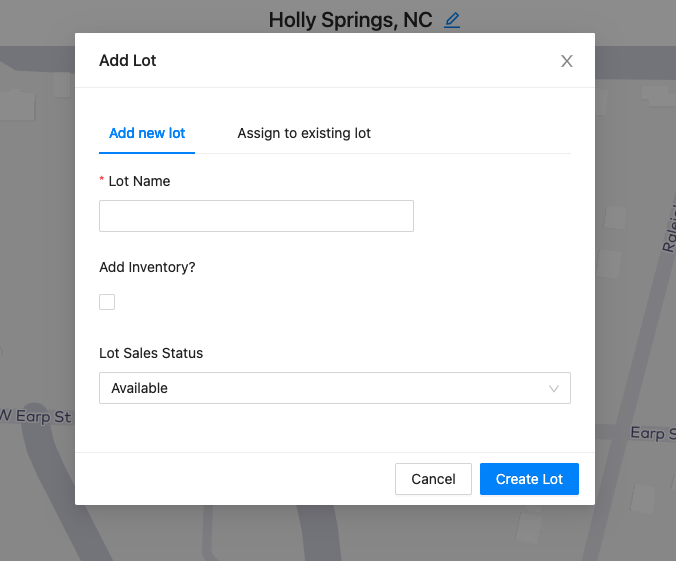
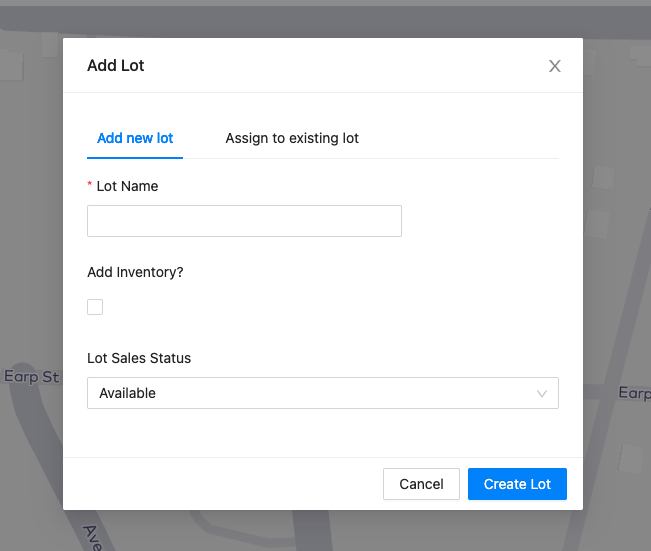
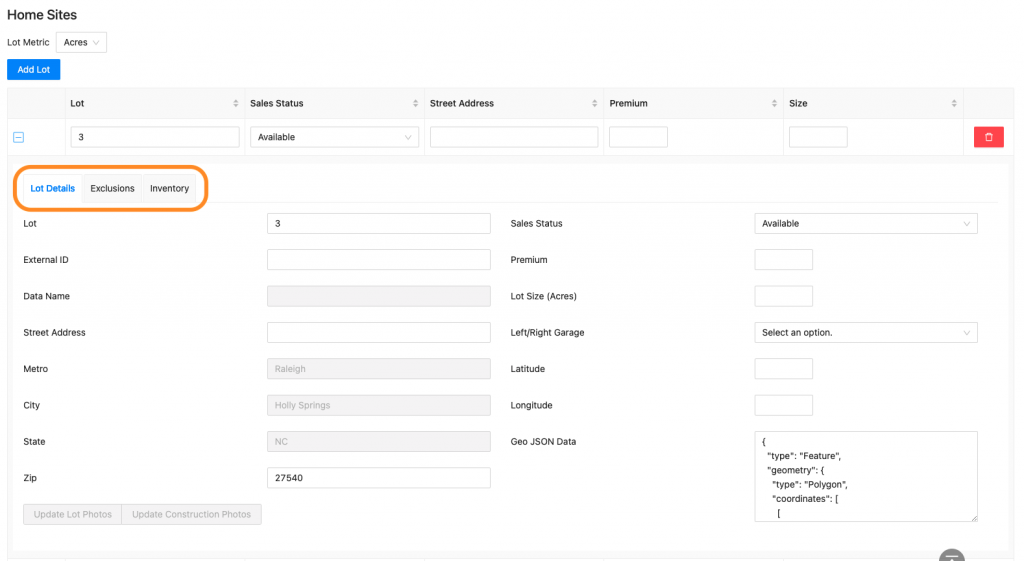
- When you have completed your shape, the lot information window will pop up. Fill in the correct information (see step 8 for “Assign to existing lot”) and click “Create Lot”
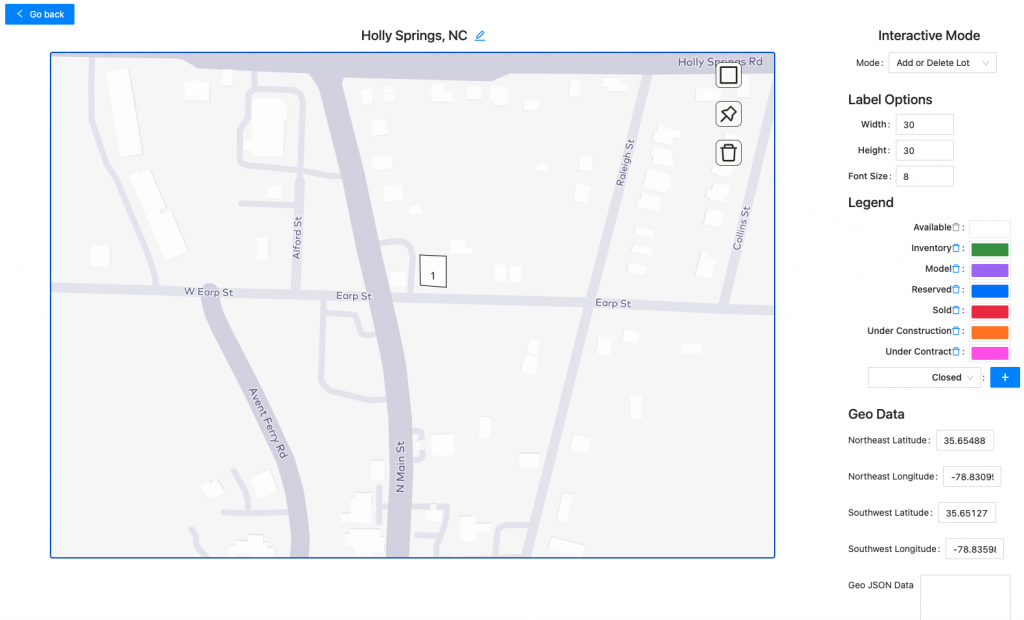
- Your lot now appears on the map.
7. To add a pin:
- Click on the map where you would like your pin to appear.
- This will open up the lot information window. Fill in the correct information (see step 8 for “Assign to existing lot”)
- Your lot now appears on the map.
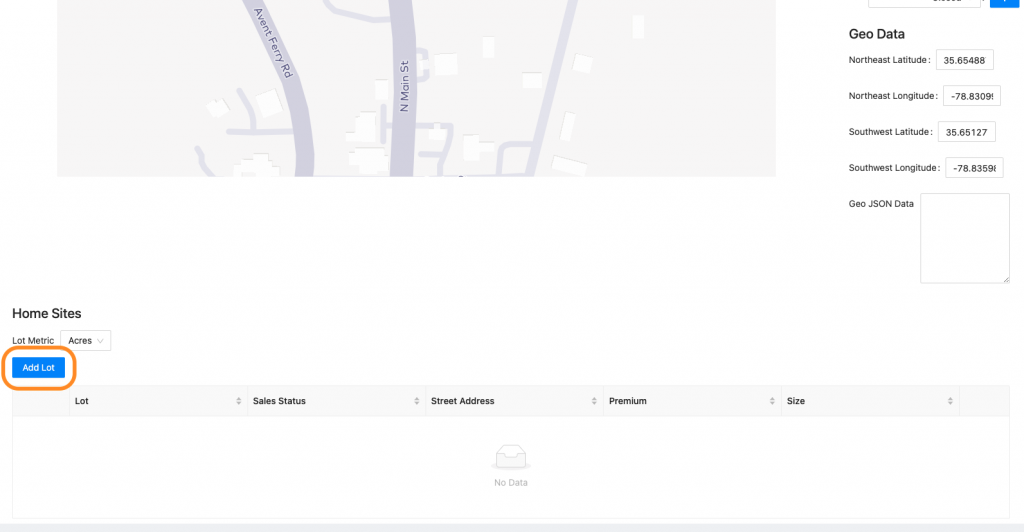
8. If you would like to add lot information before making the lot visible on the front end, you can scroll down to the lot list section and click “Add Lot” – the lot information window will pop up. Fill in the correct information. Note: This lot will not appear on the front end until you assign it a location on the map.
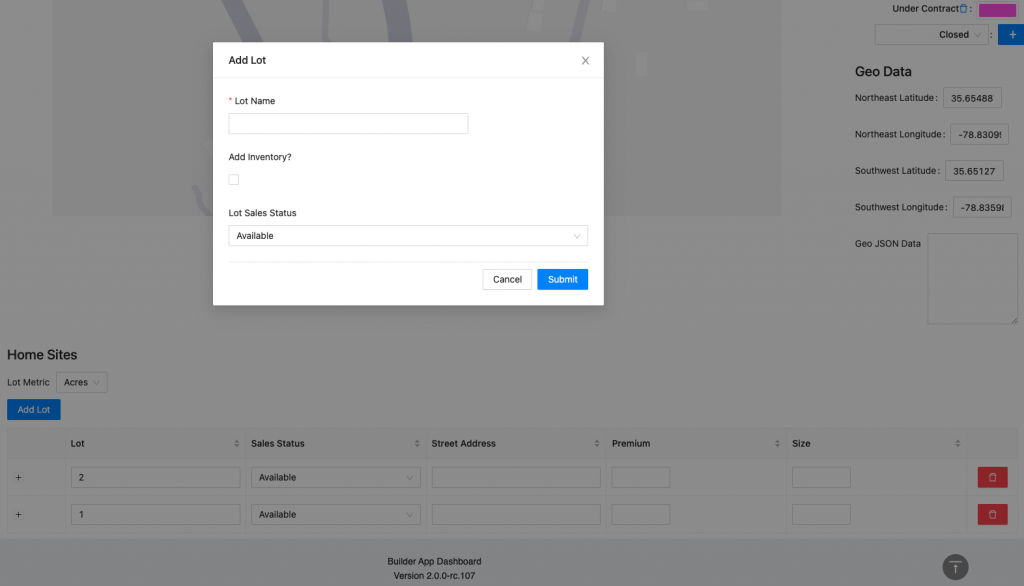
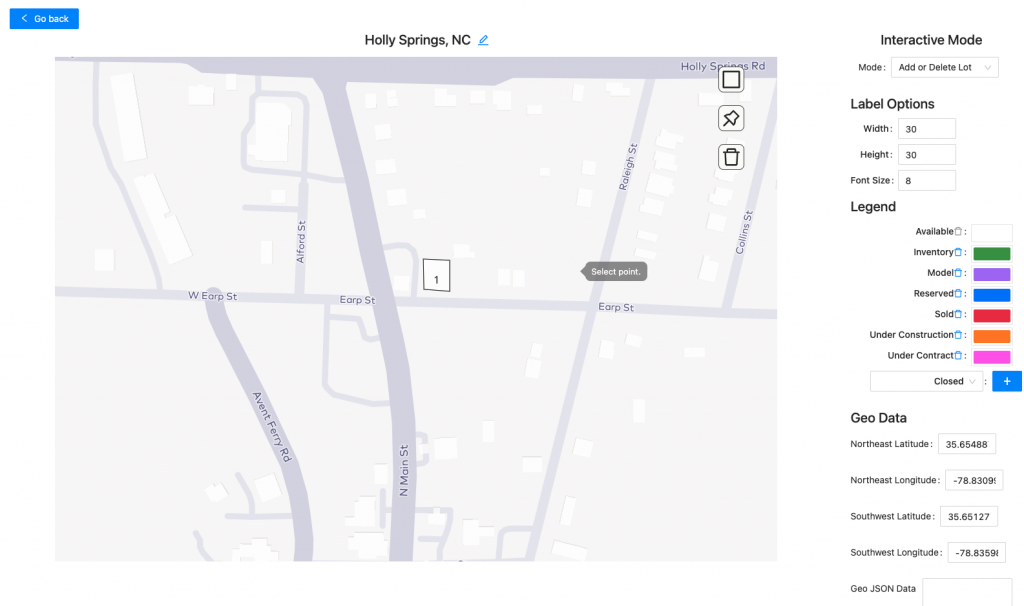
- To assign the location of this lot on the map, follow steps 6 or 7. When the lot information window pops up, select “Assign to existing lot” and select the correct lot from the drop down.
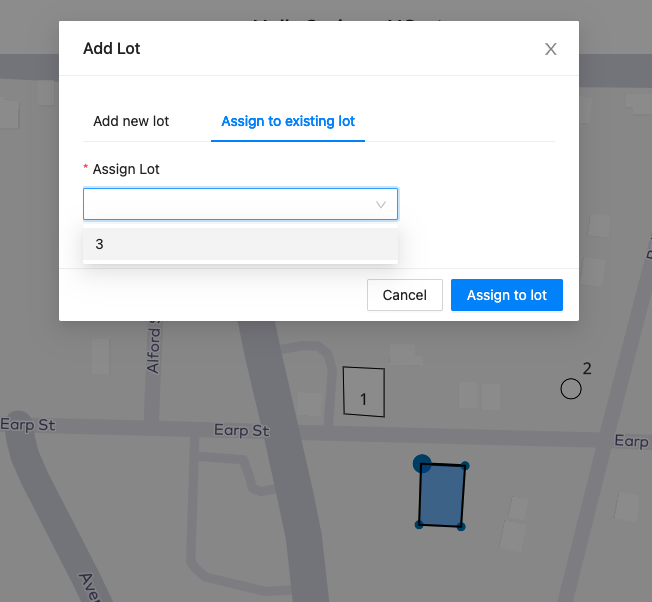
- Your lot will now appear on the map.
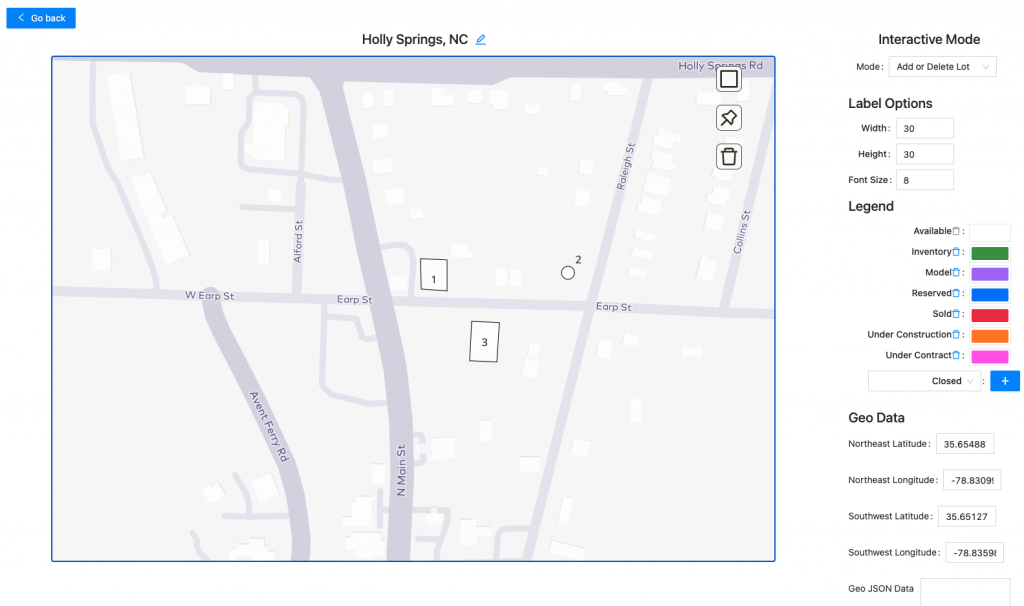
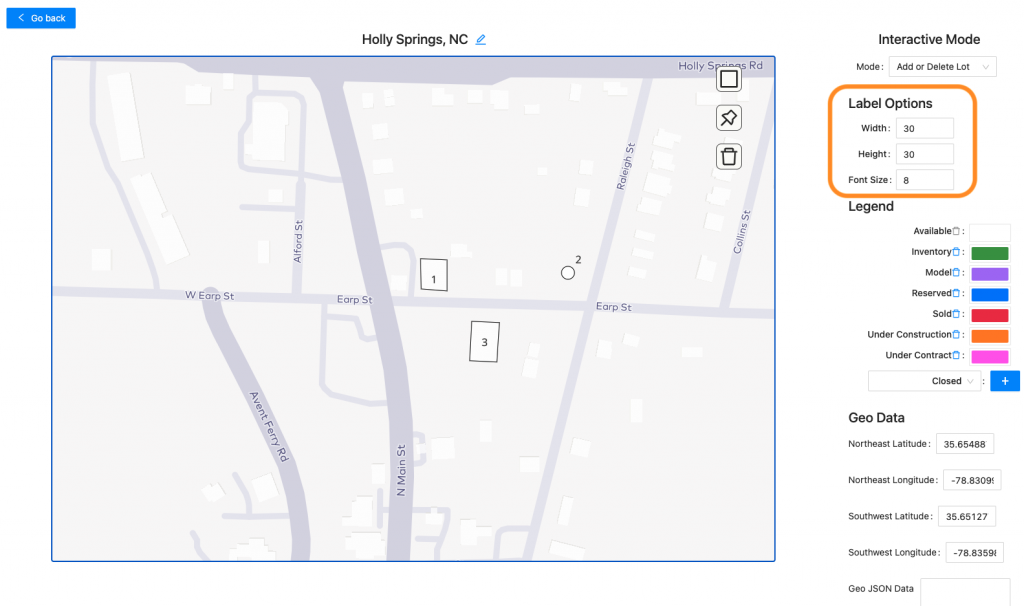
9. After you have added your lots, you can adjust the label options if needed.
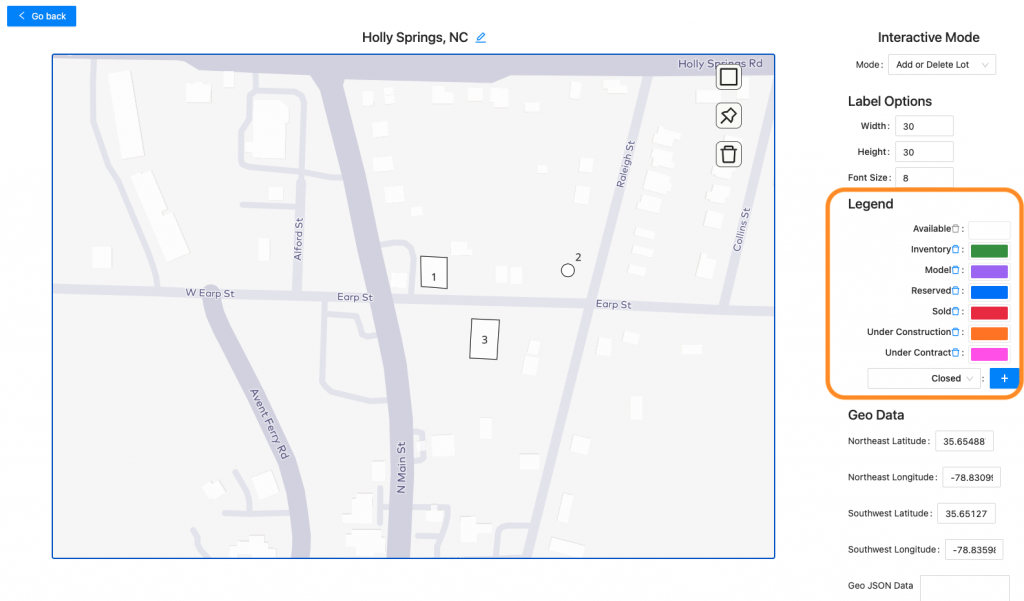
10. You can also adjust the colors of your lot statuses by clicking on the color rectangle. If you need to change the lot status terms, please contact your Account Manager or kim@anewgo.com
11. You can also adjust the Geo Data or add Geo JSON Data code if needed.
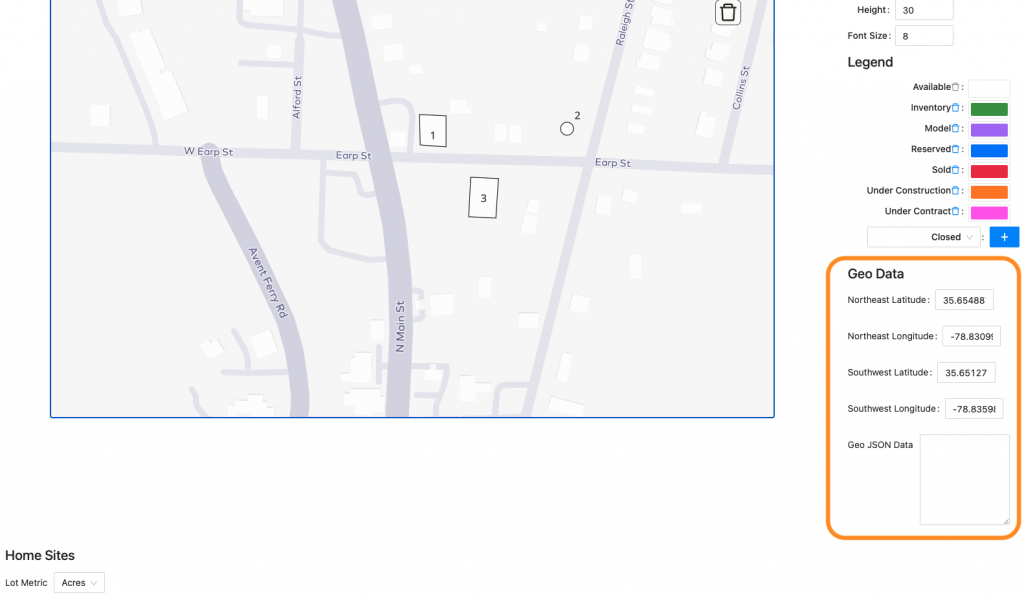
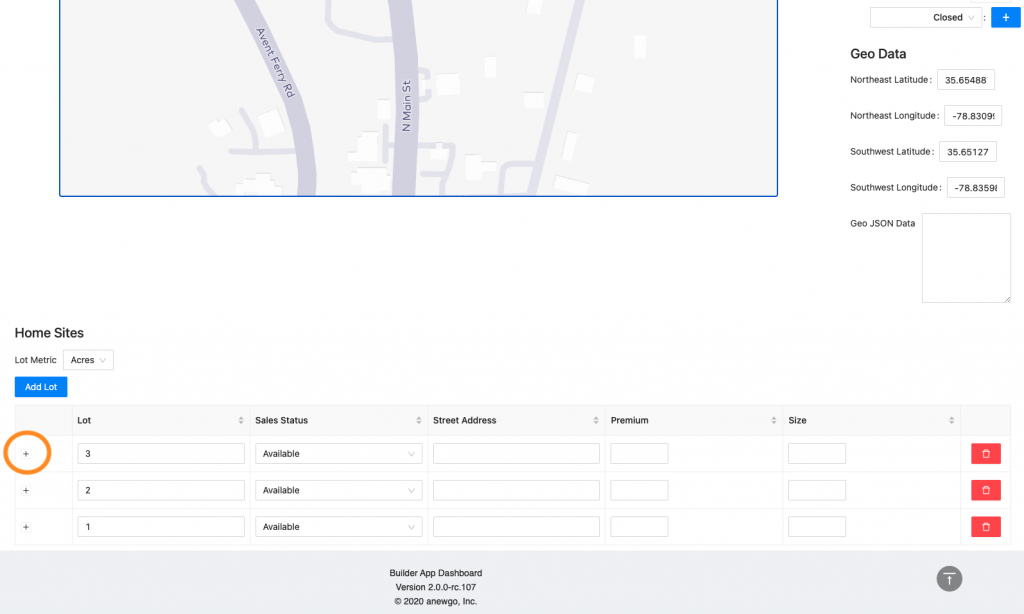
12. Scroll down to the lot list to edit the details for your lots. Click the + next to whichever lot you need to edit to expand your options.
13. The following docs are set up for our image siteplans (non-geo location), but the steps are the same for the lot detail fields.