
If you have a plan or elevation that you do not want buyers to see active in the community, but you still want it as an option for an inventory/spec home, you can retire a plan or elevation from a community. This will keep the plan selectable as an inventory home in the backend while hiding it from users on the front end.
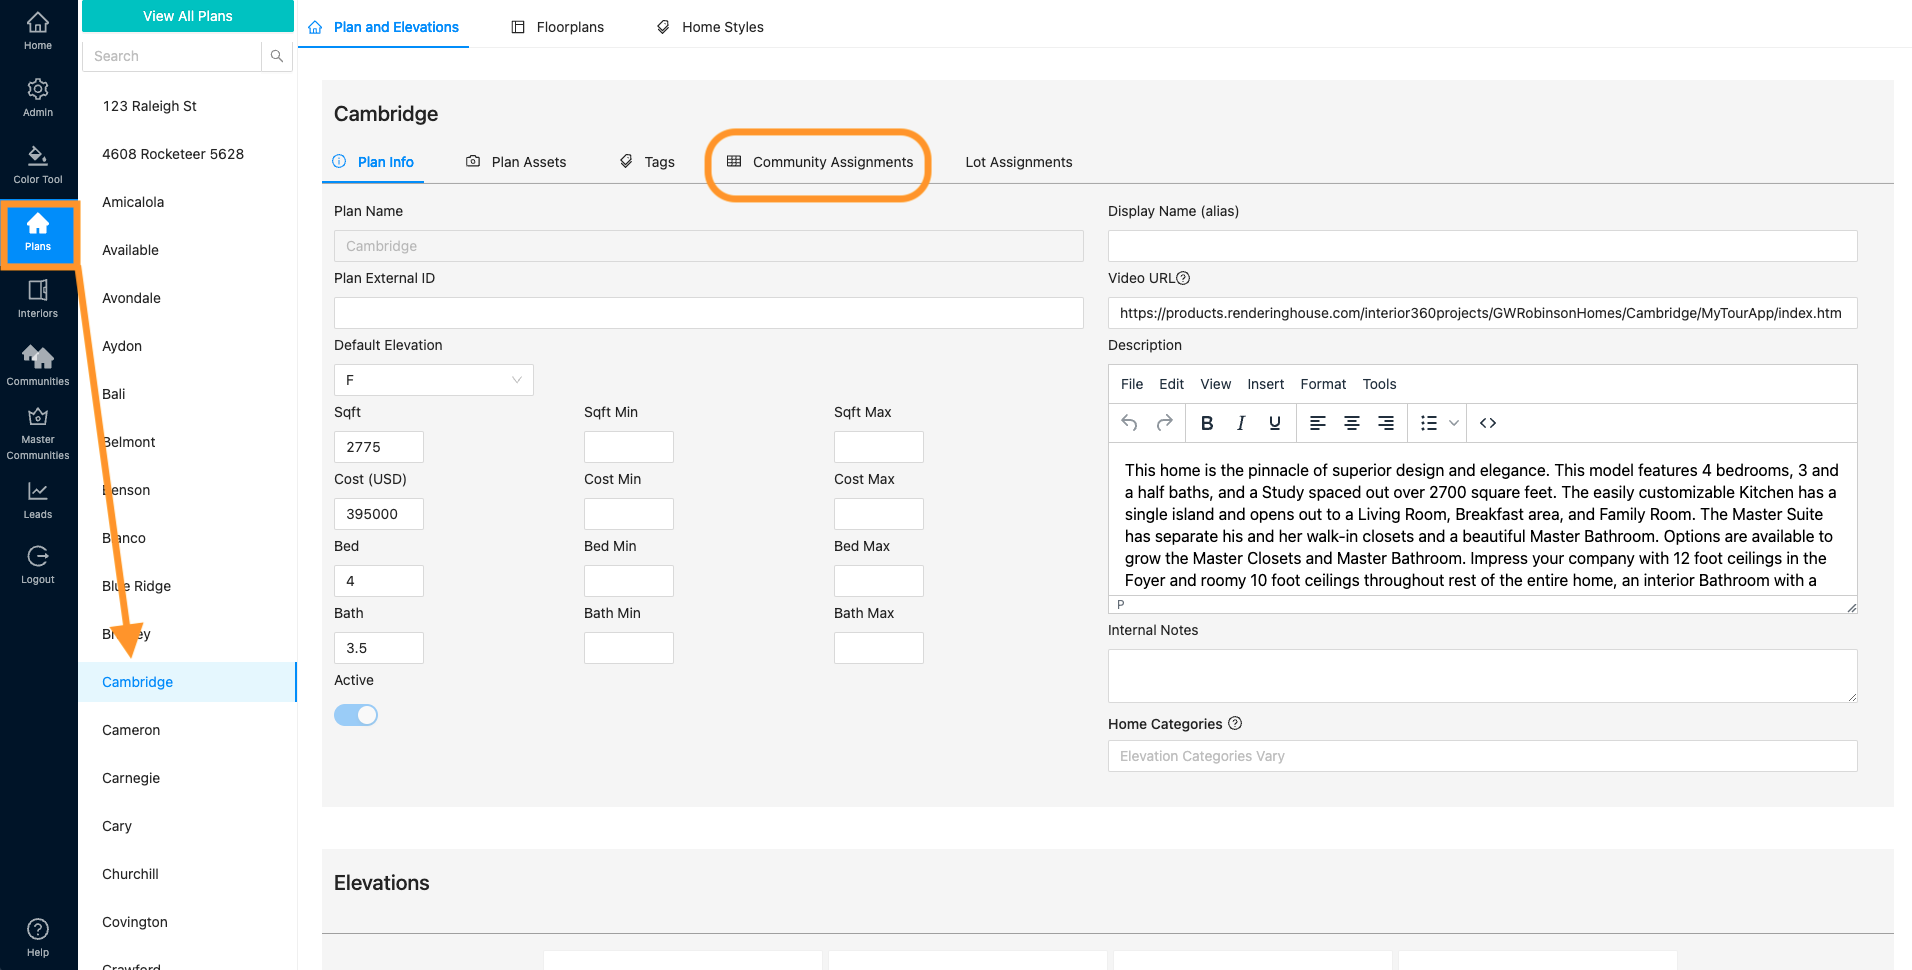
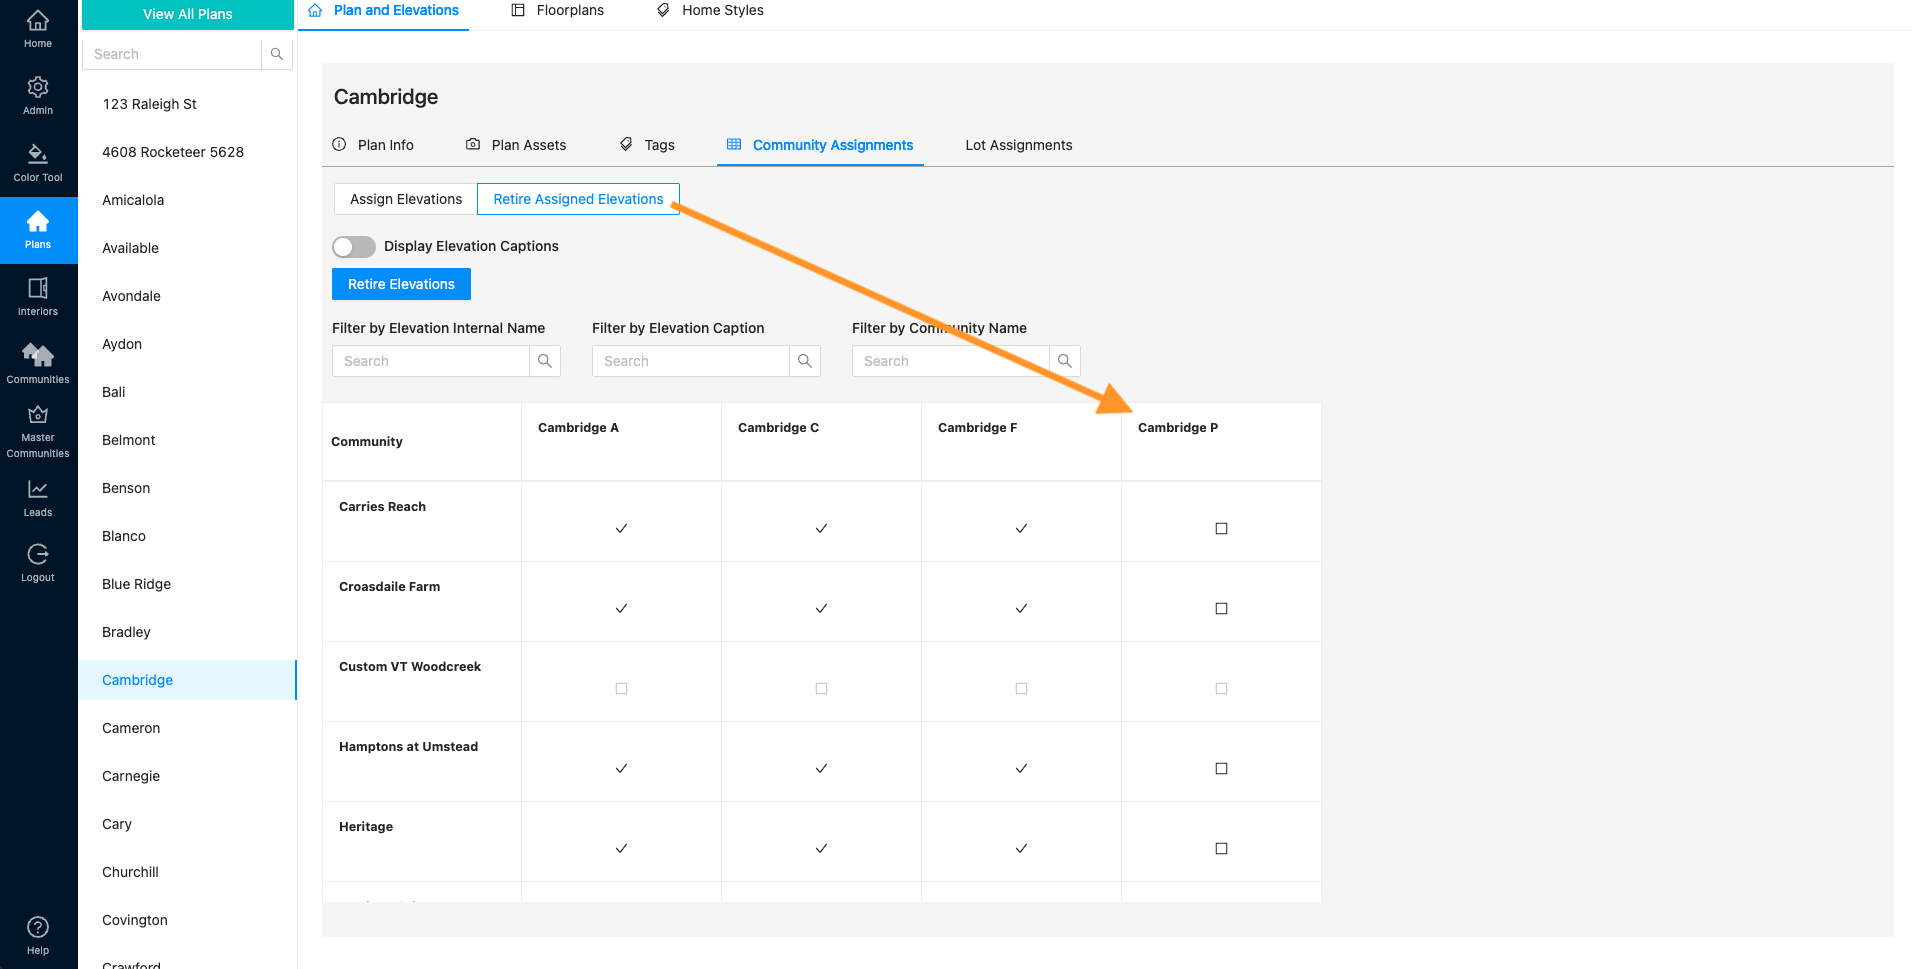
- To retire multiple elevations at once, go to the Plans tab. Select the Plan you wish to work with in the plans column. Make sure you are in “Plans and Elevations” and then click “Community Assignments”
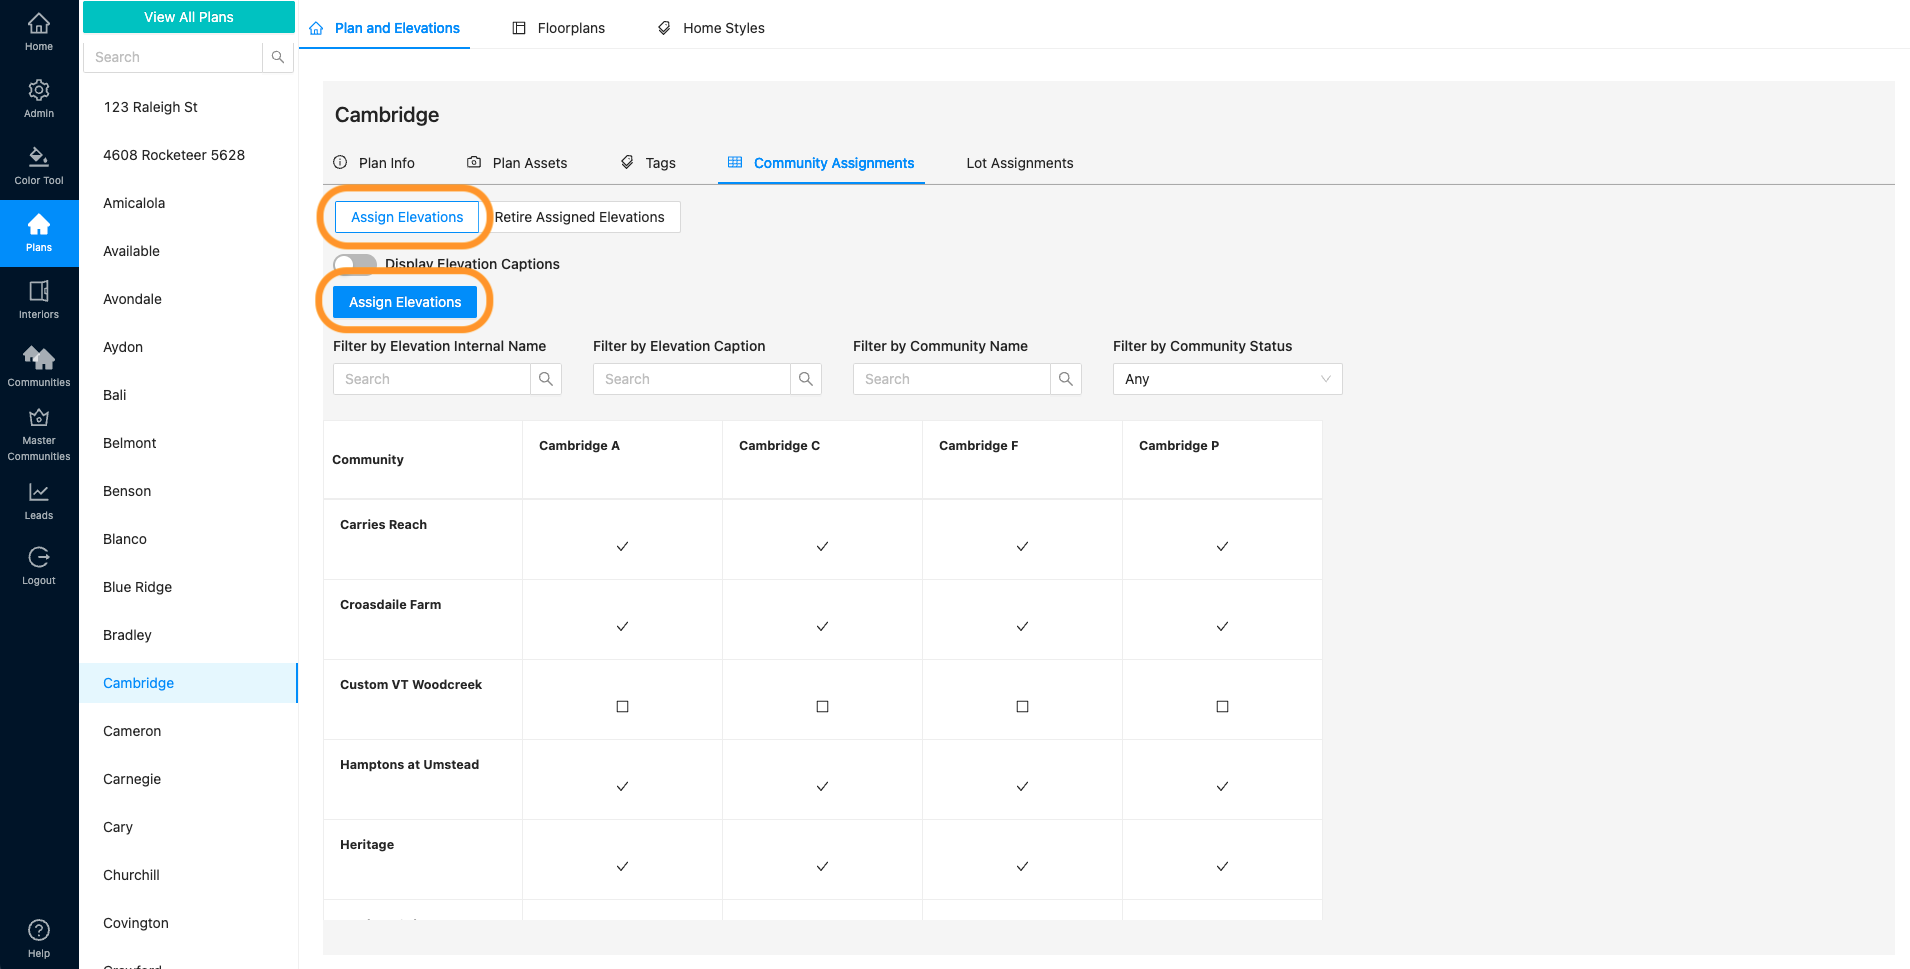
- Make sure you are in the “Assign Elevations” section. Then click “Assign Elevations”
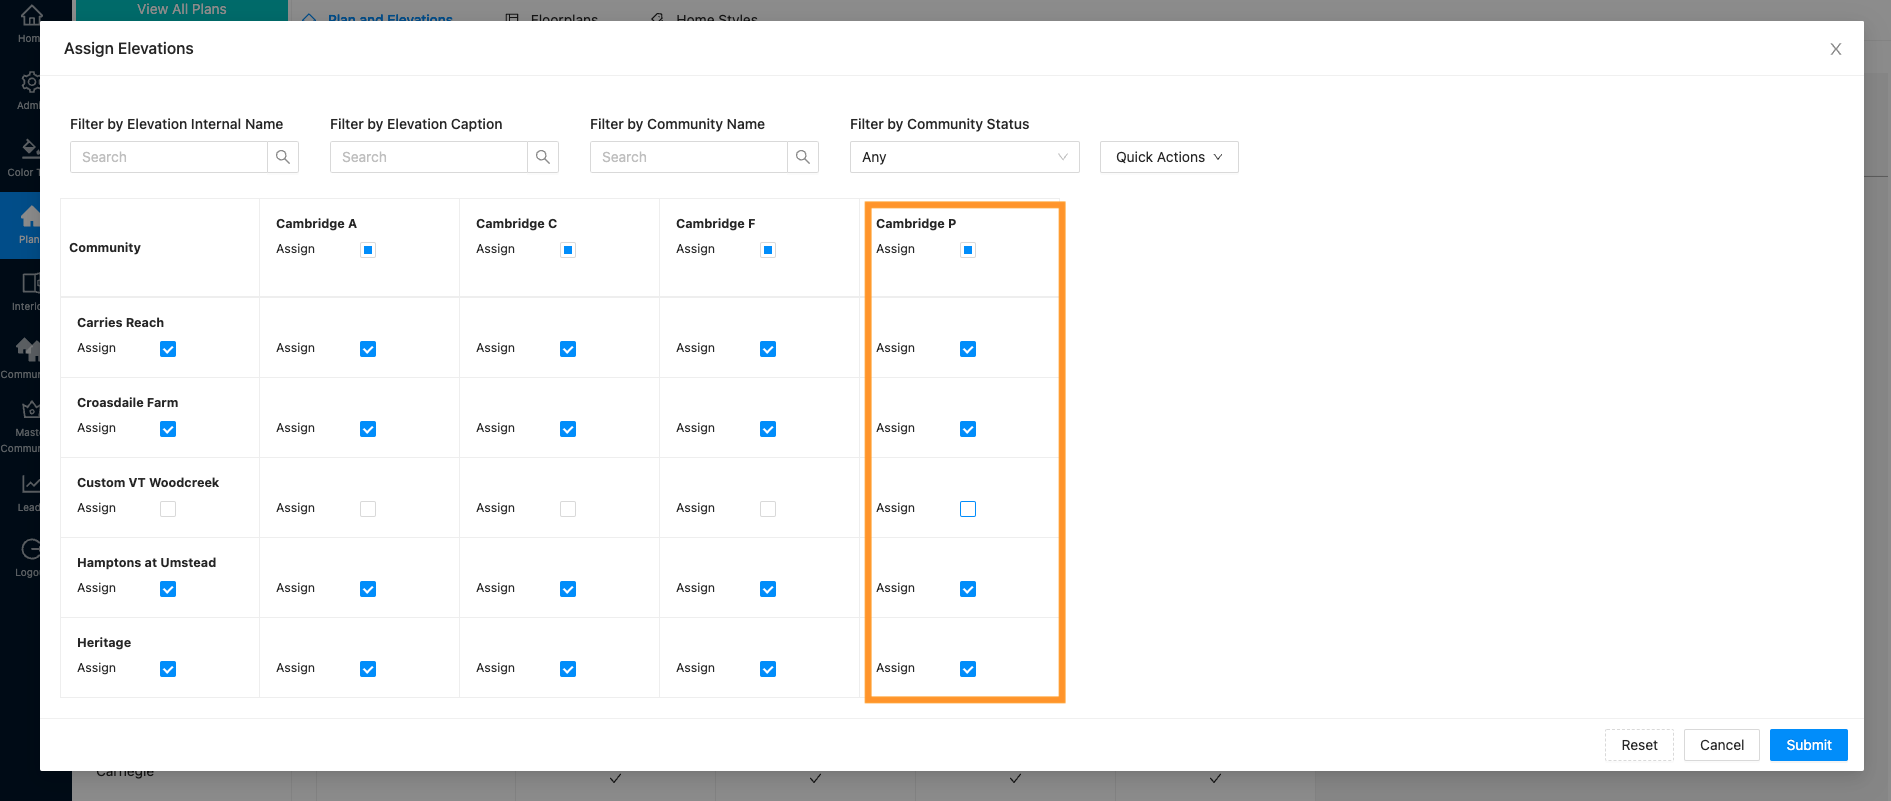
- Make sure the elevations you want to retire are assigned to the communities you wish to reitre them from. (In this example we will focus on Cambridge Prairie) Click “Submit” when done.
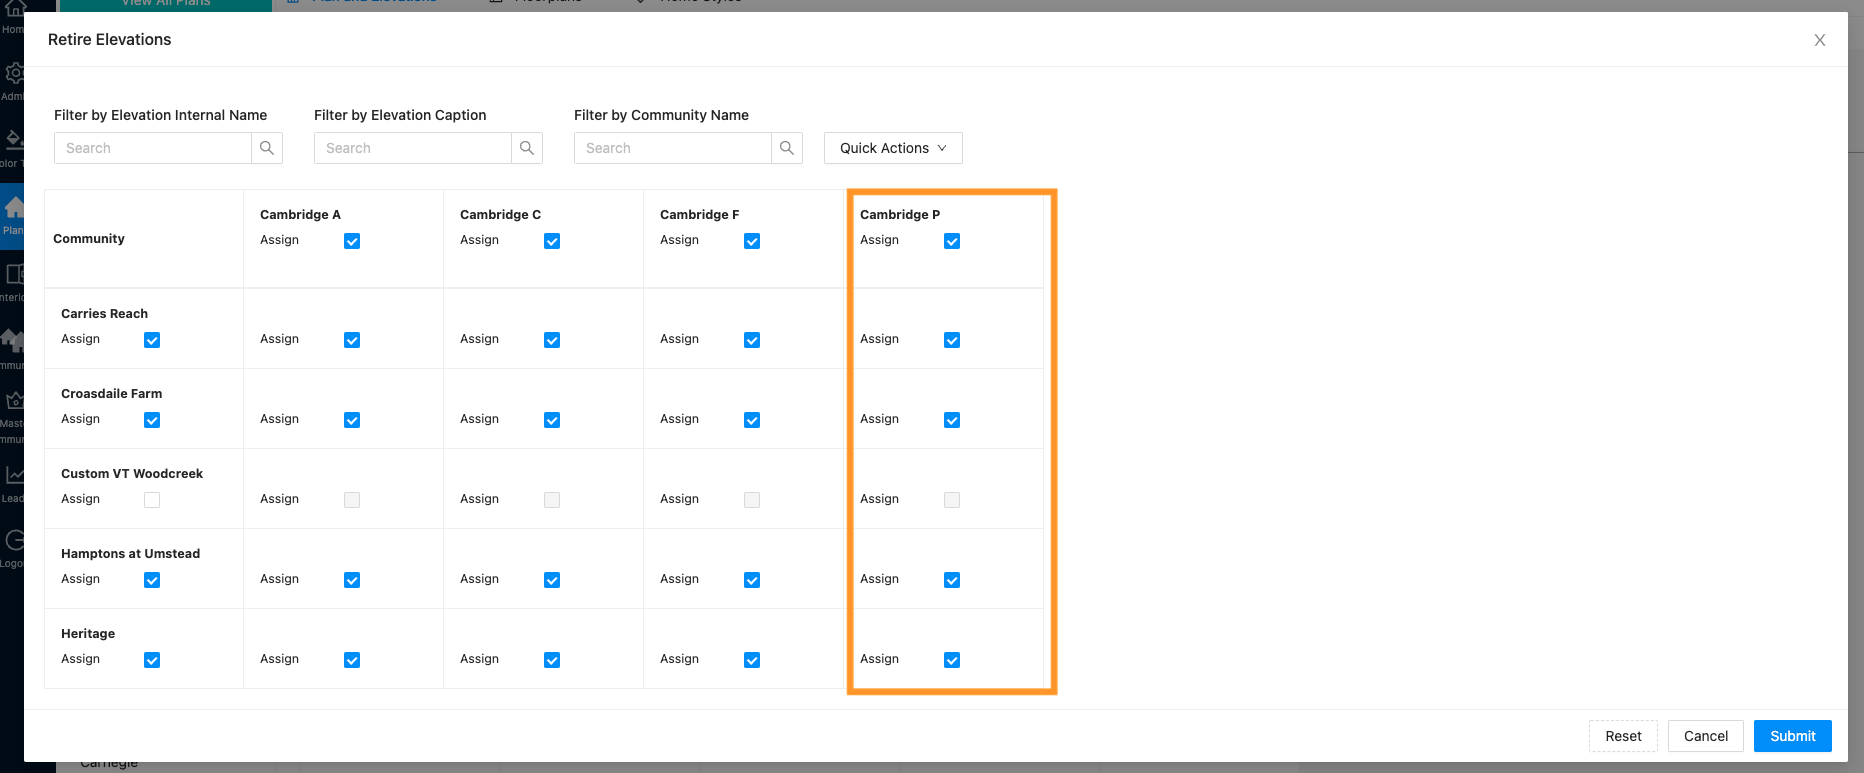
- Now switch over to “Retire Assigned Elevations” & click “Retire Elevations”

- Uncheck all of the elevations you want to retire. Then click “Submit” when done.
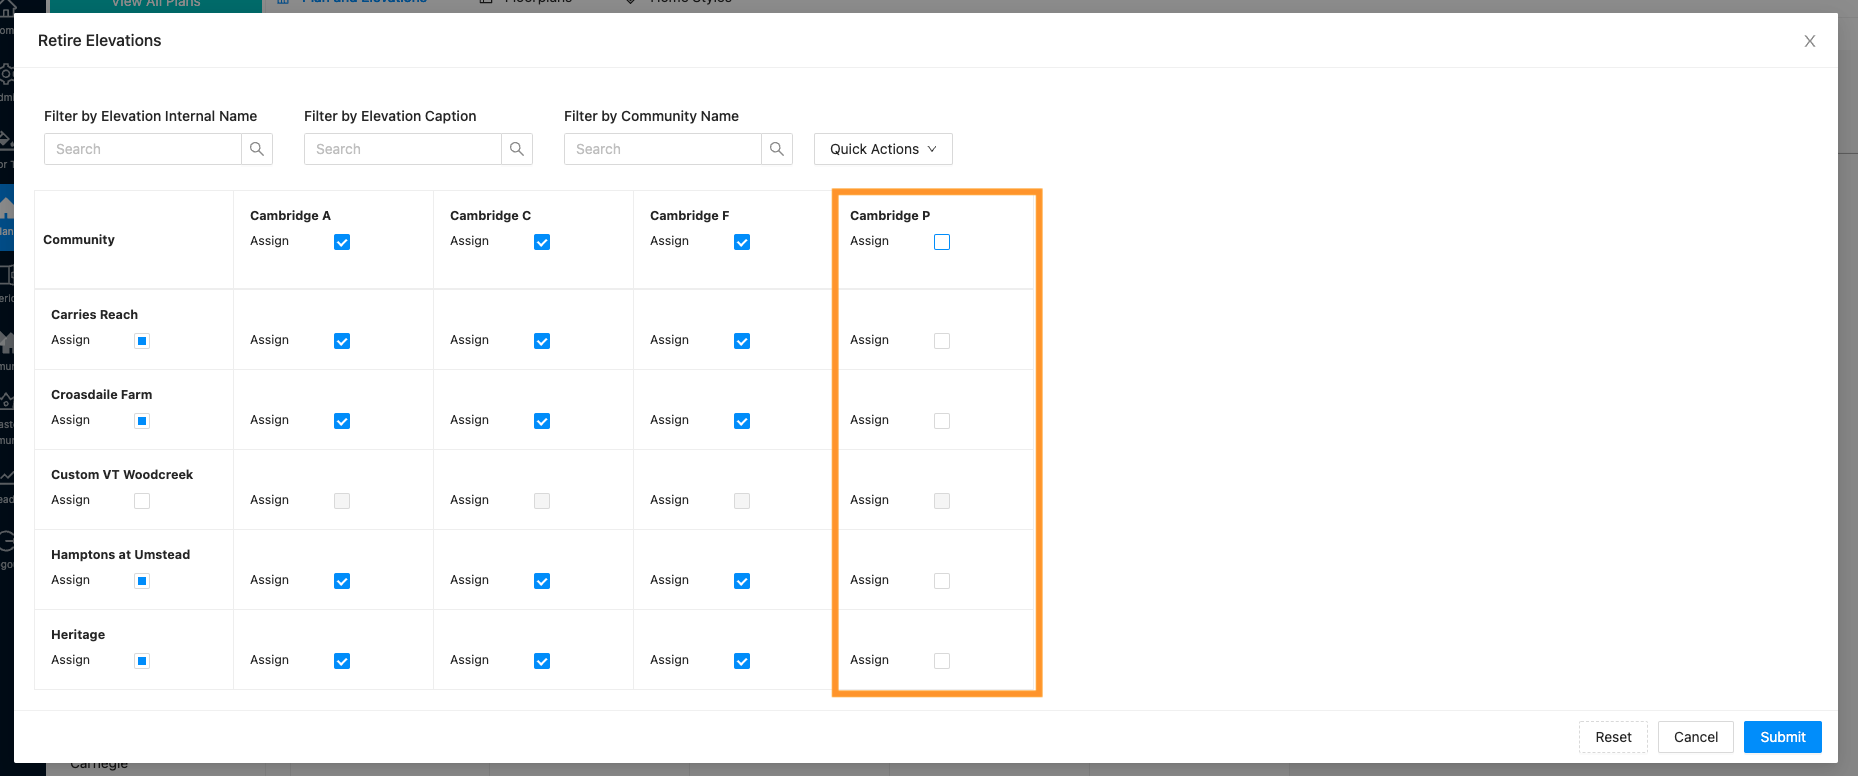
- You will see your changes reflected in the “Retire Assigned Elevations” section
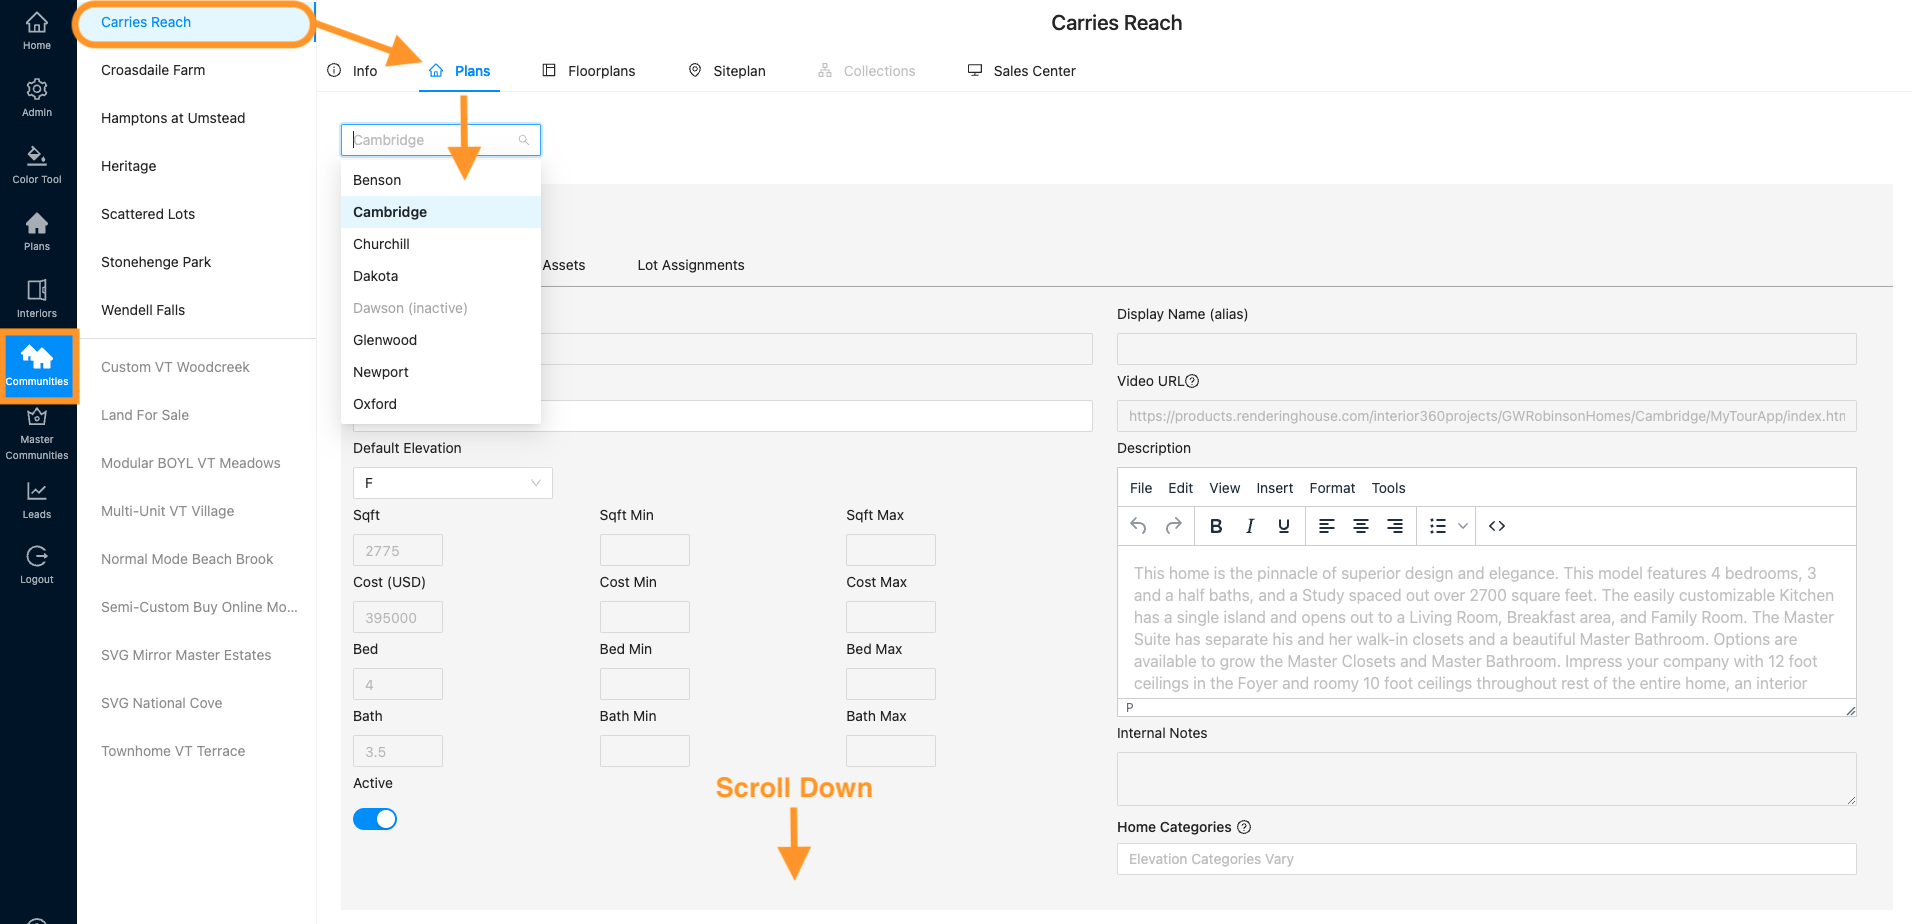
- Now you can go to your communities and see the retired elevations. Go to the Communities tab, select the community you want to check, then click the “Plans” tab. You can see your retired elevations below. (Note: make sure the Display Retired Elevations toggle is on)
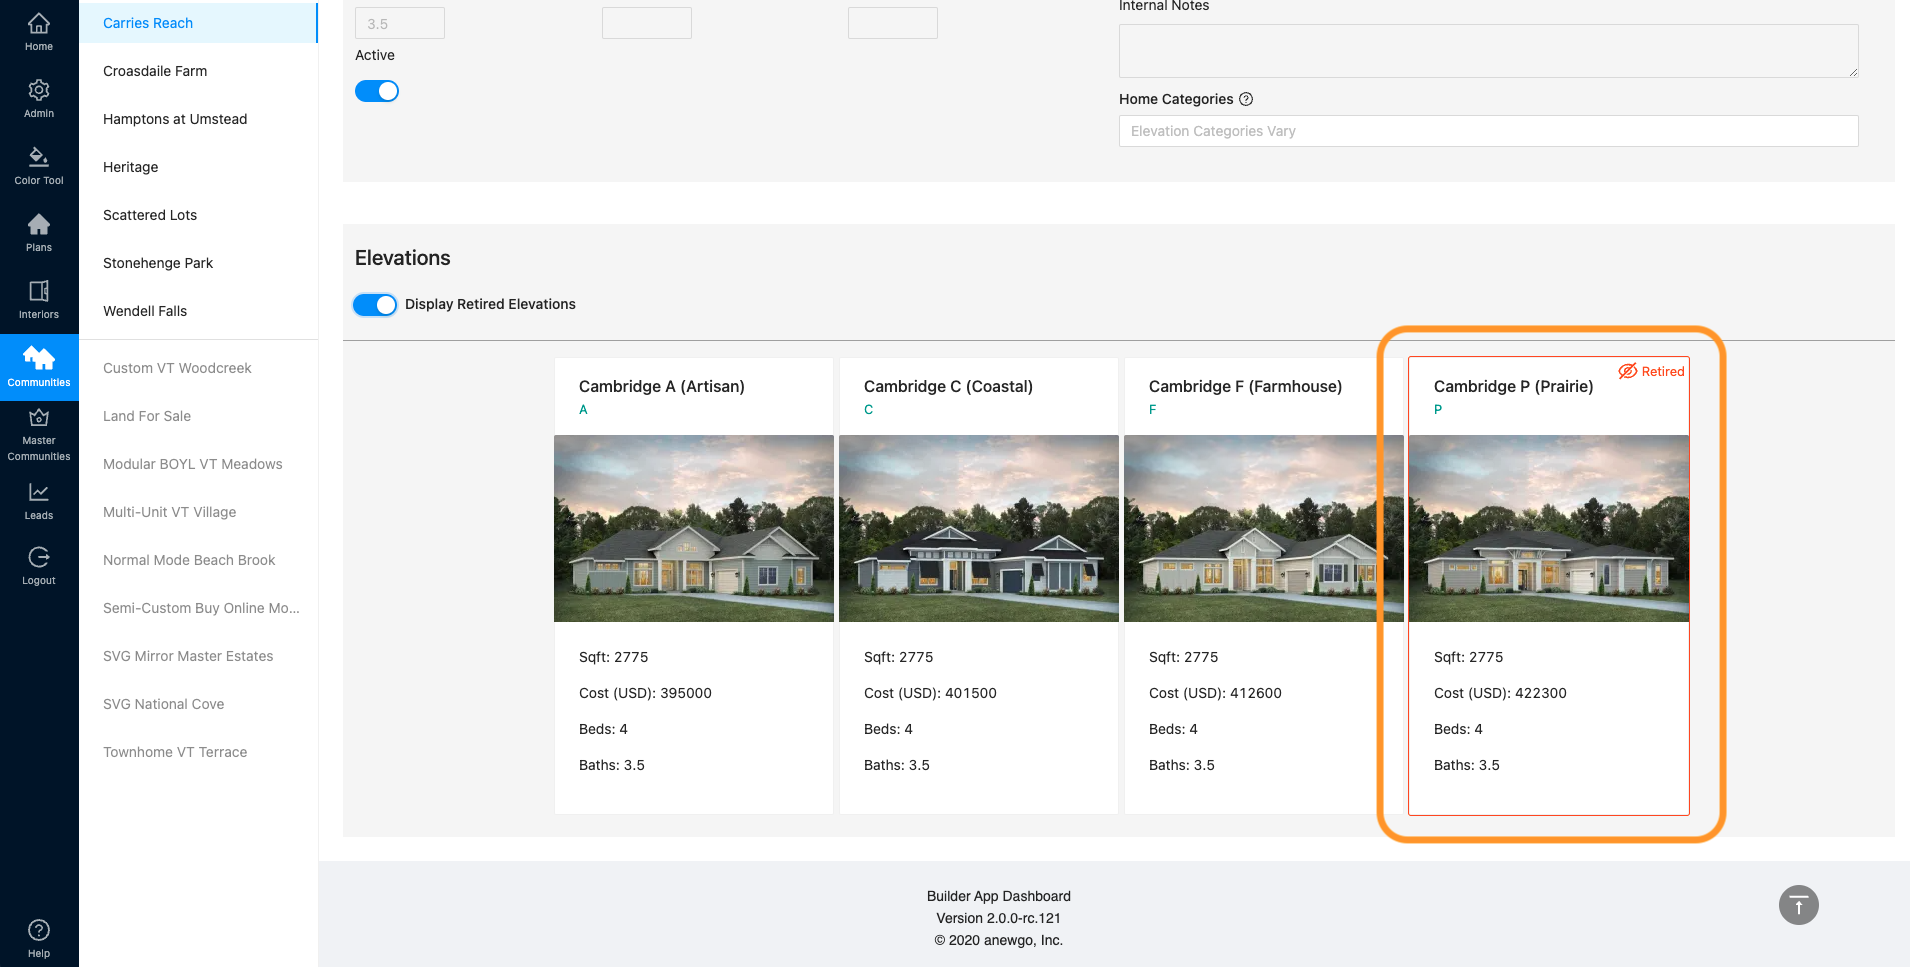
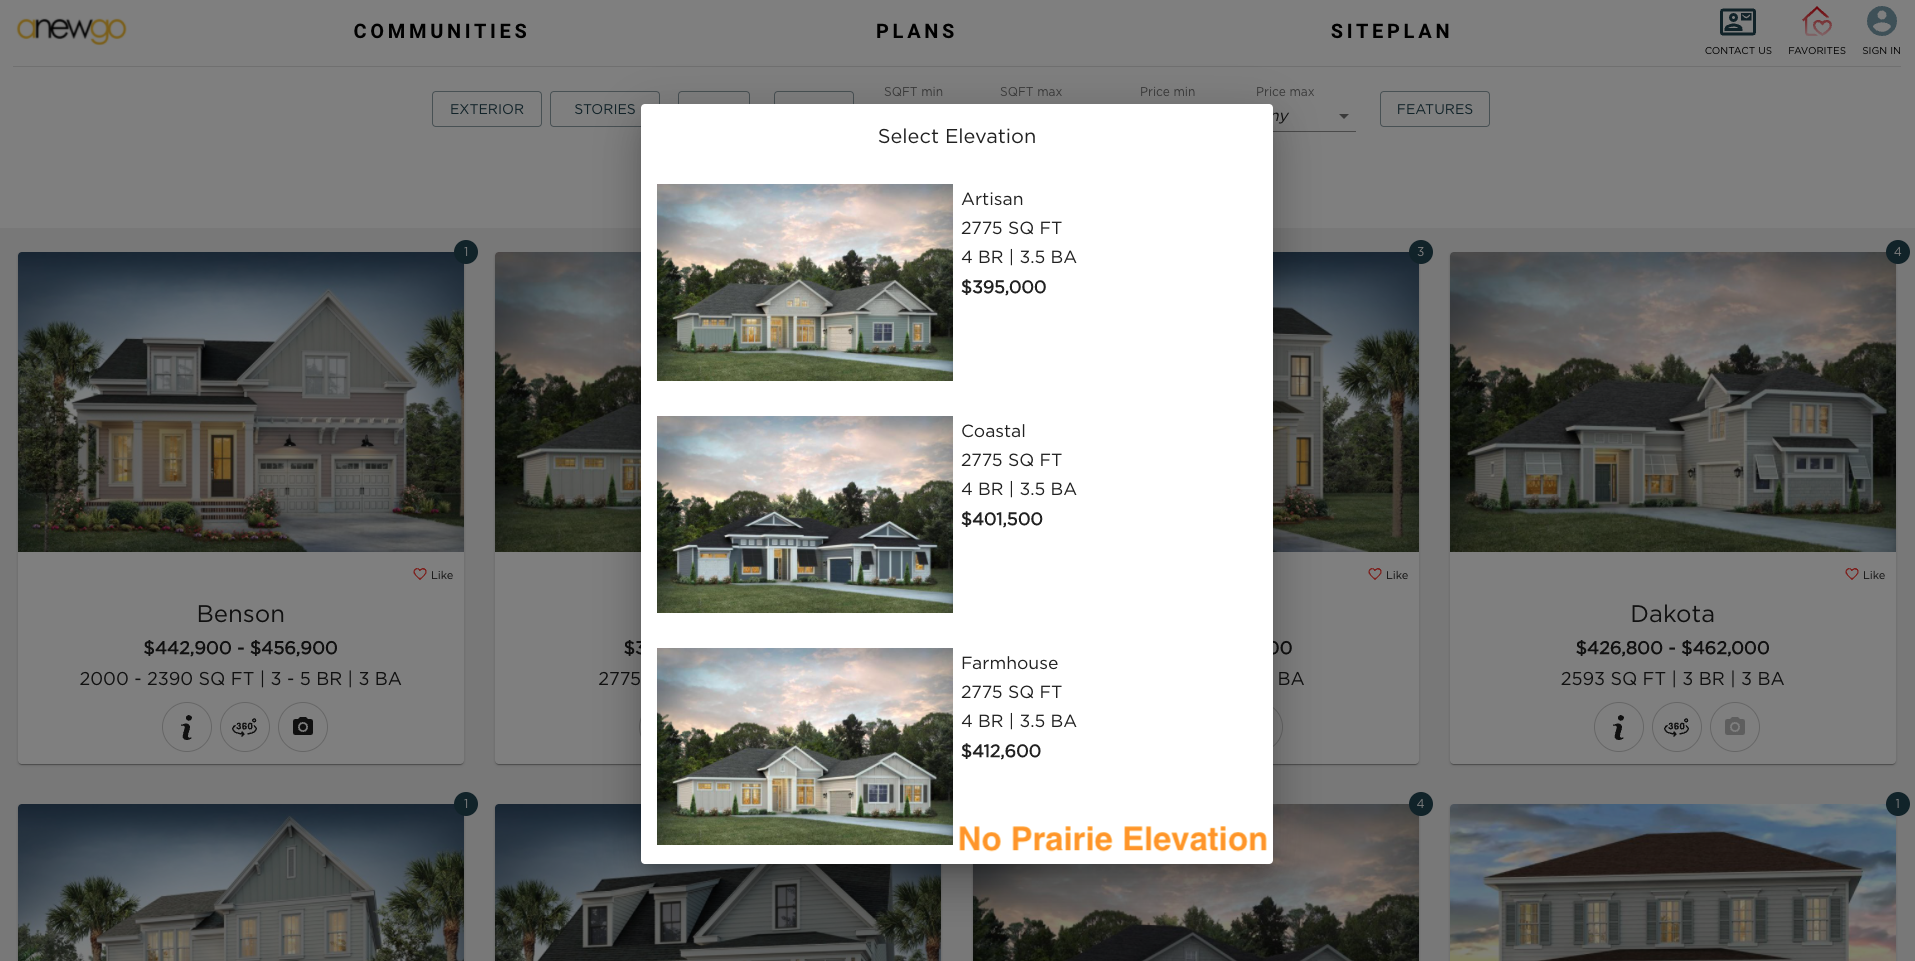
- Now on the front end, this elevation will not show up as a selection.
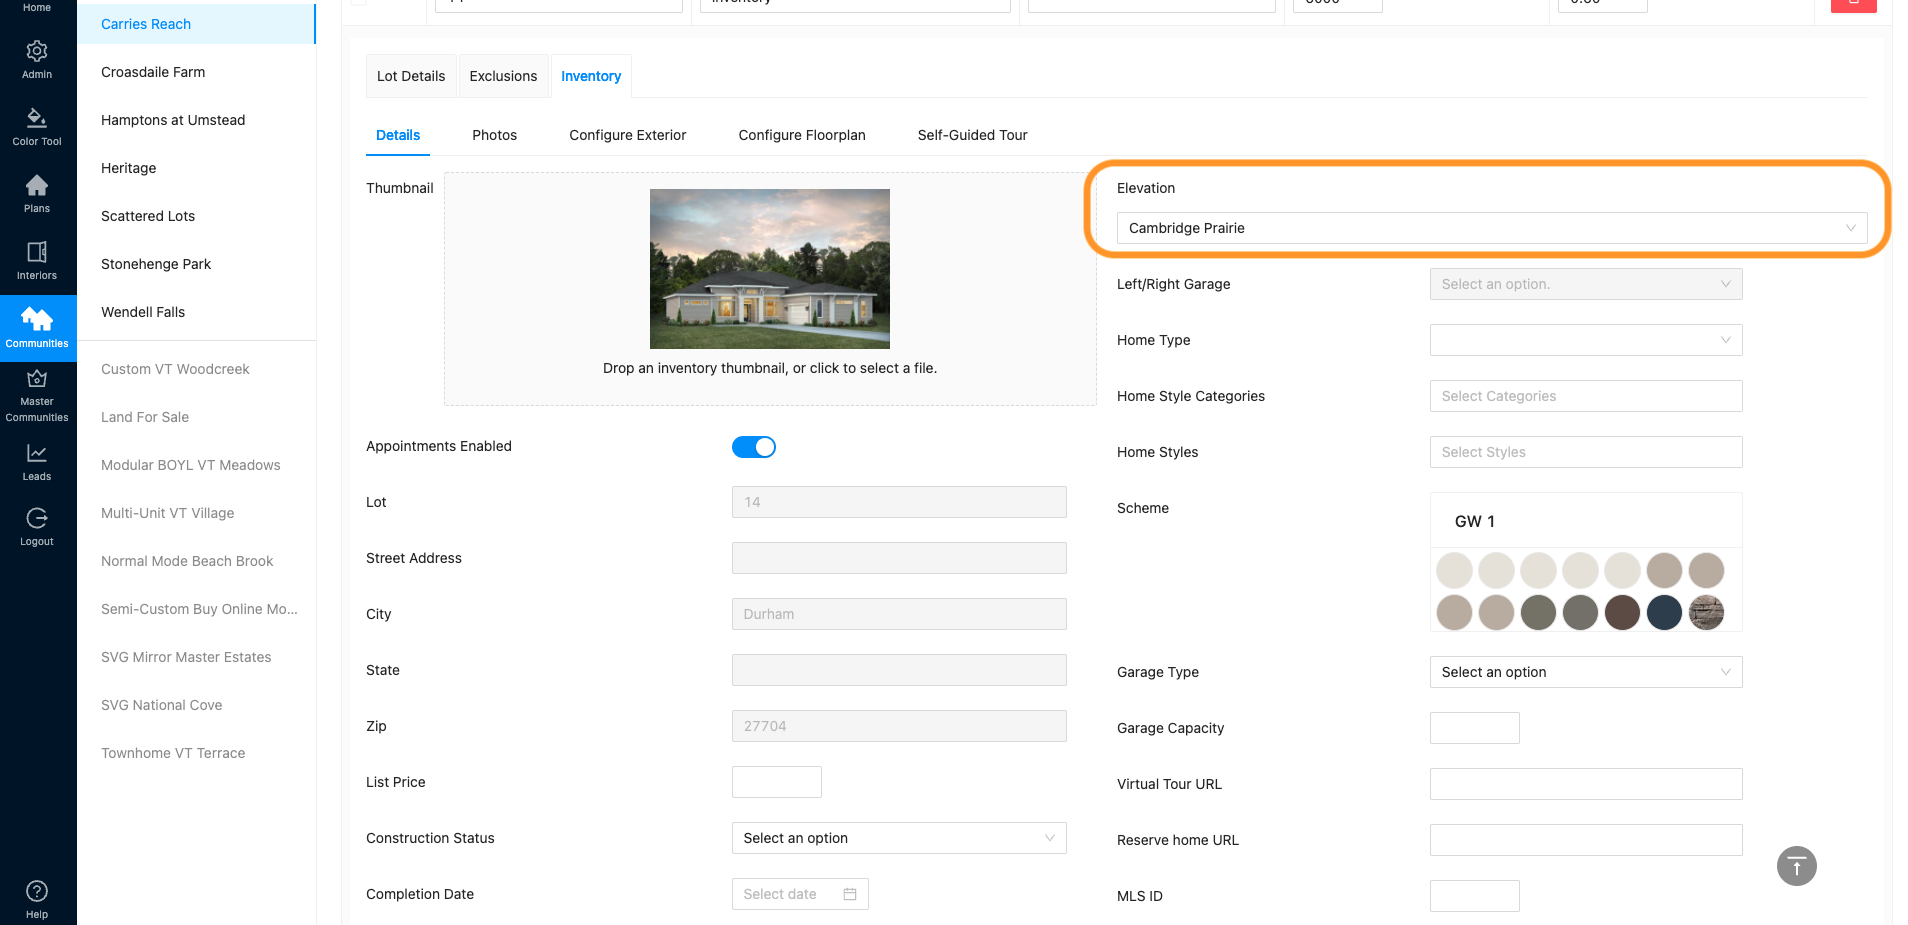
- You can still select the retired elevation as an inventory/spec home. You can see the tutorial on how to add an inventory lot here.
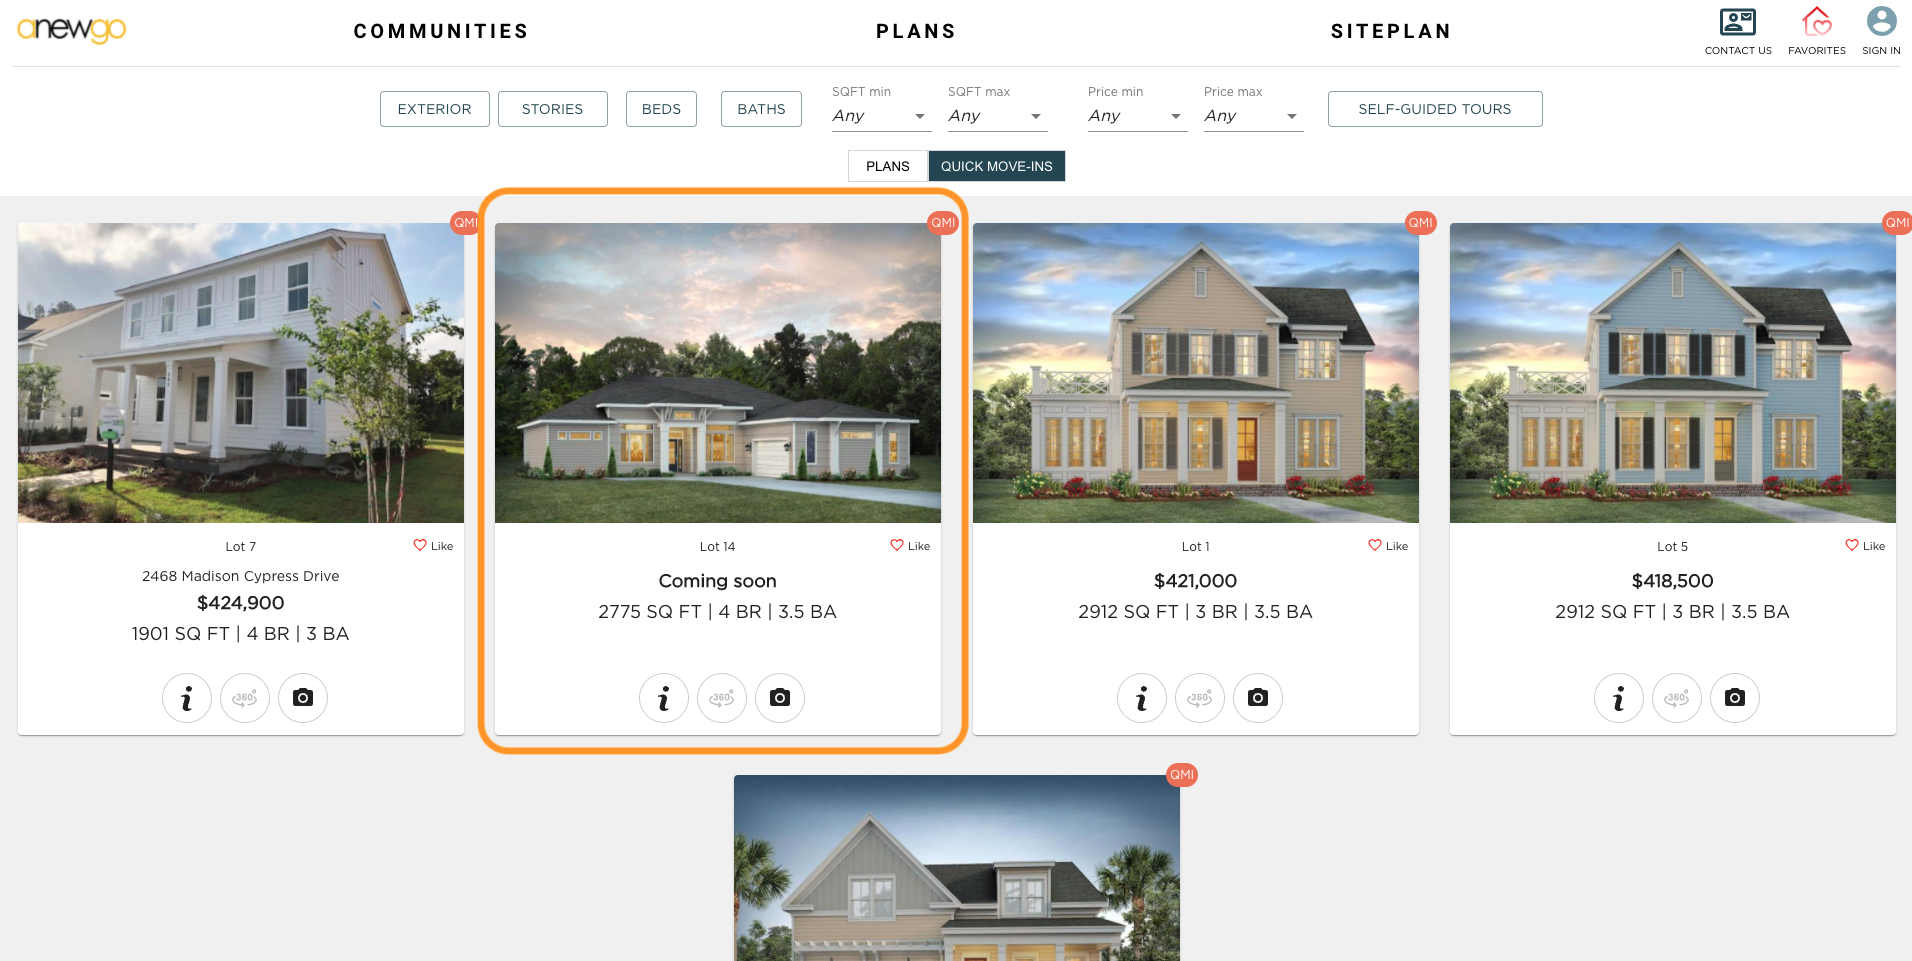
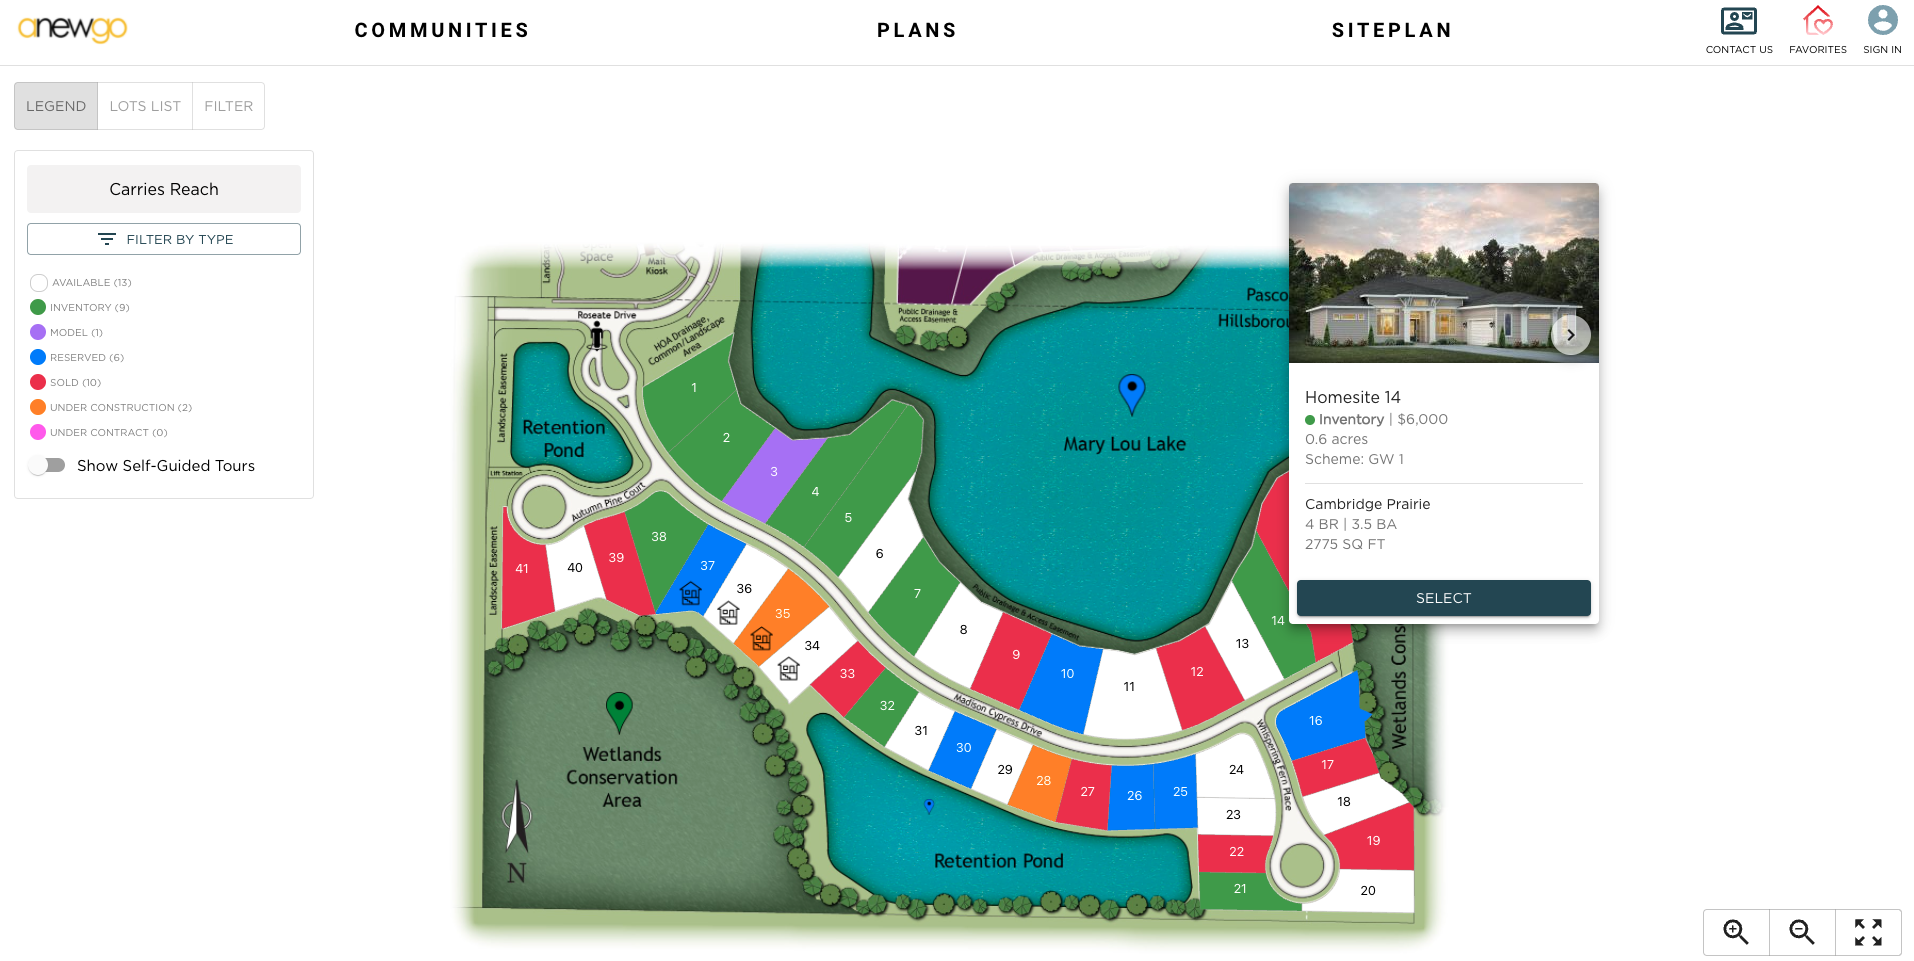
- Now this elevation will be displayed on the front end in your QMI list and on your inventory lot on your siteplan.
Click here to see the way to retire 1 elevation at a time.