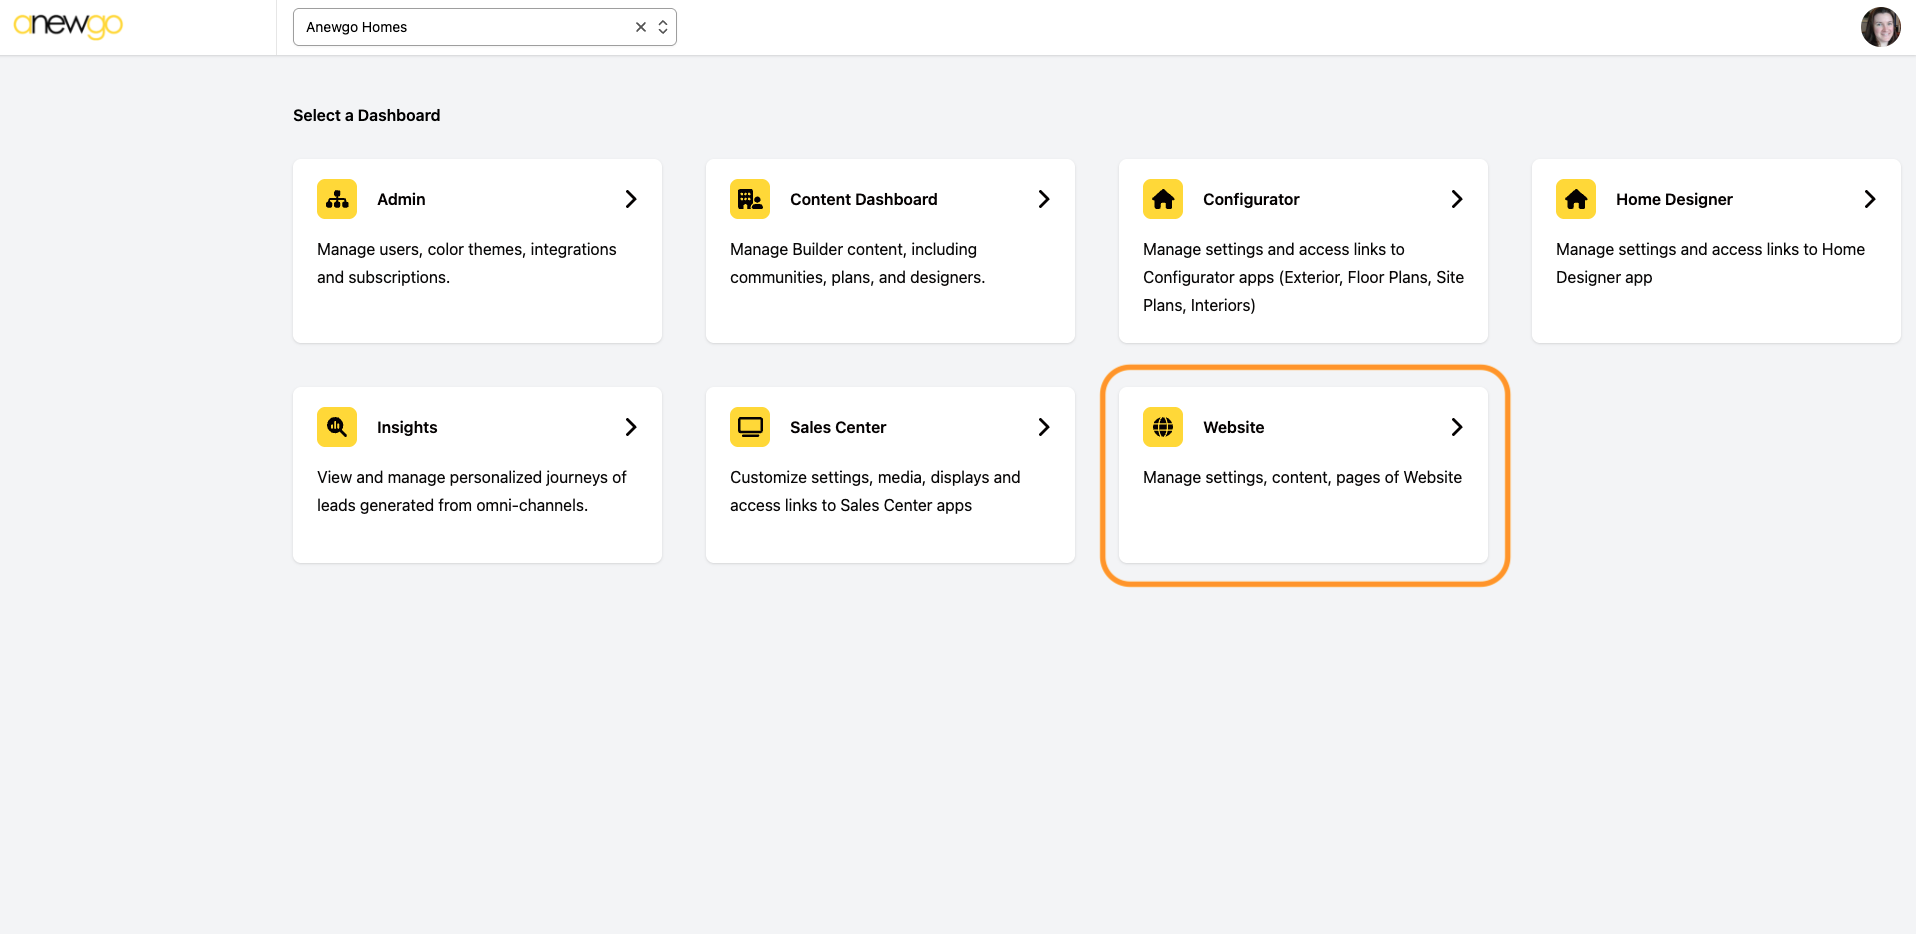
- Click Website card
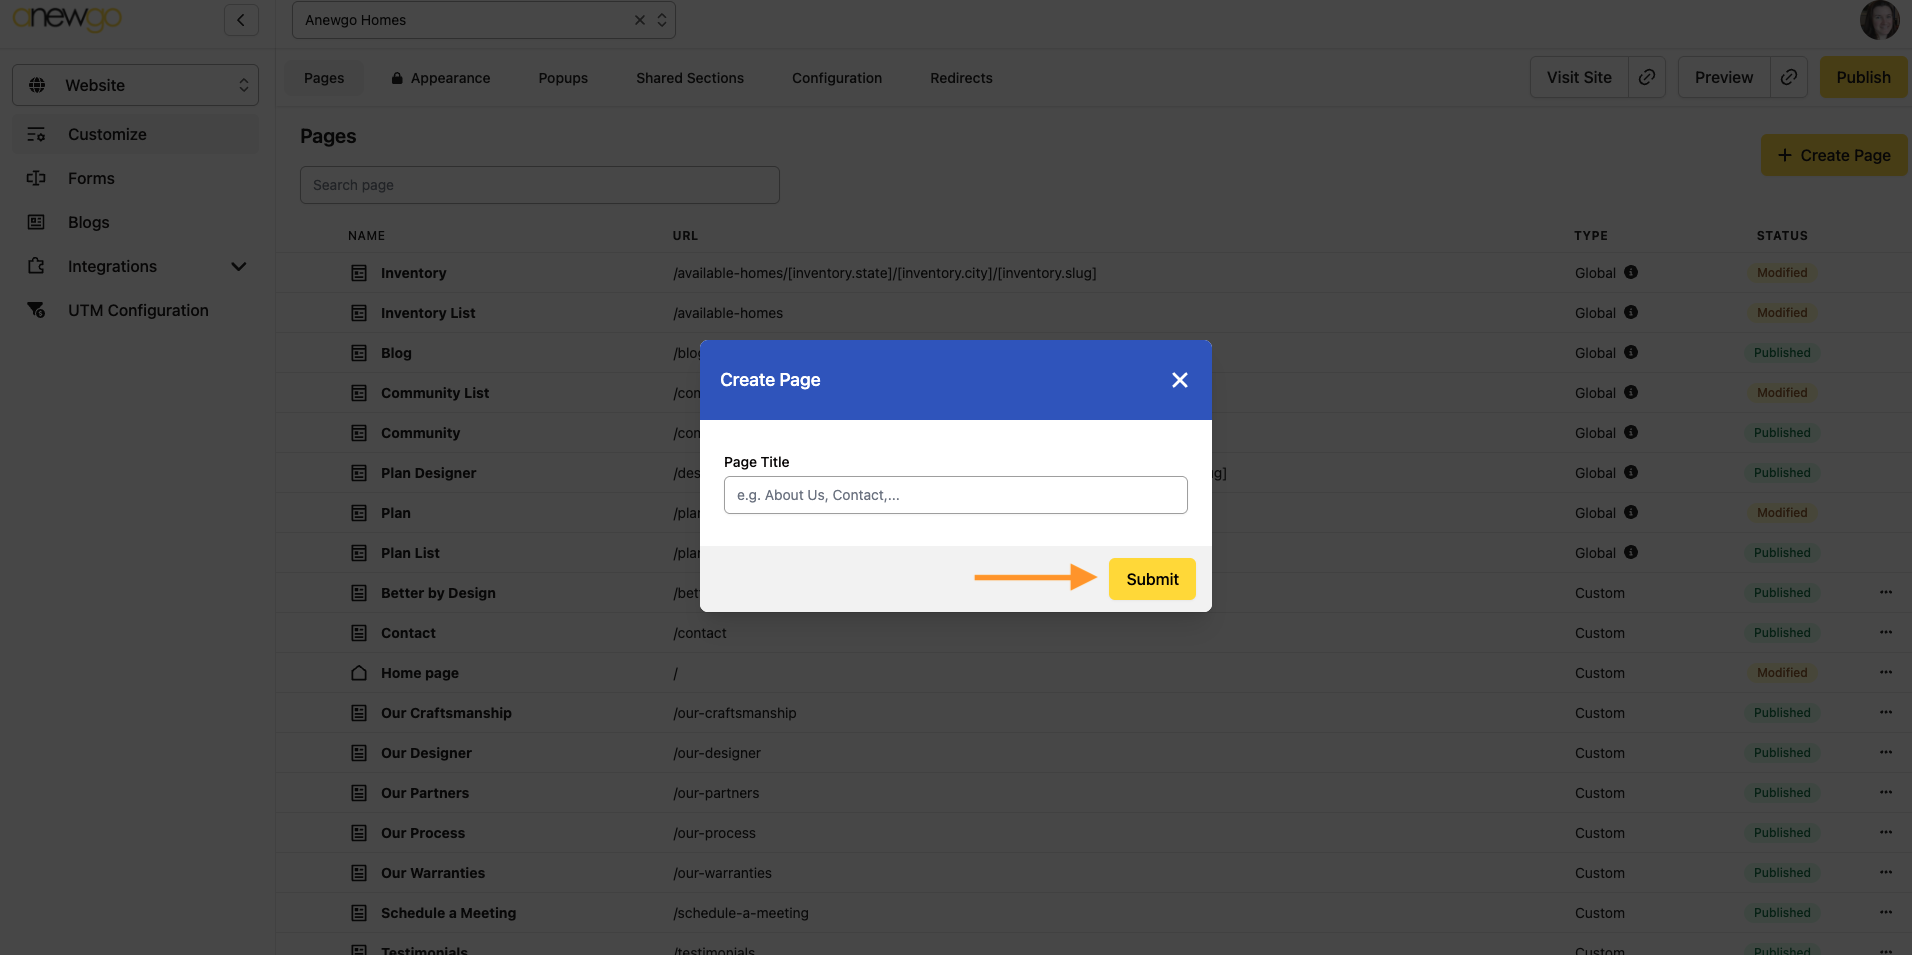
2. This brings you by default to the Customize section where you can create new pages. Click + Create Page

3. Add page name and click Submit
4. Click Edit (Note: you will always need to click Edit to make changes to any area of the website)
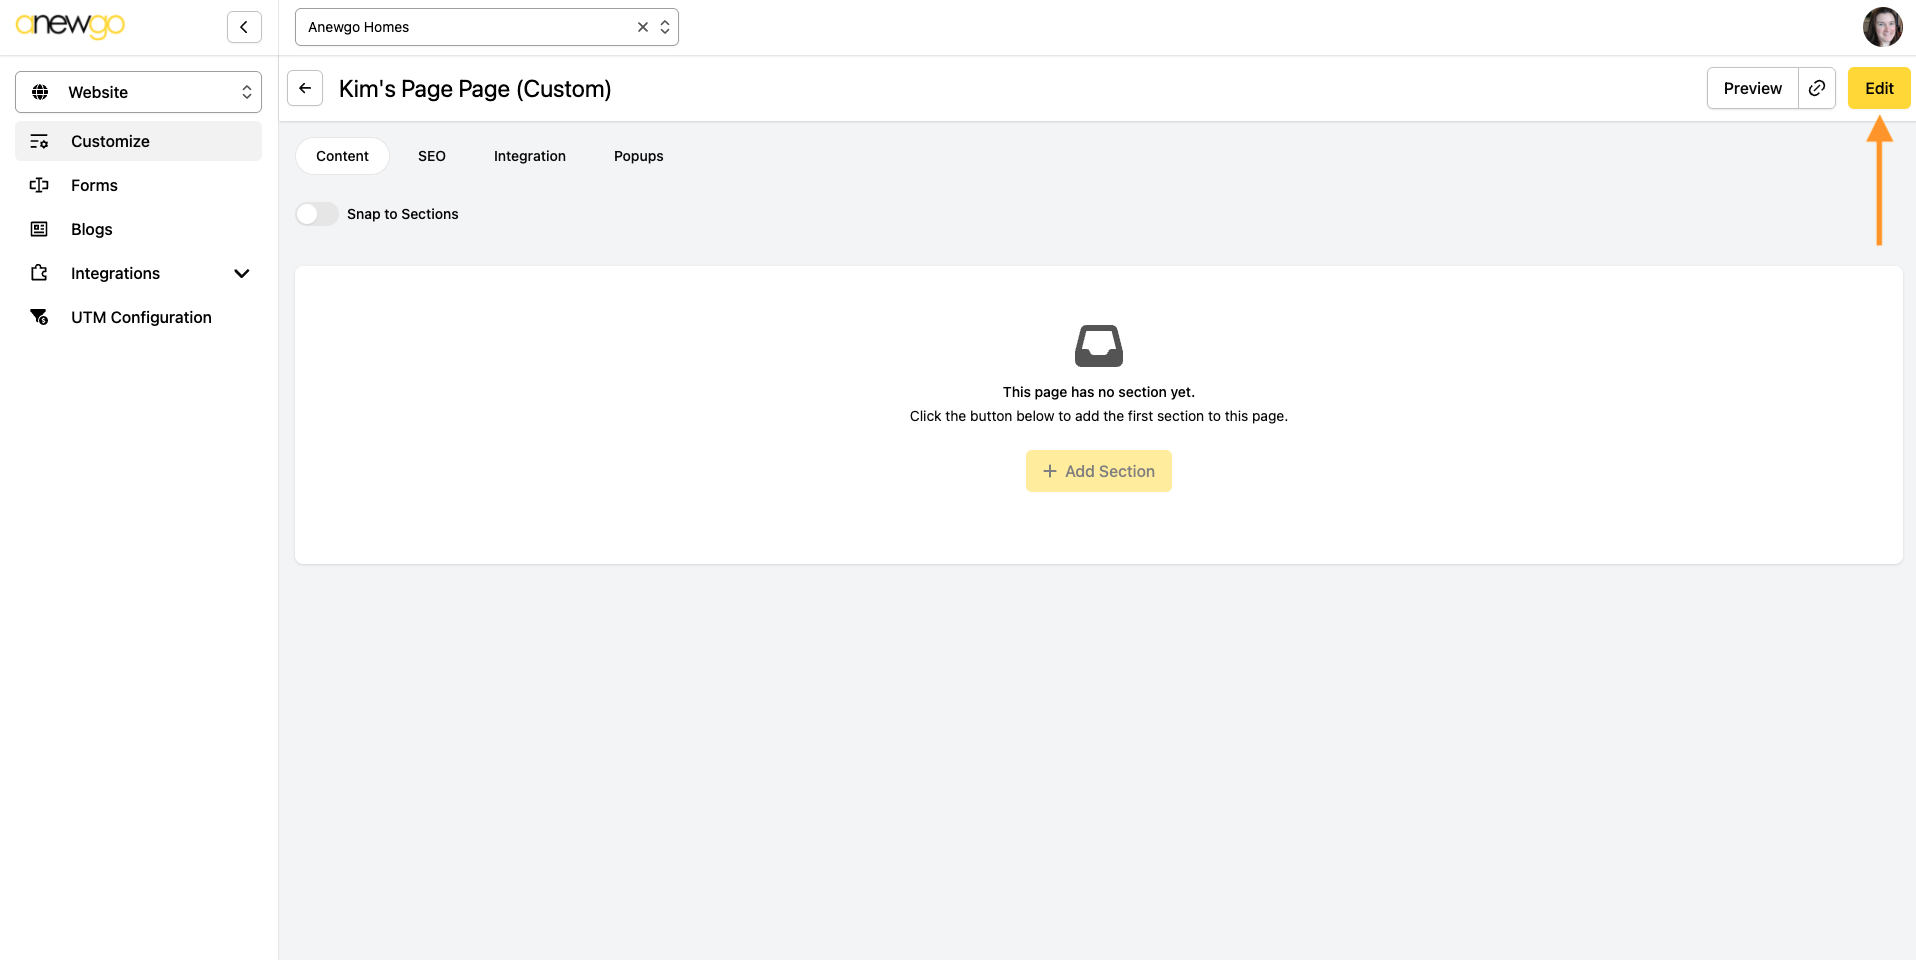
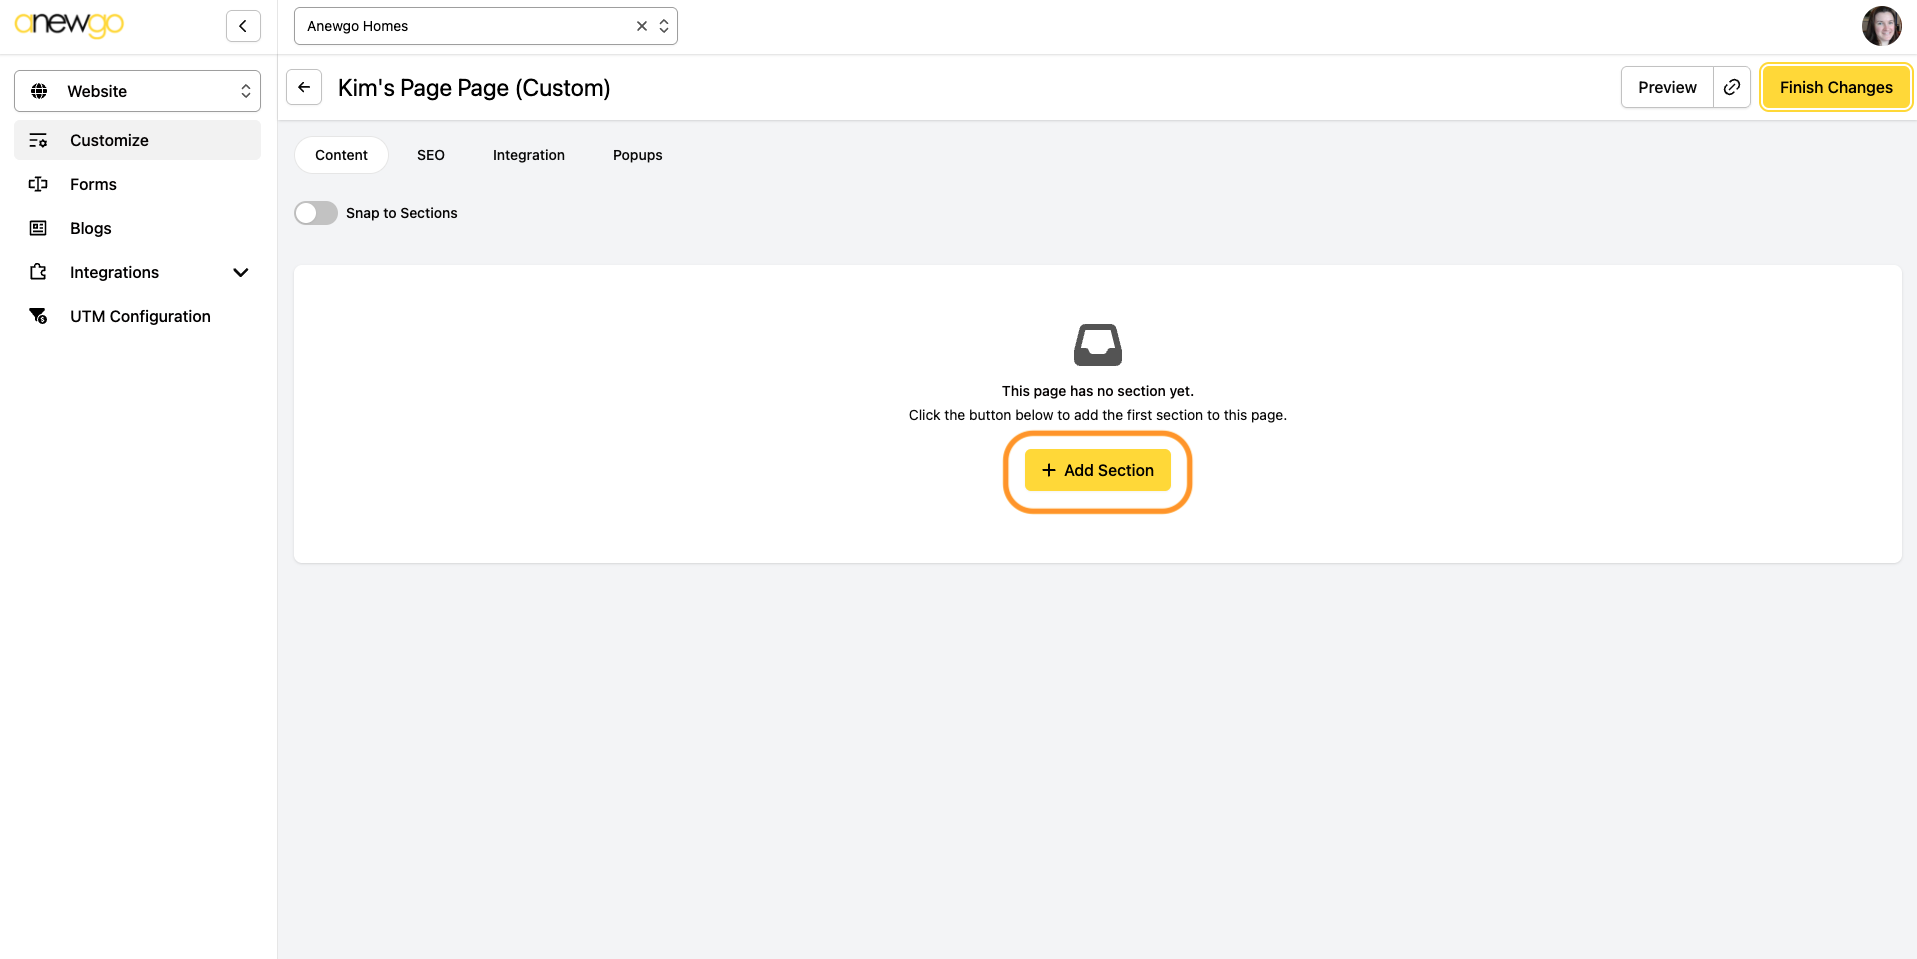
5. Click + Add Section to begin building your page
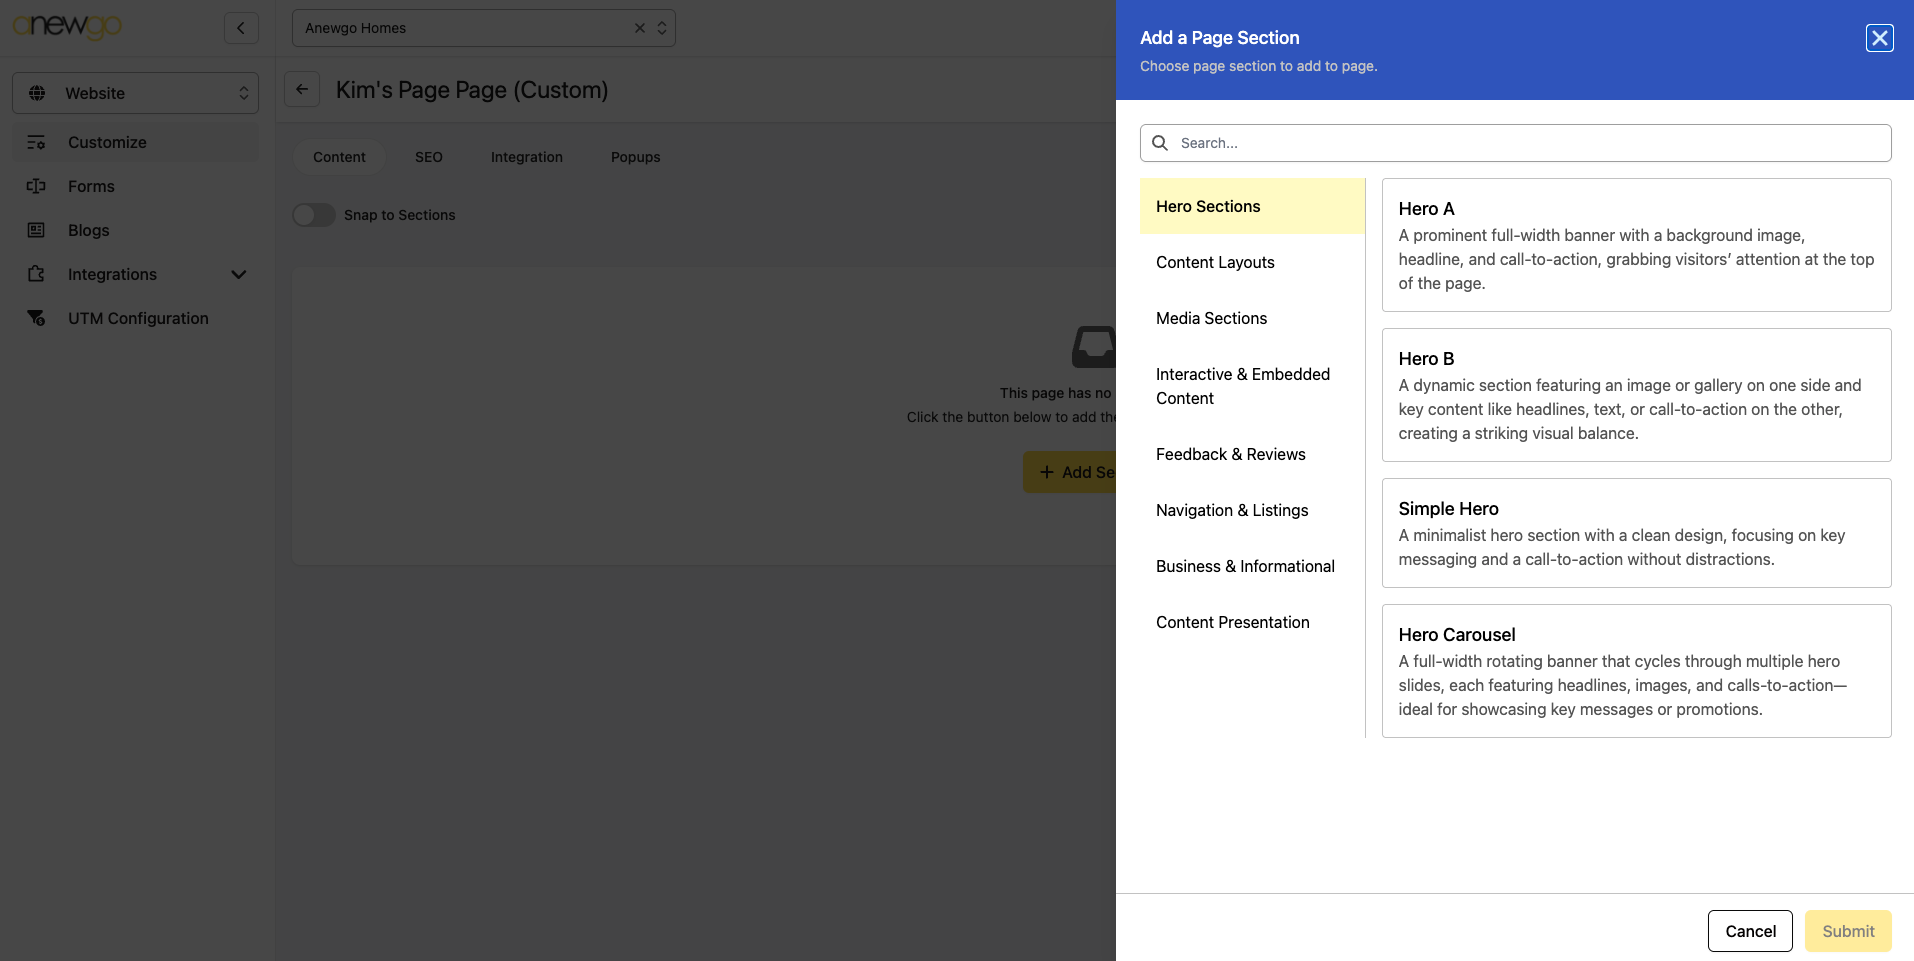
6. Here you can select the sections you would like to add to your page. This ranges from Hero sections to accordion style text to forms. Visit this page to see the various sections and how they display. You can use the Search field to type in the section you need.
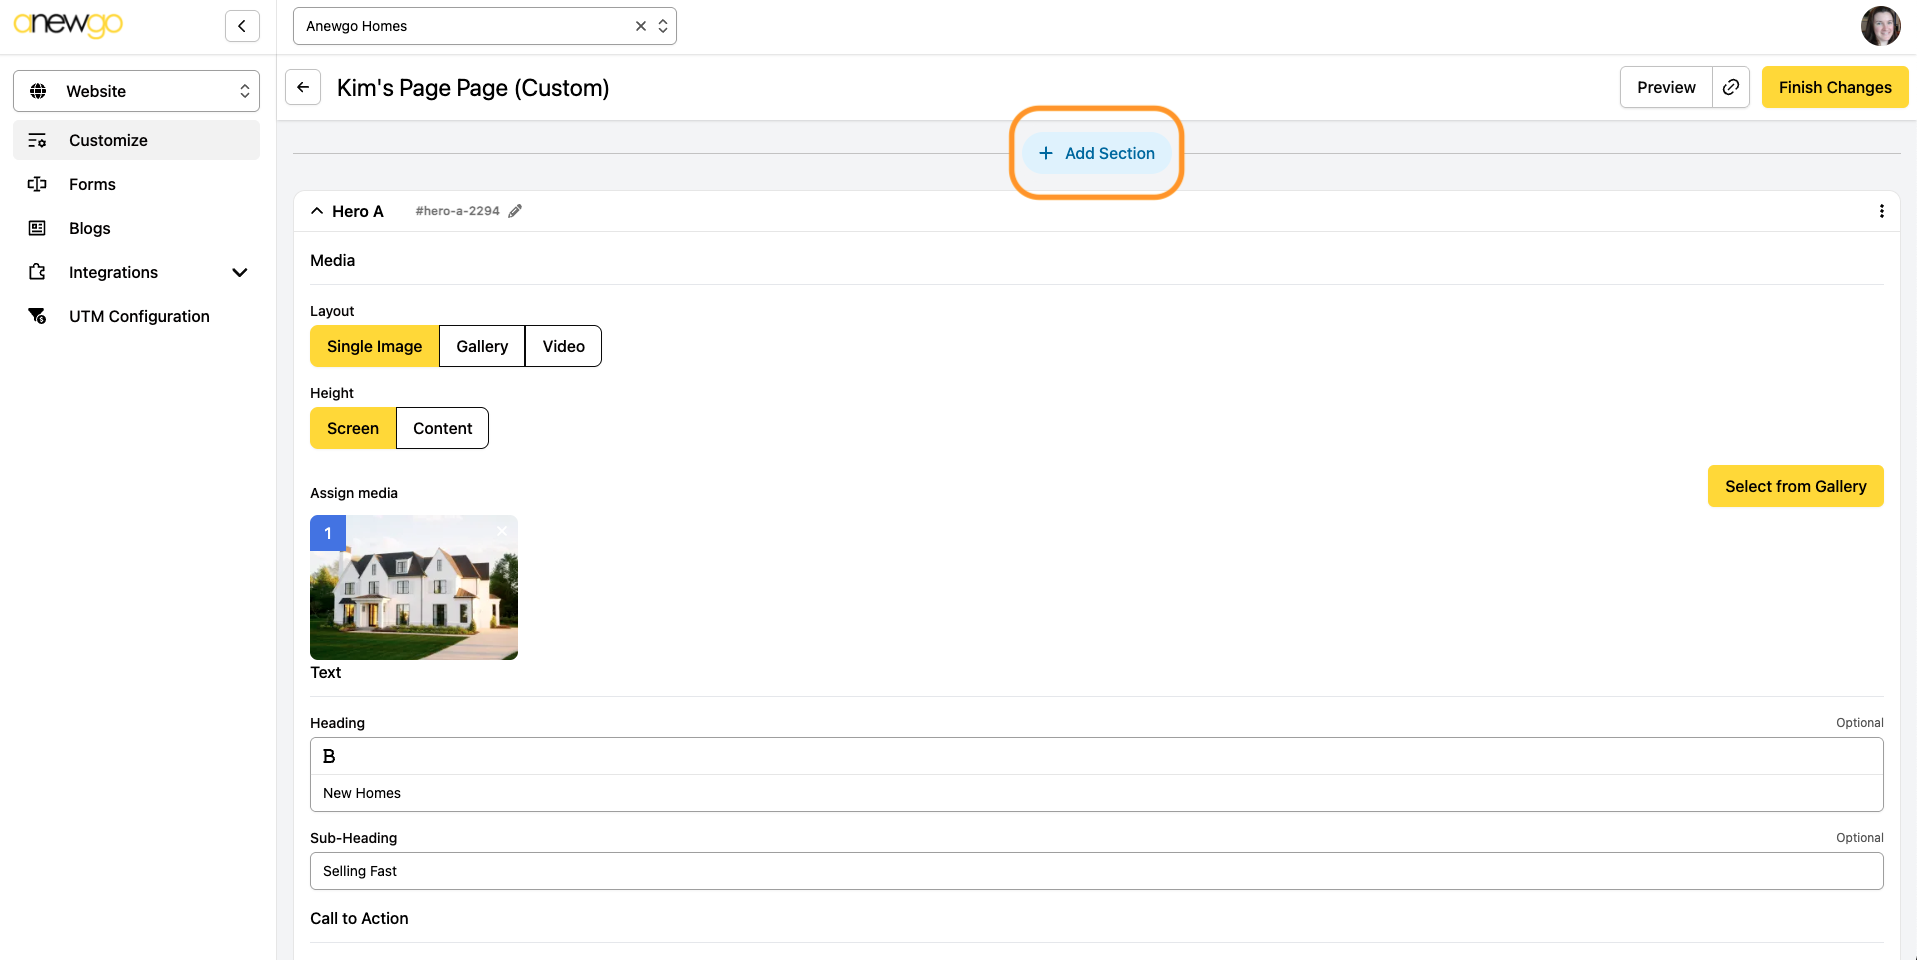
7. When you select a section, add the media/text content needed per section. To add more sections, click + Add Section again. Continue this process and add as many sections as needed.
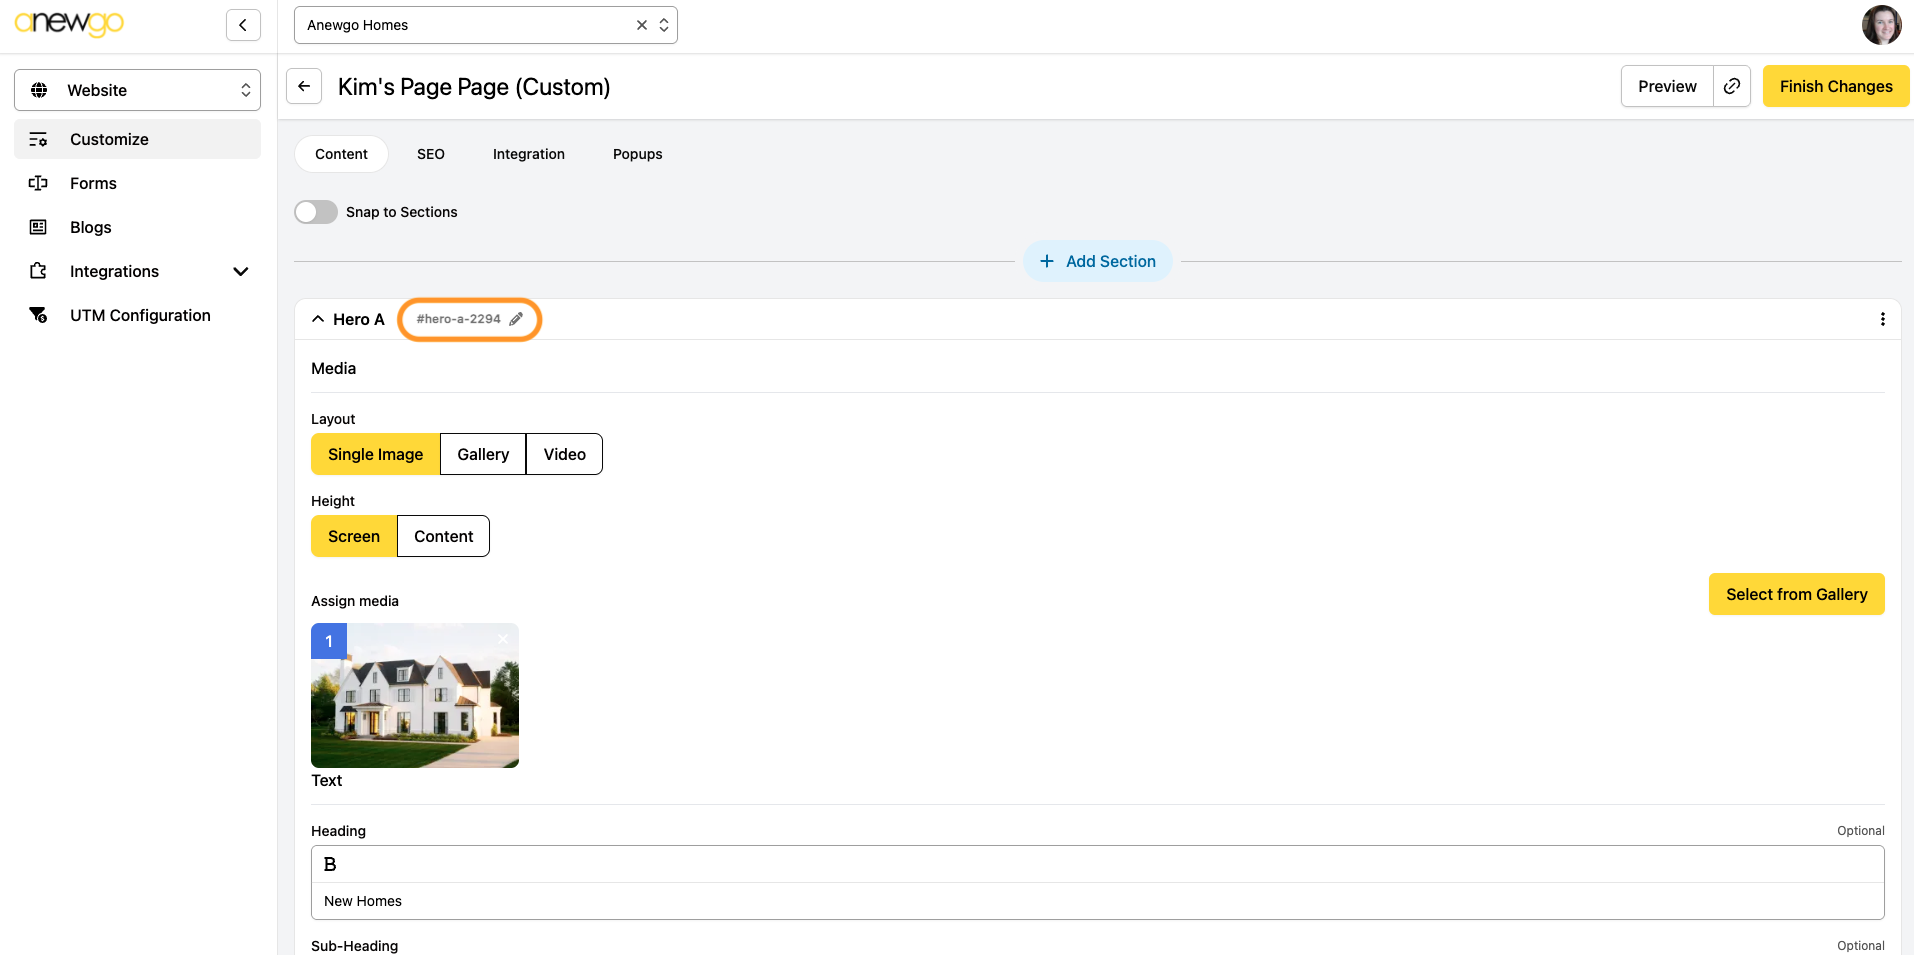
8. You can collapse sections if needed (use the arrow on the left of the section header). You can also reorder sections or delete sections (use the vertical ellipsis on the right of the section header)
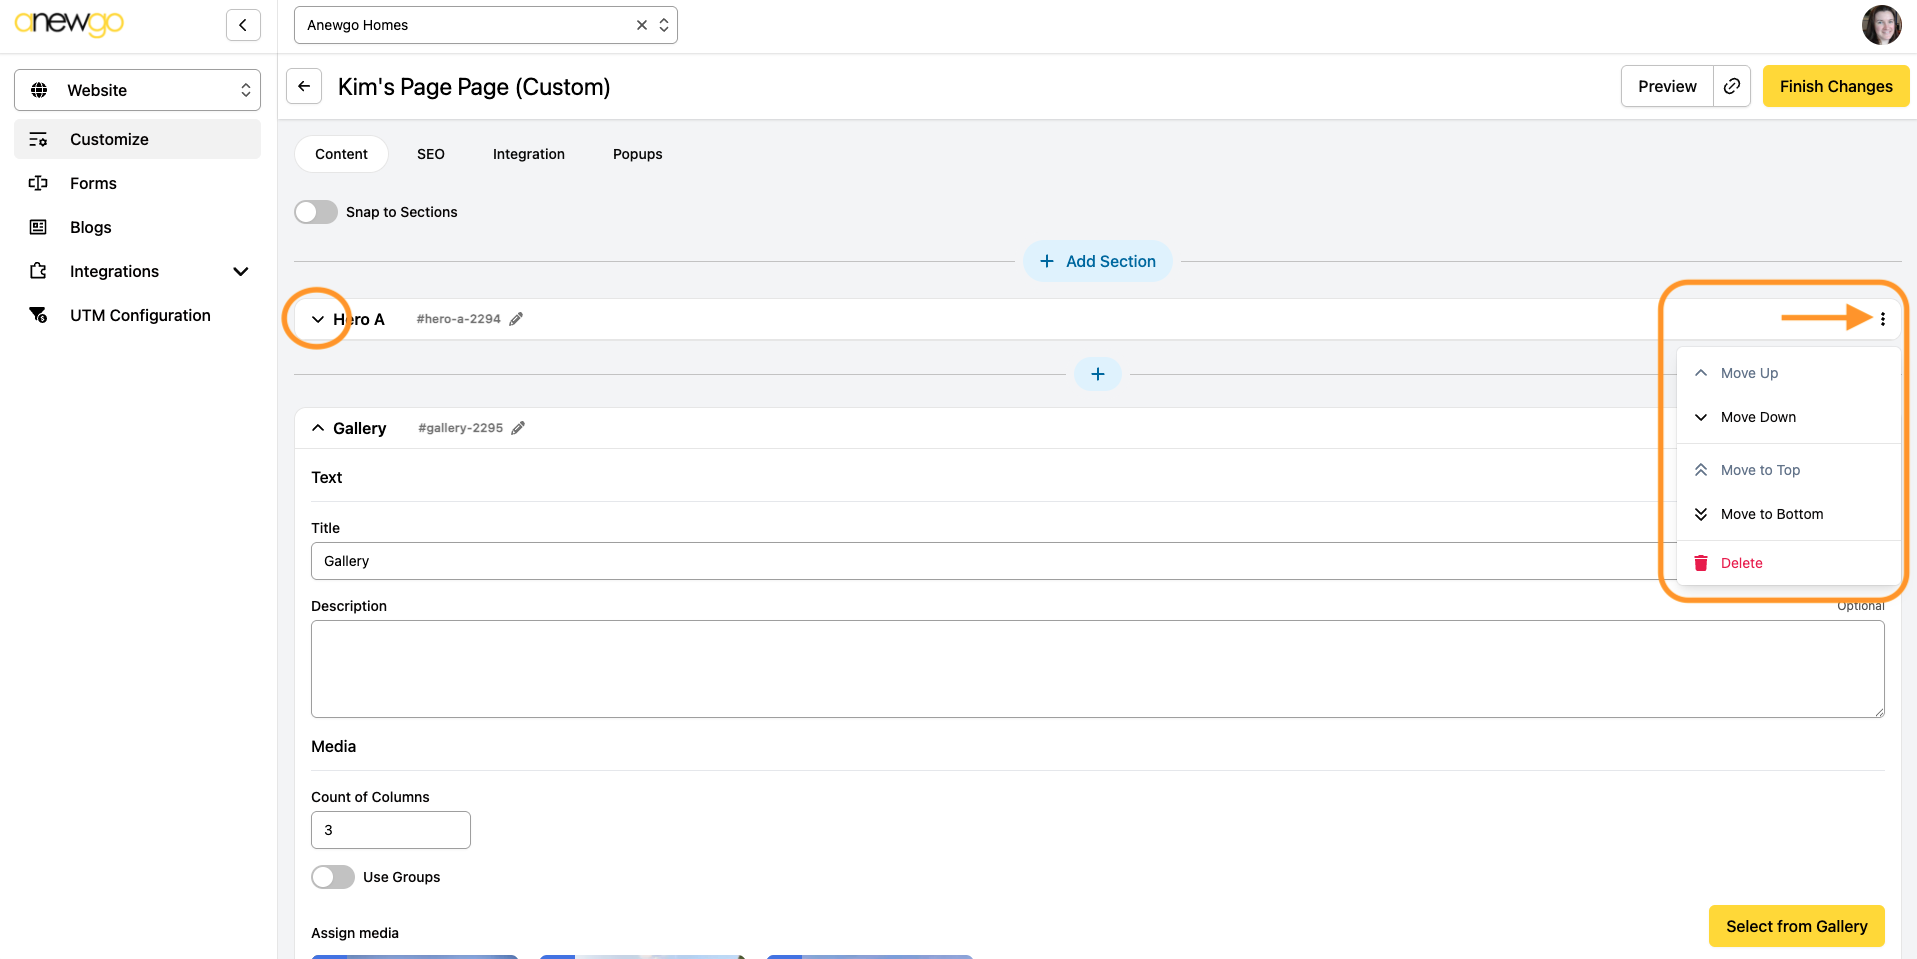
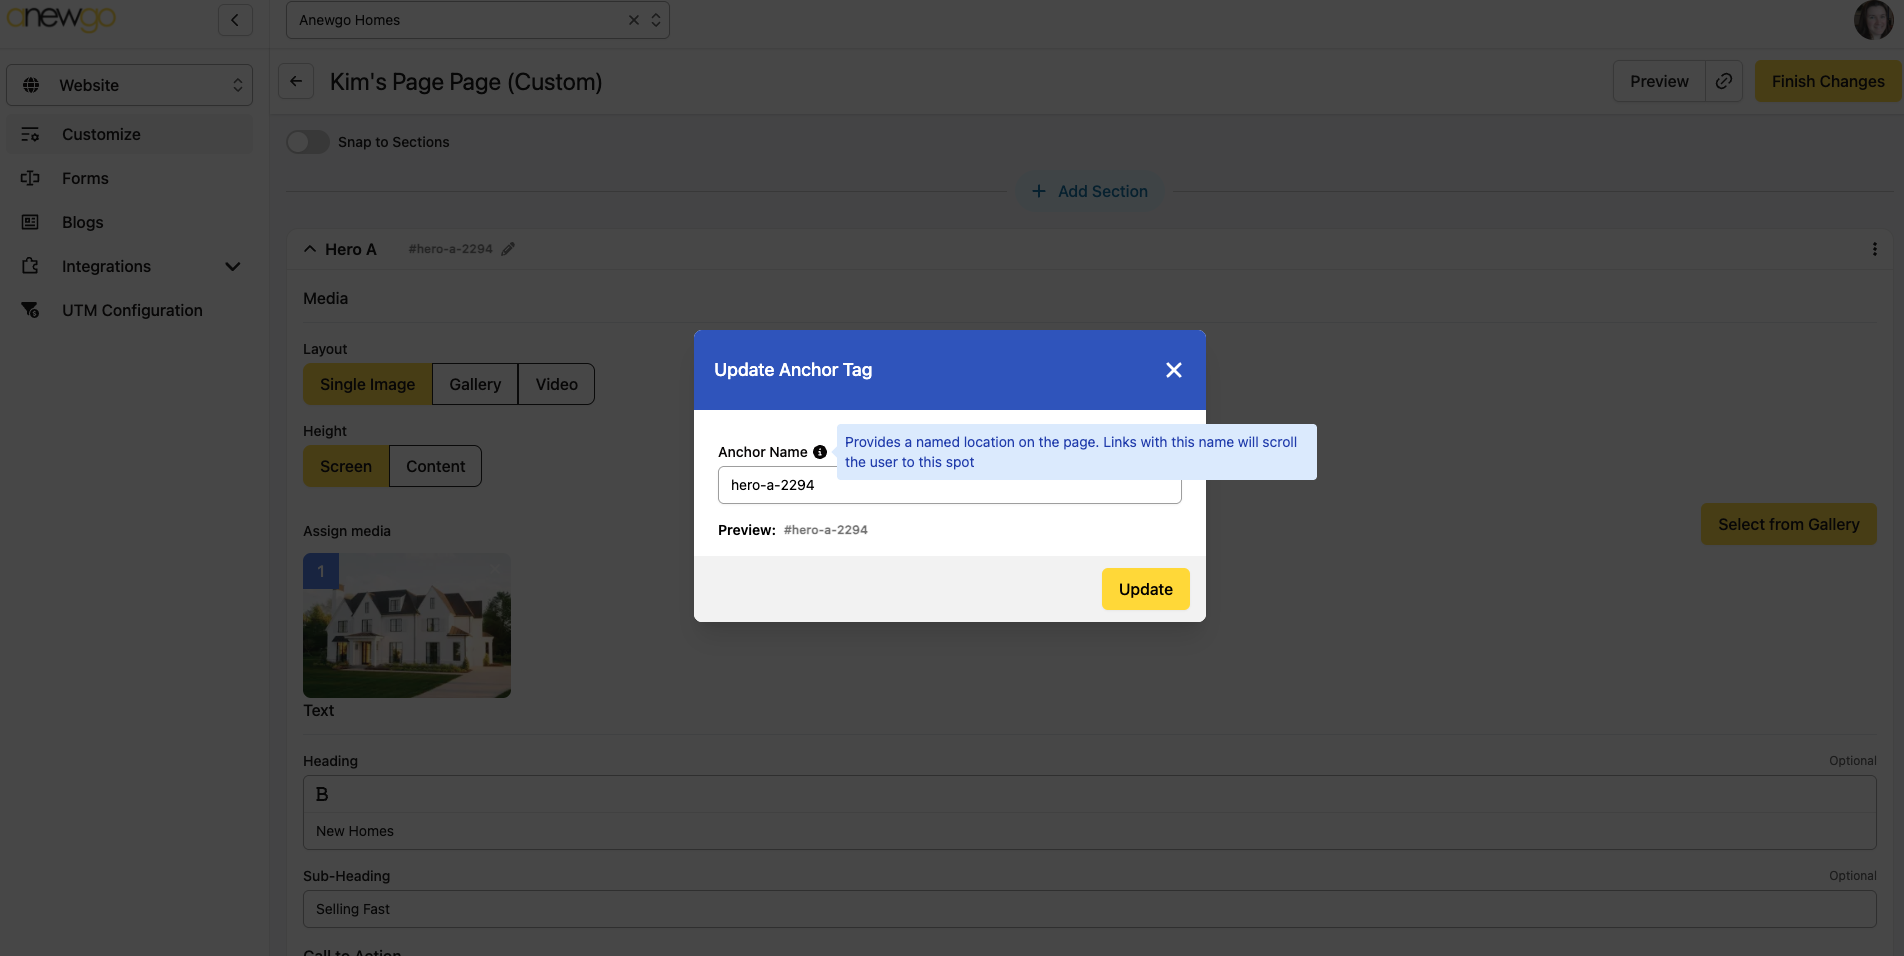
You can also edit the section Anchor Tag if needed. Click the little pencil icon.
Update the Anchor Tag name and click Update.
(Note: Anchor Tag provides a named location on the page. Links with this name will scroll the user to this spot)
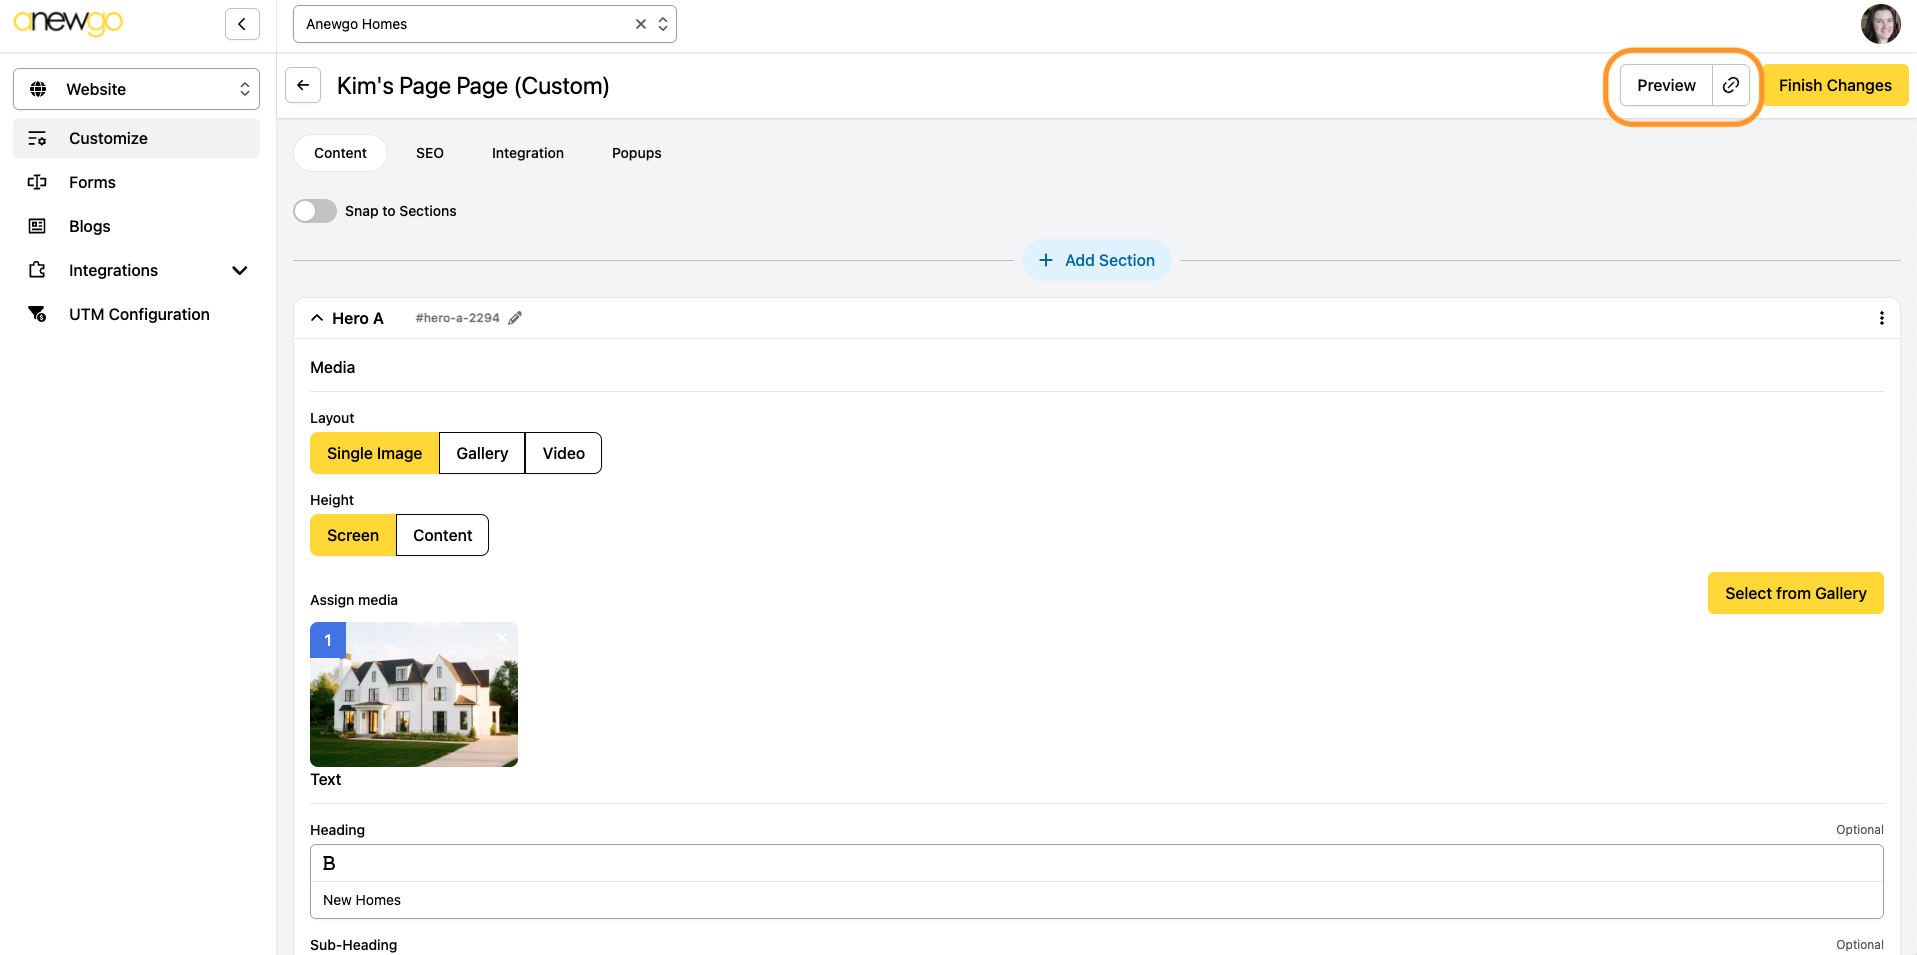
9. As you are editing/adding sections, you can click the Preview button to view how your work is looking on the front end website (Note: Changes will not be live until you click Publish on the main Customize page)
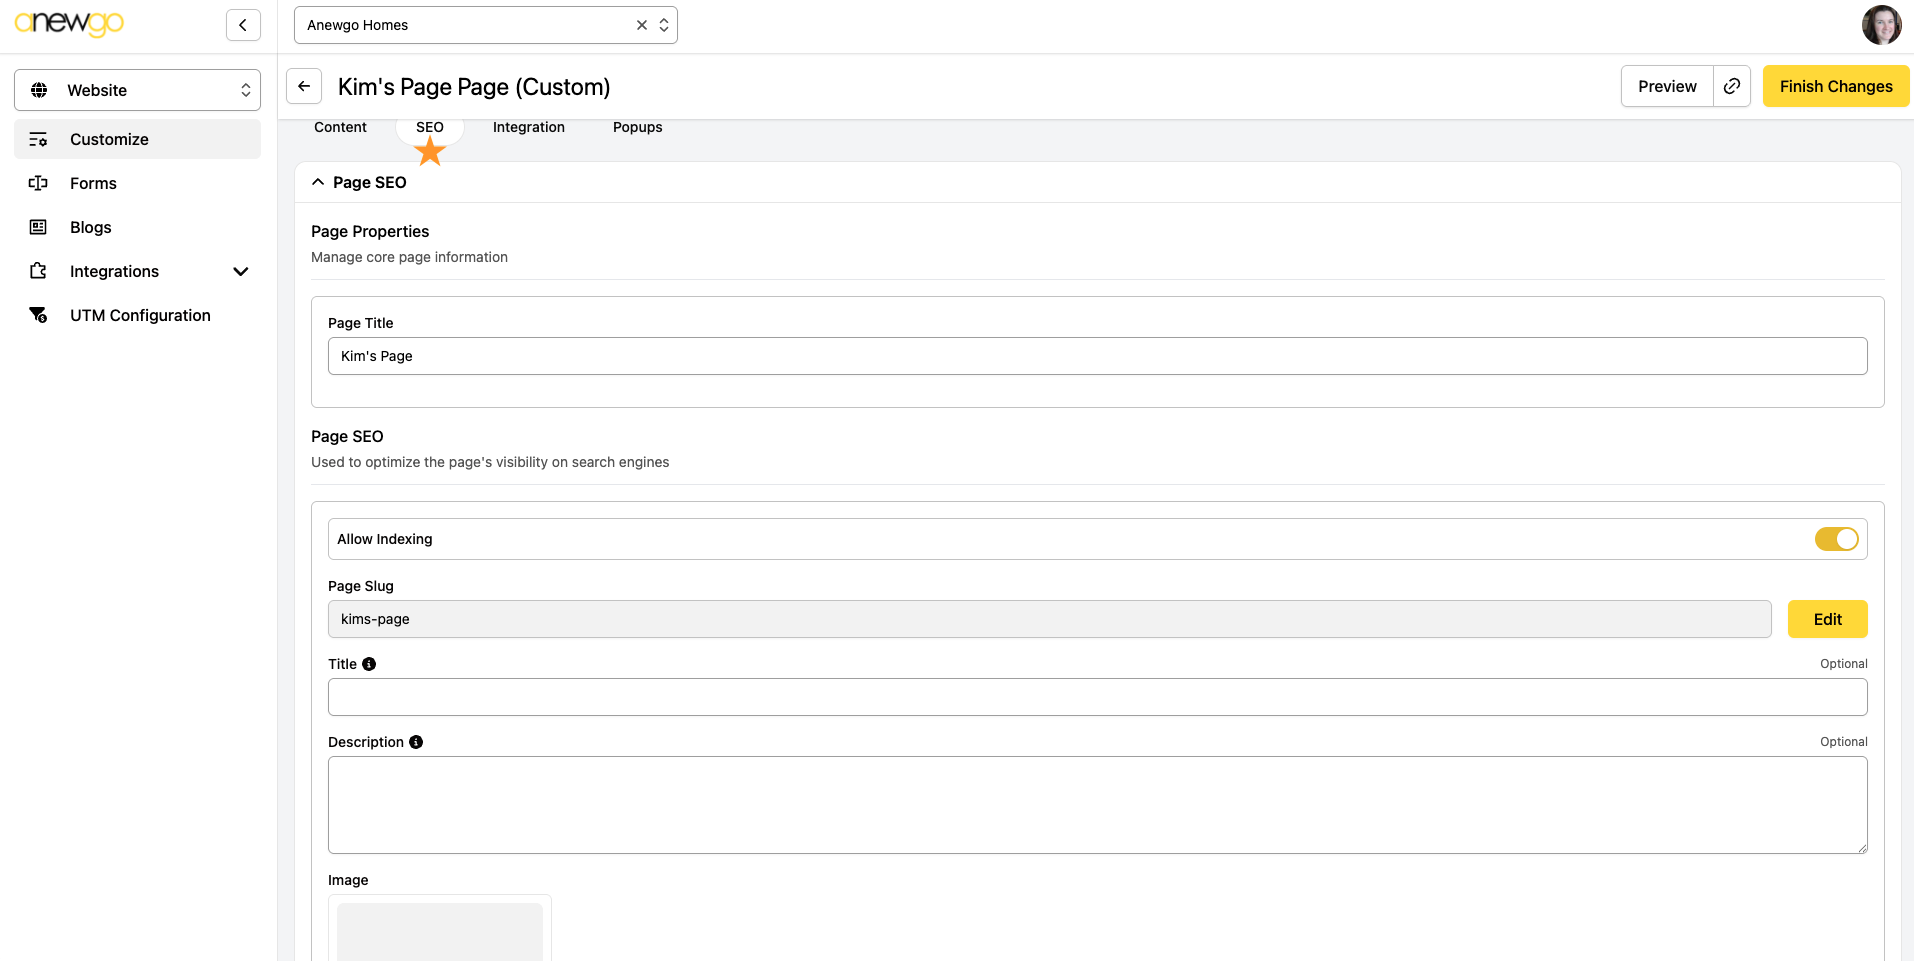
10. Here are some other page customization options: Snap to Sections, SEO, Integration, Popups
Toggle Snap to Sections on or off. When on, this will activate snapping (quick automatic scroll) between sections.

SEO – add page SEO here
(Note: If you are adding a page, but you do not want it viewable on a Google search – toggle Allow Indexing off)
See New Page SEO Checklist here
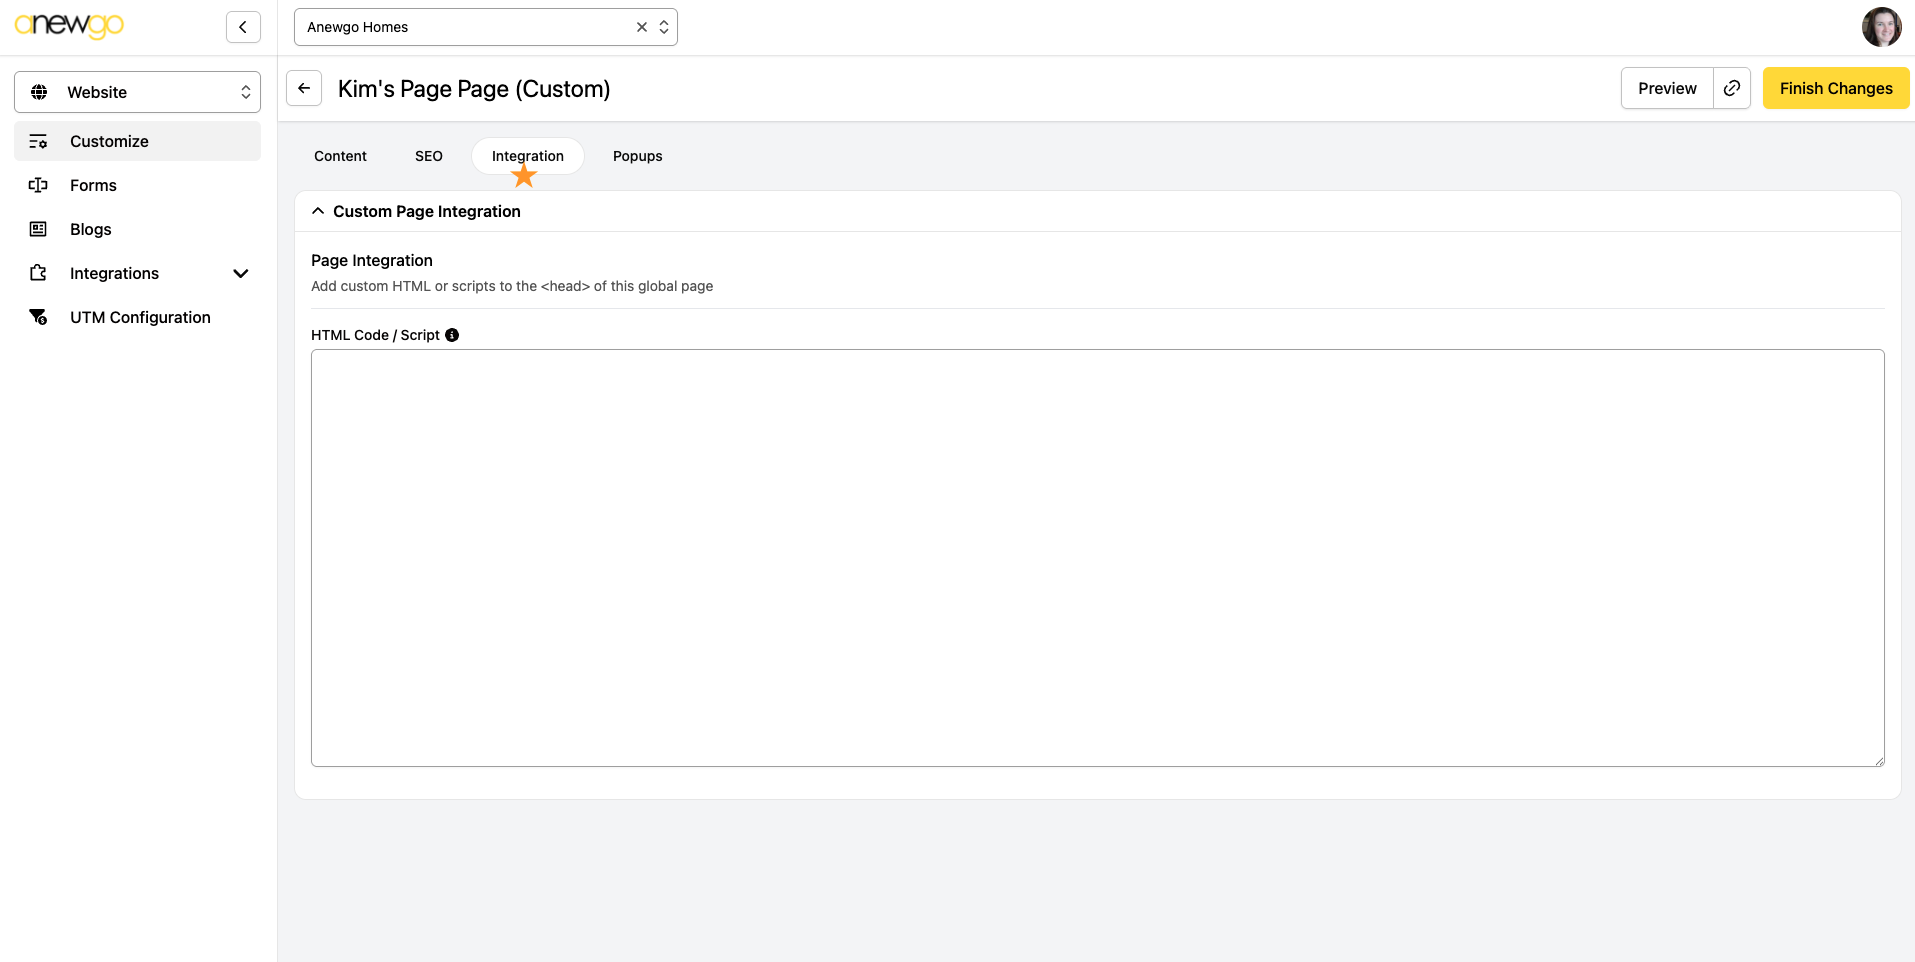
Integration – add page integration information here
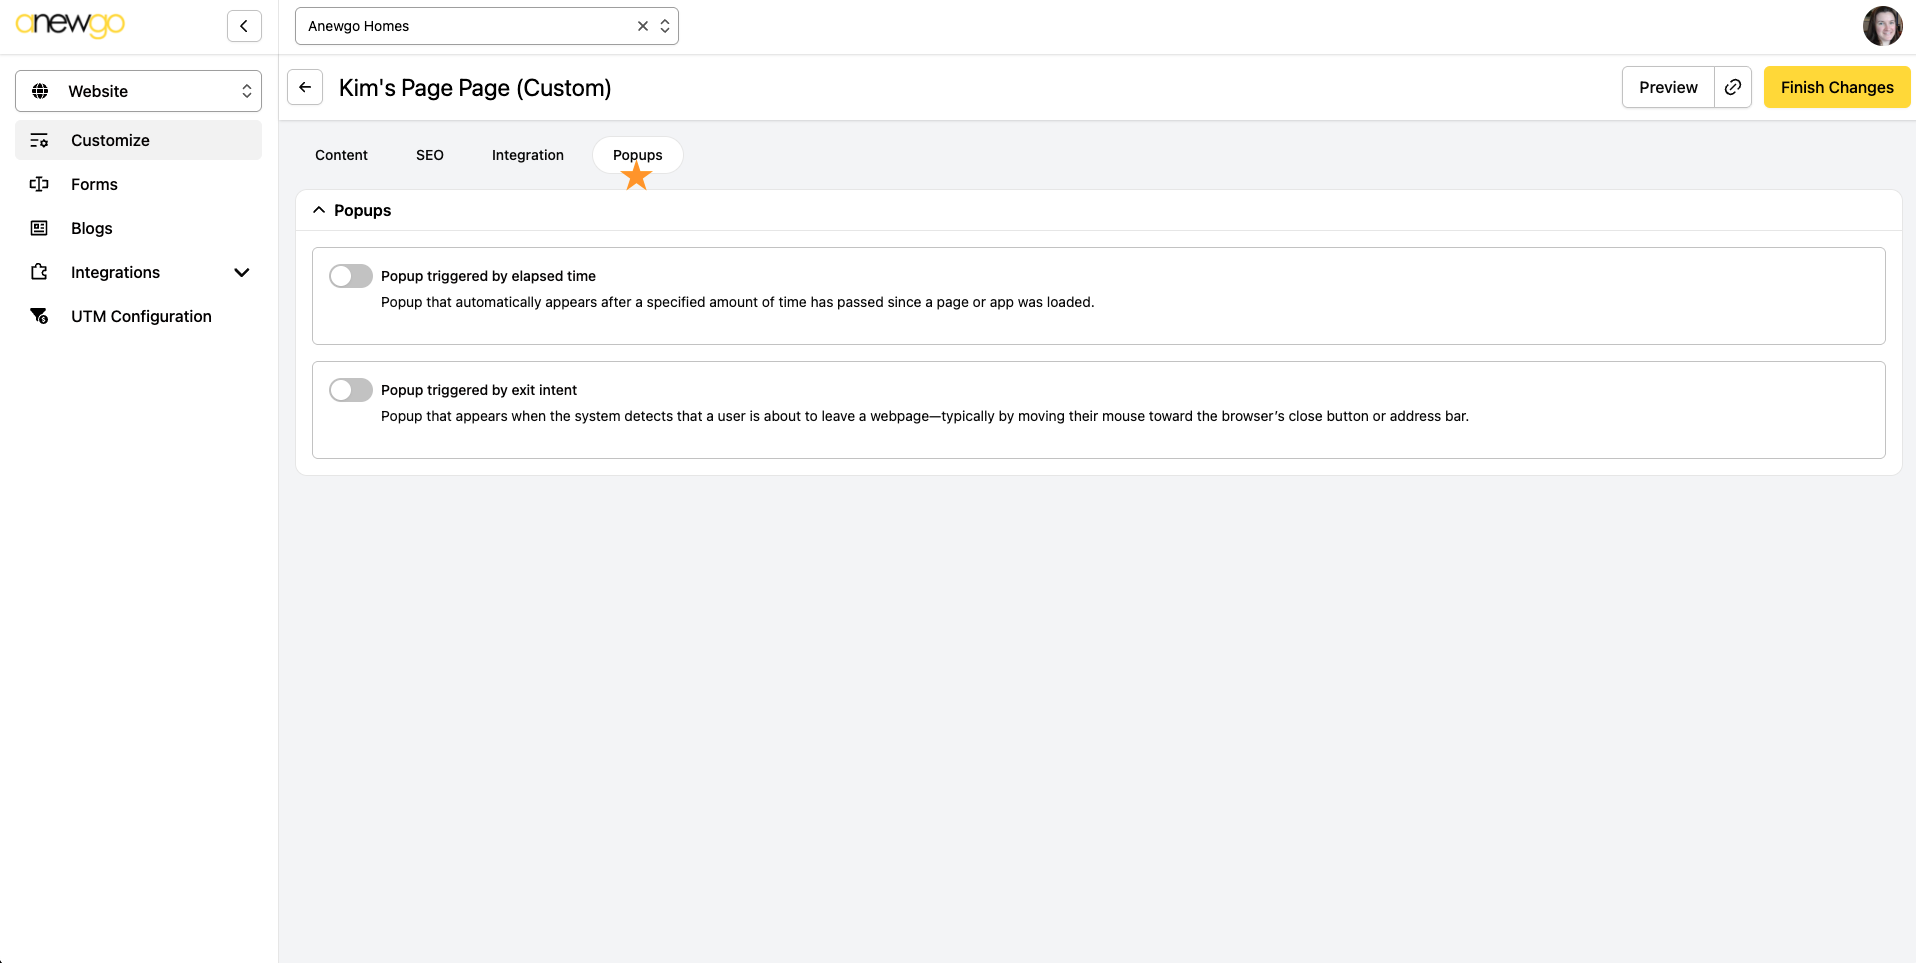
Popups – customize popup options here (toggle options on or off)
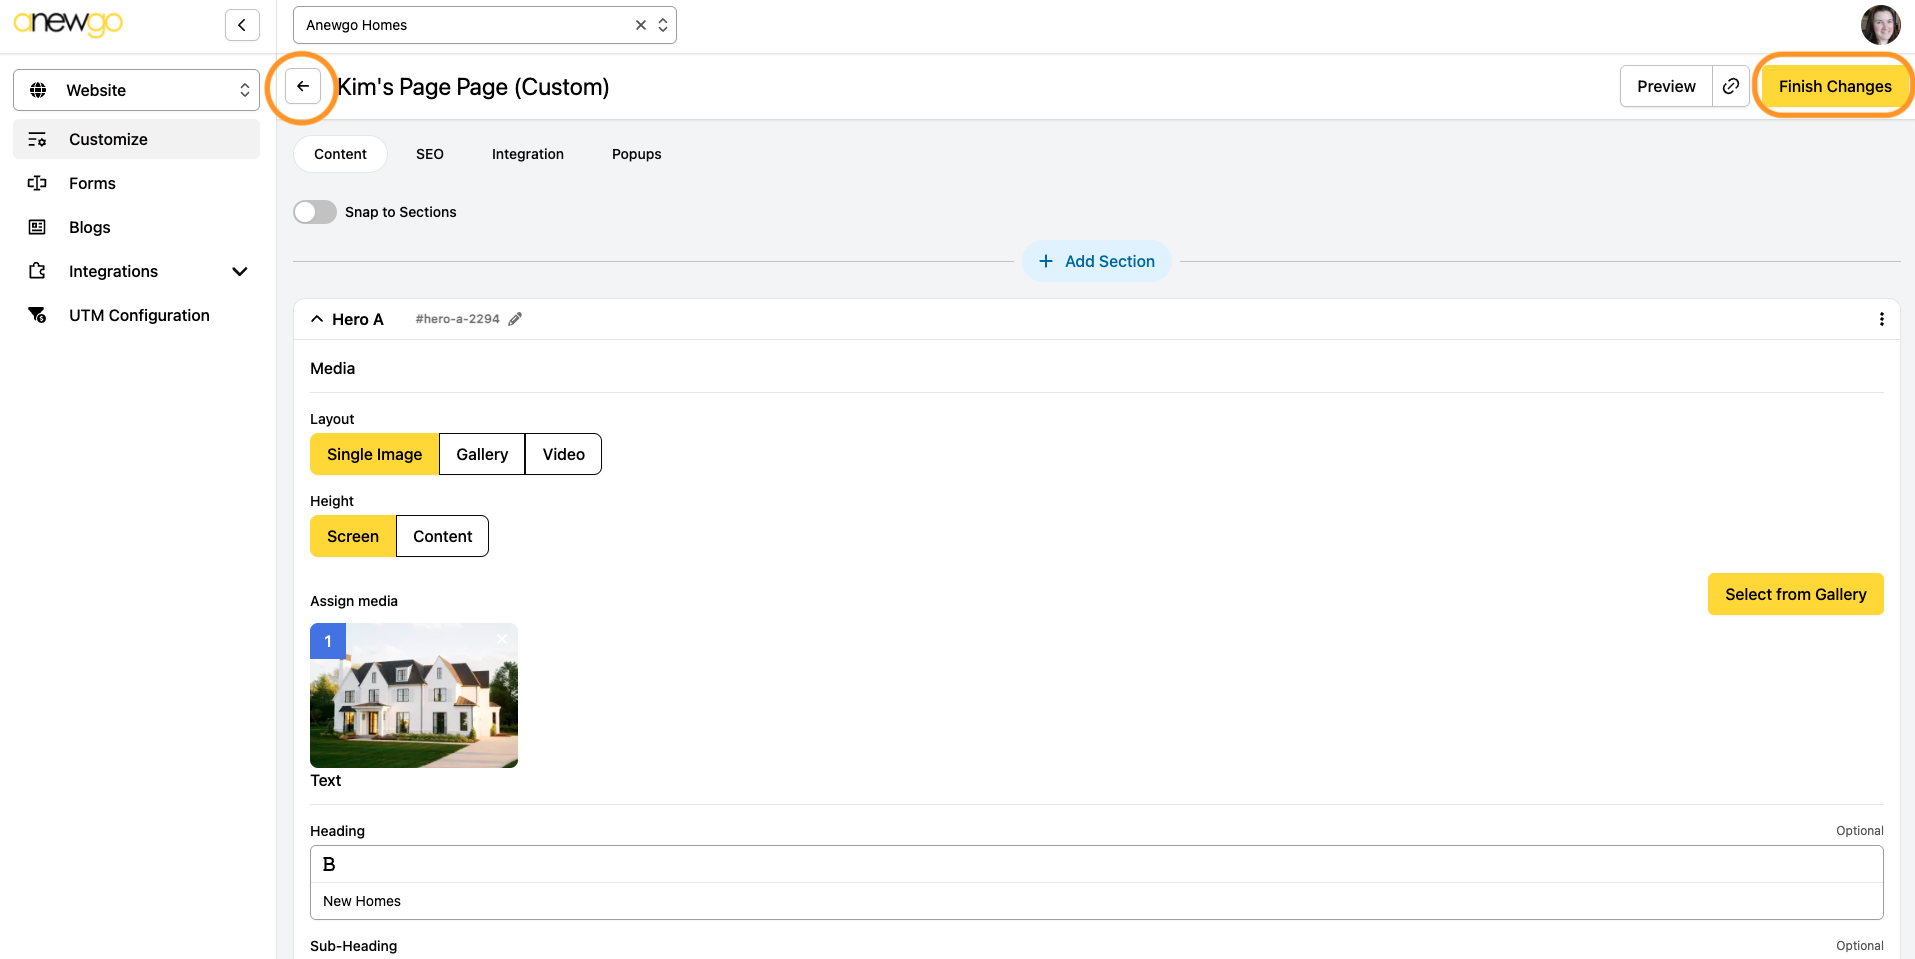
11. When done, click Finish Changes. Then hit the back arrow to go back to the main Customize area.
*If you do not hit Finish Changes, you will remain in edit mode. This will prevent the website from being published and it will lock out other users from being able to edit (unless they override your session).
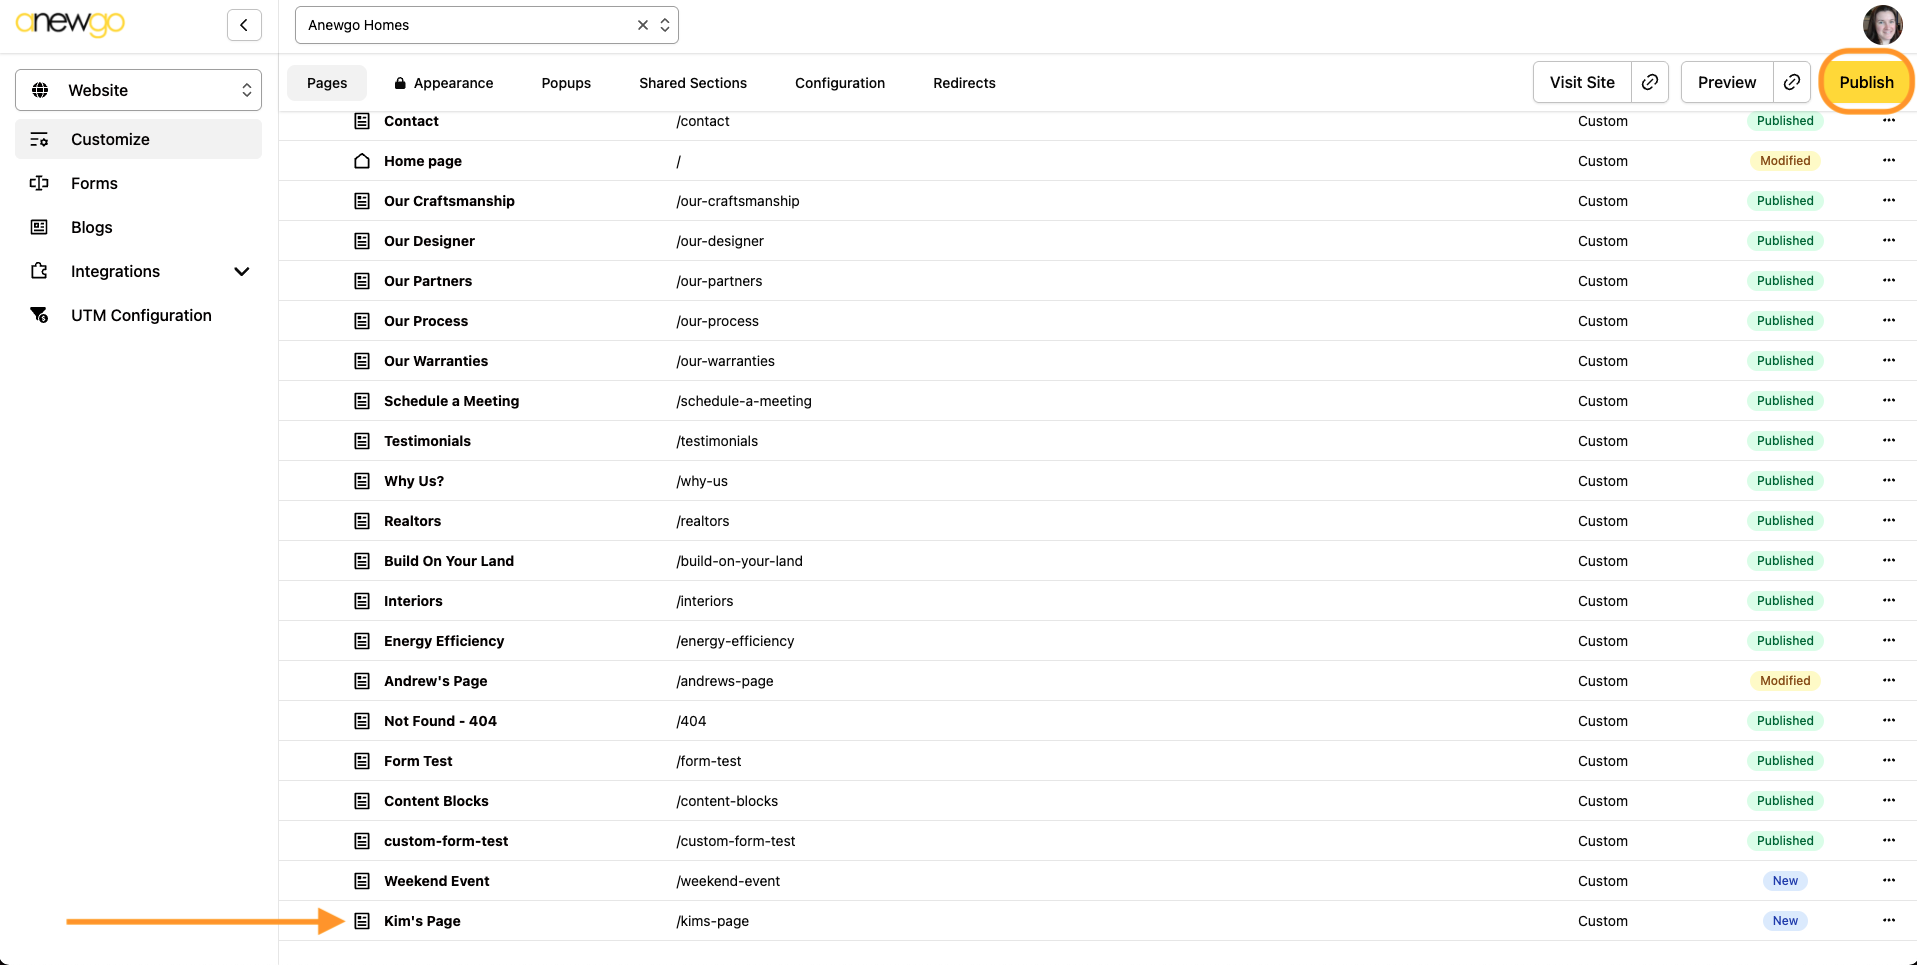
12. Now your page has been created! Add it wherever else it needs to be added (i.e. Header) and then click Publish when you are ready for it to be live.