
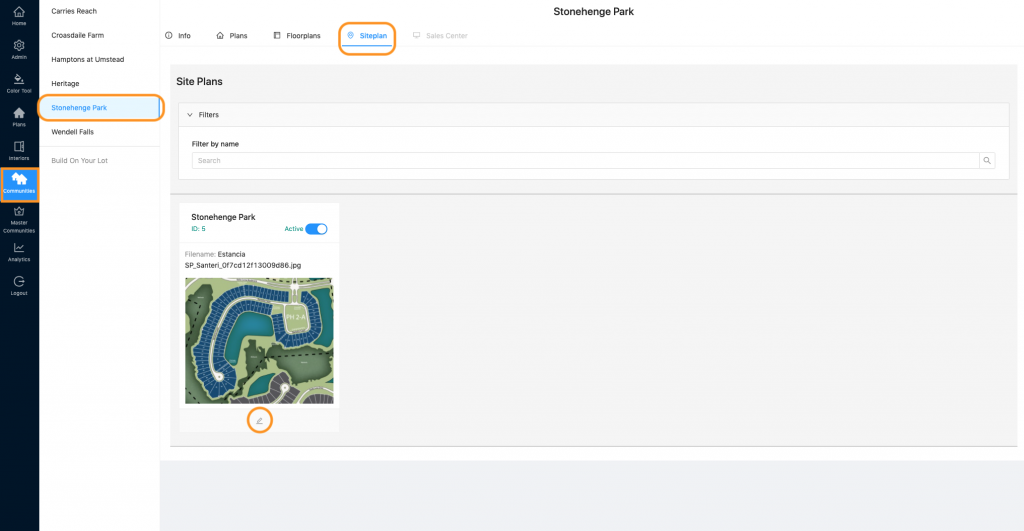
- To add a hotspot to your siteplan, go to the Communities tab. Select the community you wish to edit in the community list column, click “Siteplan” and find the siteplan you wish to edit. Click the pencil icon below the siteplan image.
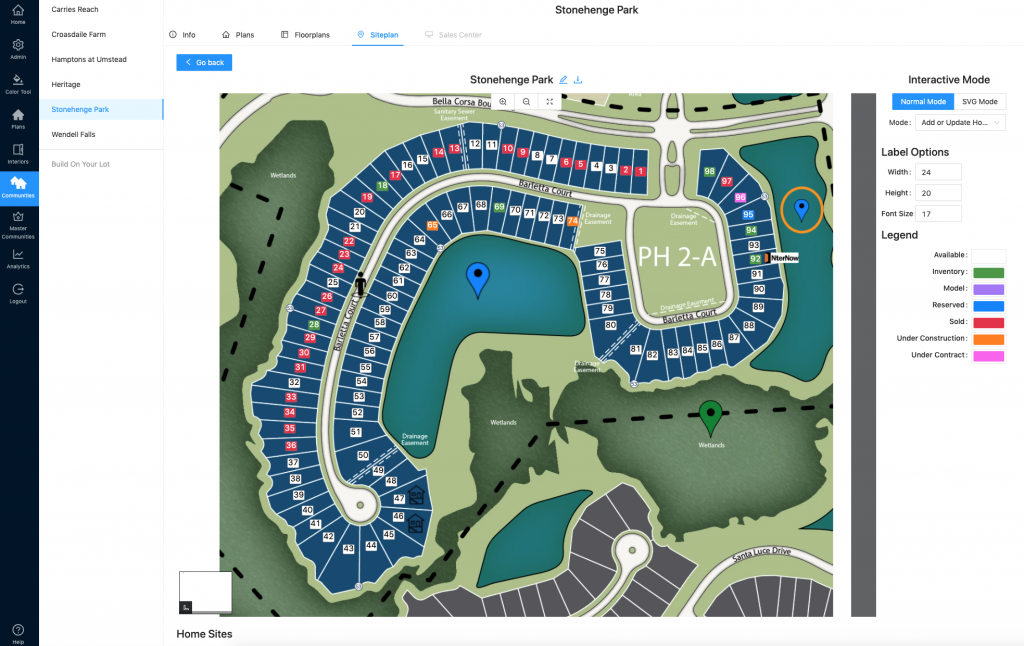
2. This will open your siteplan and allow you to make edits. Find the “Mode” drop down menu on the right.

3. Select “Add or Update Hotspot”

4. Find the hotspot on your siteplan and click it.
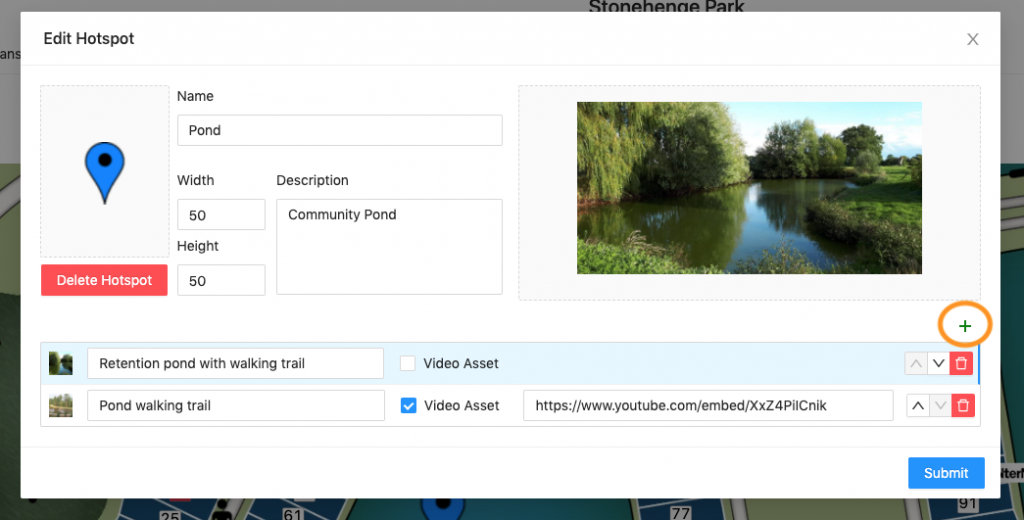
5. This will open the “Edit Hotspot” window. You have a lot of editing options.
A – Replace the thumbnail image
B – Adjust the thumbnail Width and/or Height
C – Edit the hotspot Name
D – Change the hotspot Description
E – Delete the hotspot
F – Add, rearrange, or delete assets (Note: at least 1 asset needs to be present in order for hotspot to appear on the front end!)
G – Edit asset descriptions or images

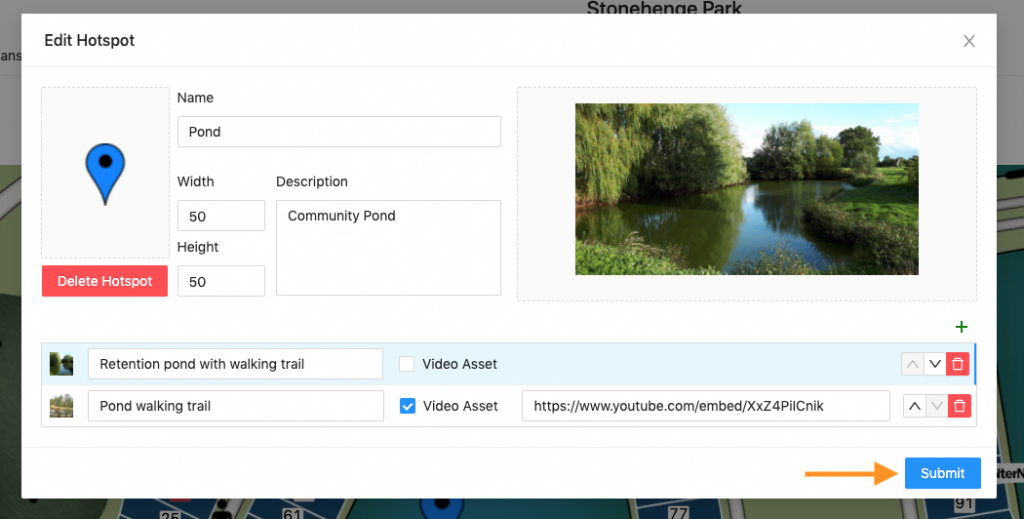
6. To see details on how to add still image or video assets, see steps 8 & 9 of this doc.
7. Be sure to click “Submit” to save your changes!
Check out this doc on how to add a completely new hotspot.