
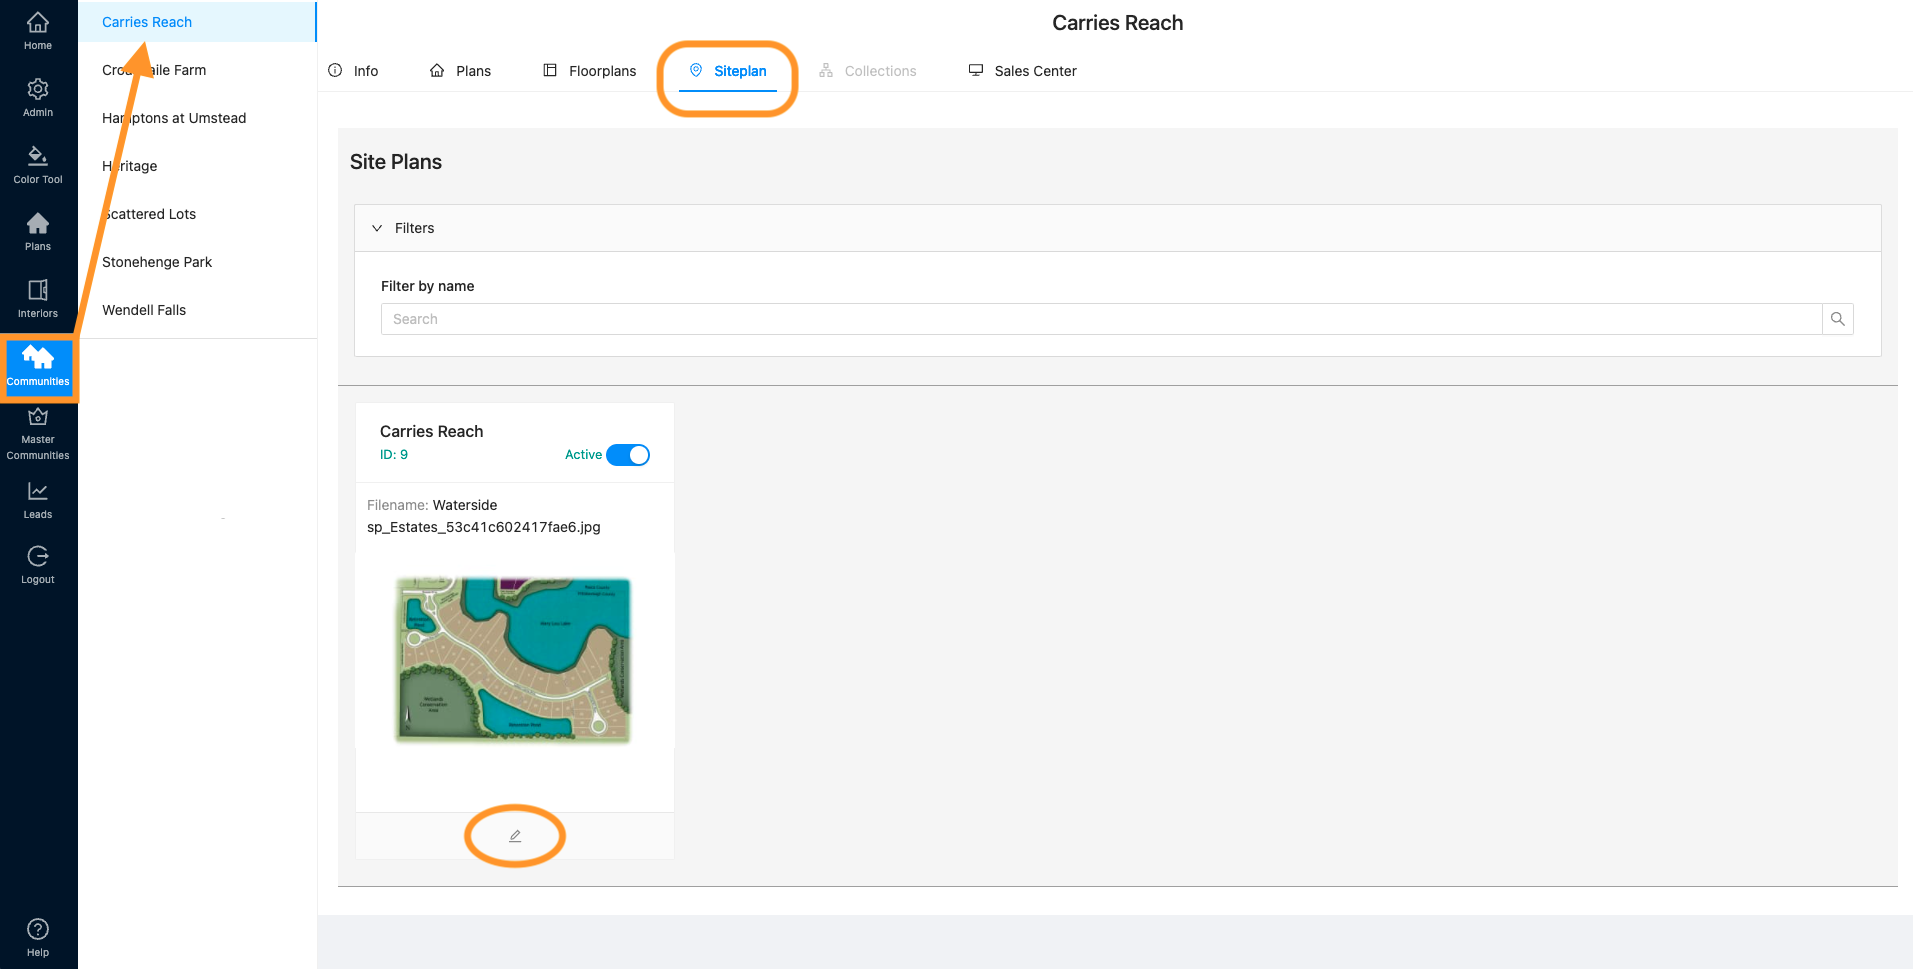
- To create or edit an inventory lot on your siteplan, go to “Communities” and select the community you need to work in, then click “Siteplan.” All of your siteplans for that community will display below. Click the pencil icon (edit) for the siteplan you want to work with.
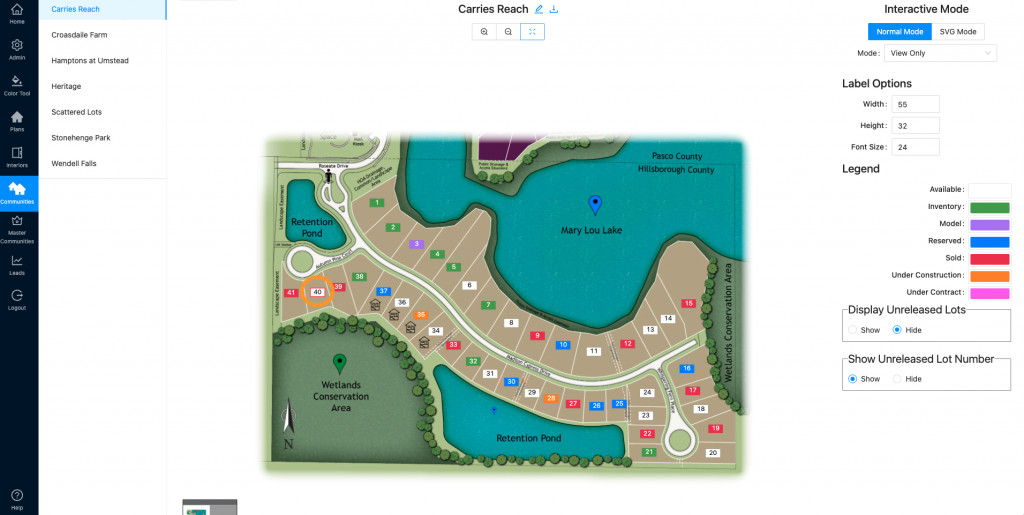
- This will bring you to your siteplan map. Scroll down to the Home Sites list.
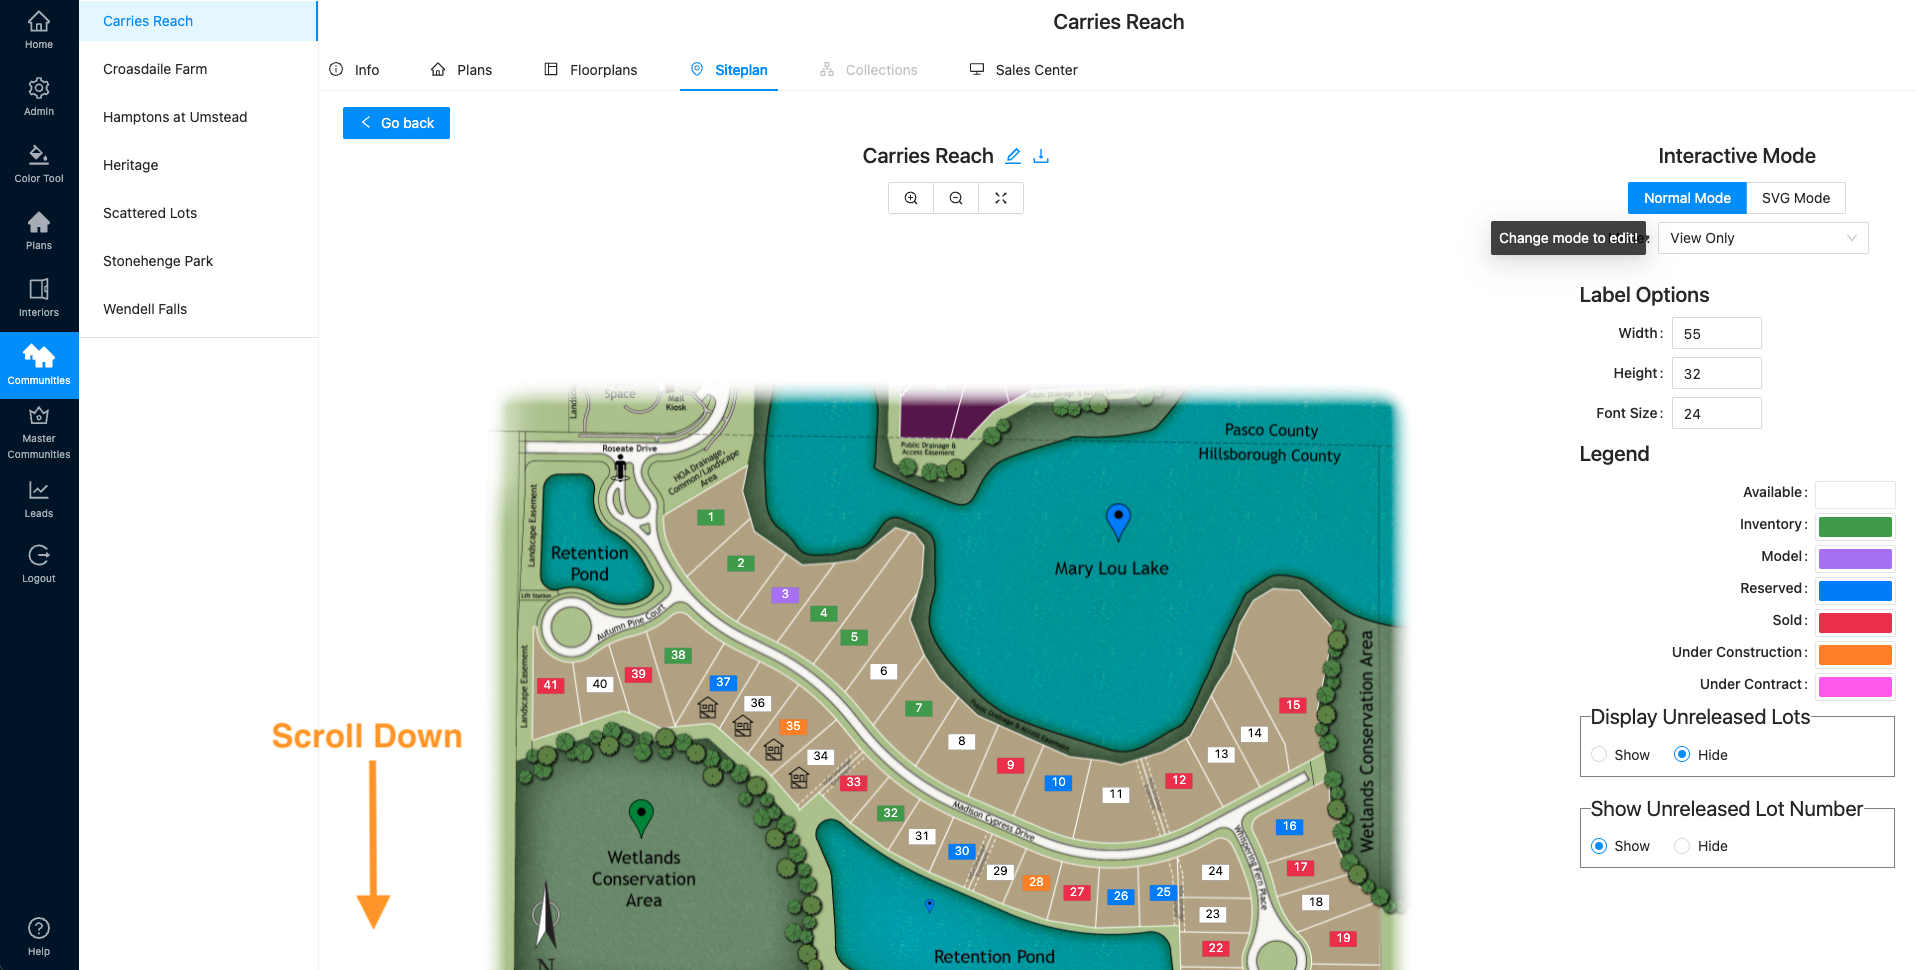
*You can now click on the lot on the siteplan and it will highlight the corresponding lot in the Homes Sites list to find it easily.
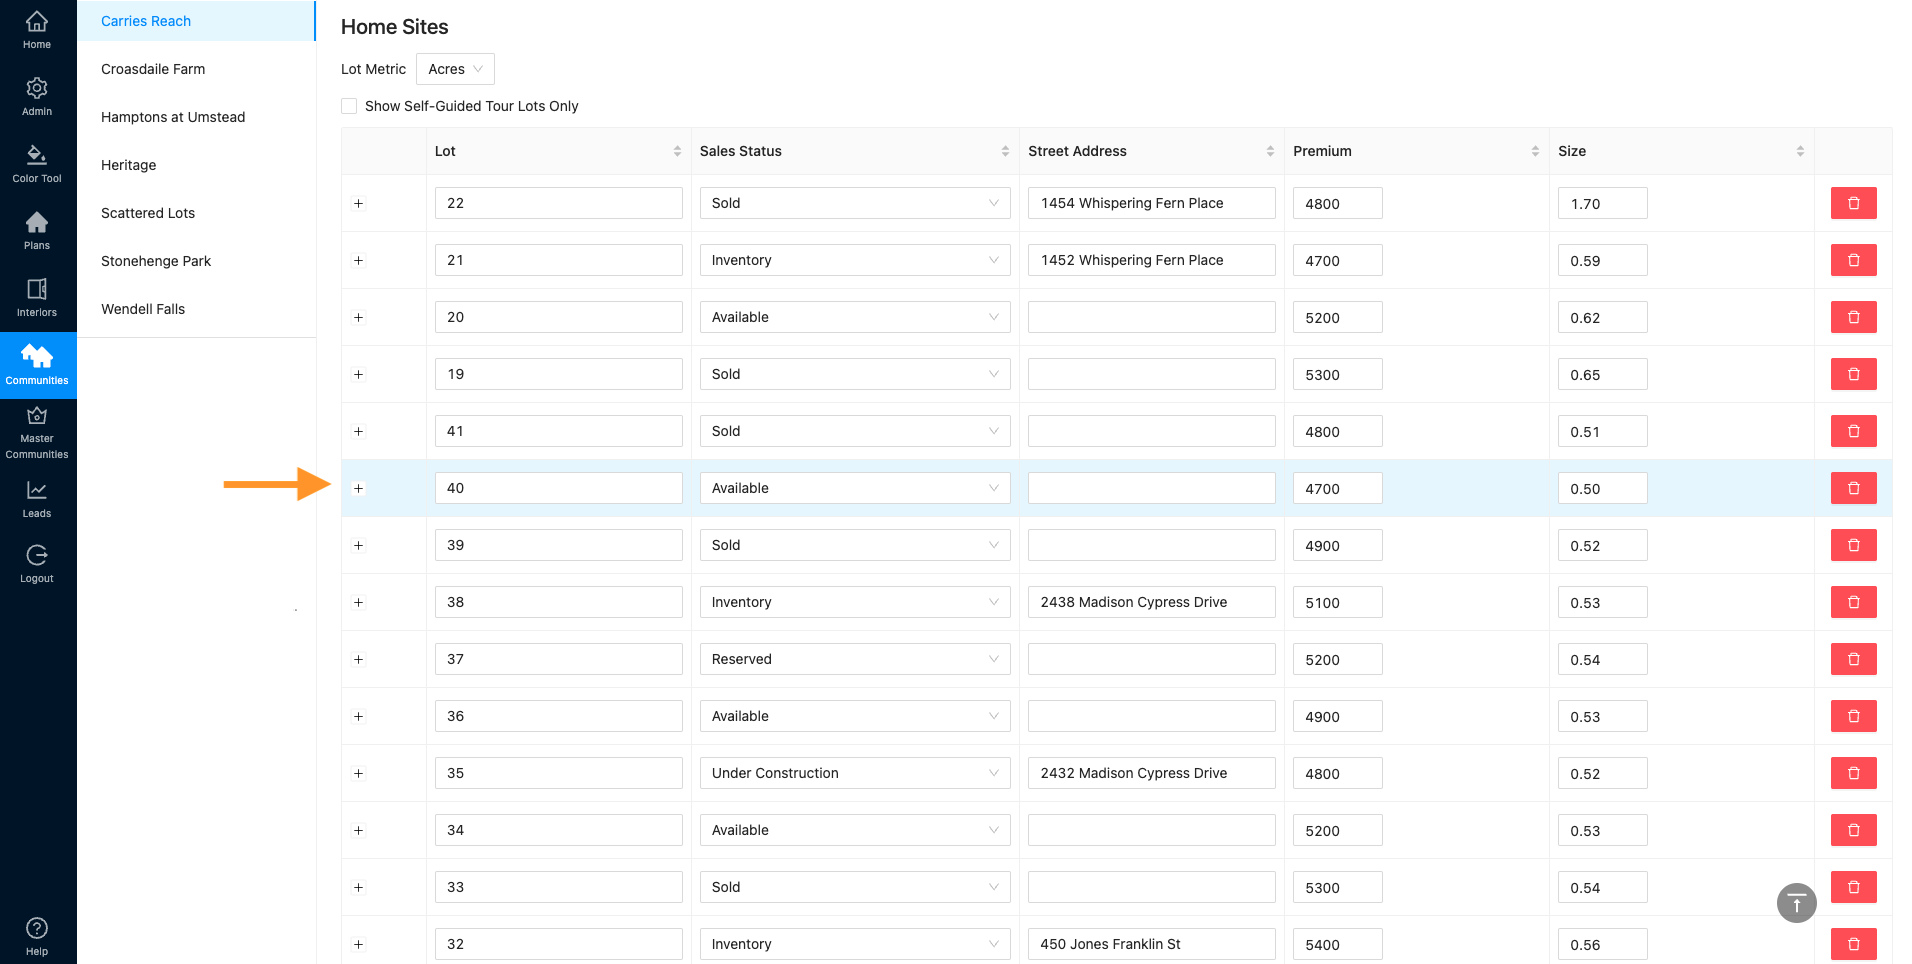
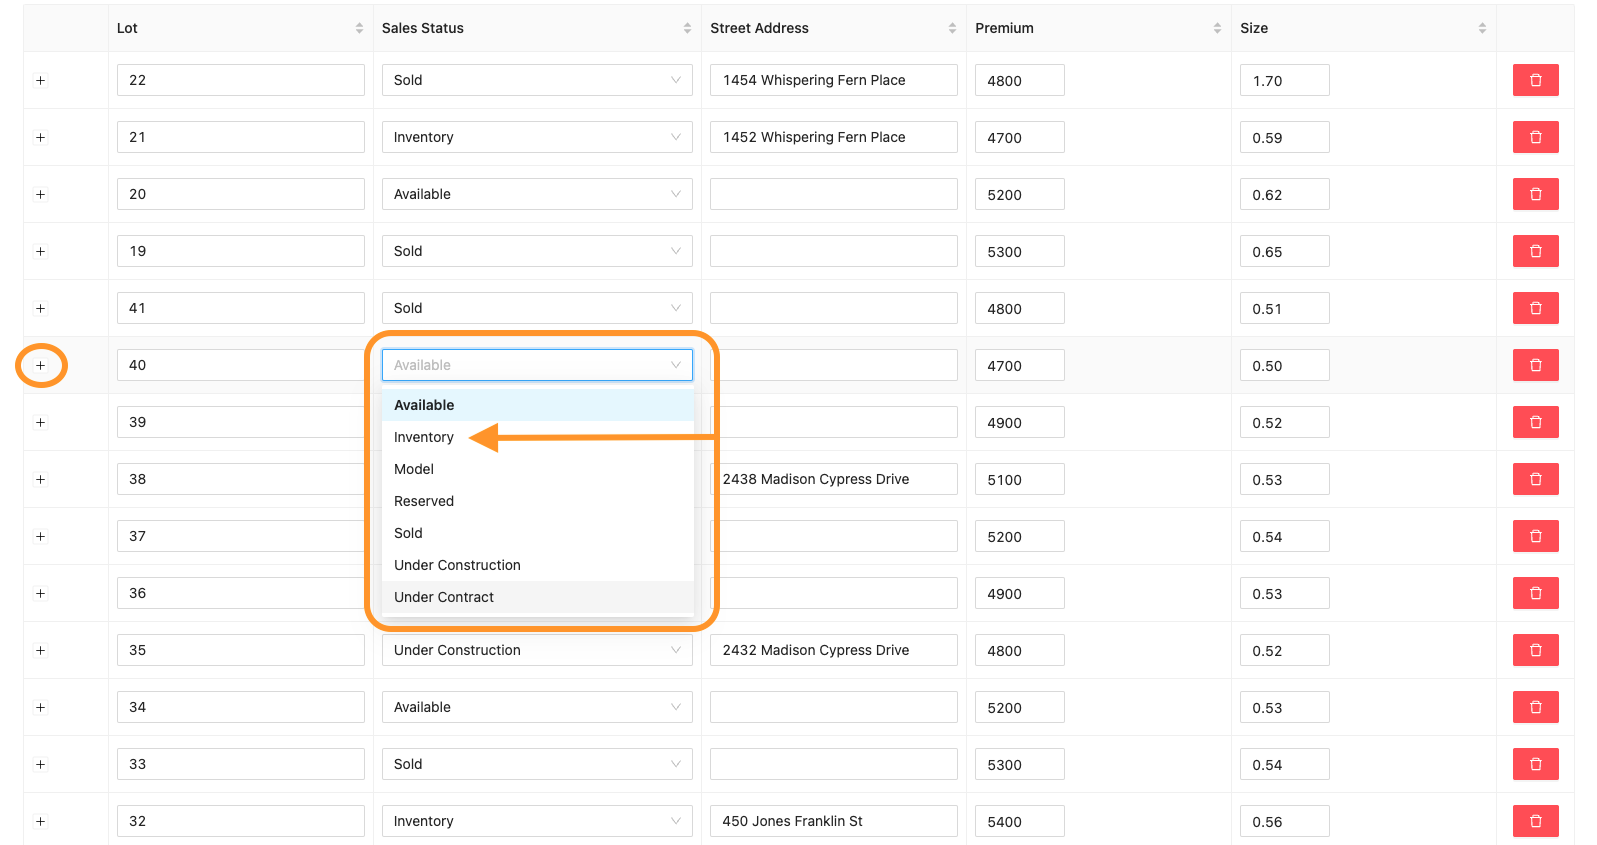
- Find the lot you need to edit, update the Sales Status to “Inventory” and click the + to expand the list options.
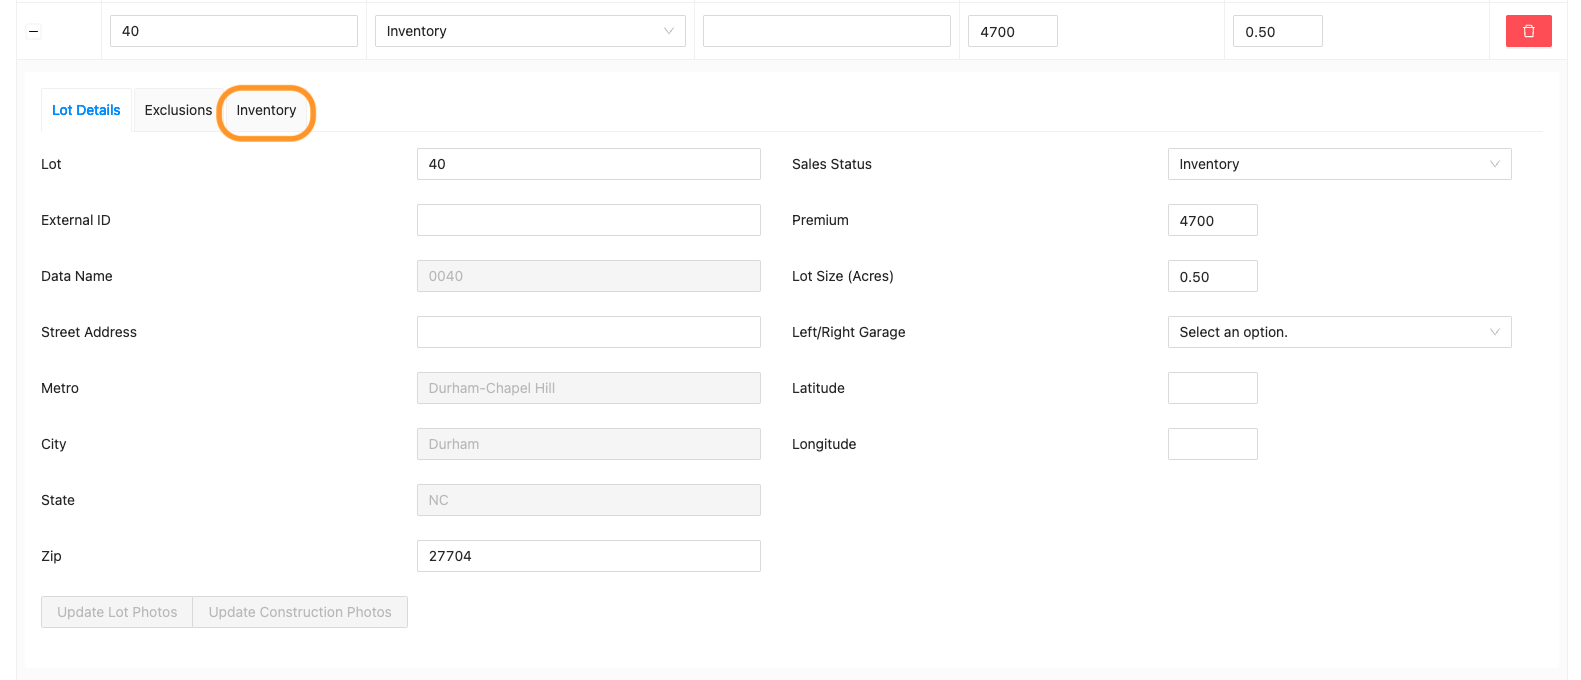
- This will default to the “Lot Details” tab. Click on “Inventory”
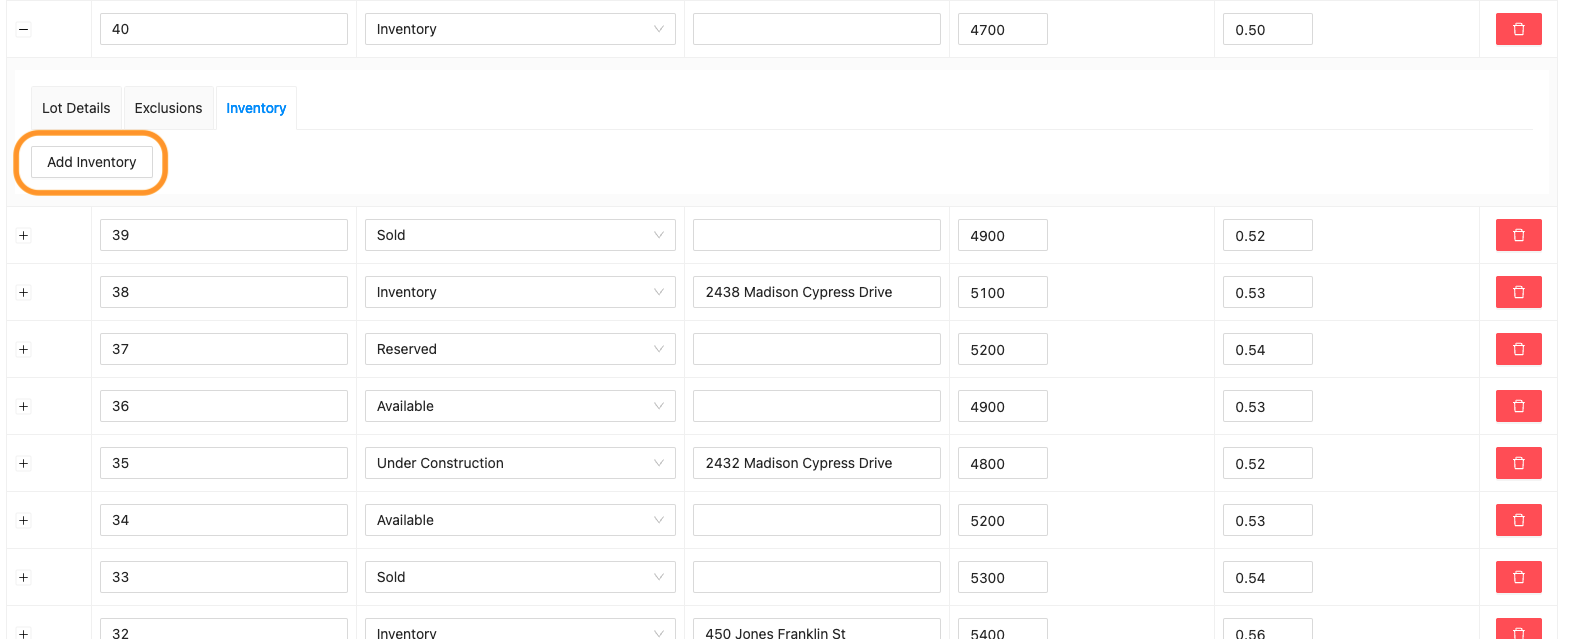
- The inventory field is auto-populated when you click the “Add Inventory” box when you add a new lot (see step 5). If you did not click that box, you can create the inventory here and now by clicking “Add Inventory”
- Now you can fill out the details of the inventory lot. Notice that some options like “Configure Exterior” and “Configure Floorplan” are grayed out. This is because you need to select an Elevation before you do anything else.
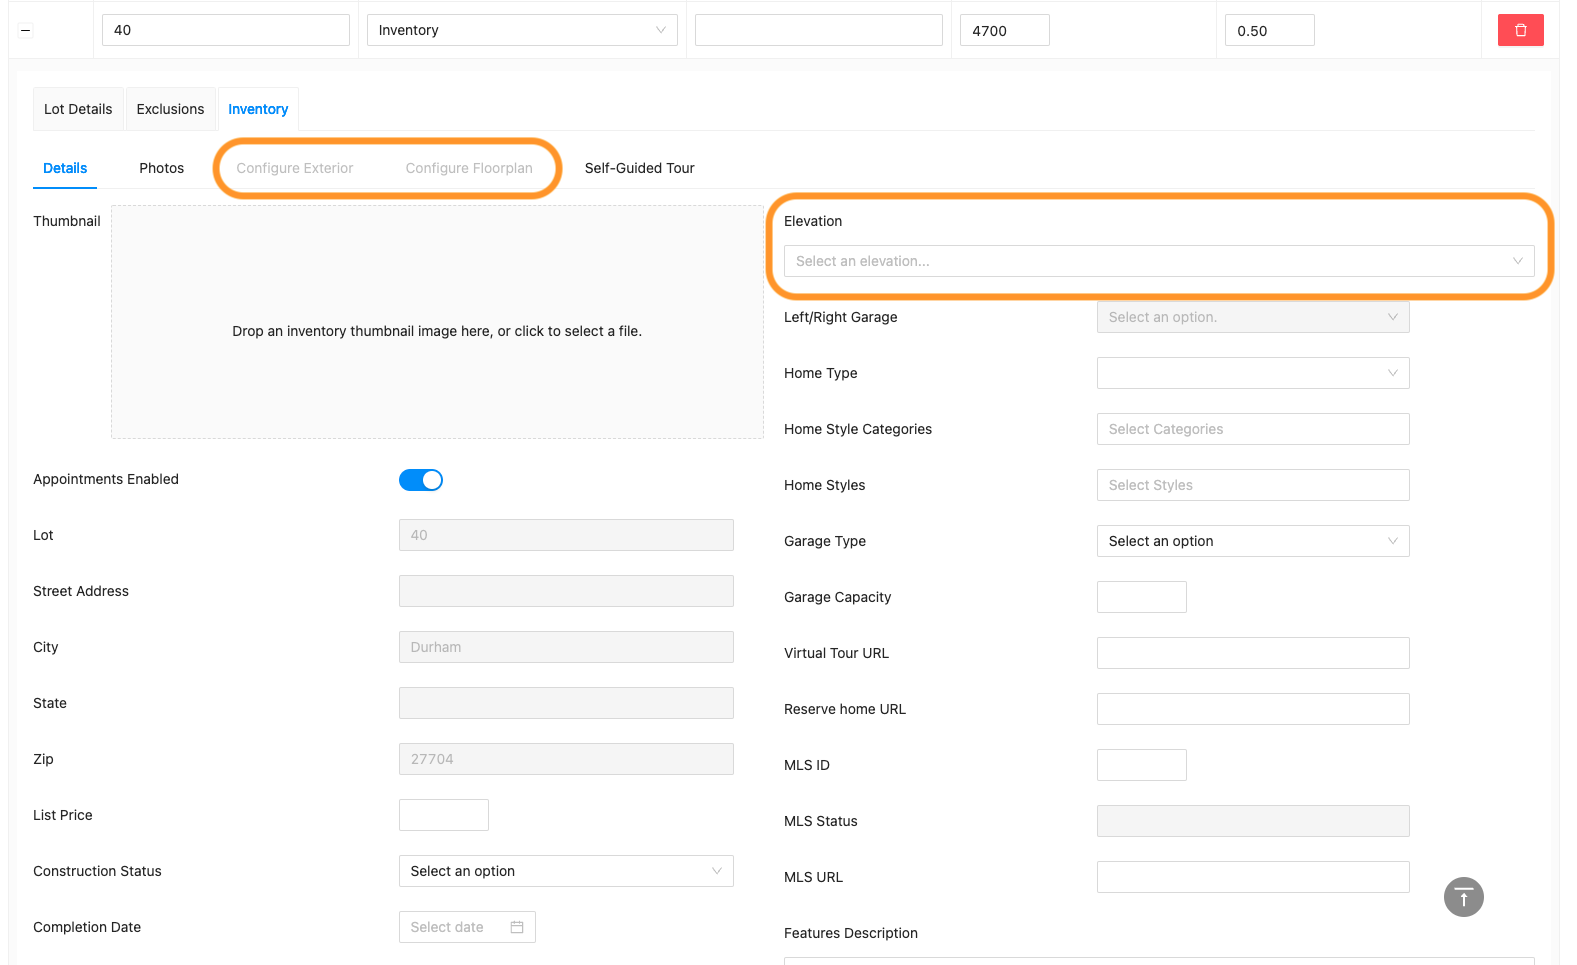
7. Once you have selected your elevation, you can now update other options.
- Photos
- Configure Exterior (Note: If you have an actual photo of the elevation, you can disregard this option and load your image to the Thumbnail section in the Details tab.)
- Configure Floorplan
- Self-Guided Tour
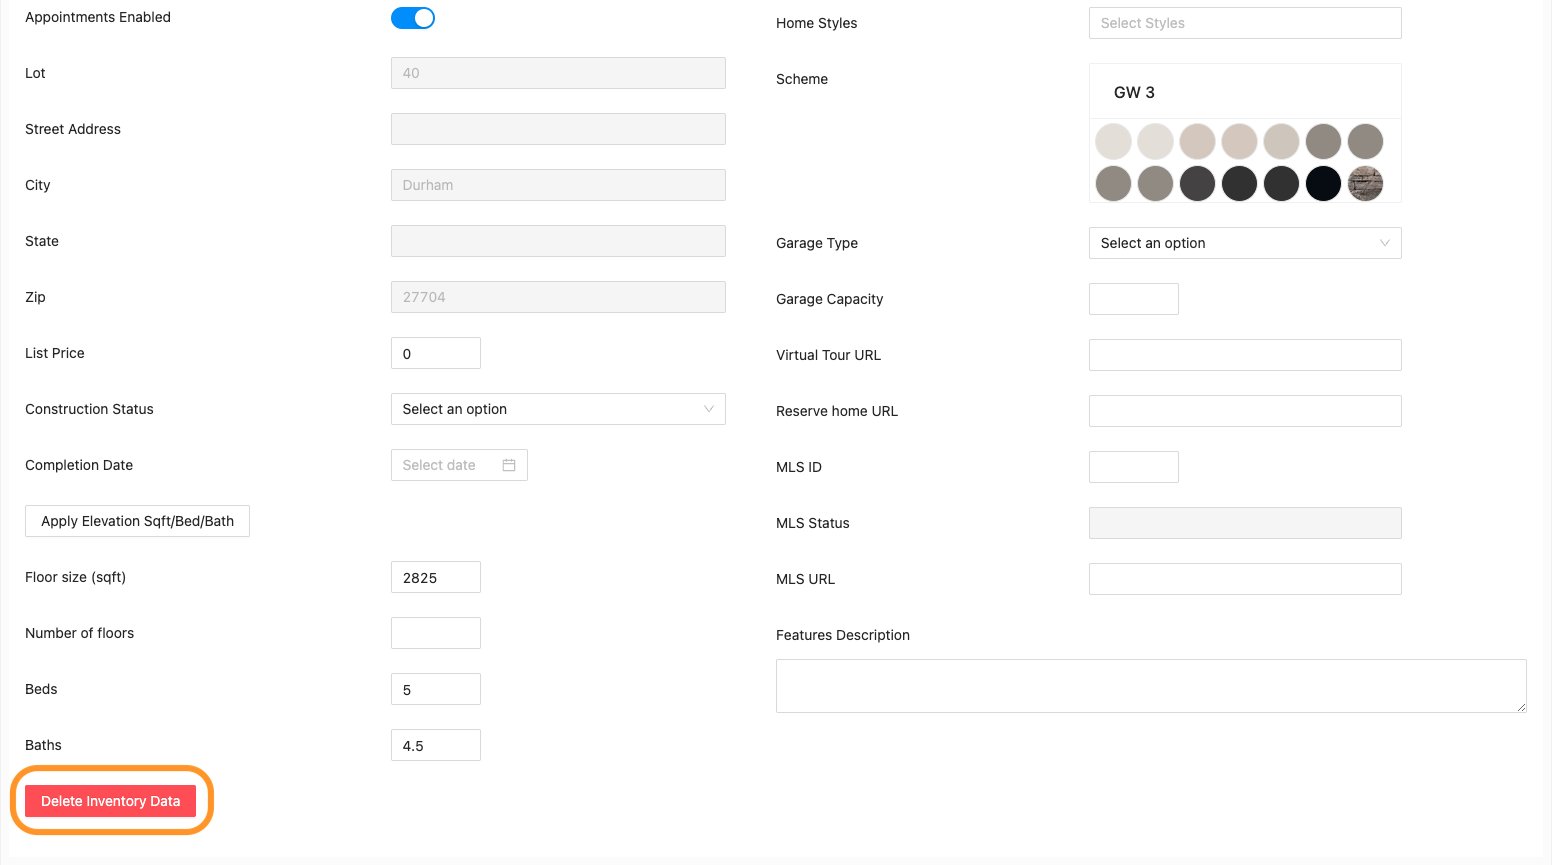
8. Most of your Details fields will be completed by updating the options in step 7, but there are some separate fields you can complete in the Details tab – Garage information, Virtual Tour link, MLS information, Construction Status and Completion Date. See step 9 for details about List Price.
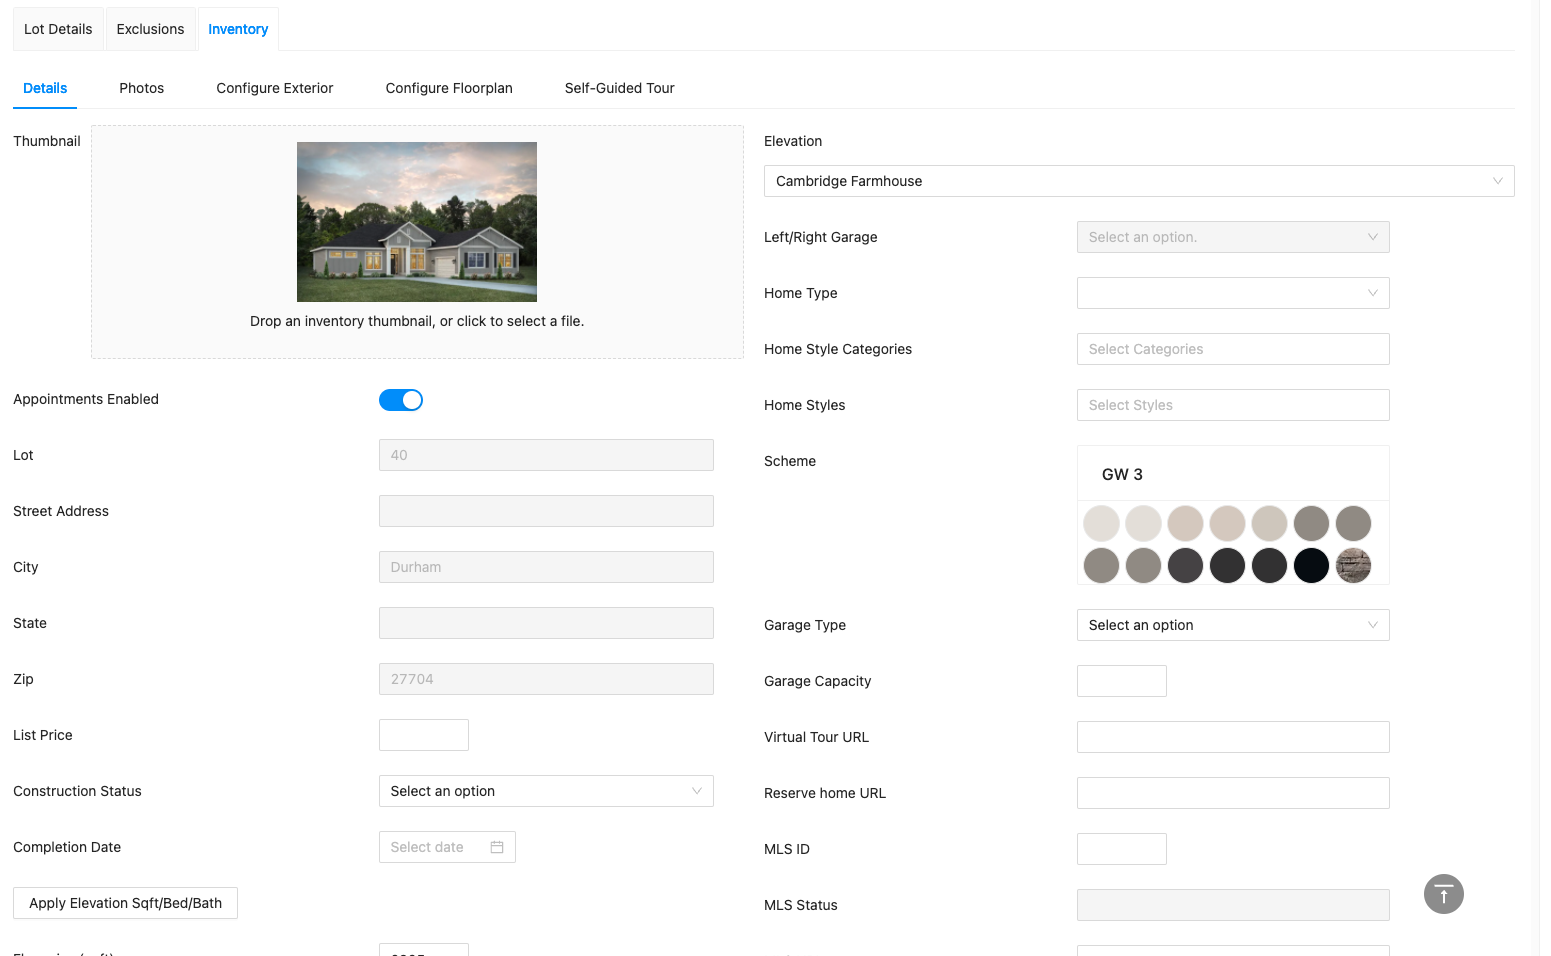
9. List Price – here you can enter the price of the Inventory Home. If there is not pricing, there are 2 options:
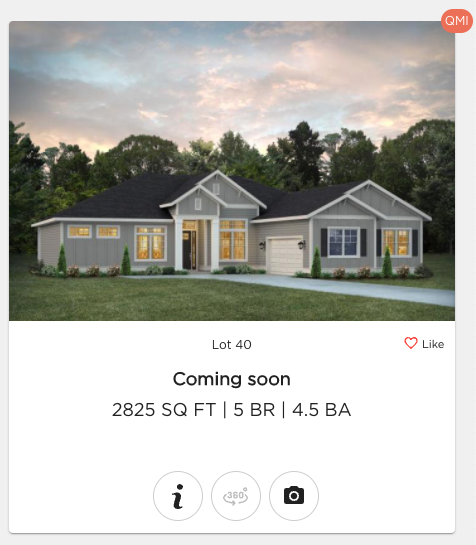
- Leave the field blank and “Coming Soon” will appear in lieu of pricing on the front end.
- Type a 0 into the List Price field and “Contact Us for Pricing” will display on the front end.
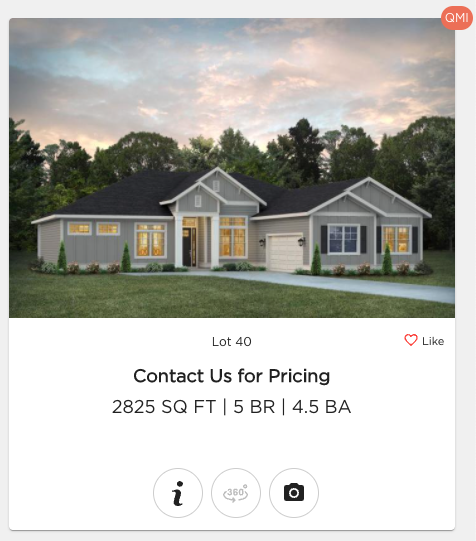
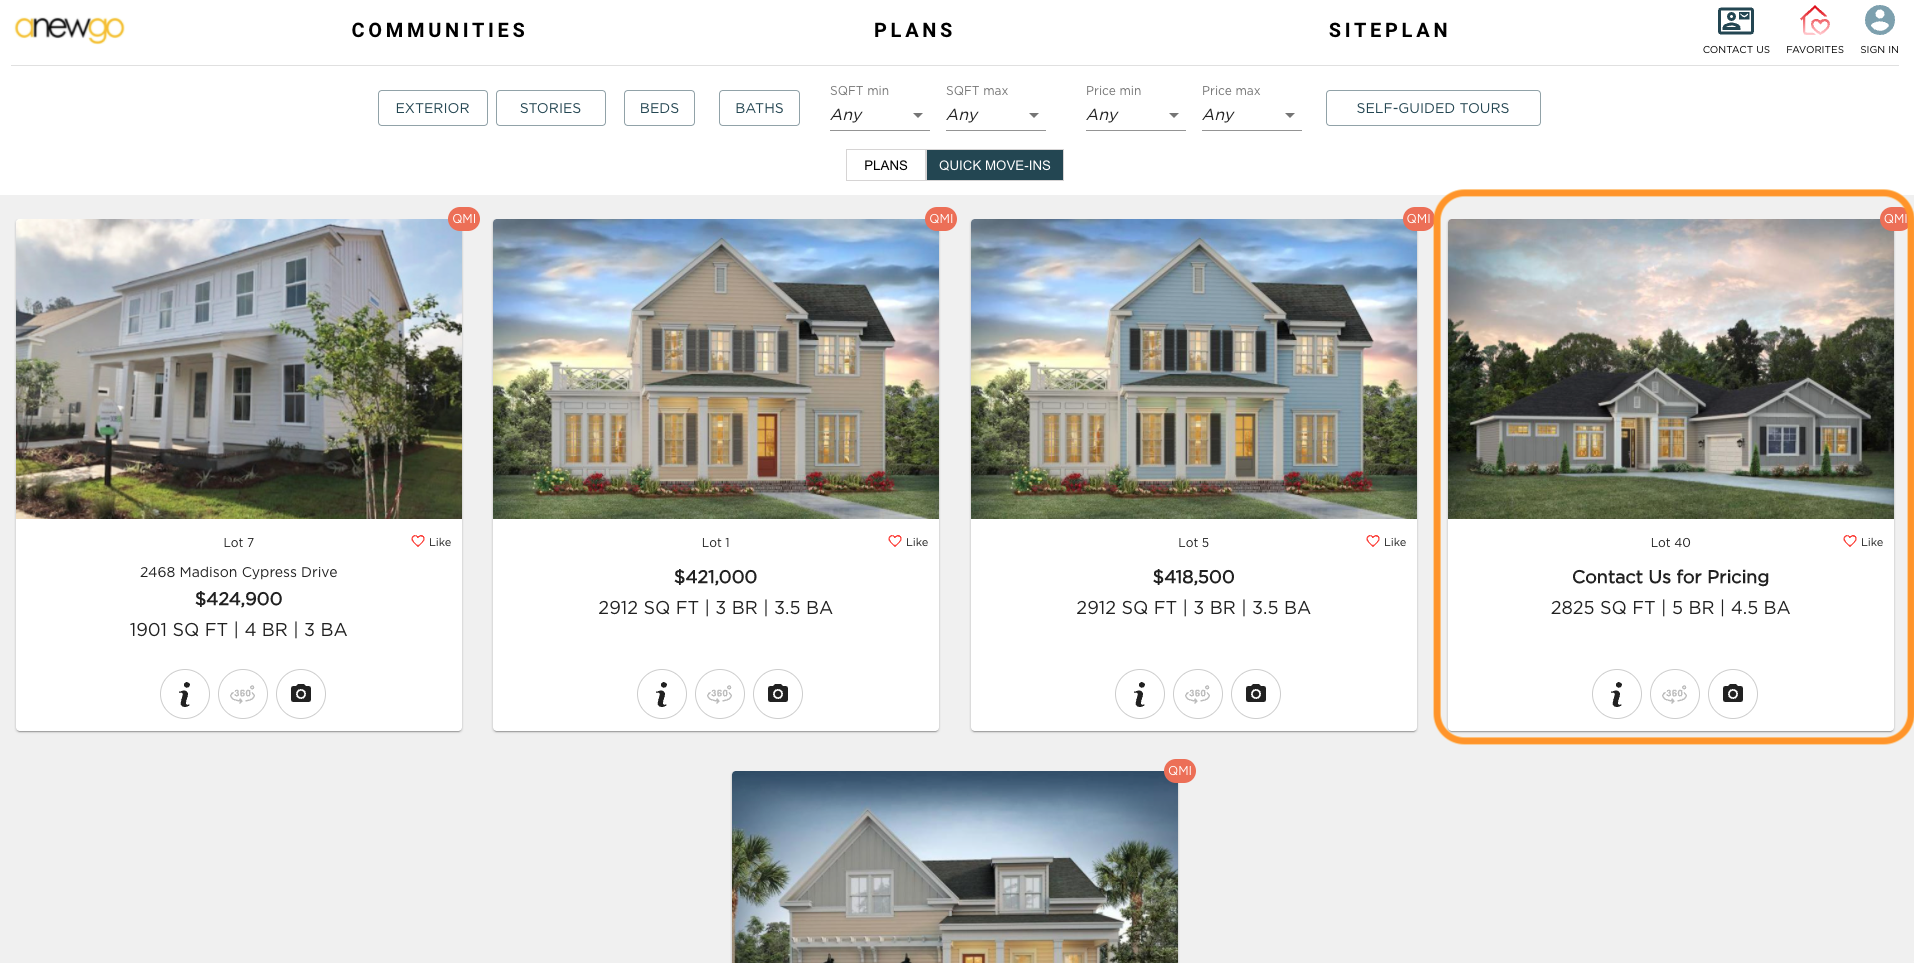
10. The Inventory Home will show on the front end of the My Home App under “Plans” as a QMI (Quick Move In) home. (Note: Plan specs – sqft, bed, bath – must be entered for the home to show here.)
11. If you need to reset all of your changes or switch the lot back to available, you can click “Delete Inventory Data” which will delete the entire Inventory field and you will be back to step 5. (Note: if you change the sales status to Available, but do not delete the inventory, then all of the inventory information will continue to display on the front end)
Click here to see sold lot updates and options.