
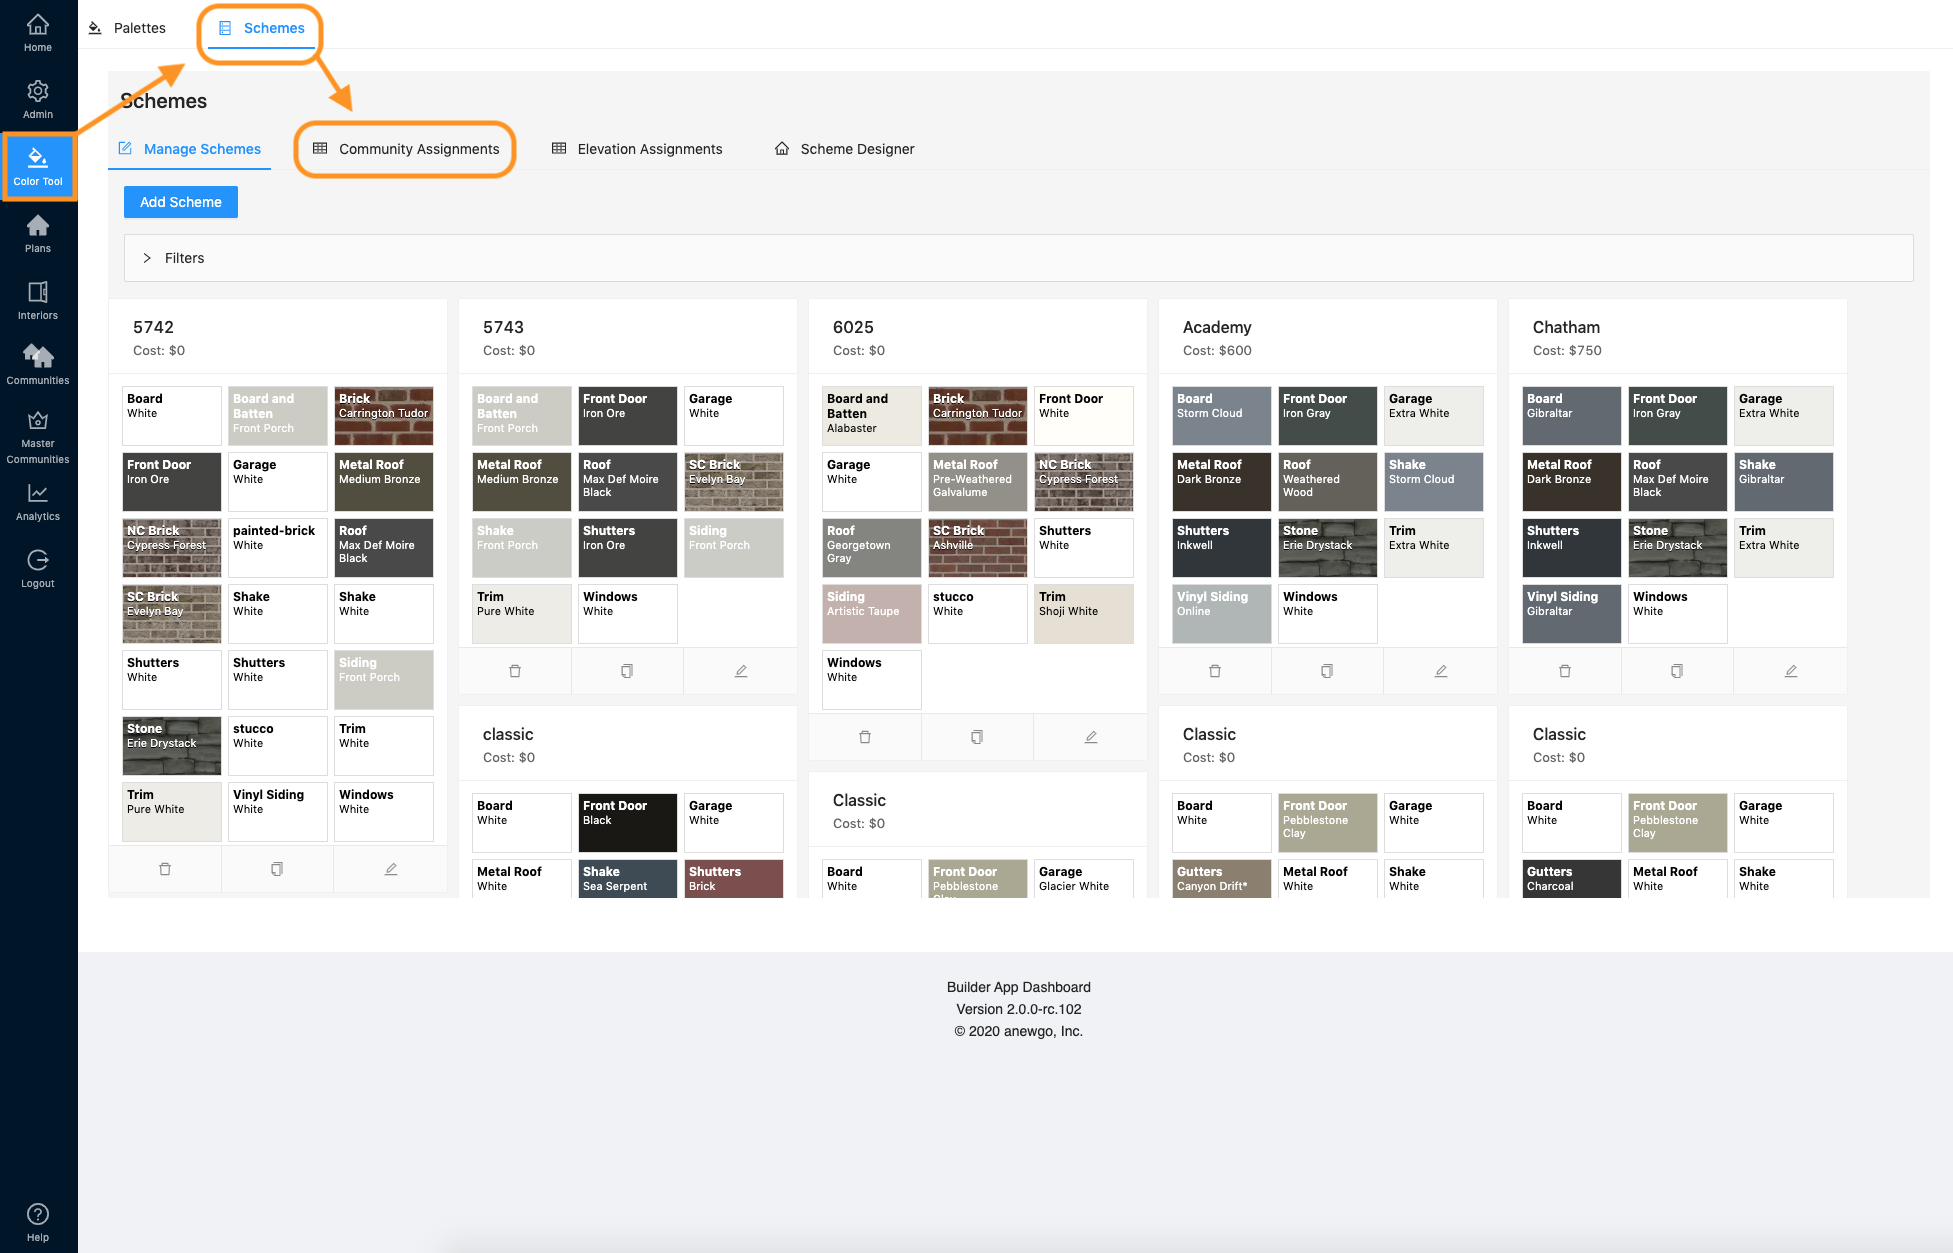
- Once in the Color Tool, click on “Schemes” then click “Community Assignments”
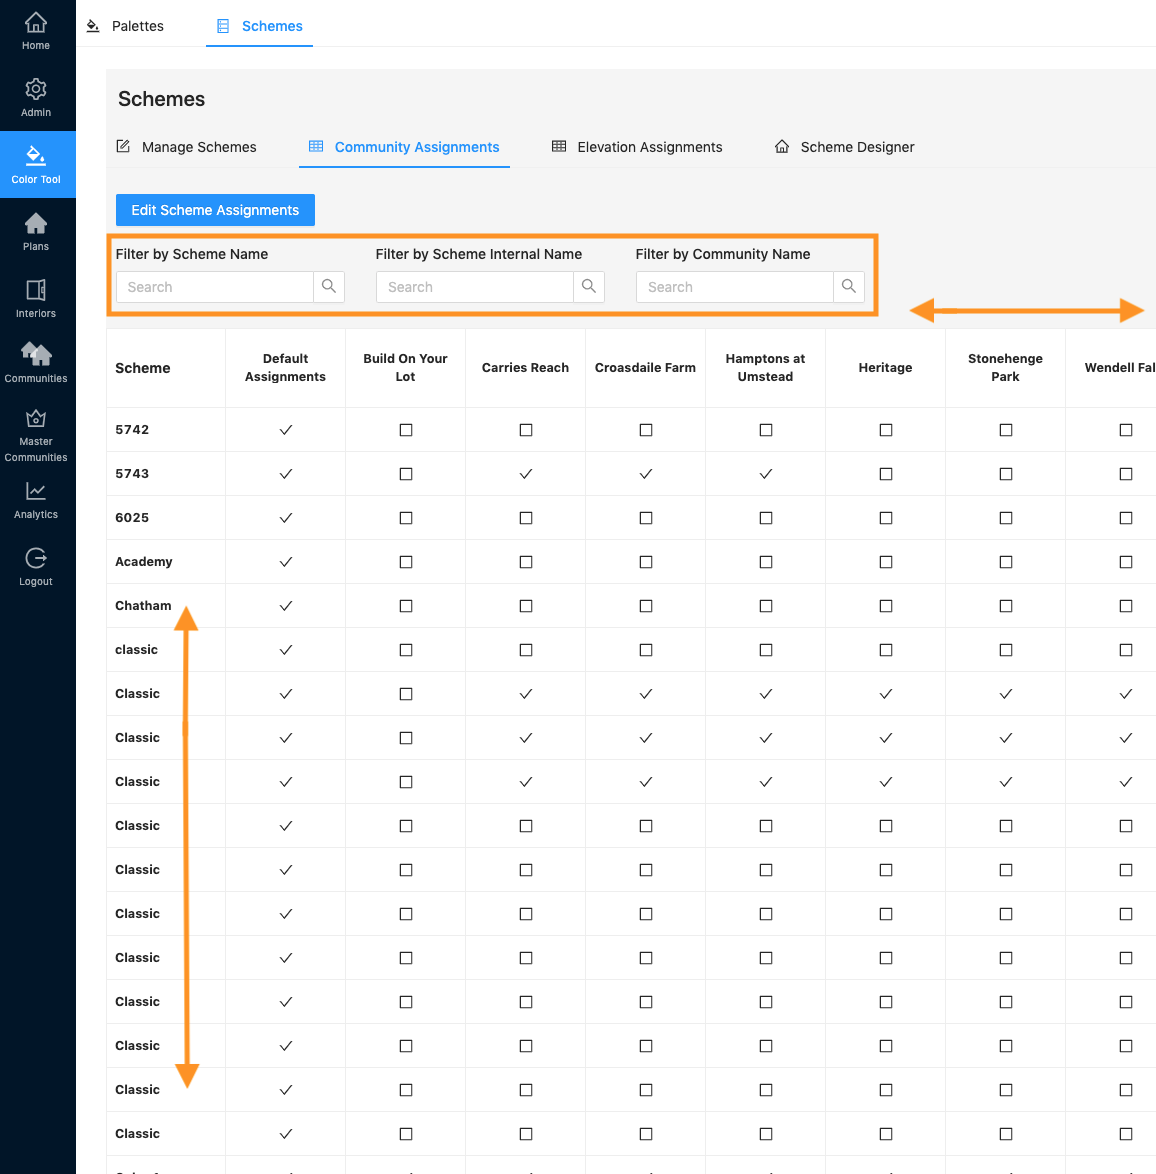
2. Here you will see which communities your schemes are assigned to – you can use the filters to narrow your view. You can also scroll right-left to see more communities or scroll down-up to see more schemes.
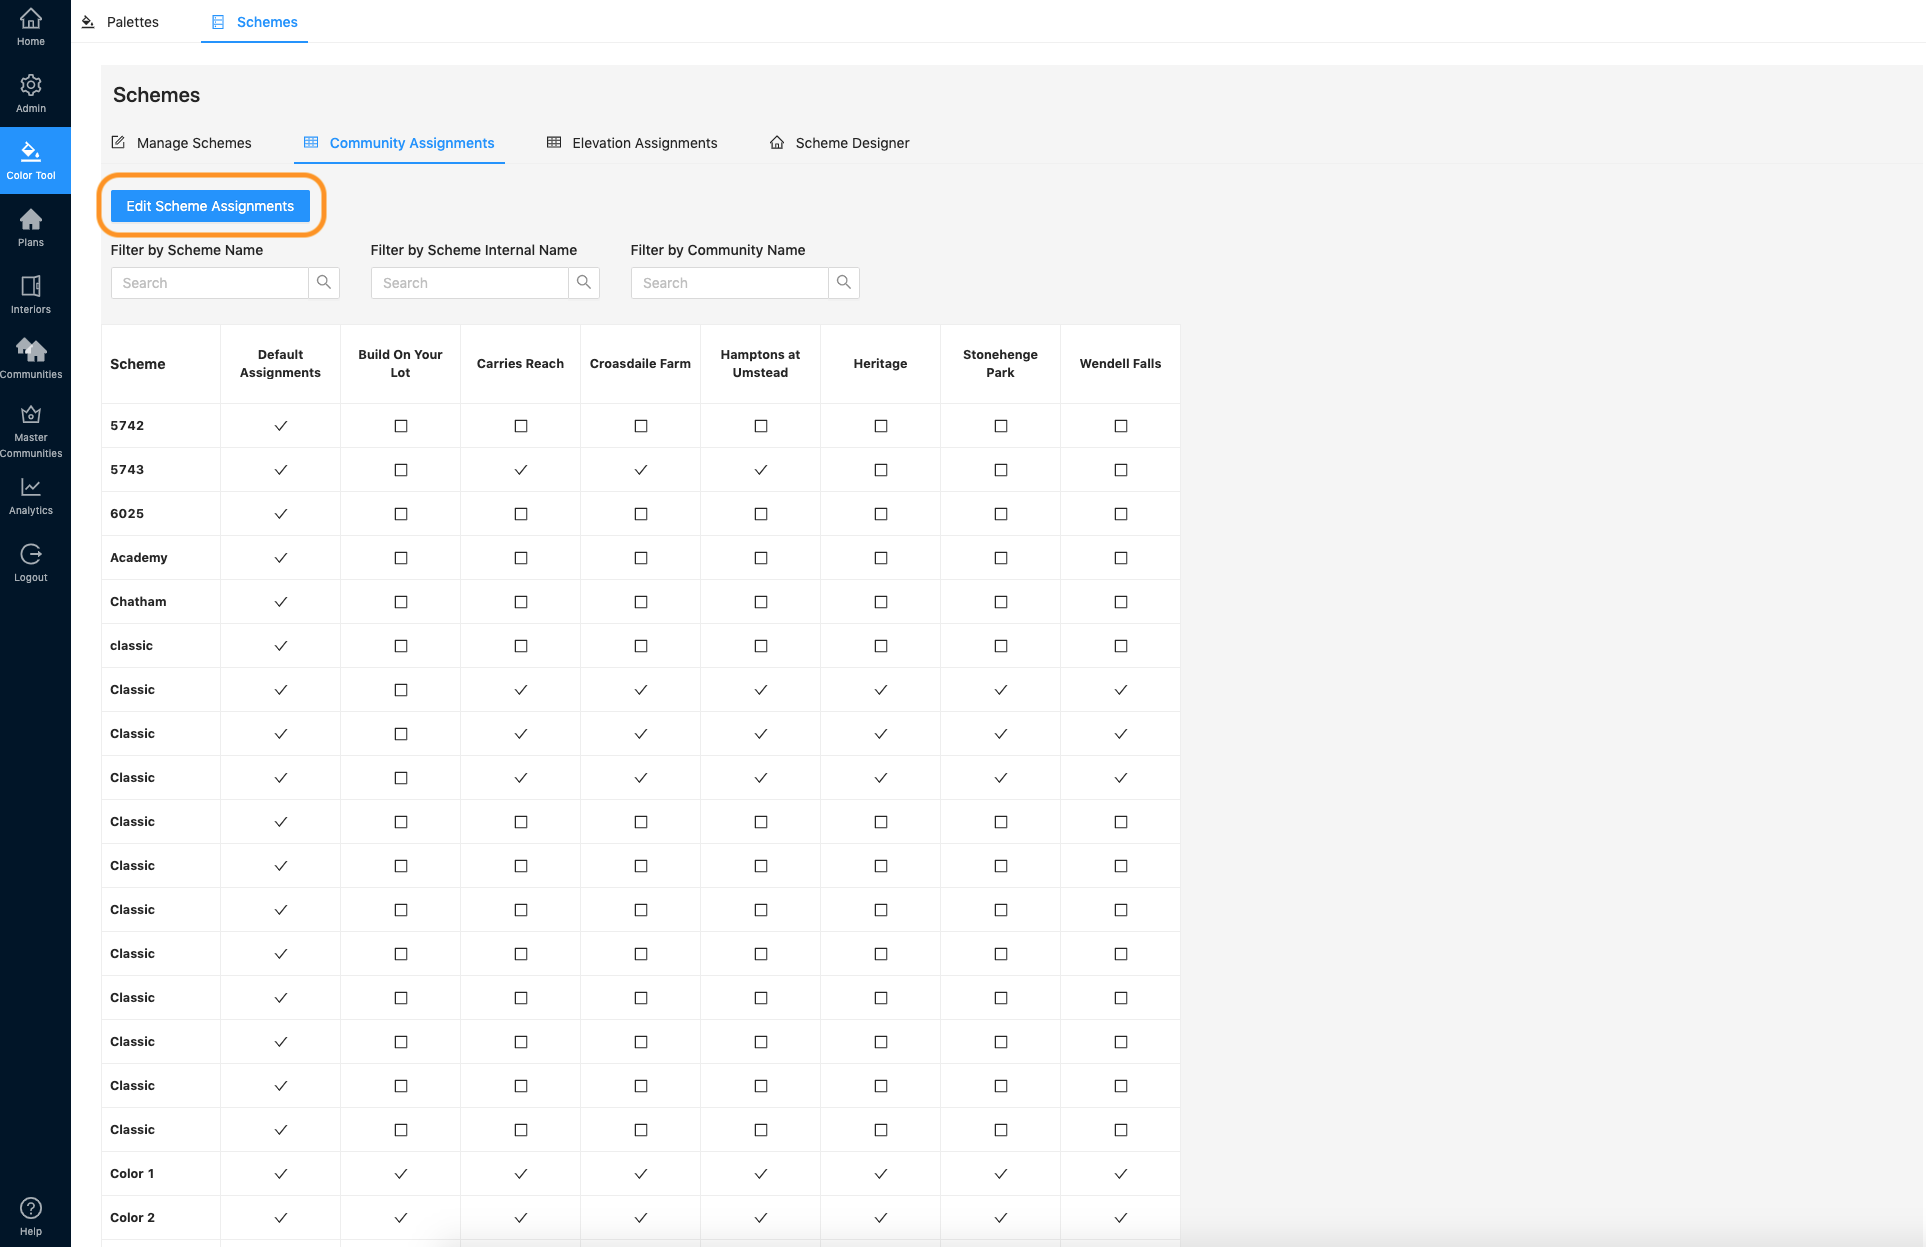
3. Click “Edit Scheme Assignments”
4. Here you can select or deselect your schemes to/from each community. Again, you can use the filters to narrow your view. You can also scroll right-left to see more communities or scroll down-up to see more schemes. The boxes next to the scheme names and under the community names are “select all”
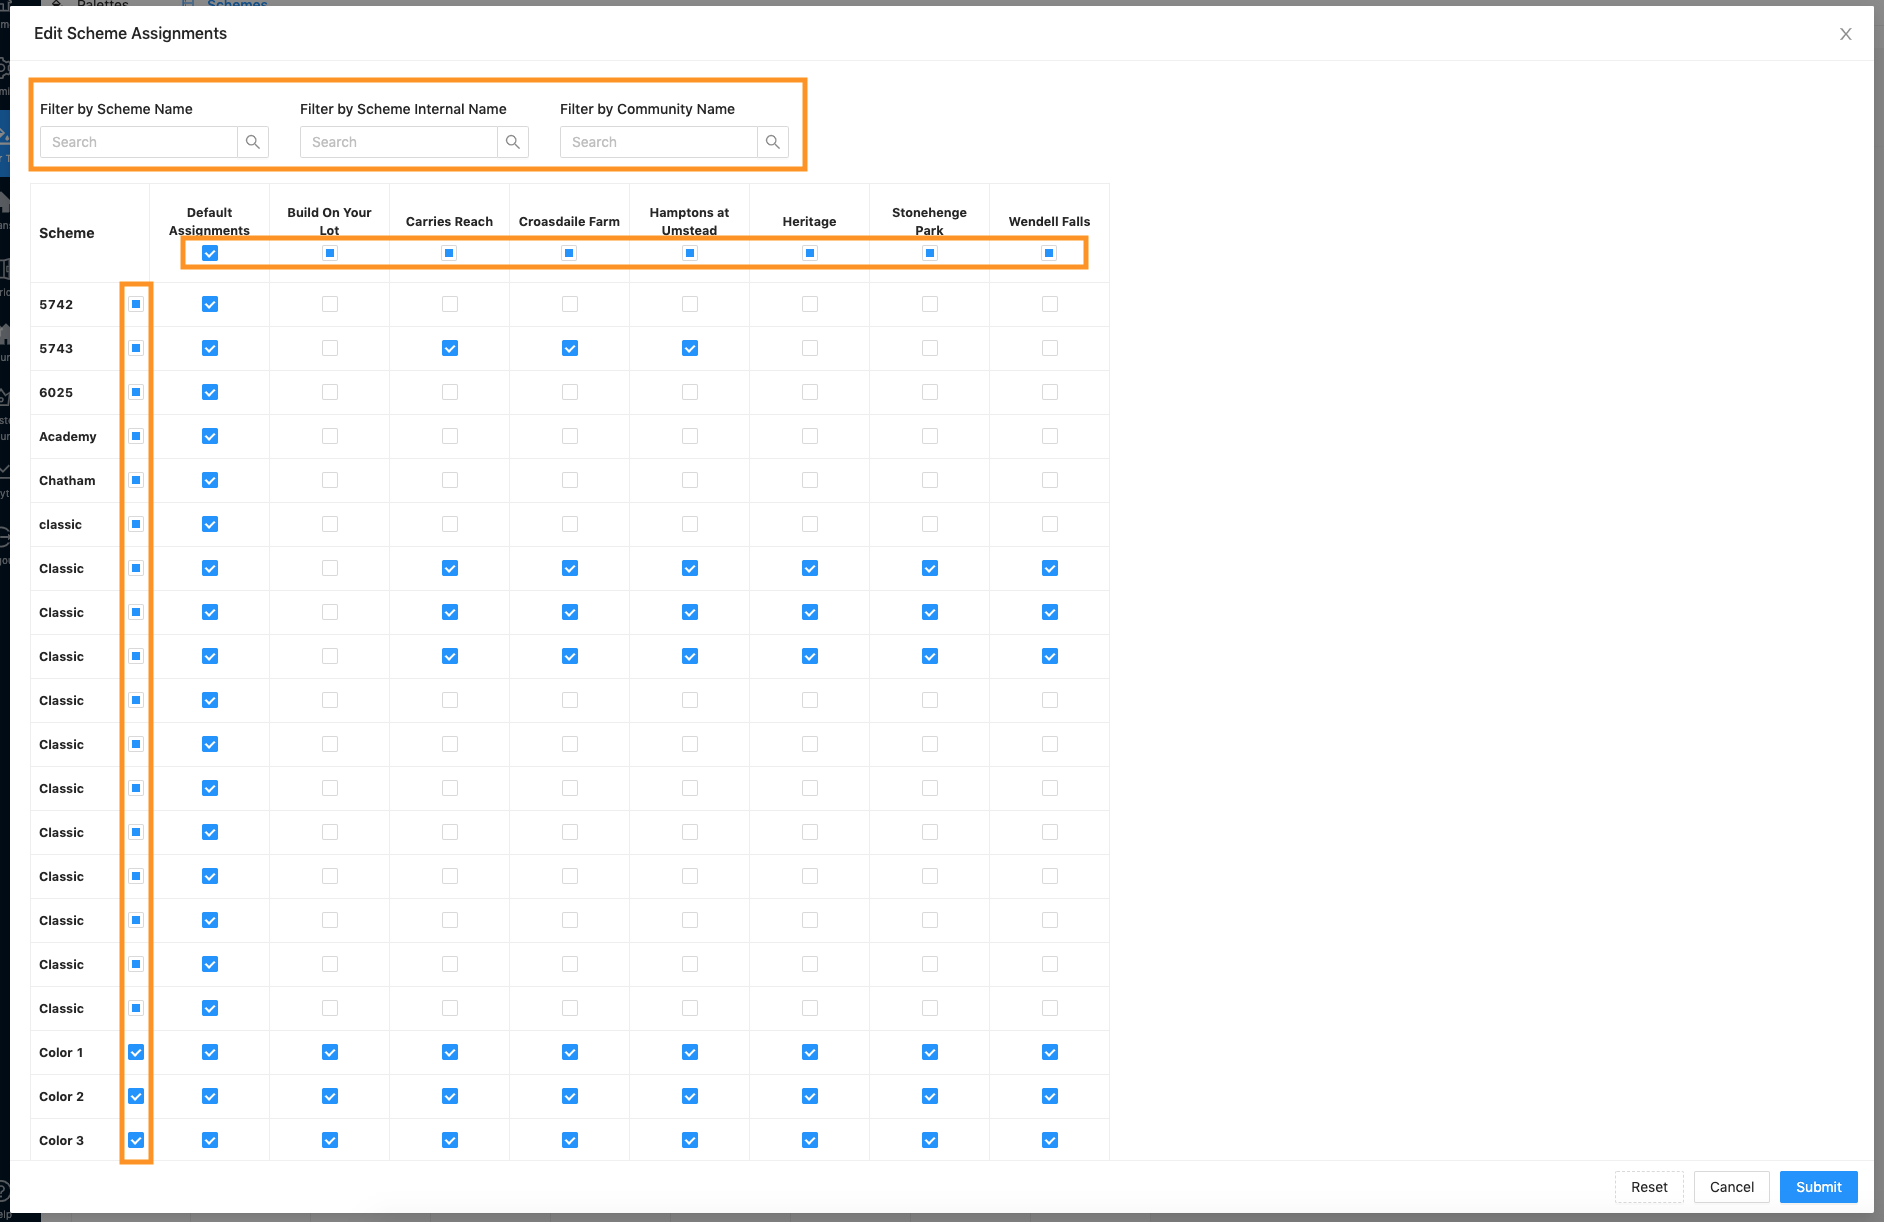
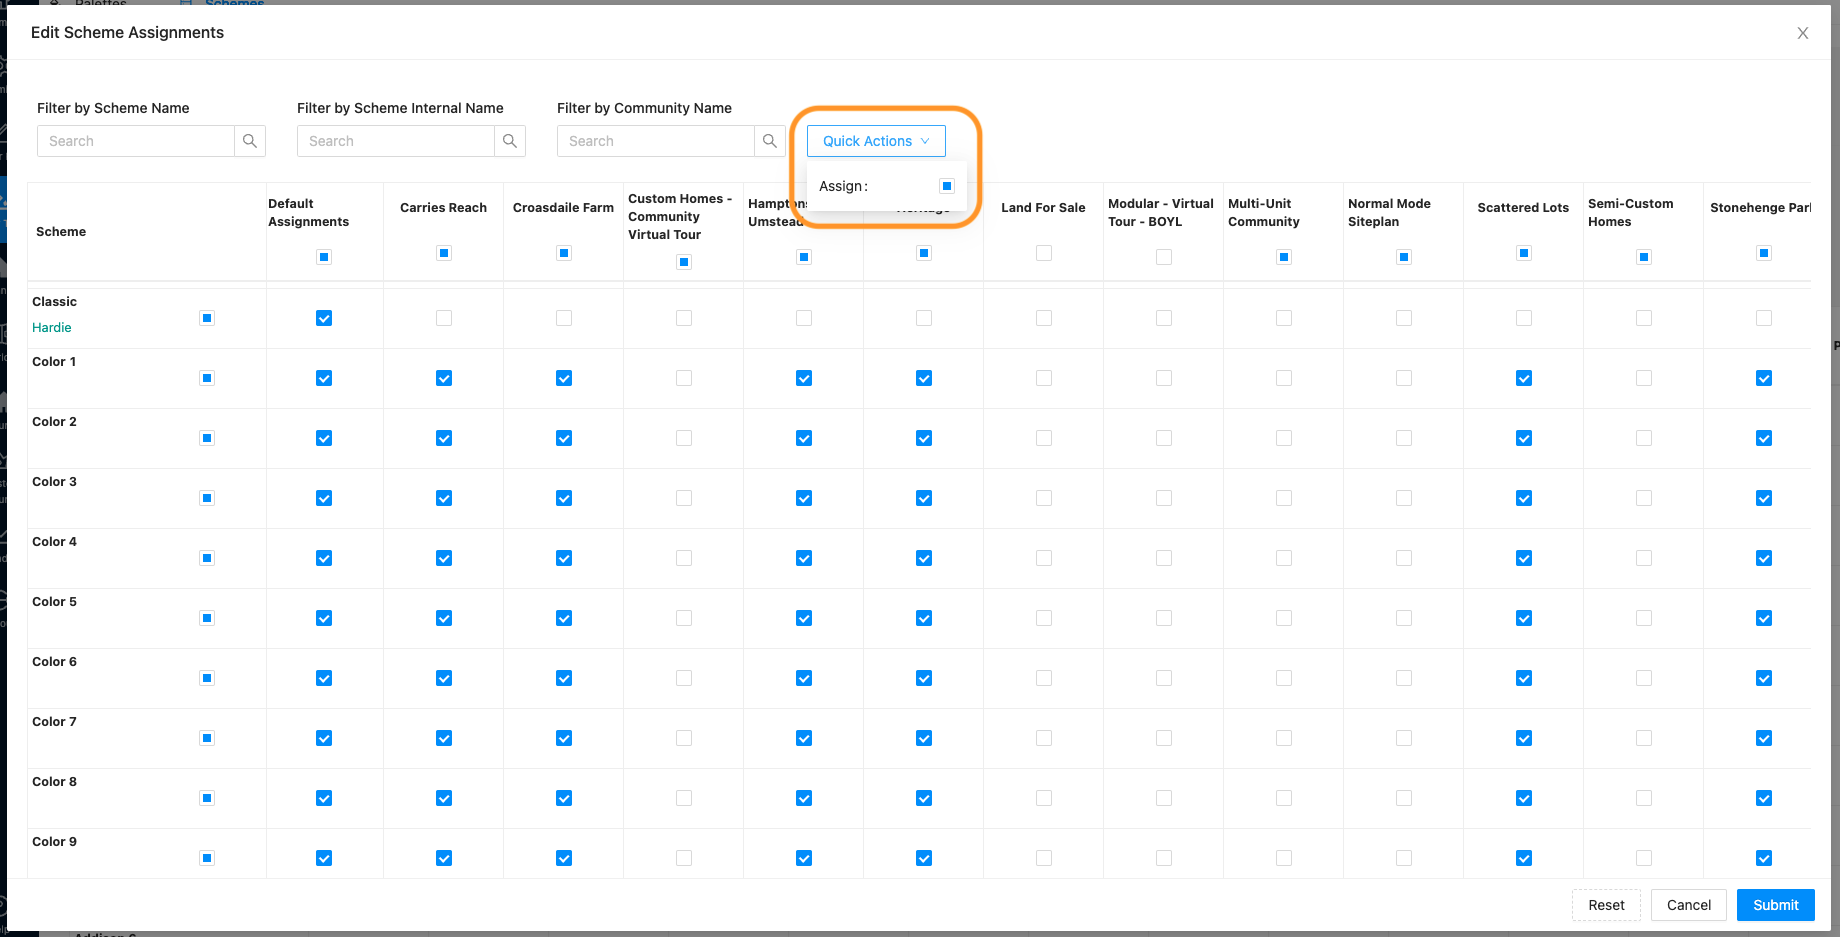
Also, the Quick Actions dropdown will assign or unassign the entire table. (This works with the filters, so you can filter down your view and use Quick Actions to assign or unassign. Only changes will be made to what you are actively viewing with the filters.)
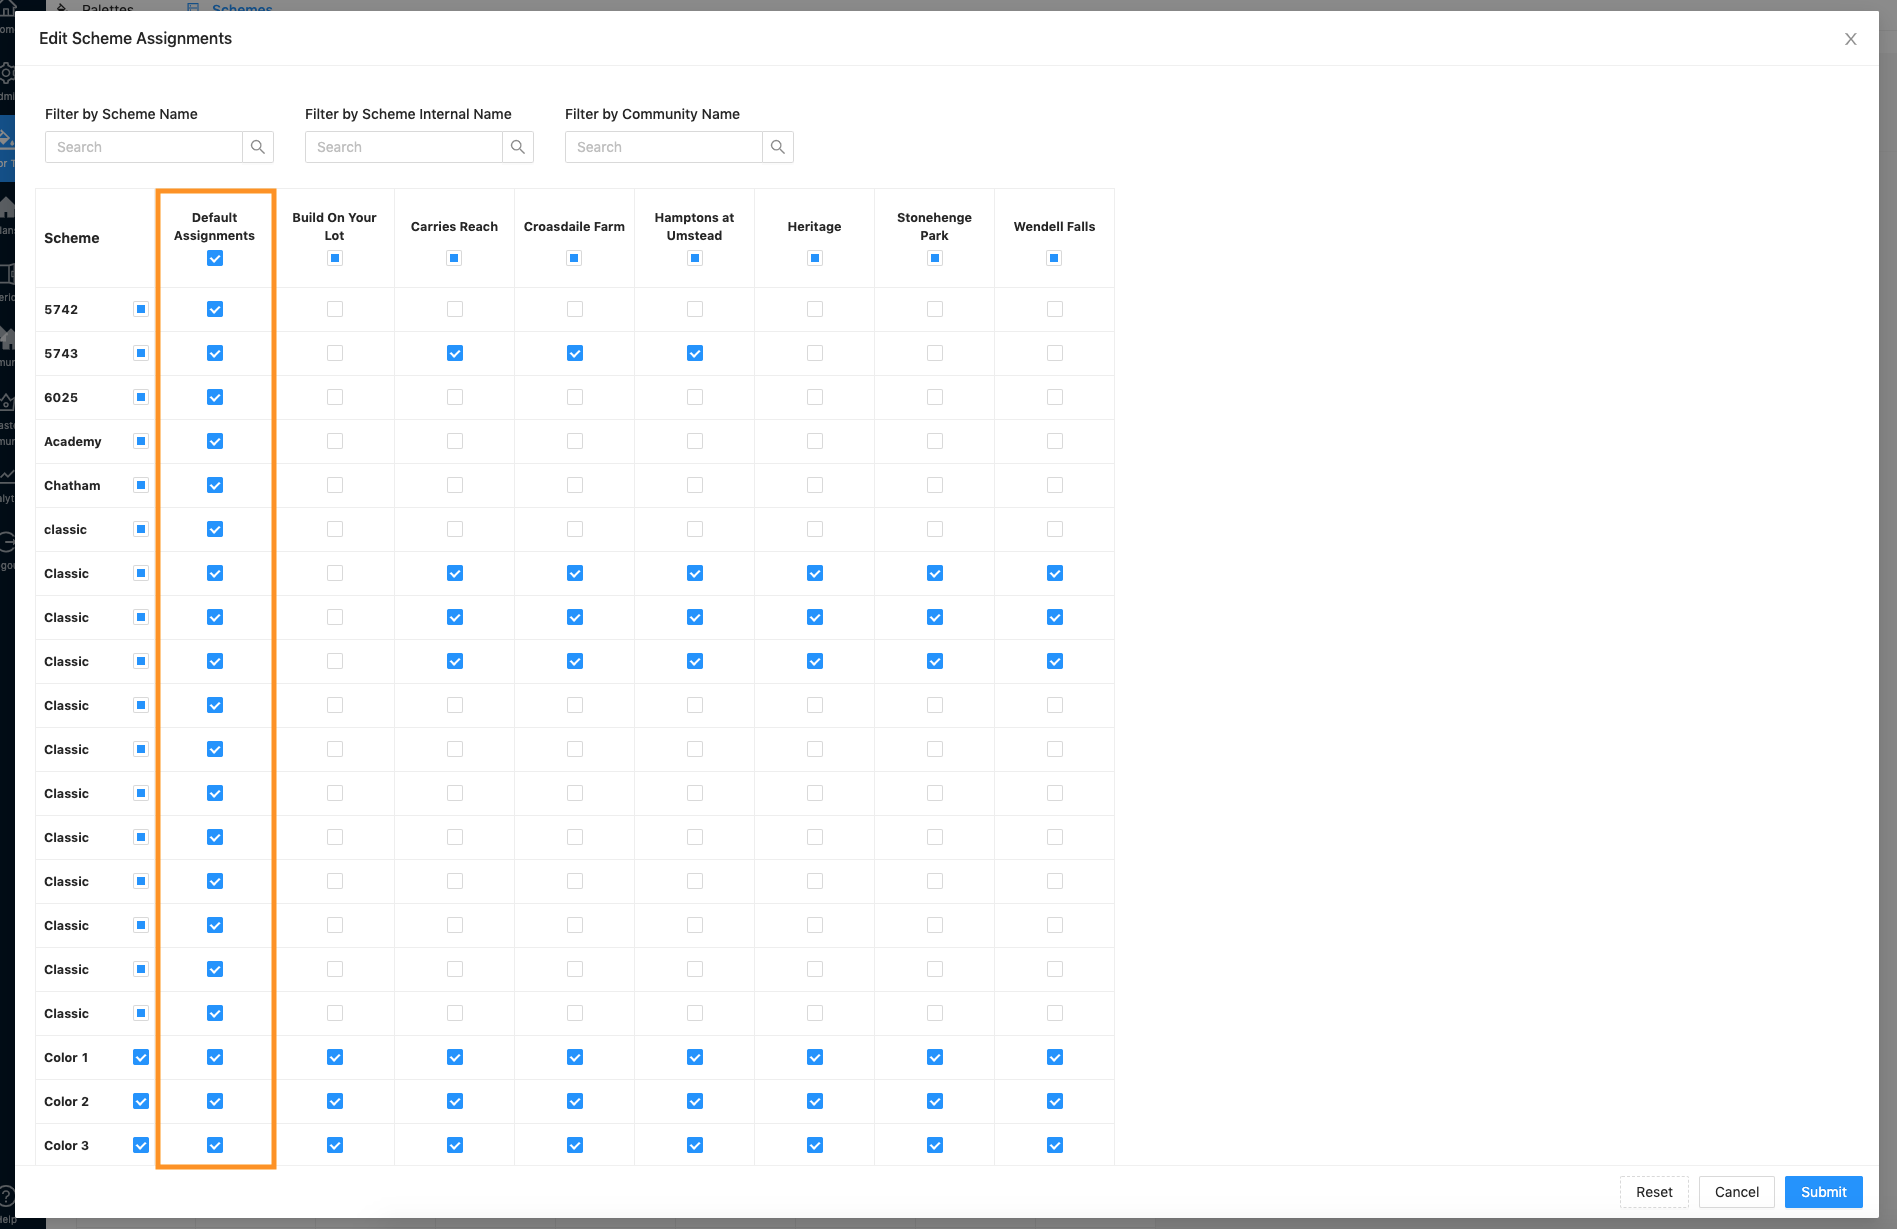
*Default Assignments serve an important function for Schemes in the backend dashboard: Default Assignments need to be assigned to display in the Schemes section of Exterior Preview in the Plan Repository. Exterior Preview is where you can update elevation thumbnails or download elevation images.
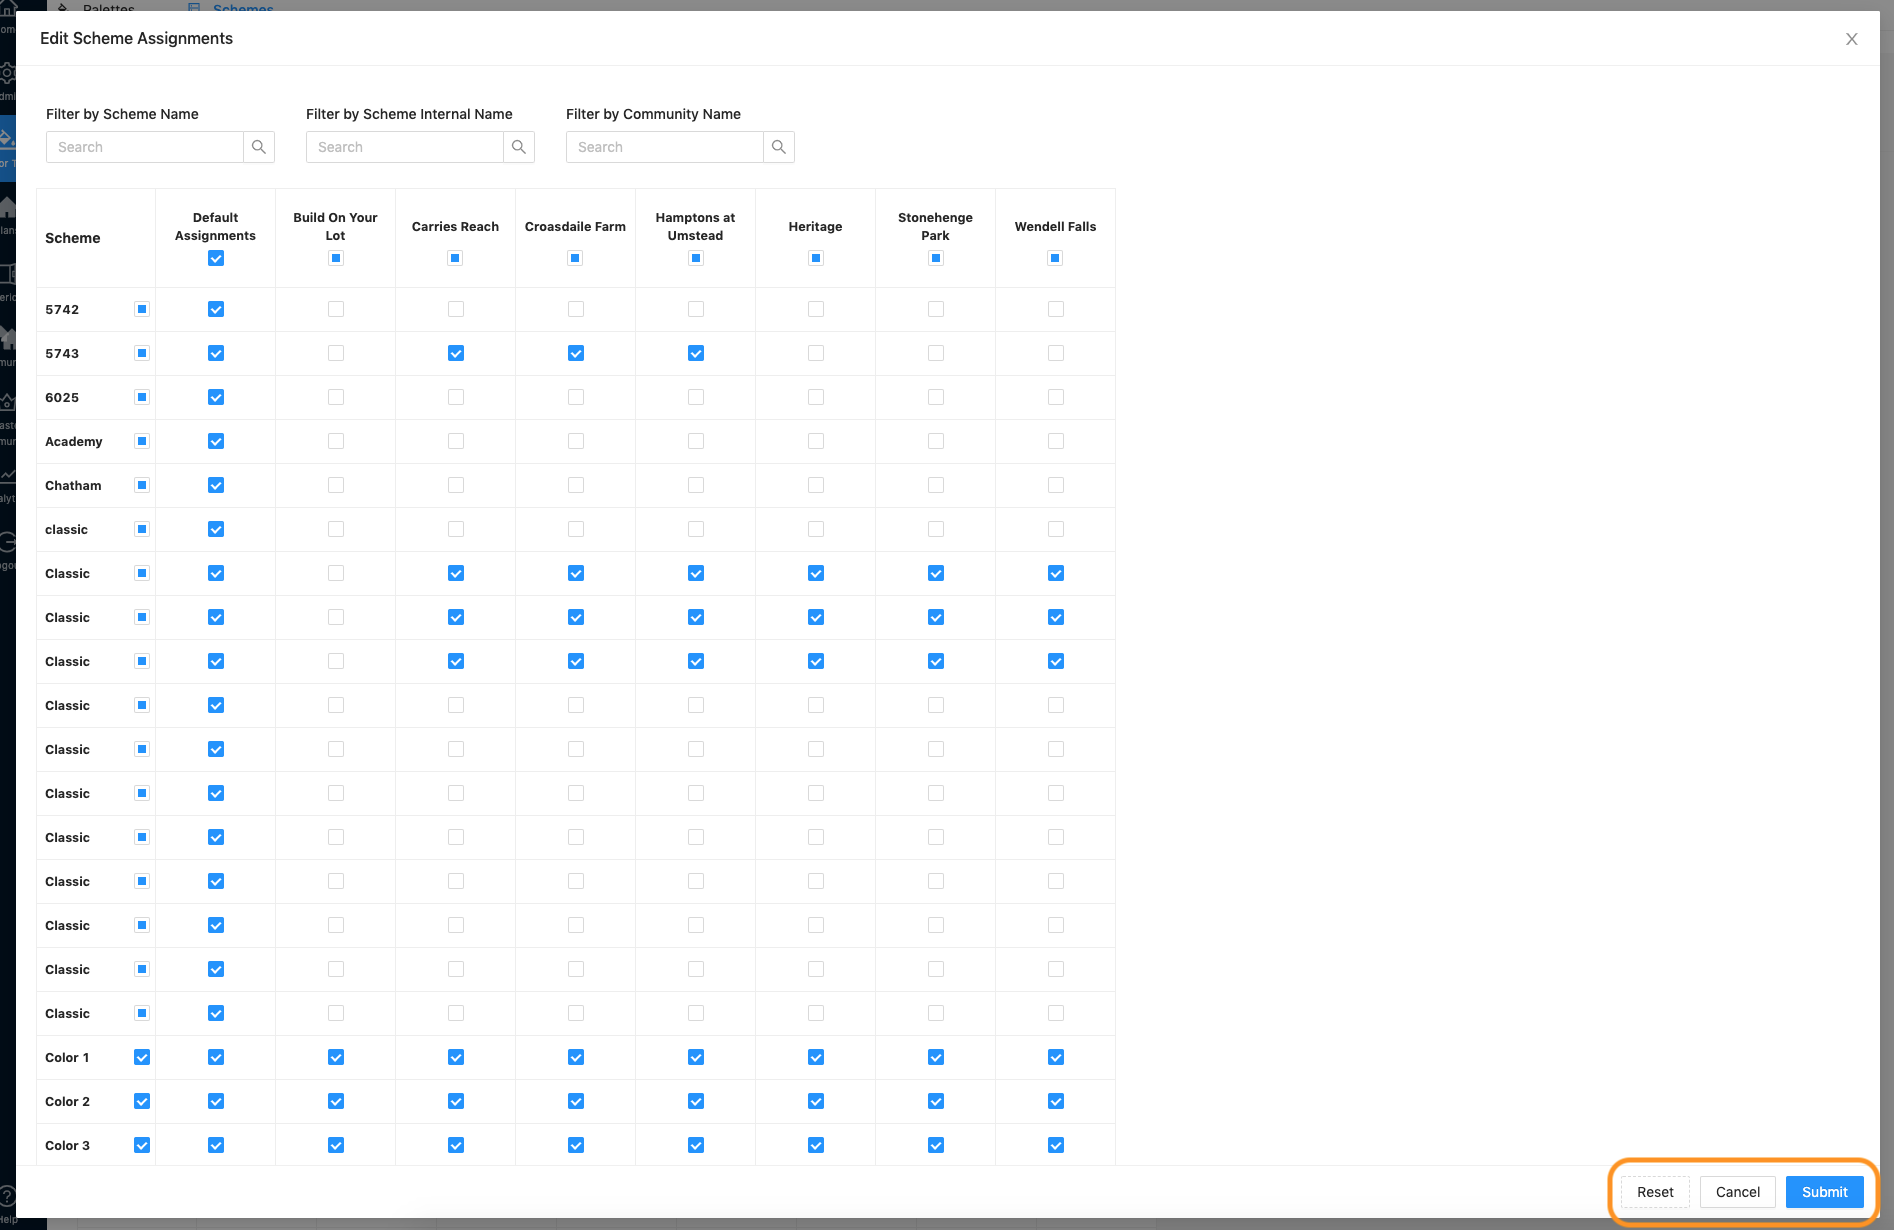
Click “Reset” if you need to undo any changes you have made since you opened the Edit Scheme Assignments window. Click “Cancel” to leave the window and not save any of your changes. Click “Submit” to save your changes.
5. Your Schemes are now assigned! Make sure your community color method is set to Scheme or Hybrid in order for these to display on the front end. Lastly, make sure your schemes are assigned to the correct elevations.