Are you adding/editing your brick or stone choices? Please read over this doc and then contact your Account Manager for how to proceed. Thank you!
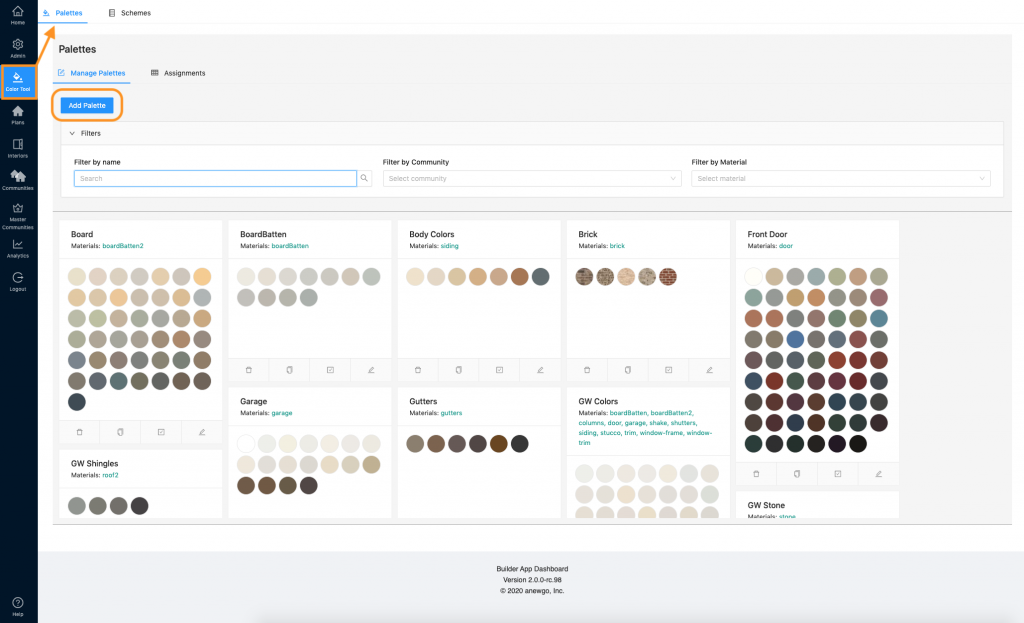
1. Navigate to Color Tool and then Palettes. Click “Add Palette”
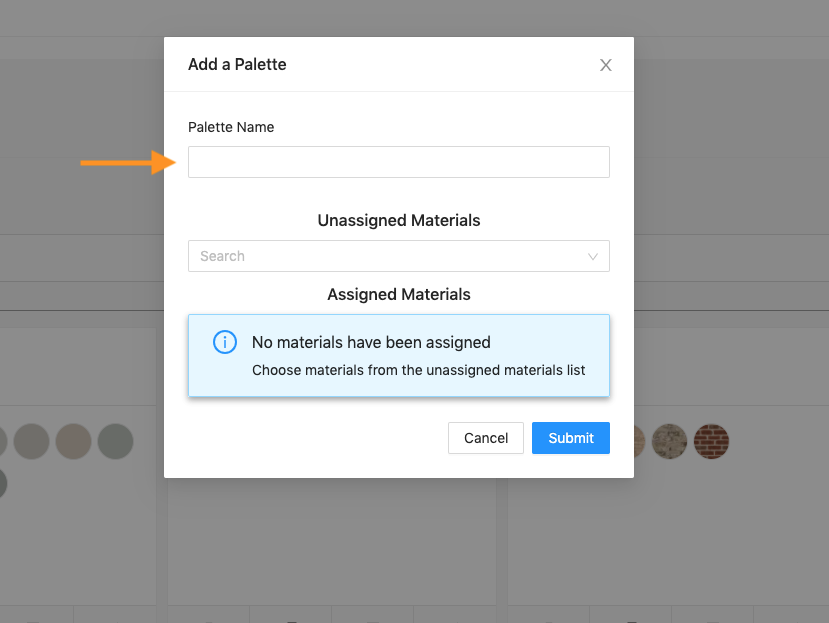
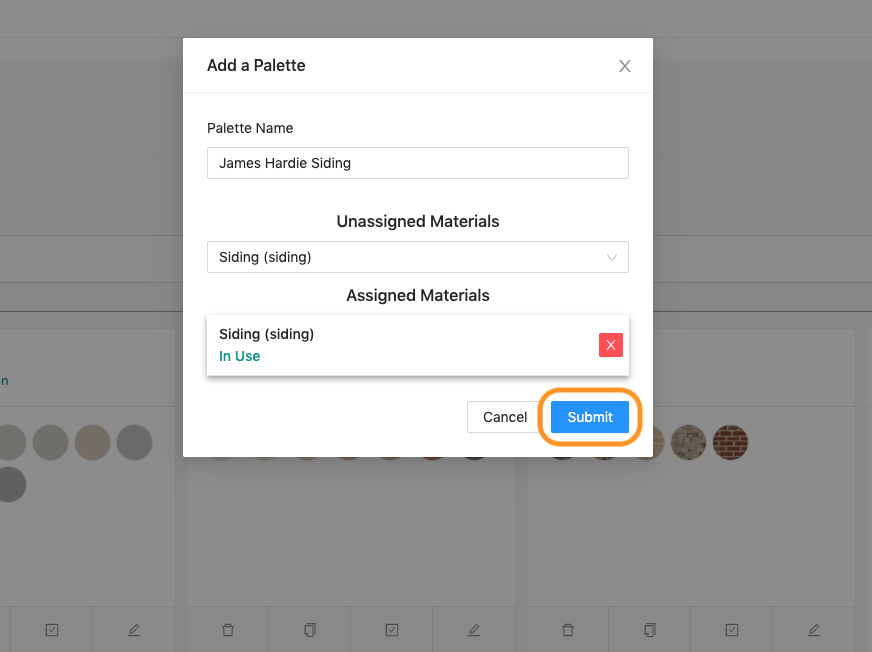
2. Fill in the Palette Name (i.e. Body Colors, Accent Colors, Trim Colors, etc.). The palette name does not appear on the front end, so use whatever reference needed.
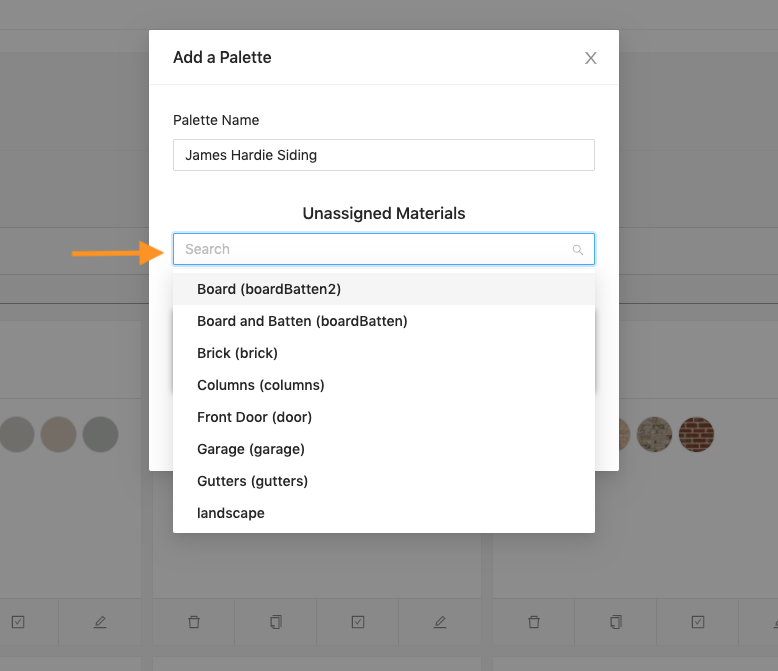
3. Then select the materials you would like to have the palette applied to (this is extremely important because this tells the app which materials on your exterior get these colors). You can assign more than one material to a palette (i.e. Body Colors assigned to Siding, Shake, BB).
4. The notation “In Use” means that material is currently active in your app. Click “Submit” when you are done.
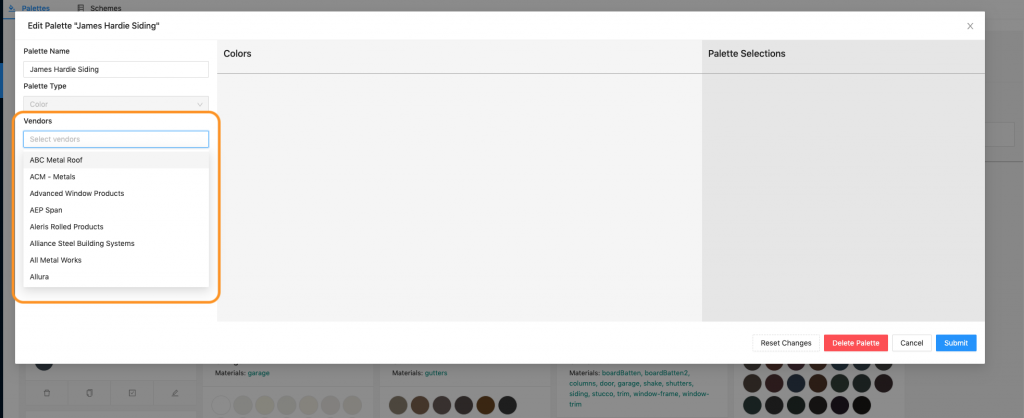
5. You will be prompted to edit the new palette. Here you will choose your vendor and paint colors. First, select your vendor.
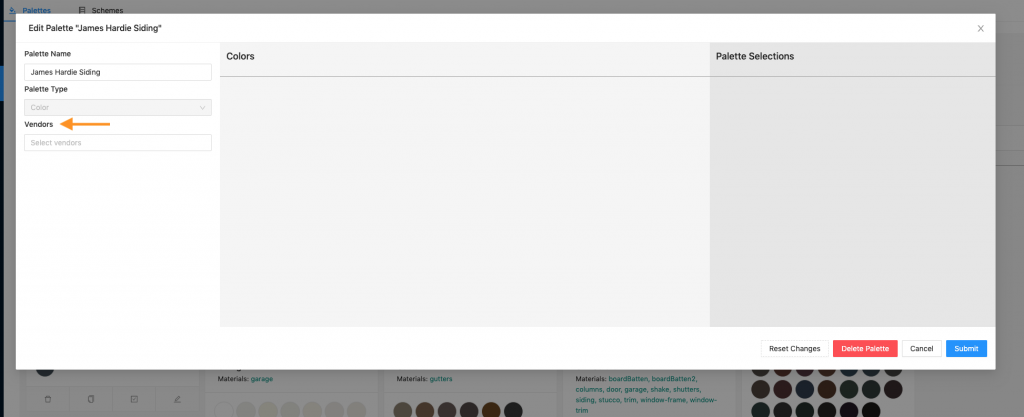
- We have an extensive color library we share between builders. We keep it as accurate to vendor swatches/samples as possible. Please email kim@anewgo.com if you need a new vendor and/or colors added to our library.
- Custom colors are available by request for an additional fee. Please contact your Account Manager for details.
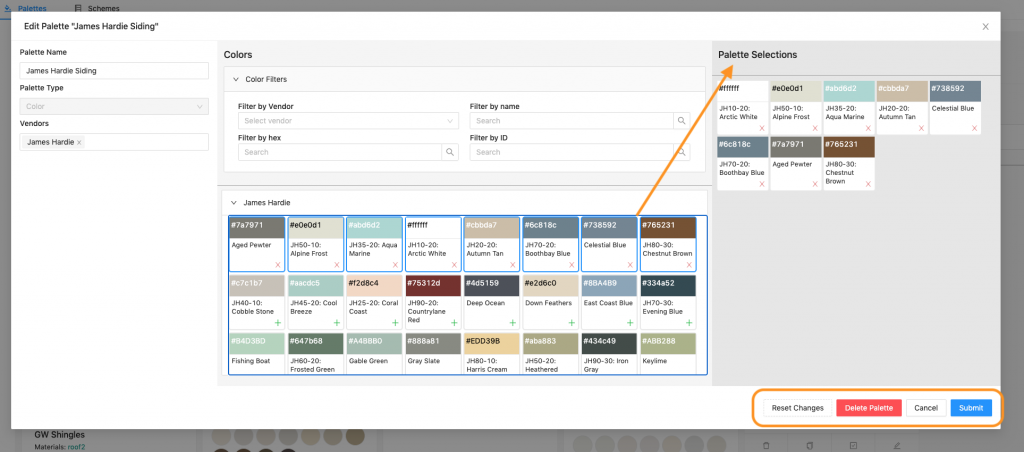
6. Now you can filter through the colors by name, hex or ID. Click the green + to add your colors to your palette.
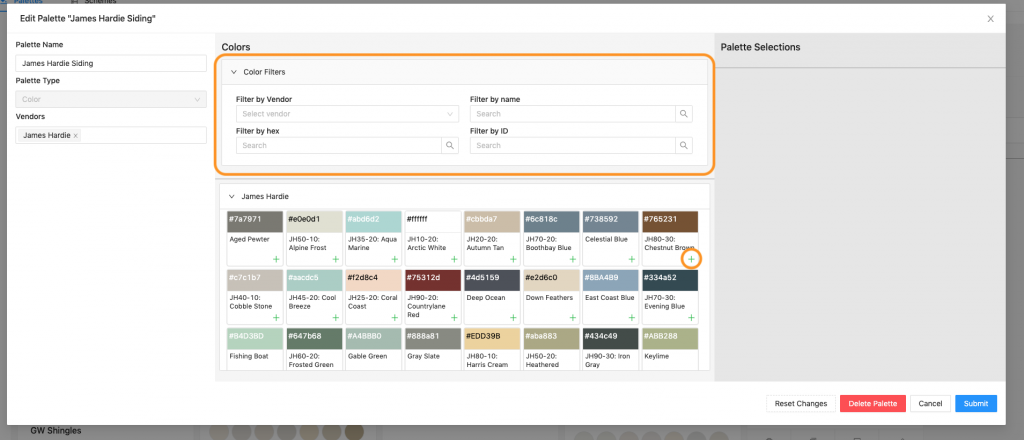
7. Your selections will appear in the Palette Selections area. Click “Reset” if you need to undo any changes you have made since you opened the Add Palette window. Click “Cancel” to leave the window and not save any of your changes. Click “Submit” to save your changes. You can also “Delete Palette” if needed, but be 100% sure you are ready to delete it before you do!
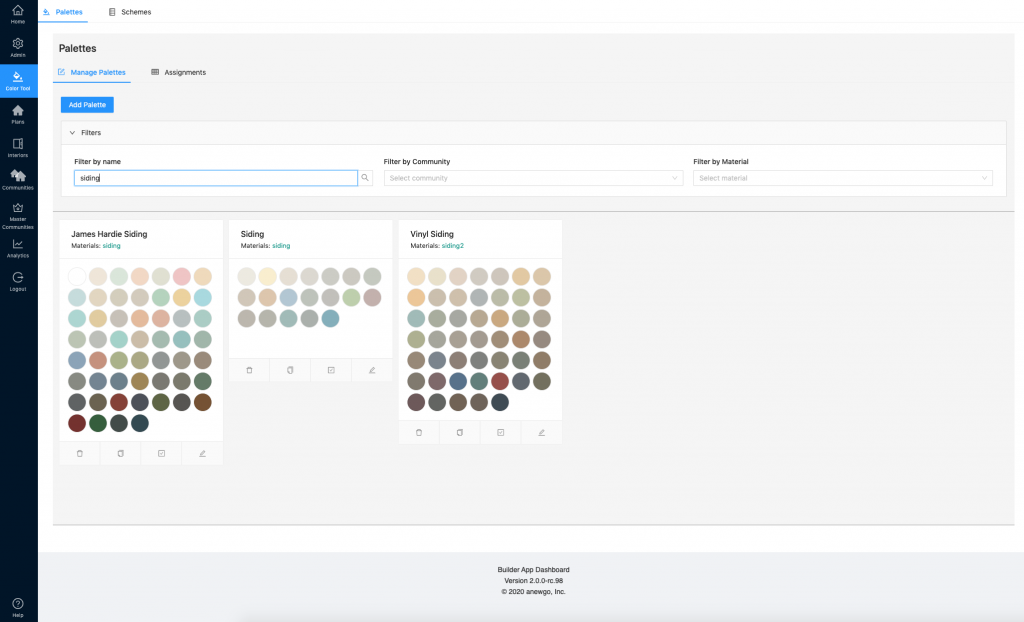
8. Your new palette will now appear in the palette board with all of your other palettes. Congratulations – you have successfully added a new palette! Next step > Assign your palette to the correct communities!
