
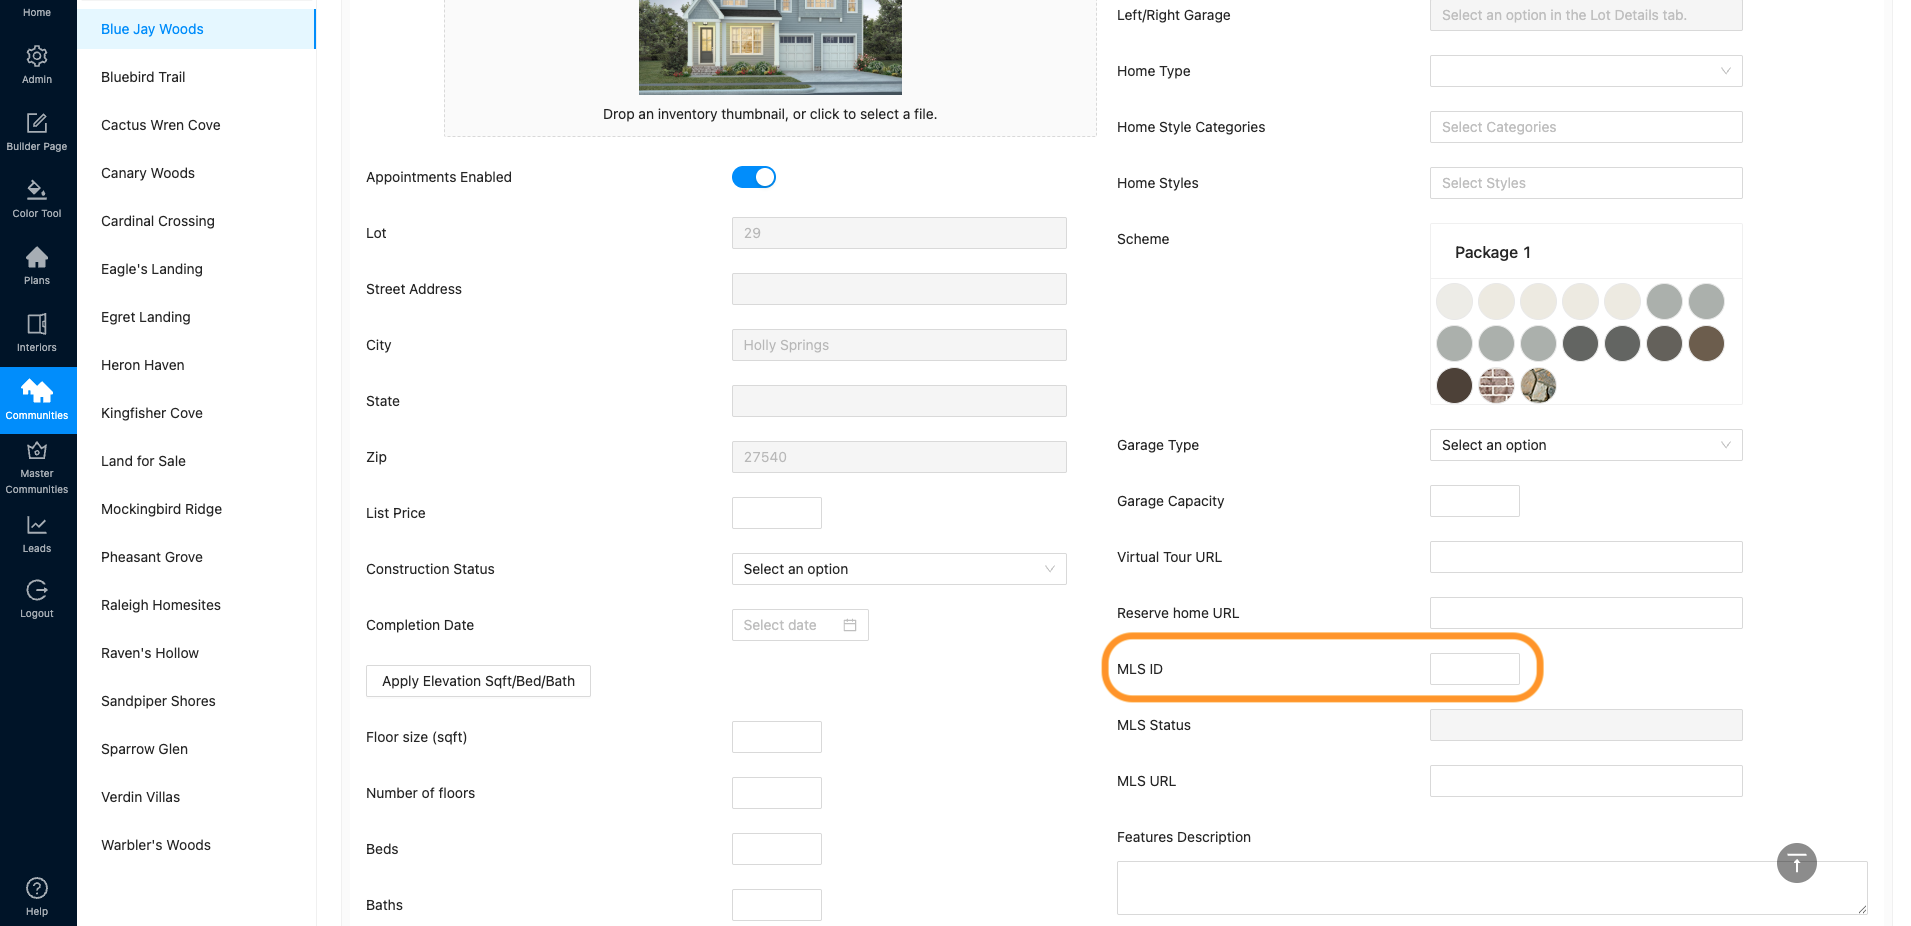
- Navigate to the 2.0 backend dashboard. Follow this doc and see step 8 for where to enter MLS information for Inventory Homes. Enter the MLS ID for each Inventory Home needed.
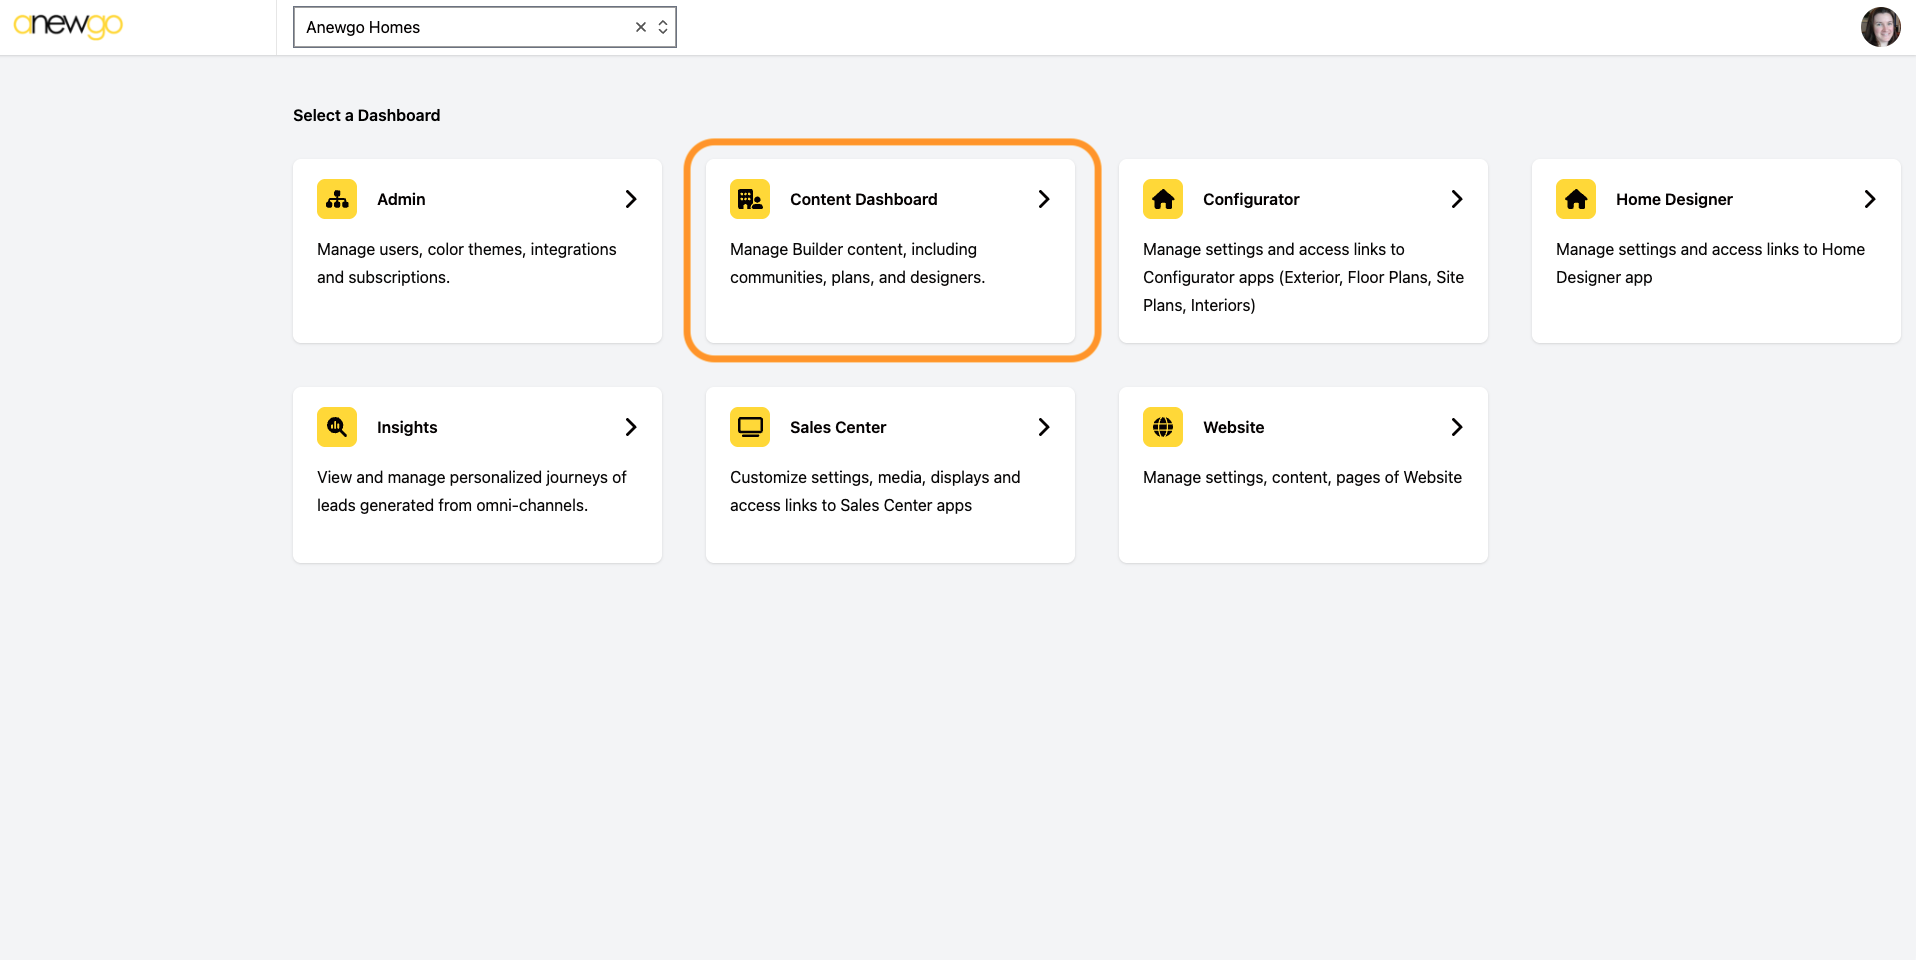
2. Navigate to the 3.0 backend console. Click Content Dashboard.
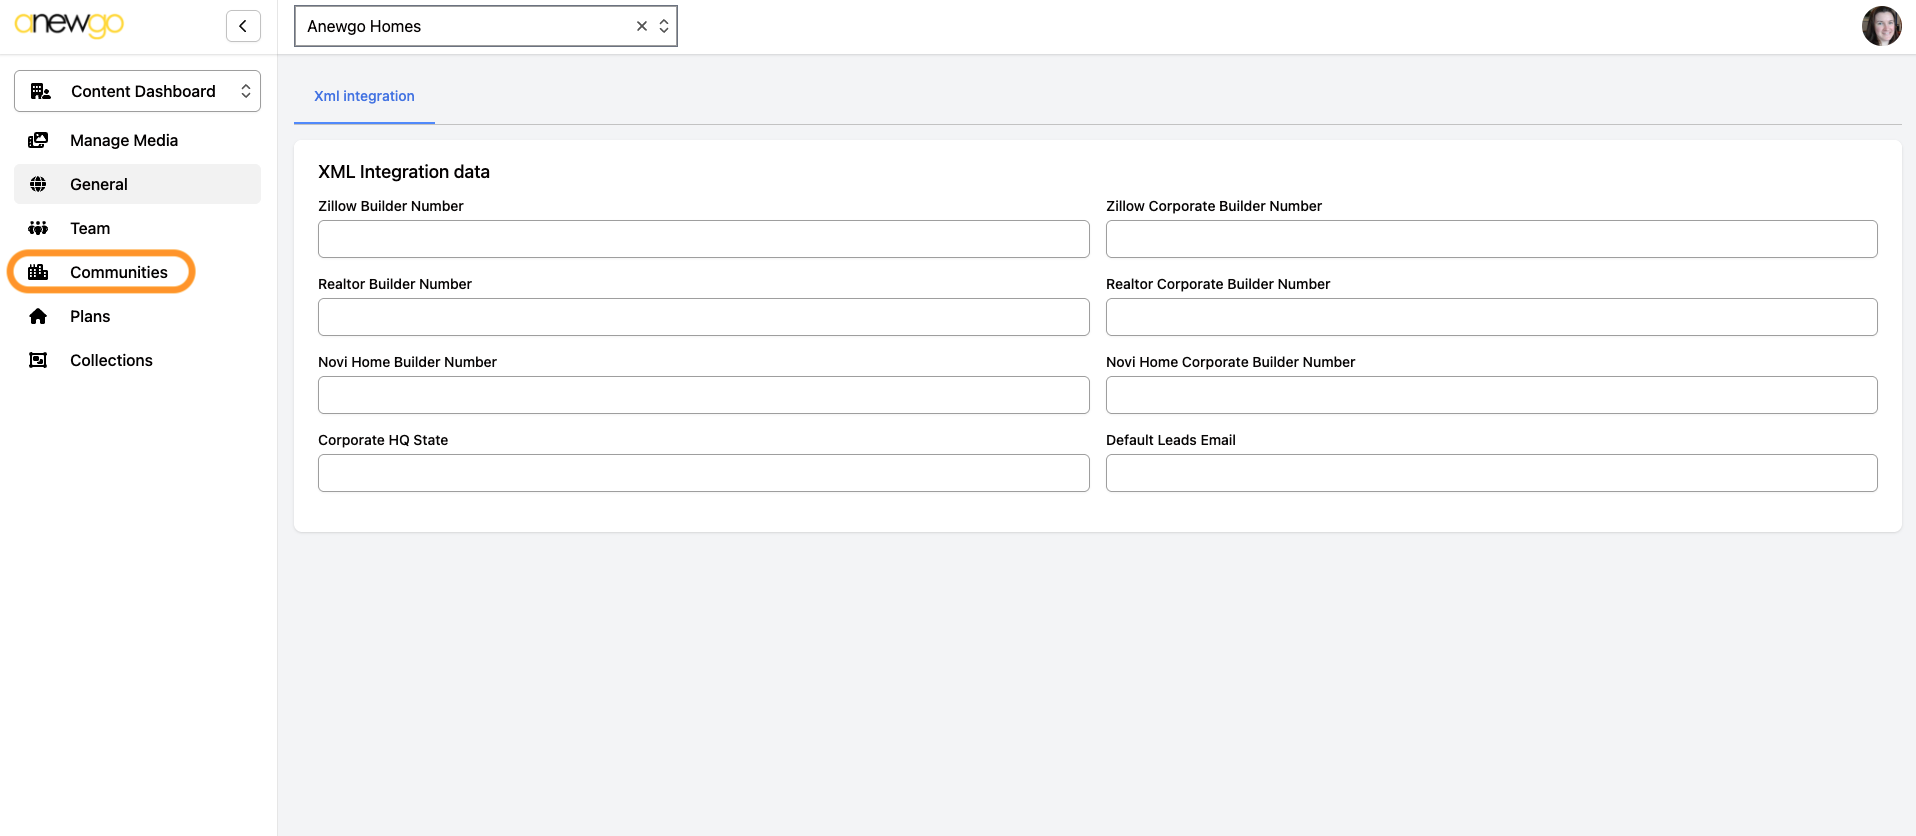
3. Click General
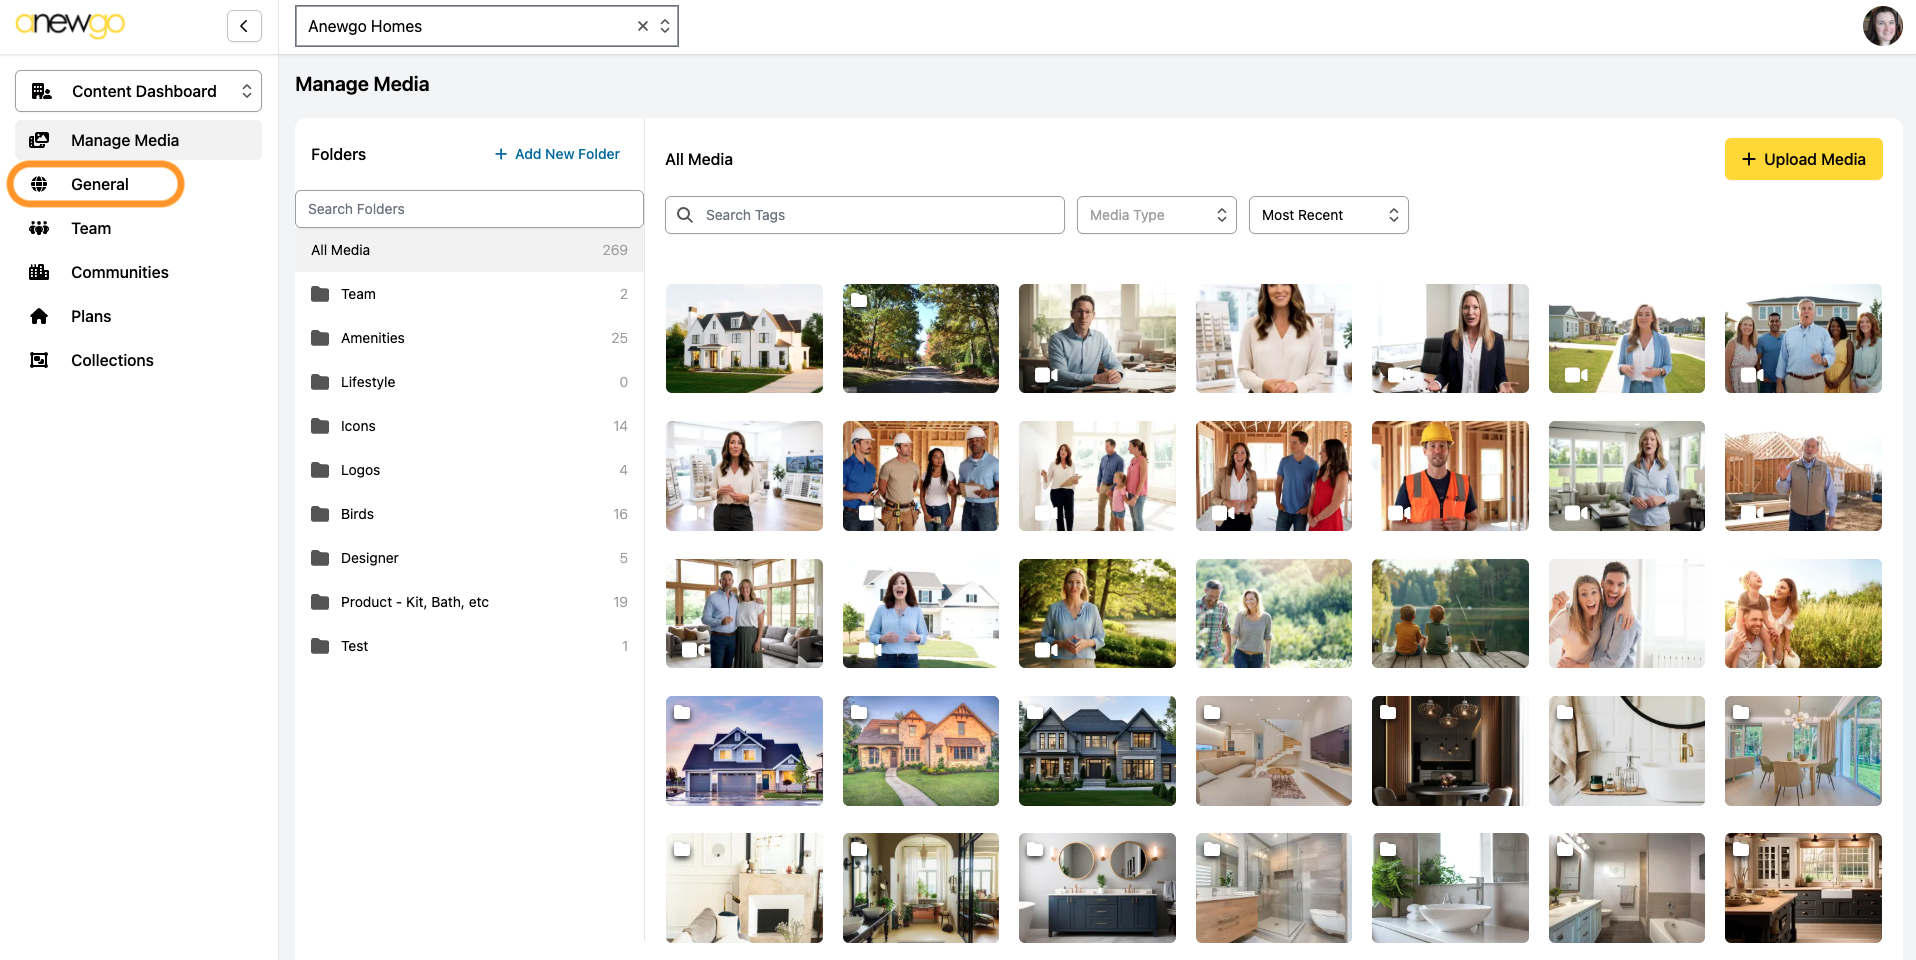
4. Enter applicable information:
- Work with the portal to identify the Builder and Corporate Builder Numbers
- Corporate HQ State should be your state abbreviation
- Default Lead Email is the email that portal leads will be sent to

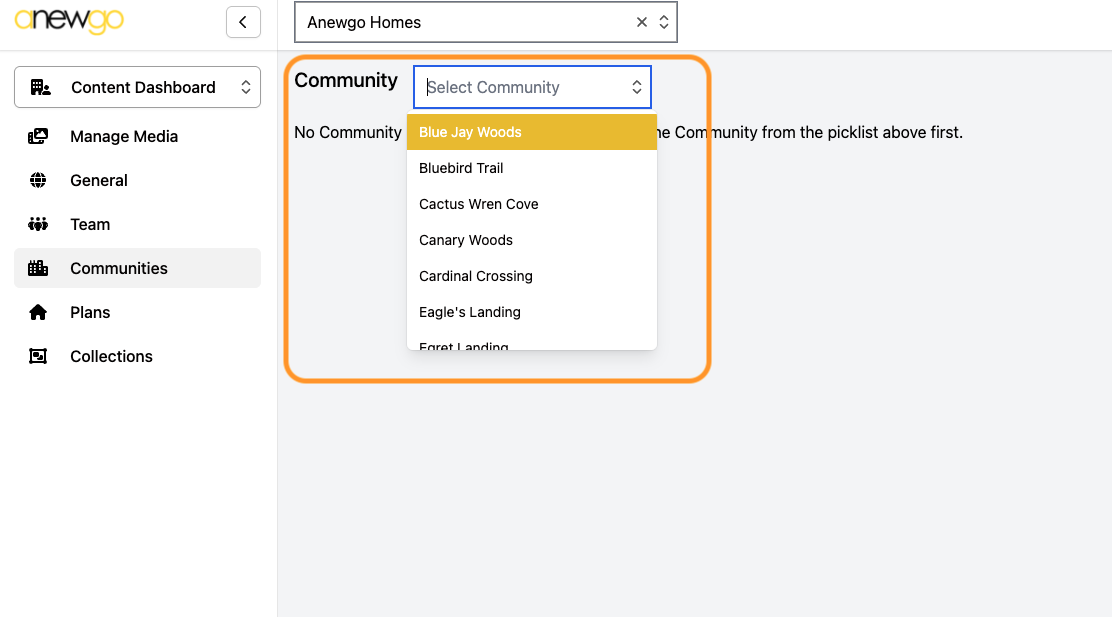
5. When done, click Communities
6. Select the community from the dropdown menu.
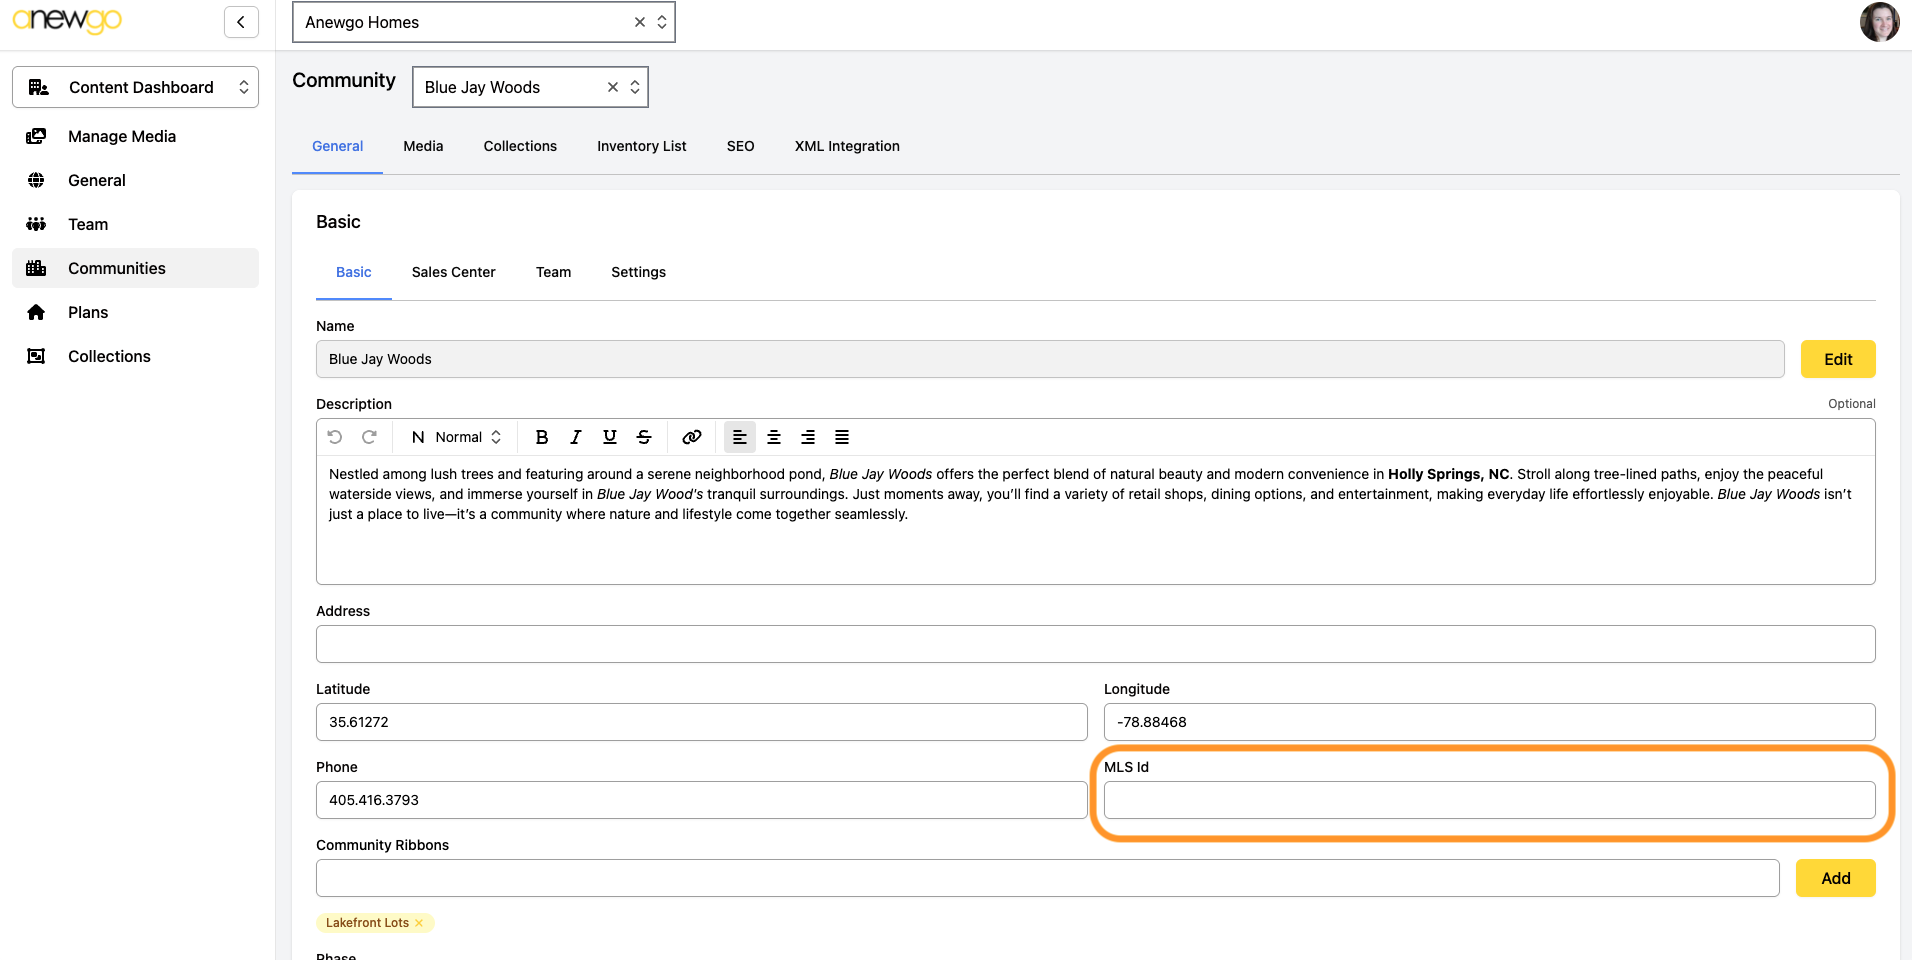
7. Enter the local MLS ID at the community level. List of Local MLS IDs: https://newhomefeed.com/mls-identifiers
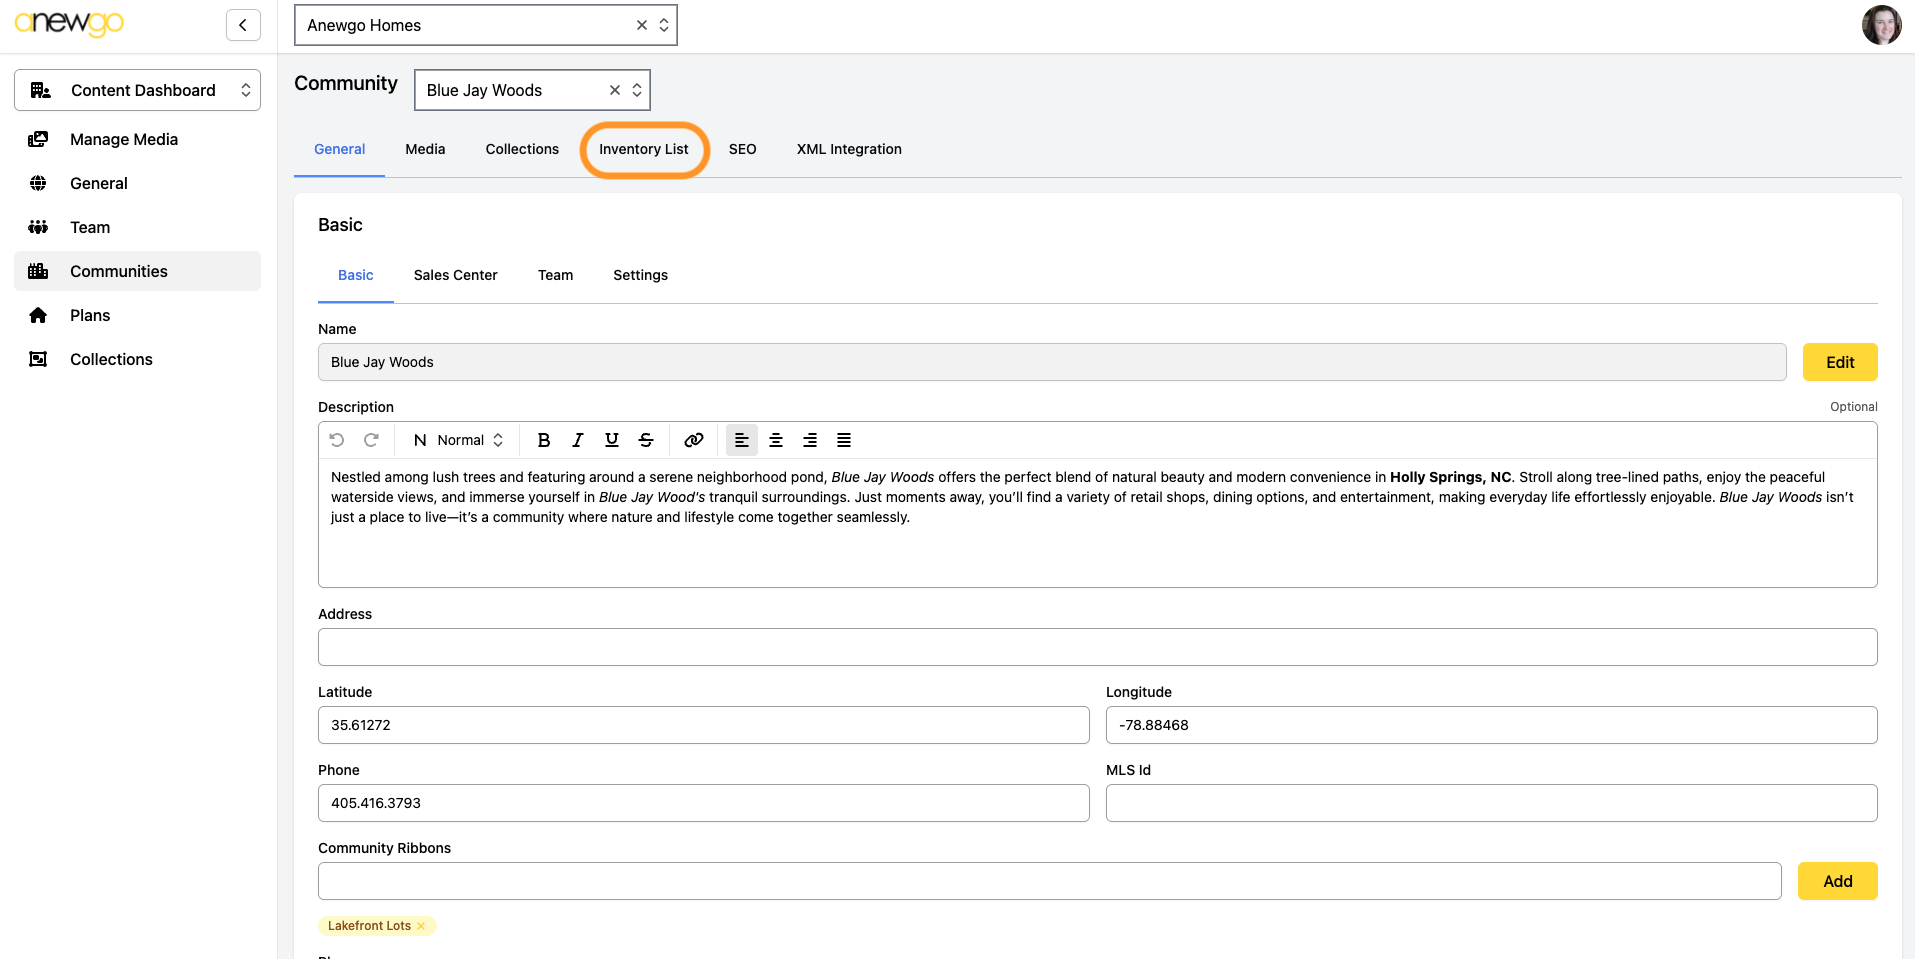
8. Click Inventory List
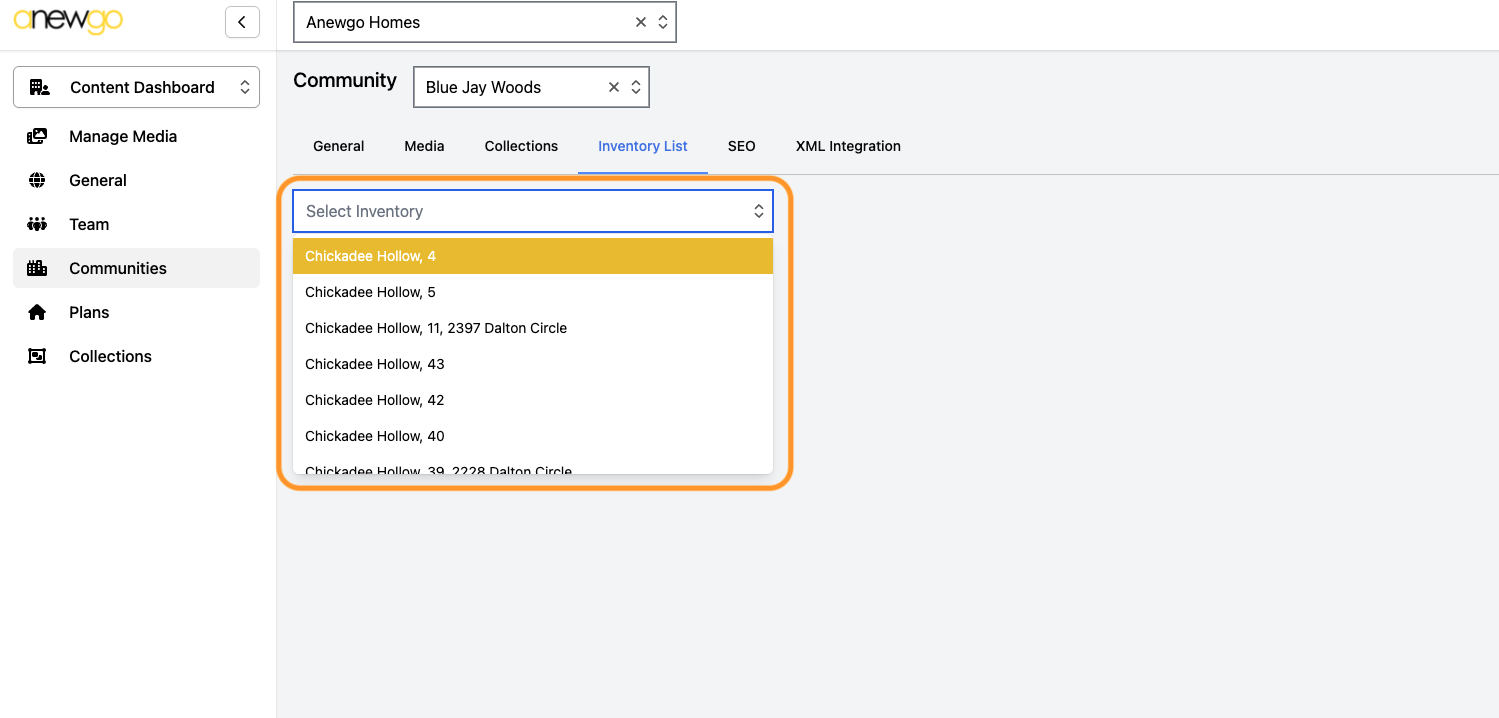
9. Select an Inventory Home from the dropdown.
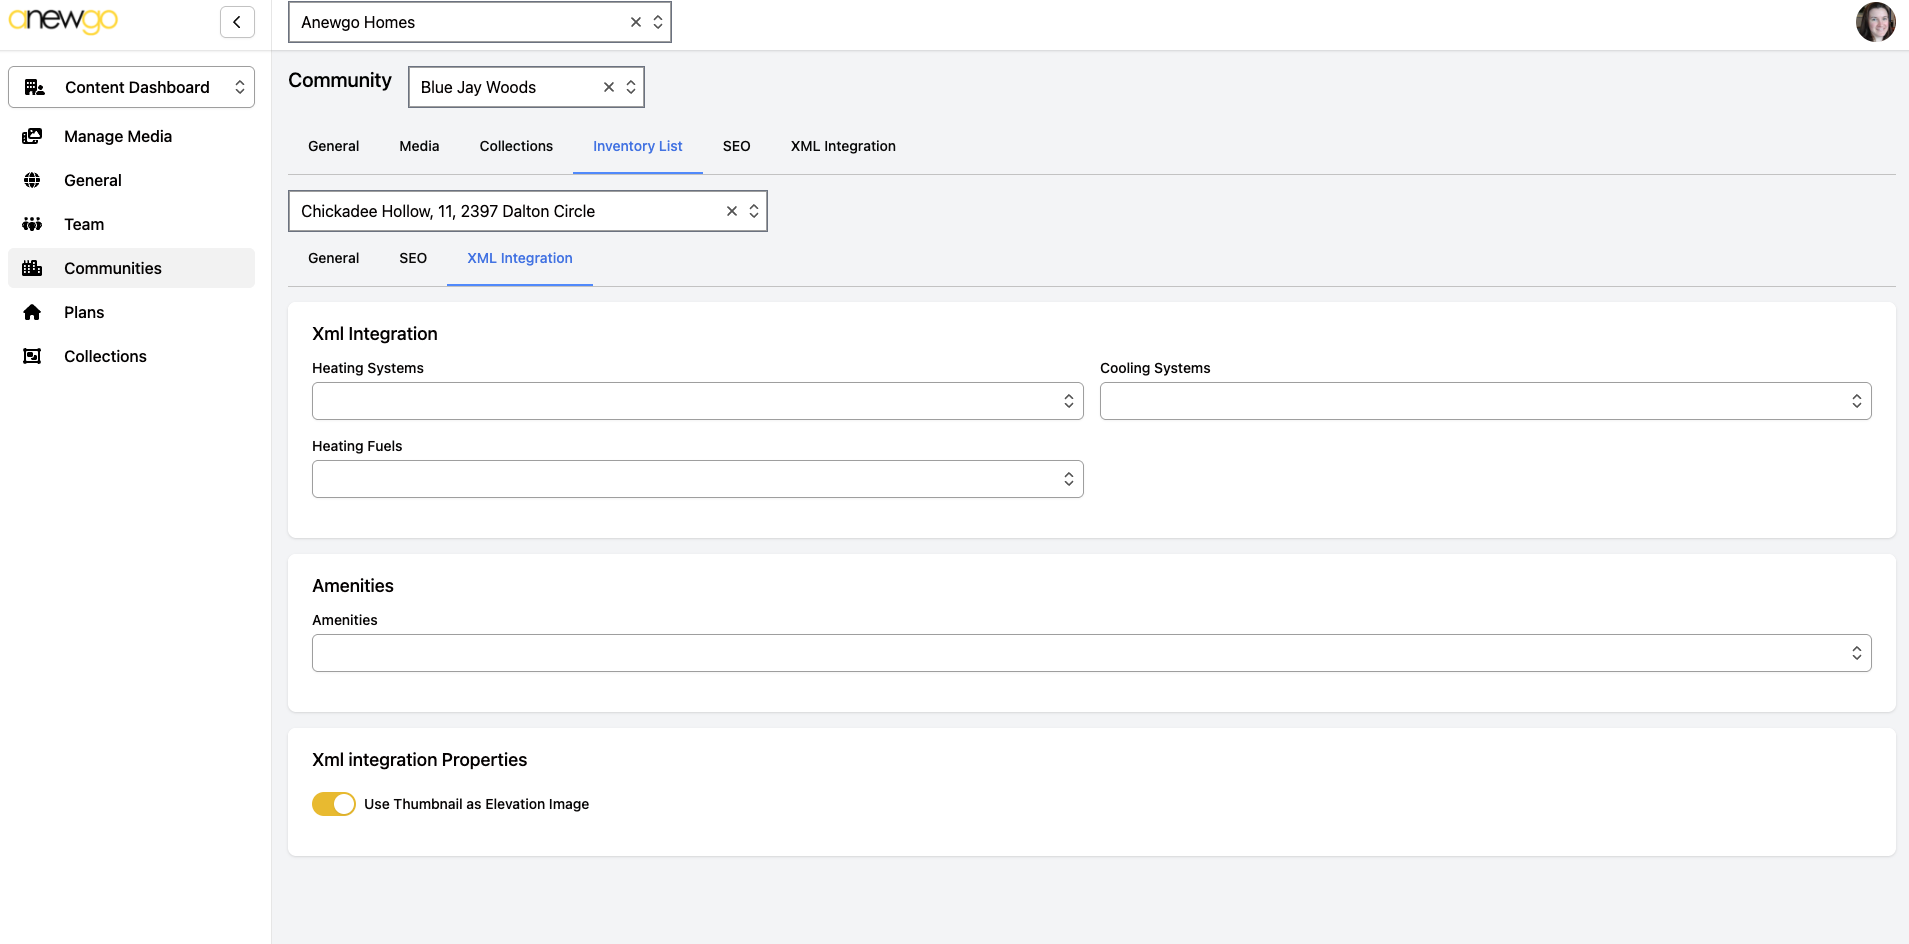
10. Click XML Integration
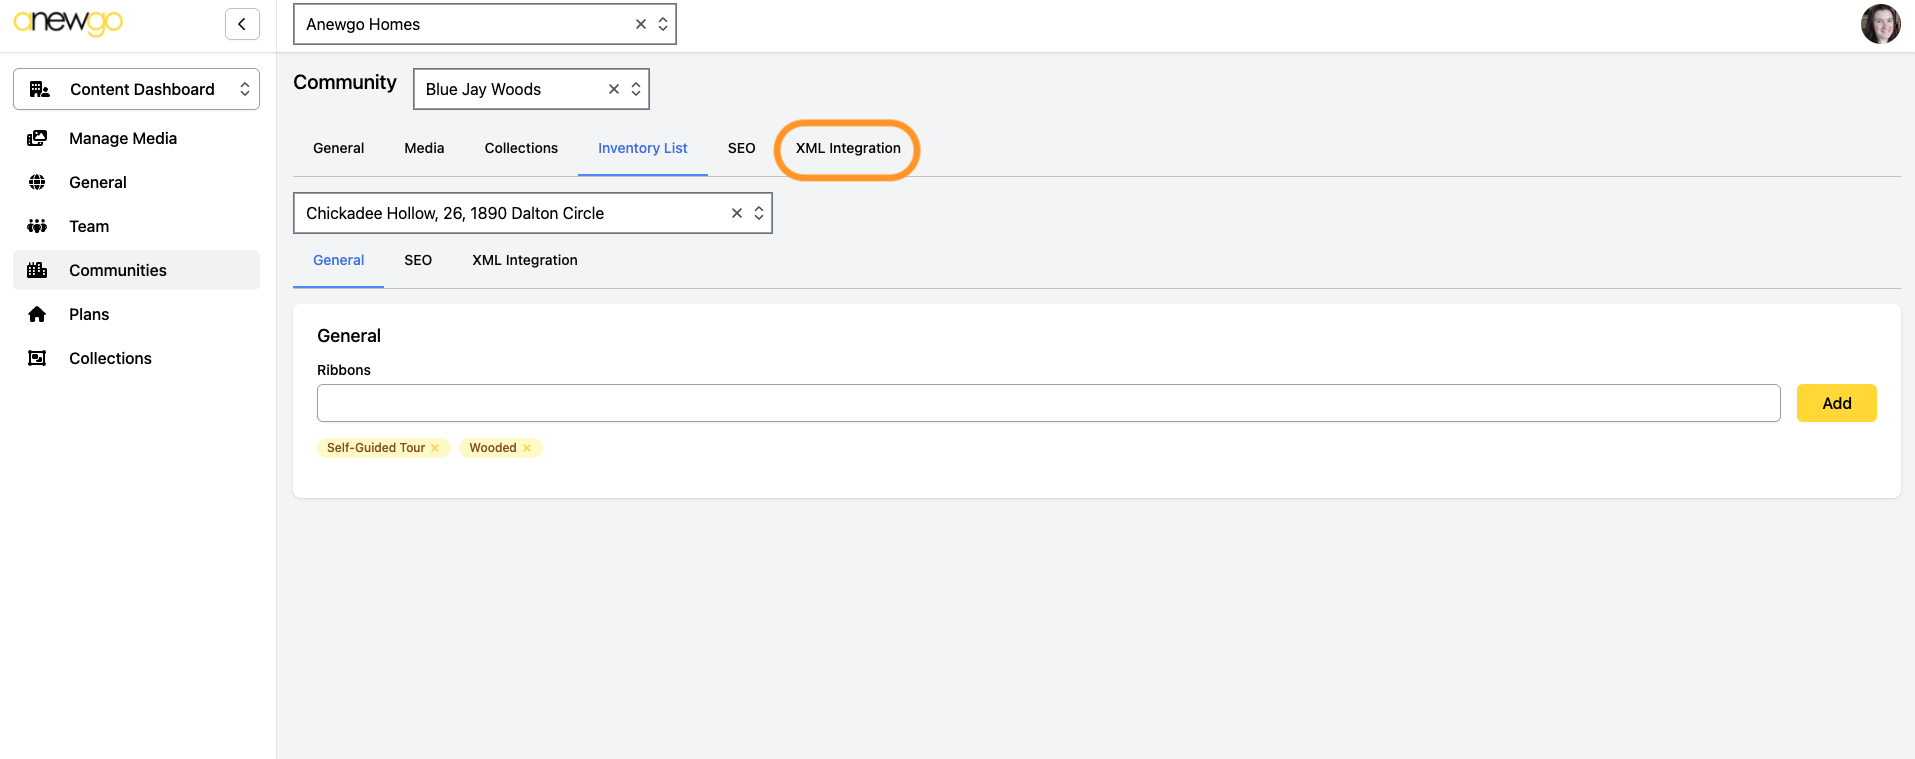
11. Add Inventory Home data and repeat for any/all Inventory Homes needed.
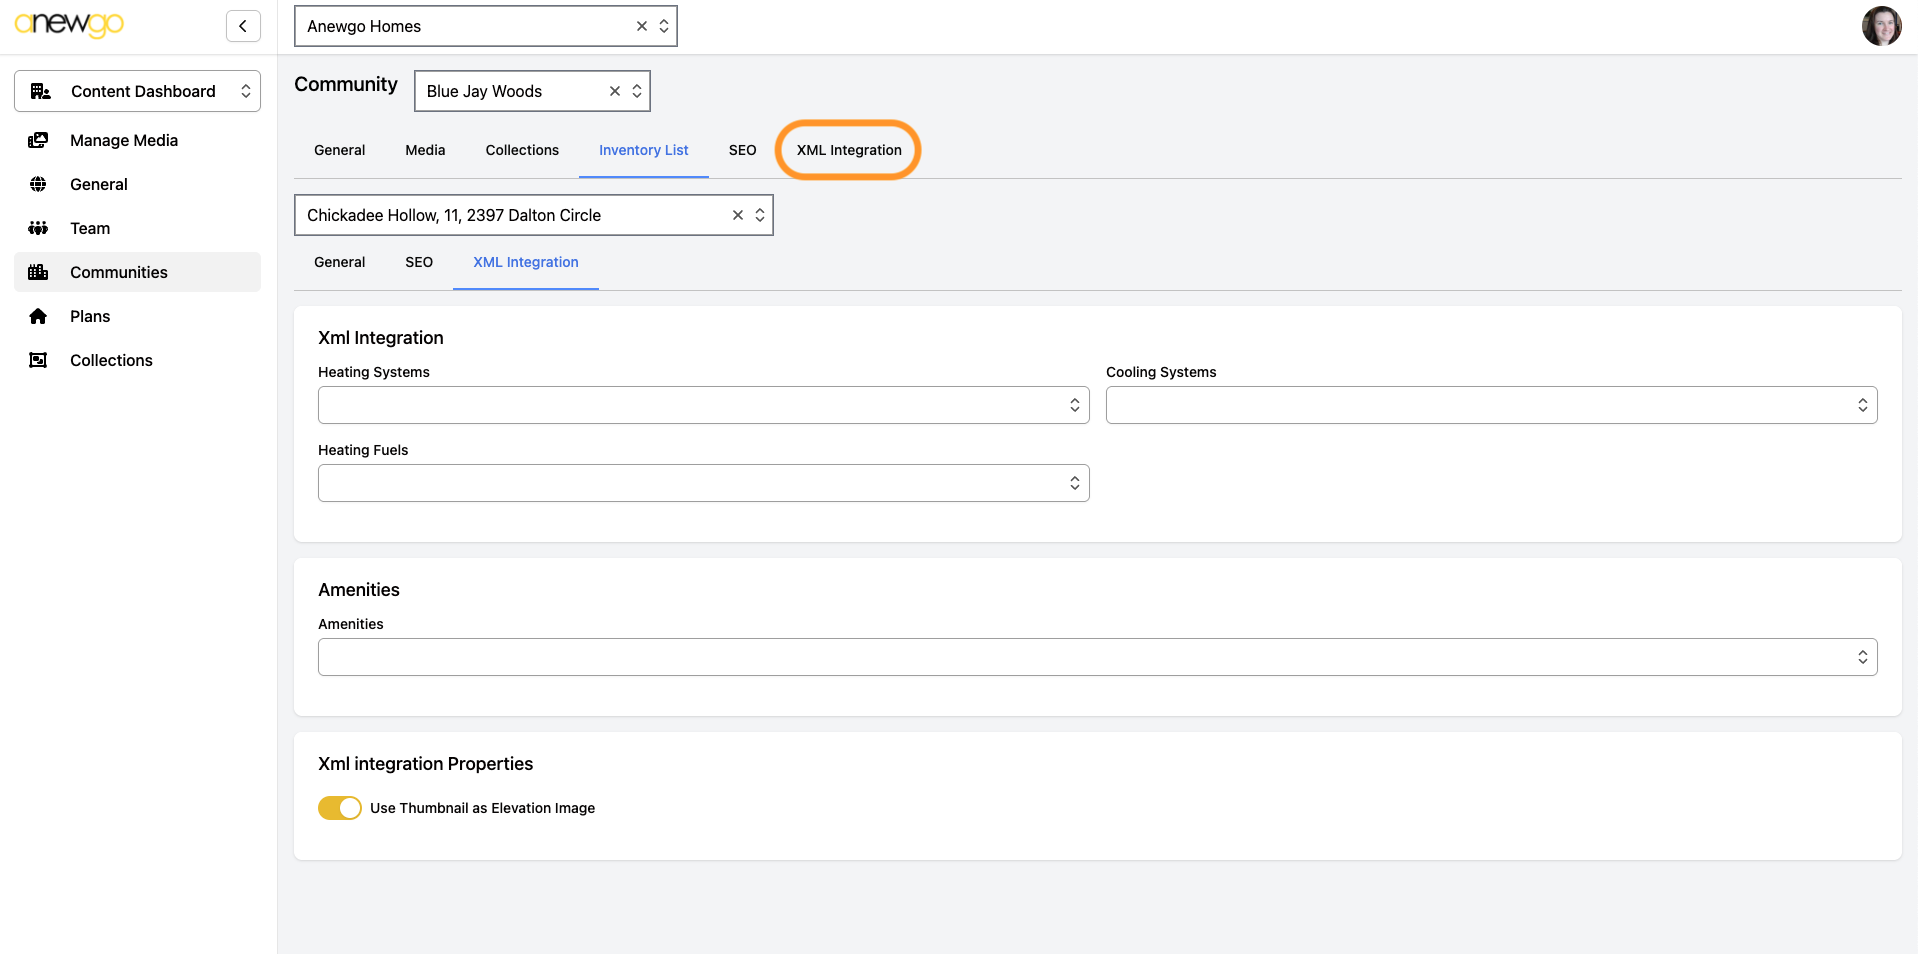
12. Then click XML Integration at the community level.
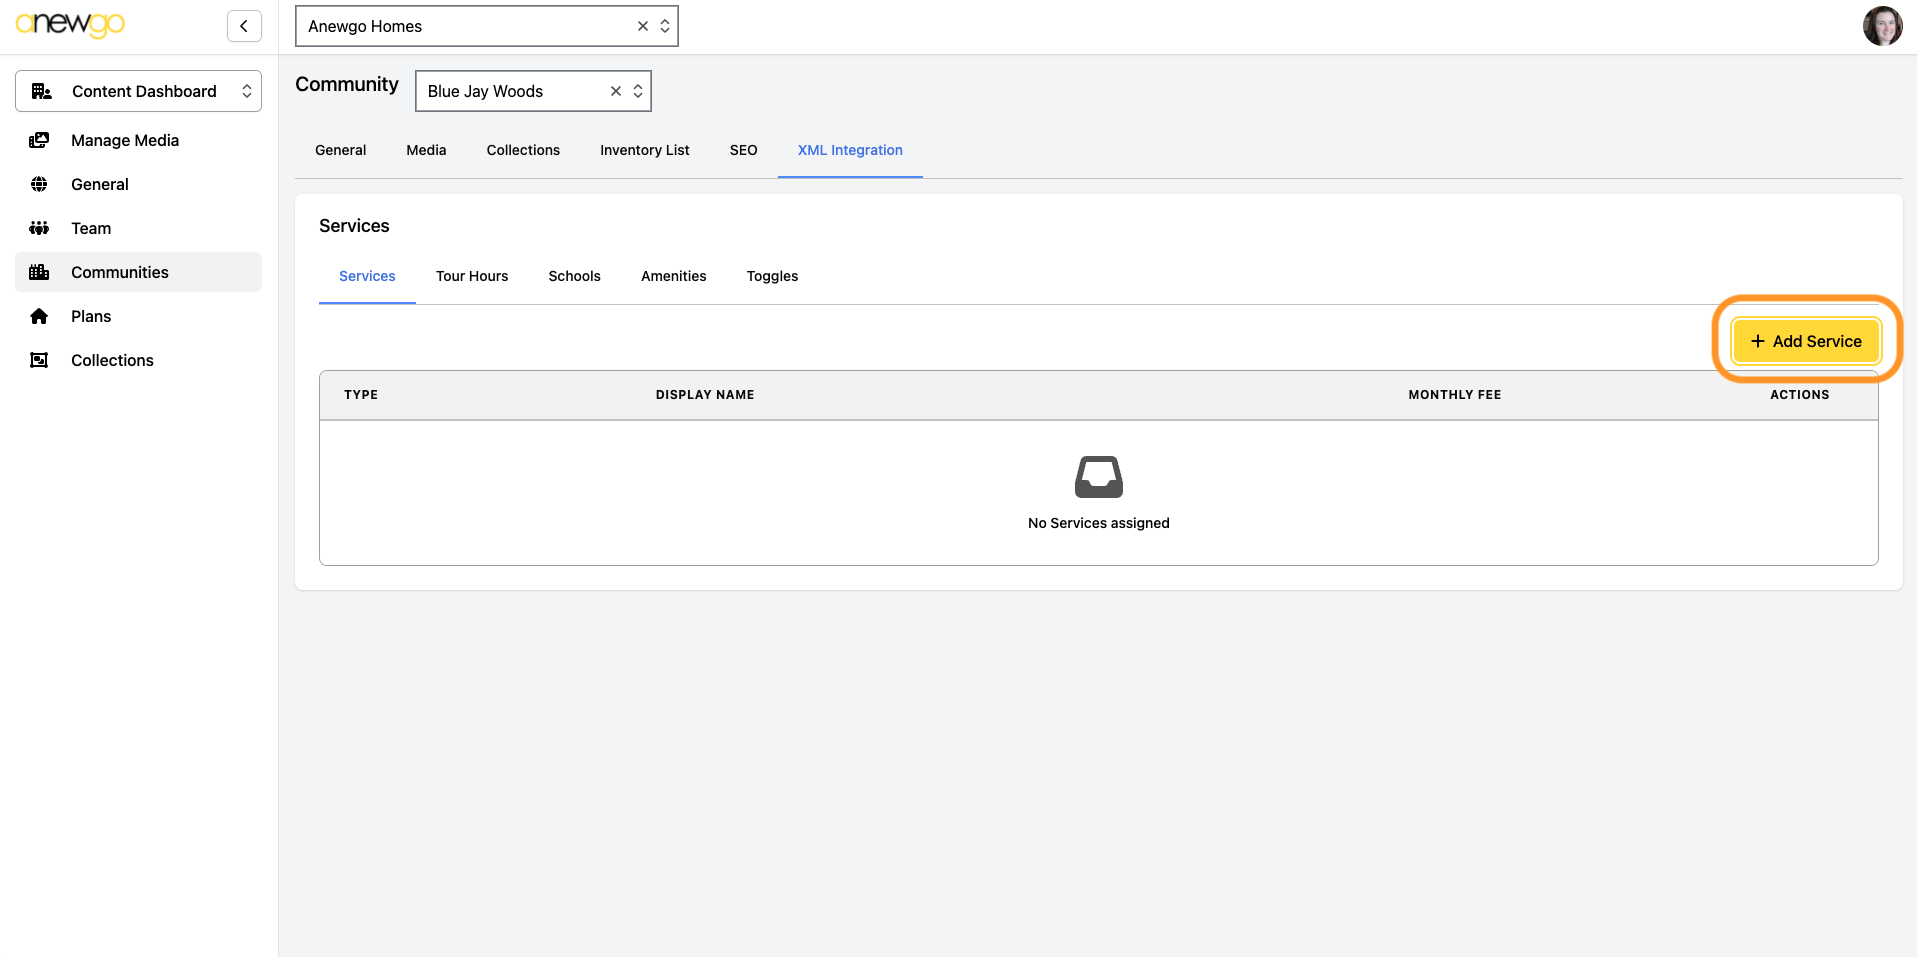
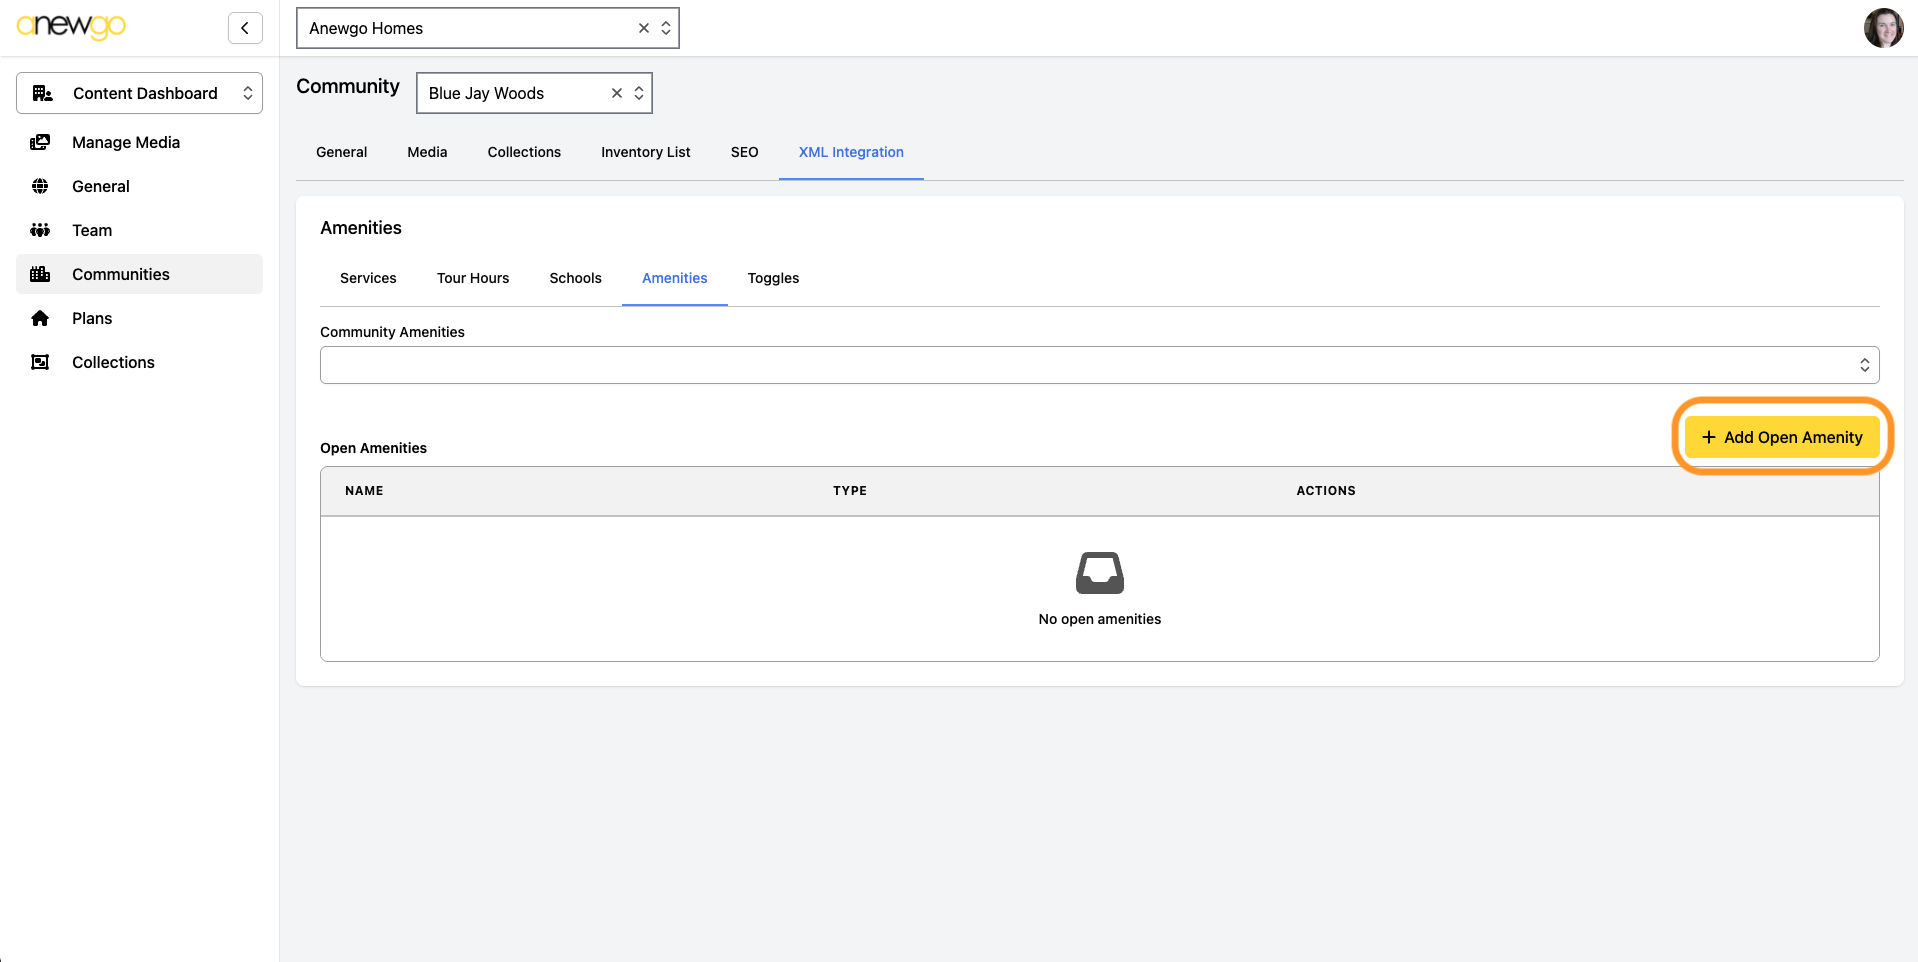
13. Update any information needed under Services, Total Hours, Schools and Amenities.
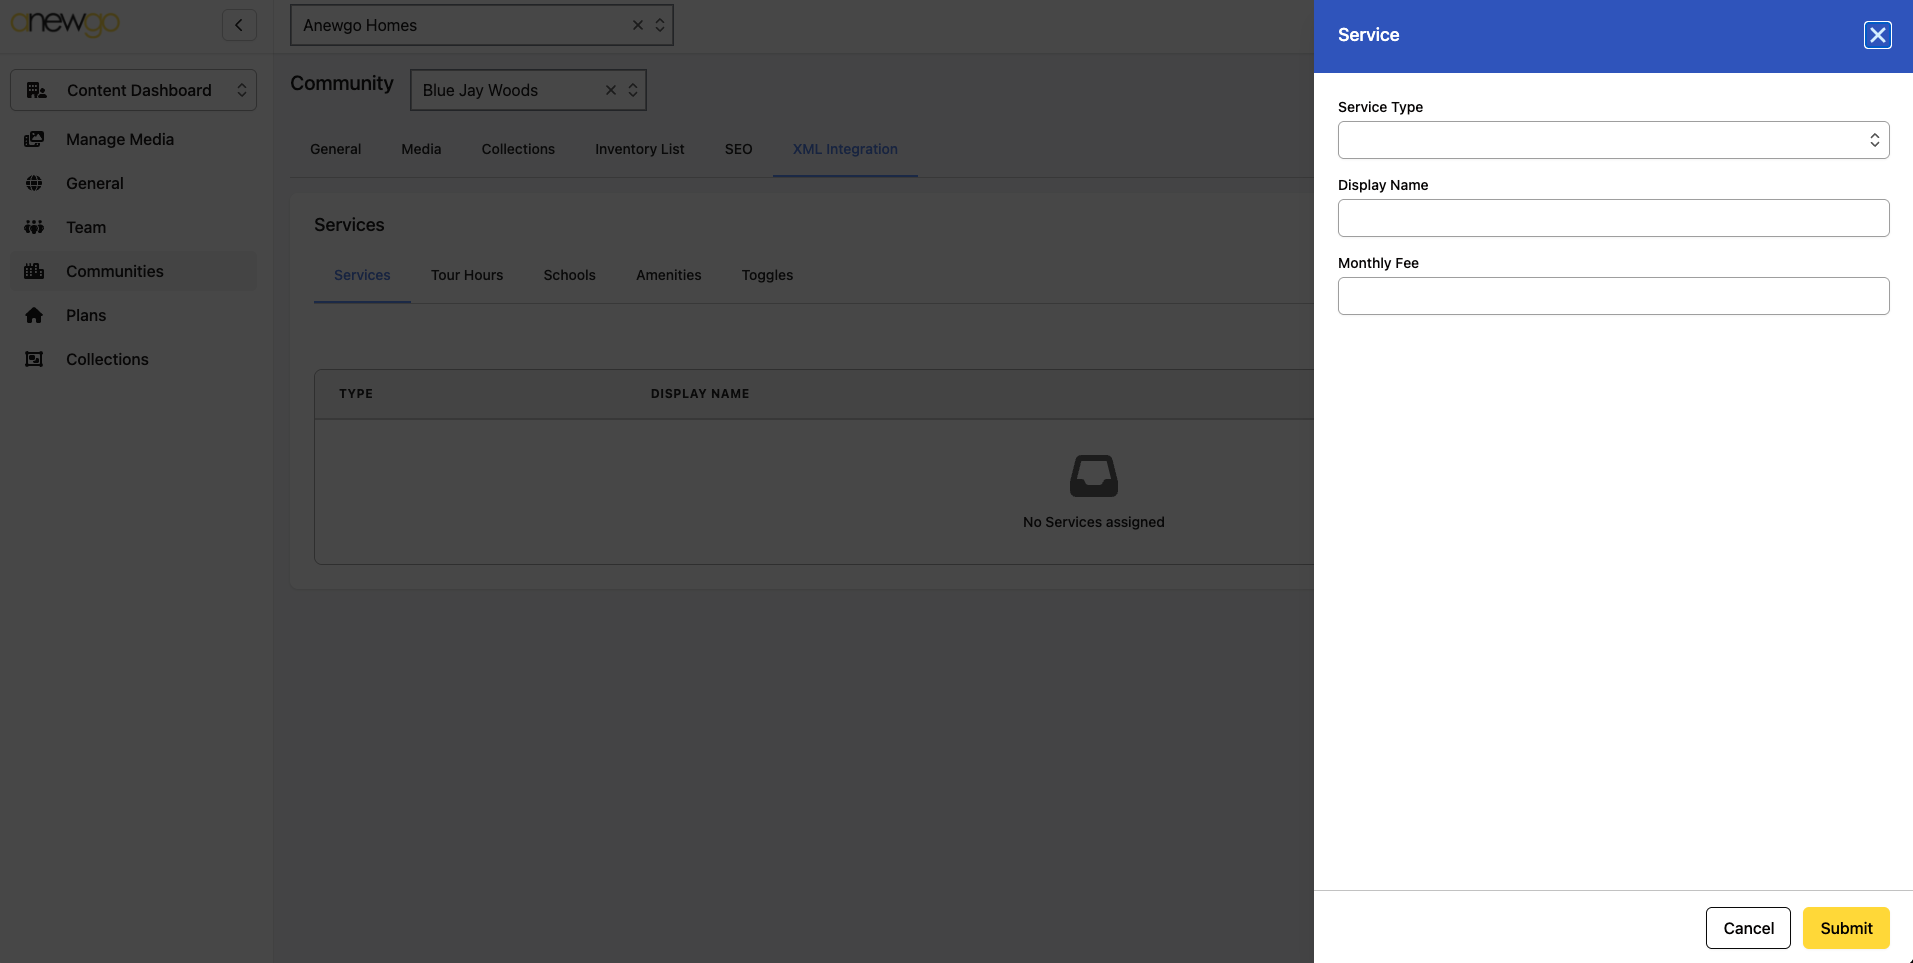
a) Services – click + Add Service to add services. Fill out the fields in the pop out and click Submit to save.
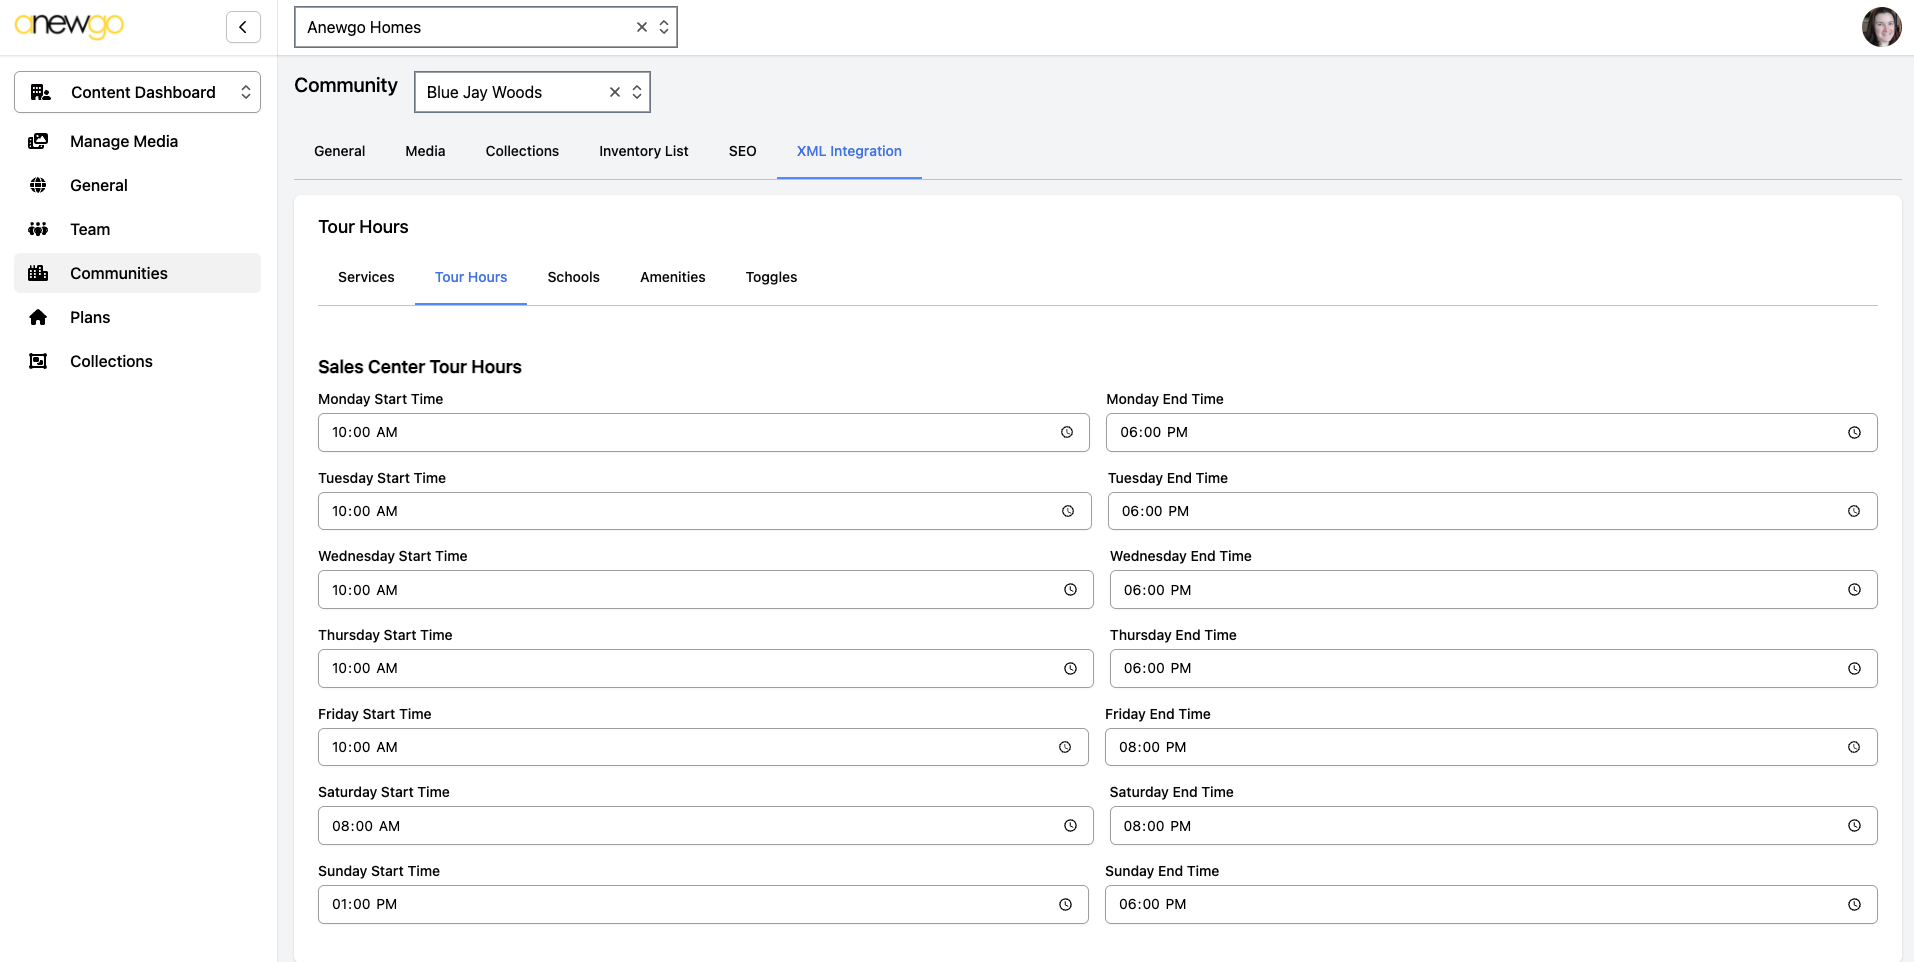
b) Total Hours
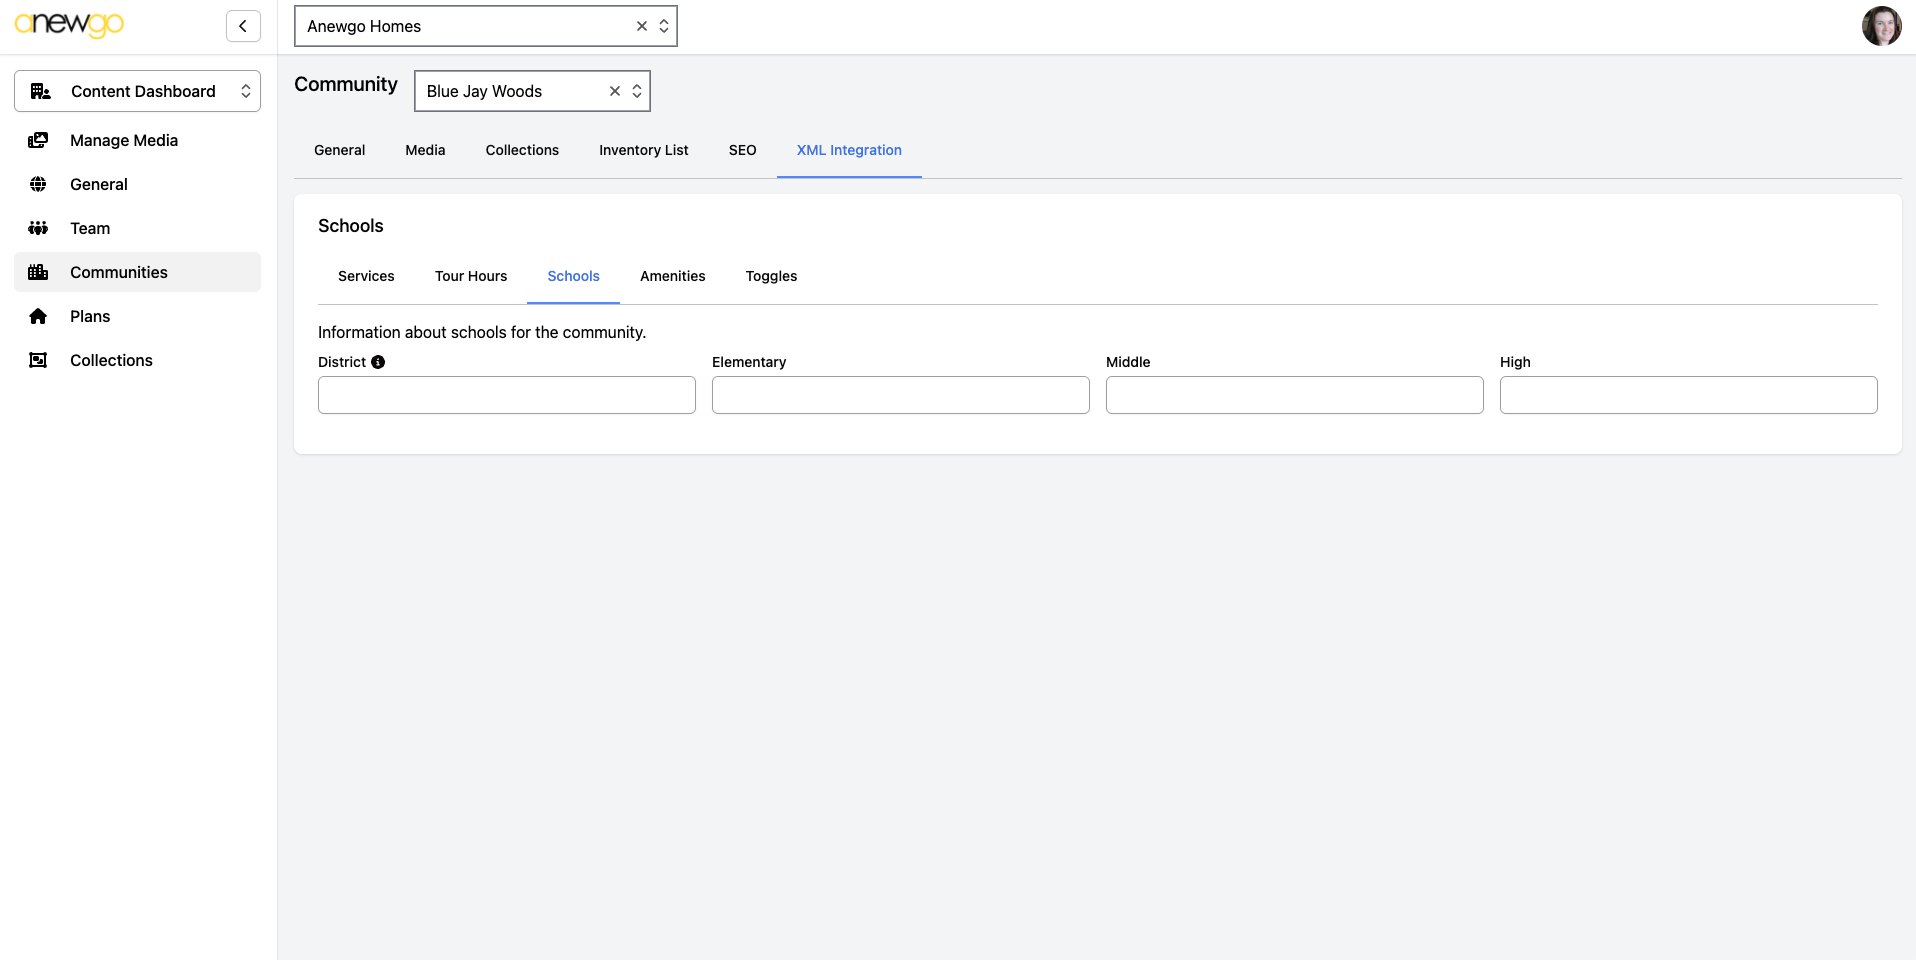
c) Schools
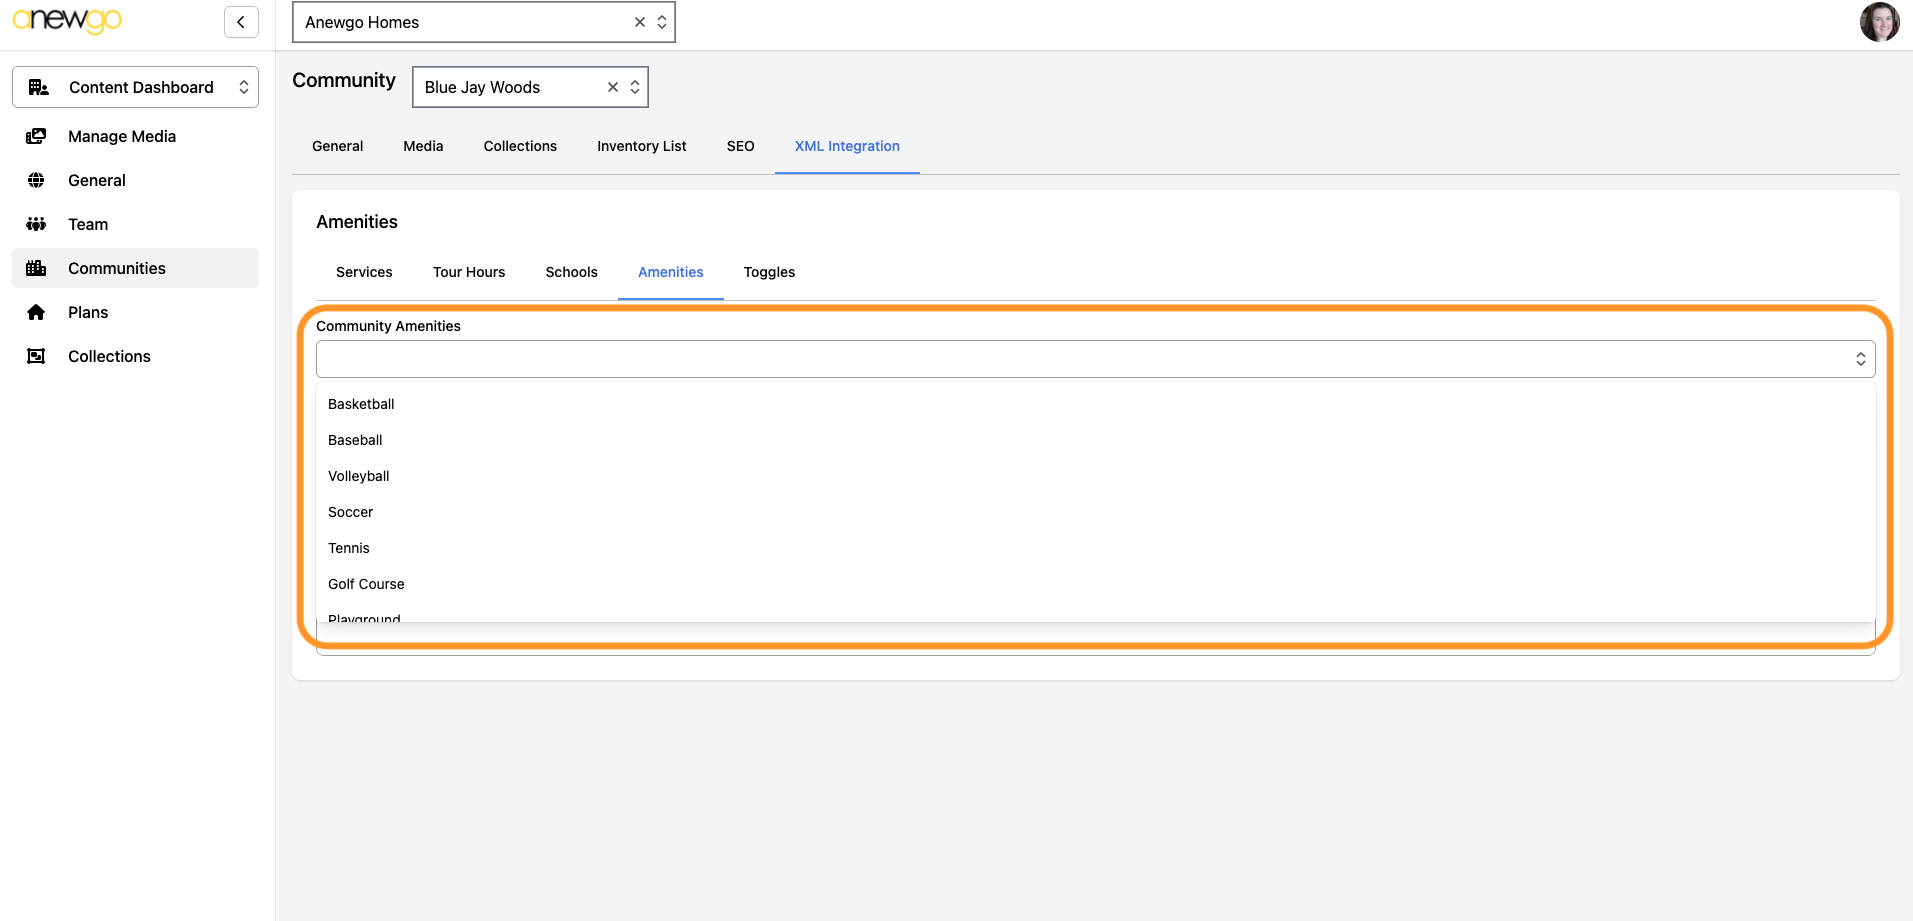
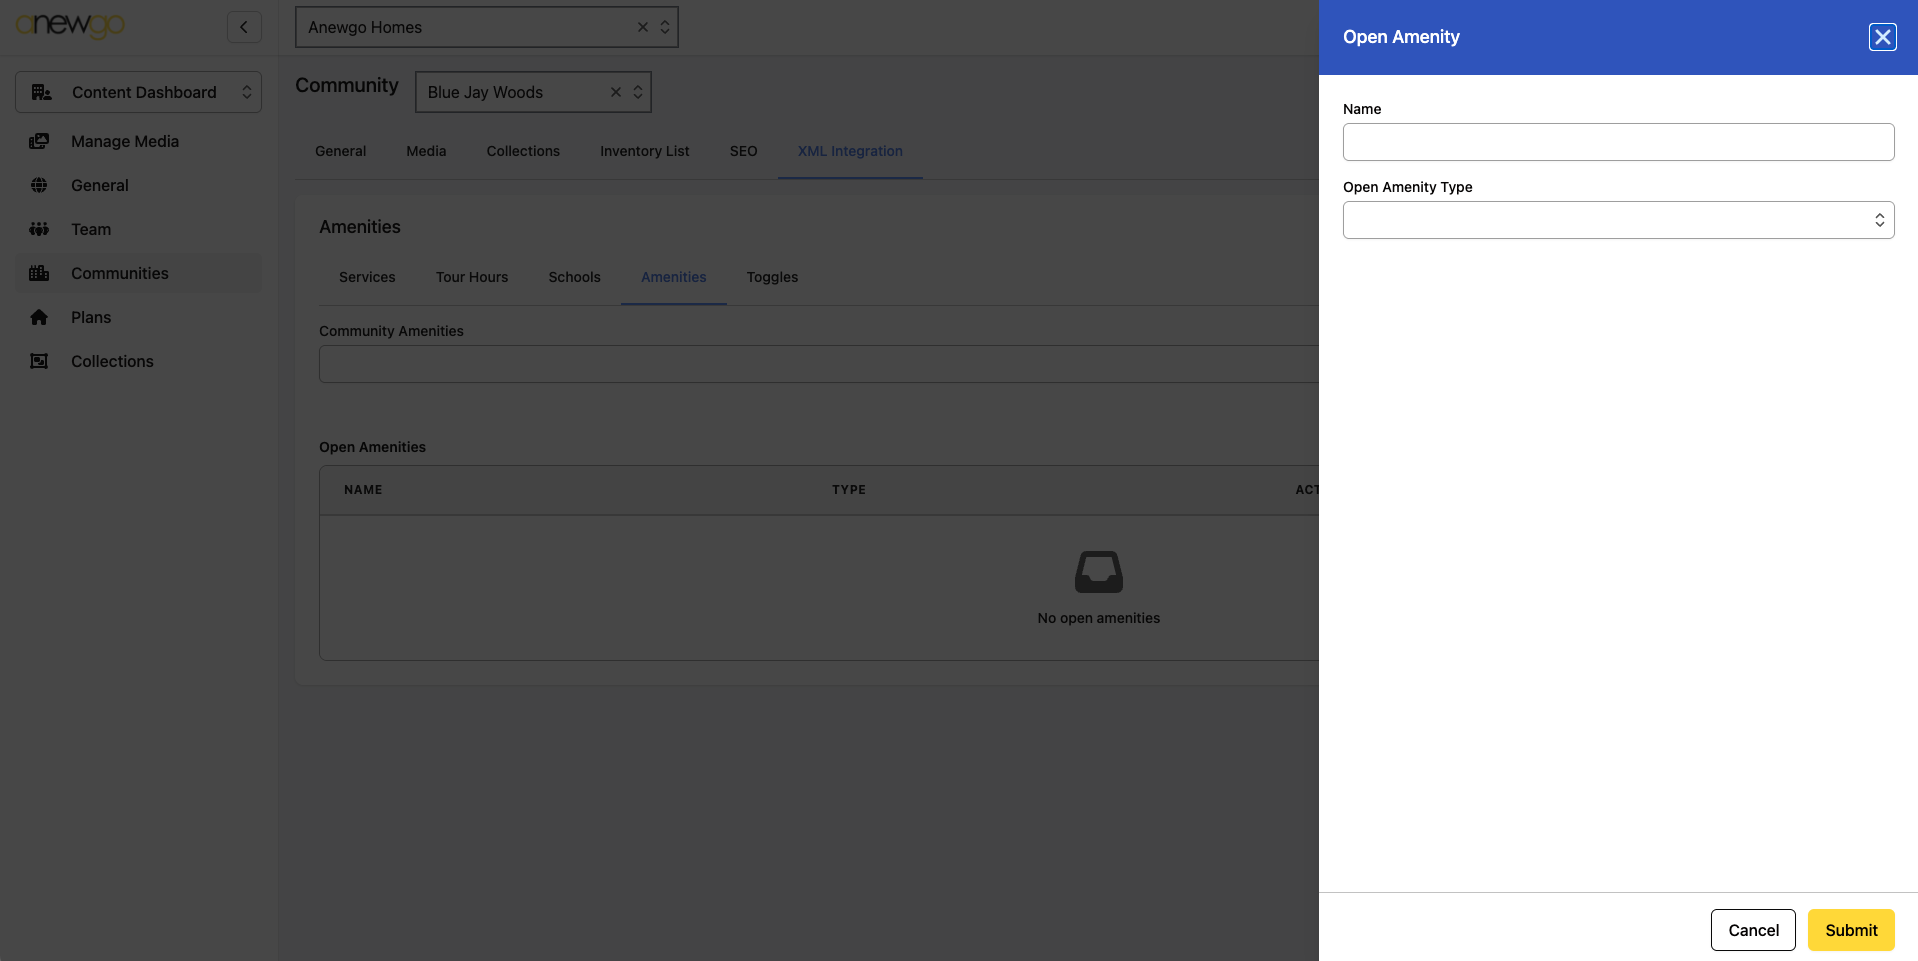
d) Amenities – Select Amenities from dropdown and/or click + Add Open Amenity to add an amenity. For Open Amenity, fill out the fields in the pop out and click Submit to save.
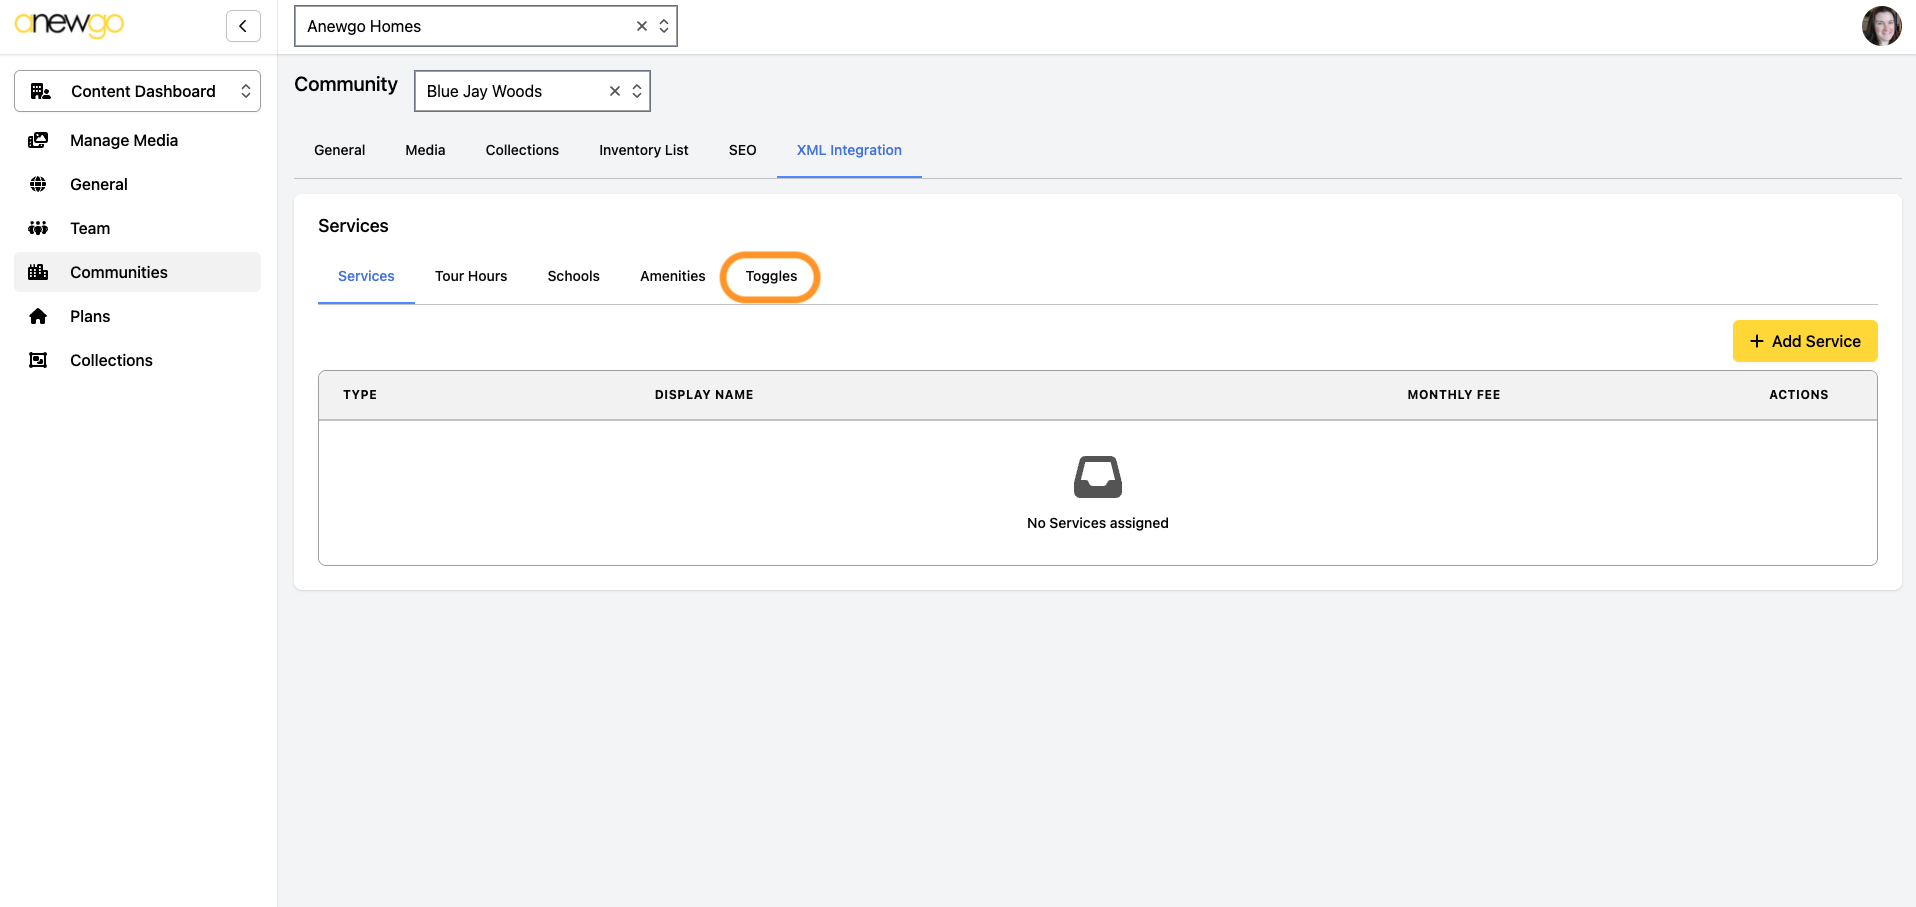
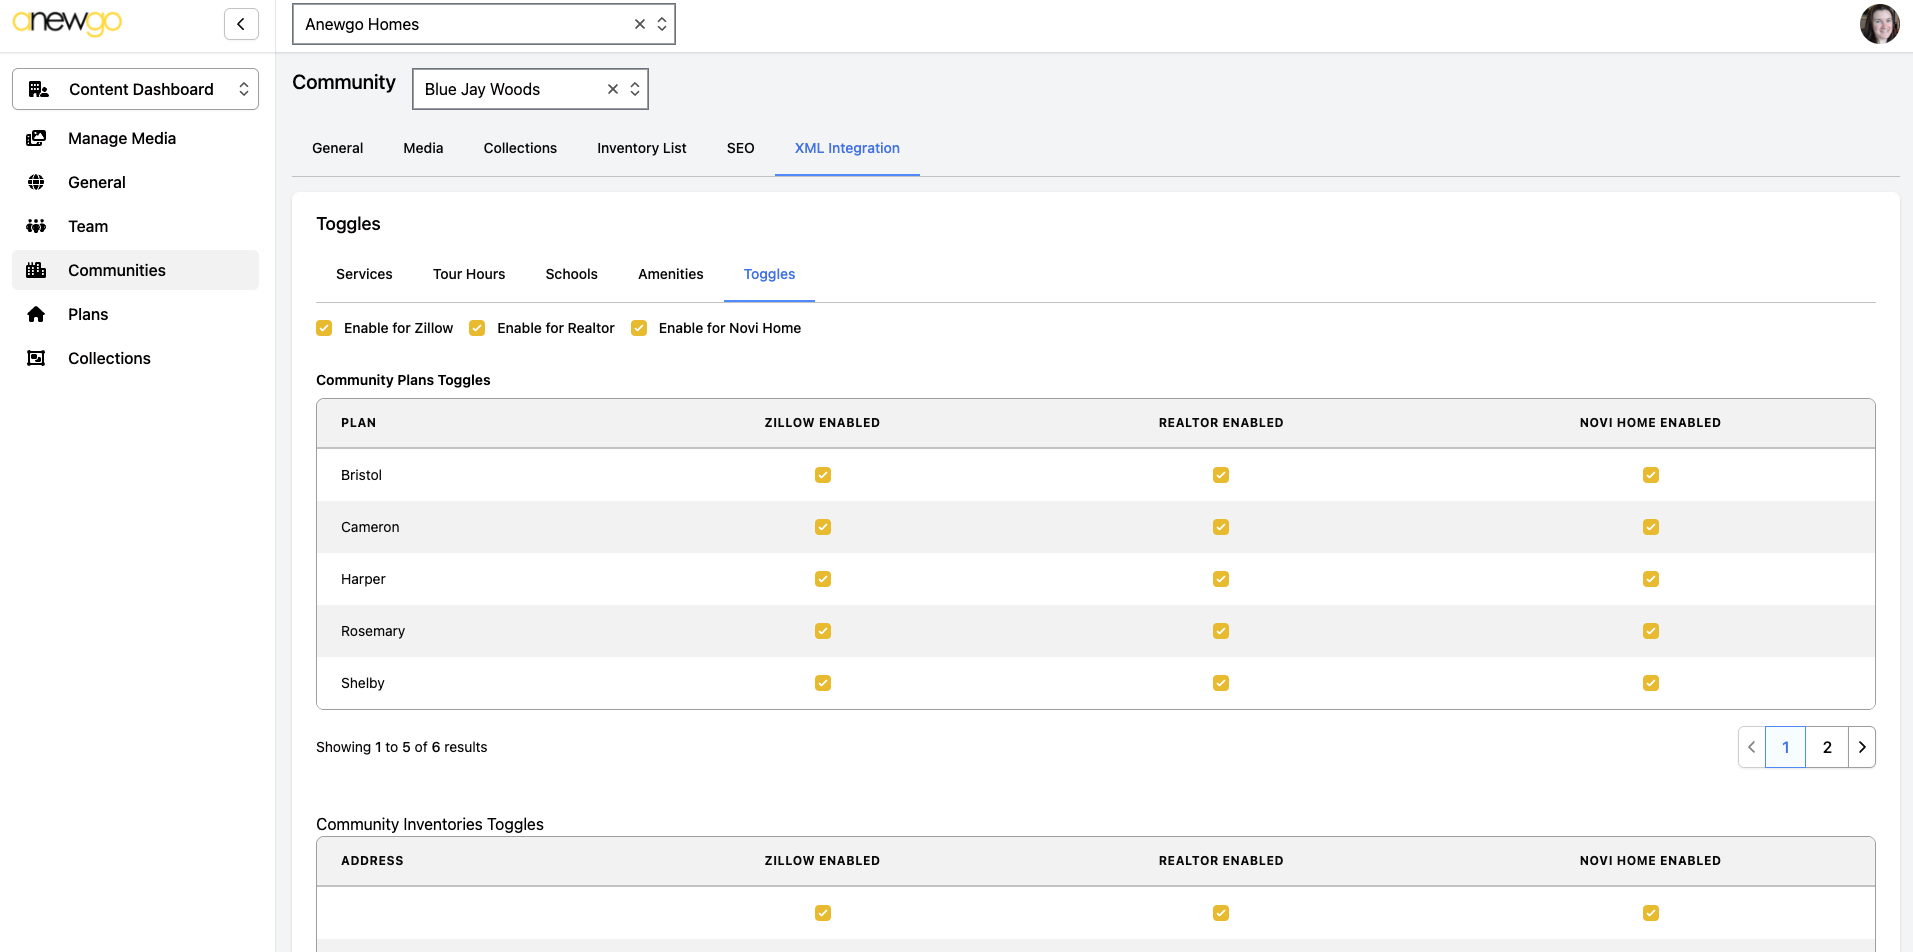
14. Click Toggles
15. Confirm that all desired plans are turned on.
The XML Feed is now set up!