*The recommended iFrame ratio is 16:10
See here how to update Builder Terms or Brochure Disclaimers.
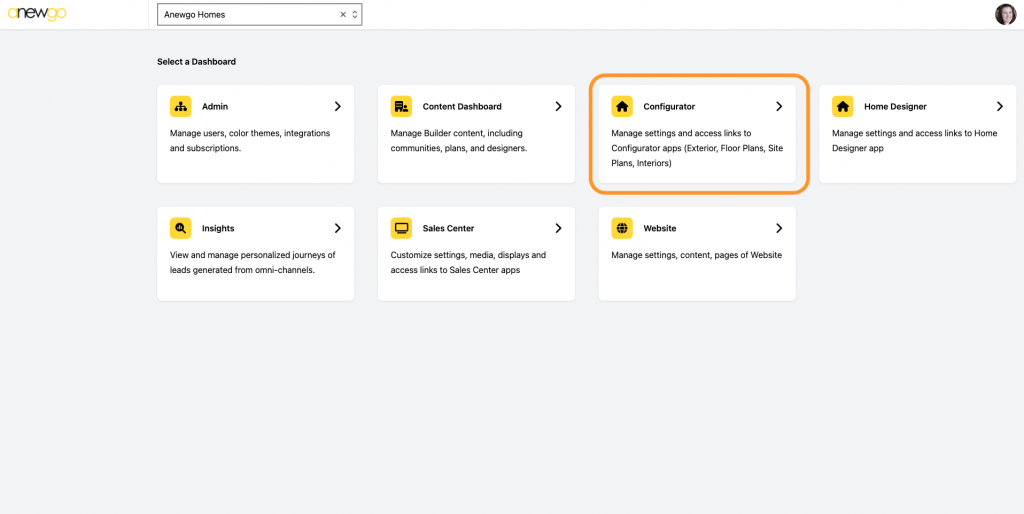
- Click Configurator
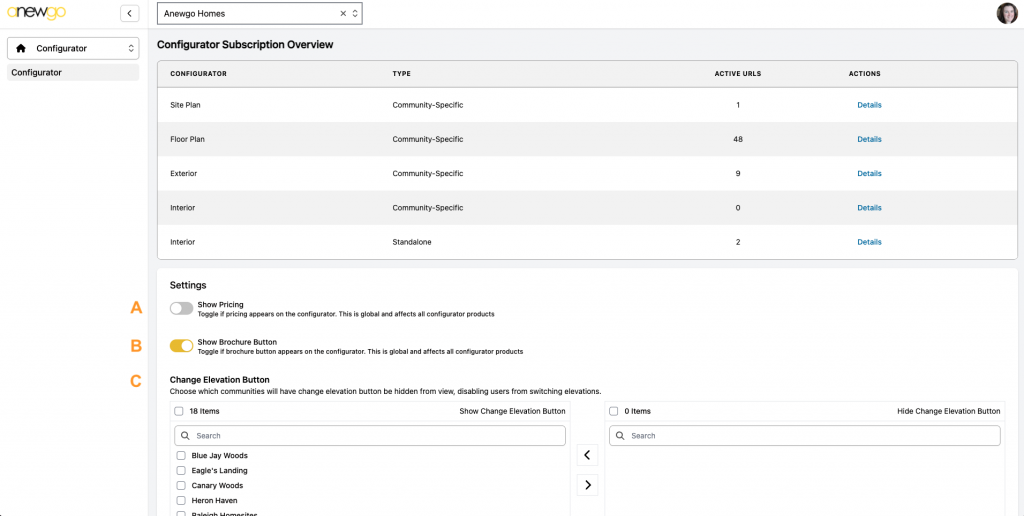
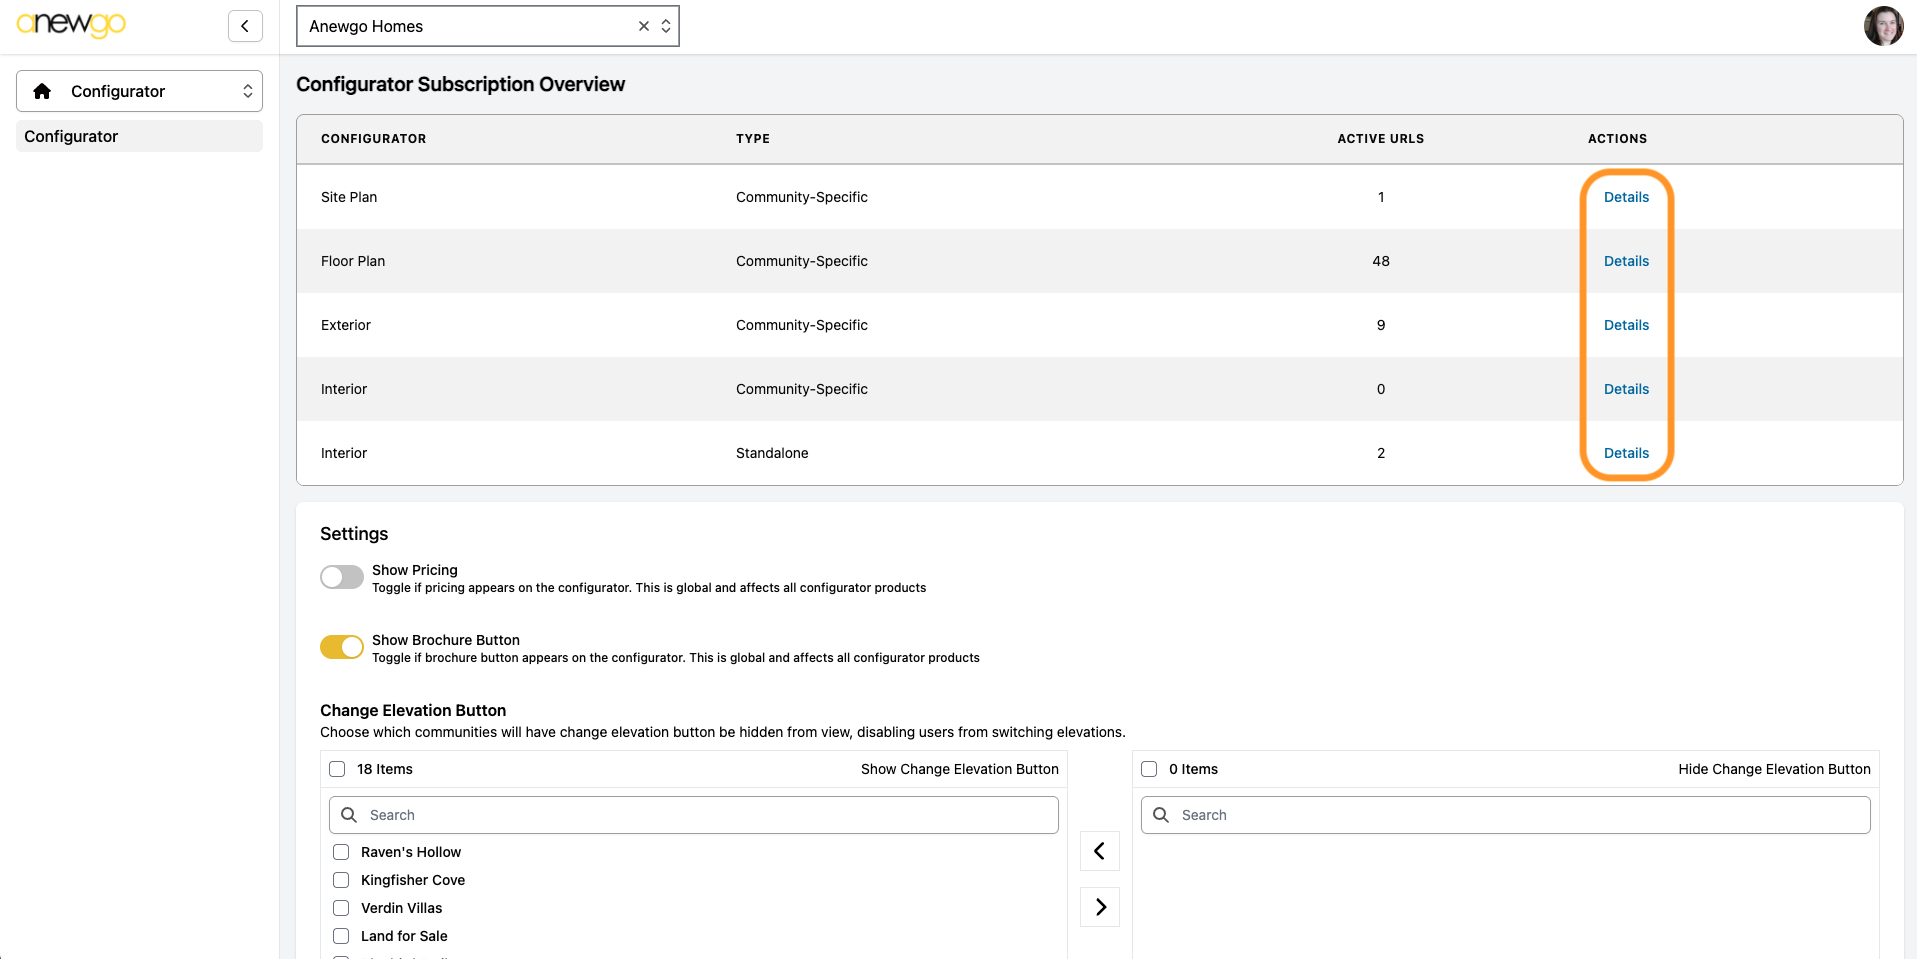
2. Before we get to the links, there are some customization options below.
a) Show Pricing (toggle on or off)
b) Show Brochure Button (toggle on or off)
c) Show Change Elevation Button (see step 8)
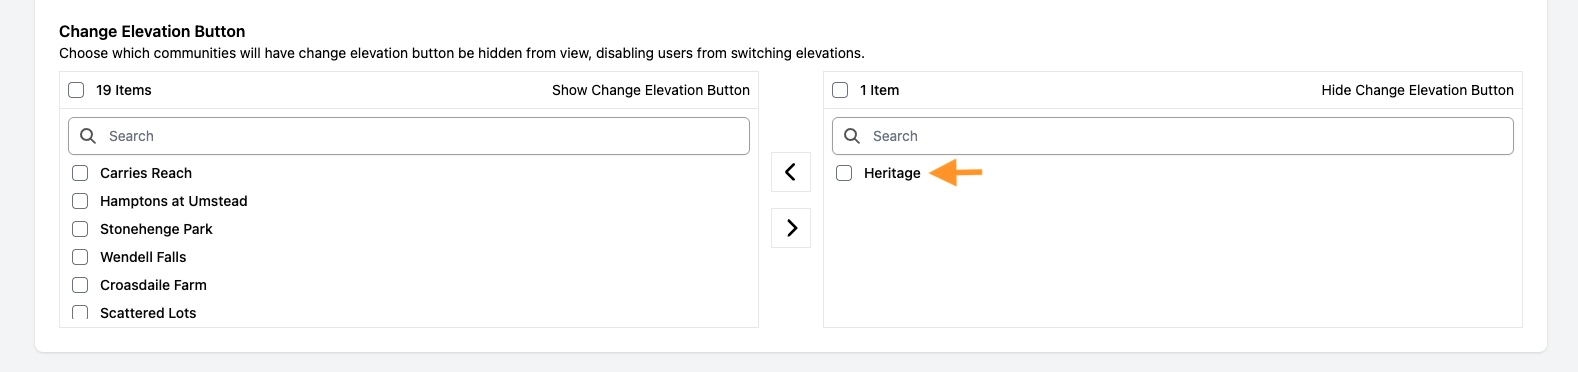
3. The Change Elevation Button is the option for users to switch between elevations within a plan on the front end. You can decide if you would like users to be able to do this per community. First, select the community from the “Show Change Elevation Button” box.
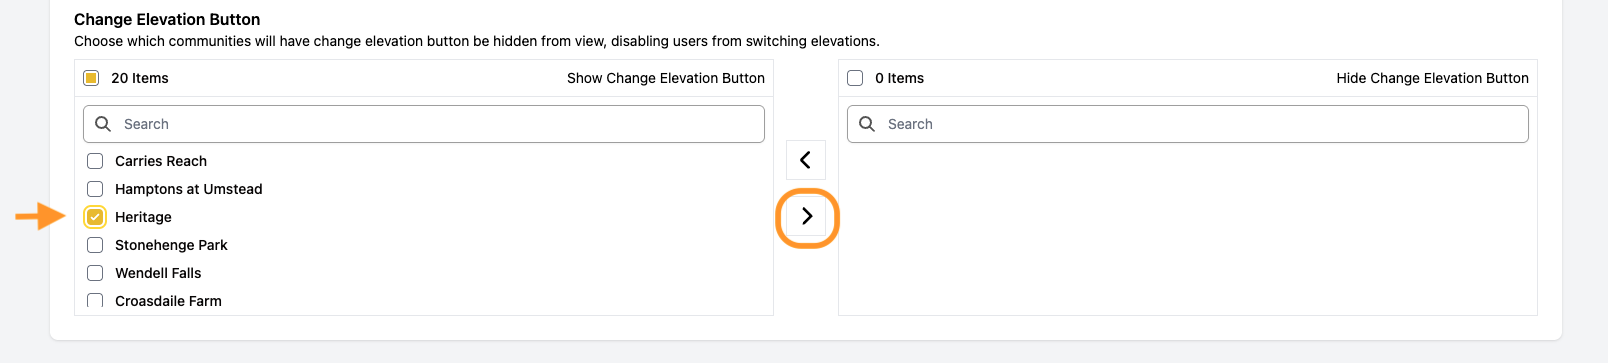
Then move it over to the “Hide Change Elevation Button” box to hide that button and only show one elevation in a configurator at a time.
4. Now back to how to access your Configurator links. You will see whichever configurators you have subscriptions for listed out (this is our Demo app, so we have all of them featured). Find the correct configurator and then click Details
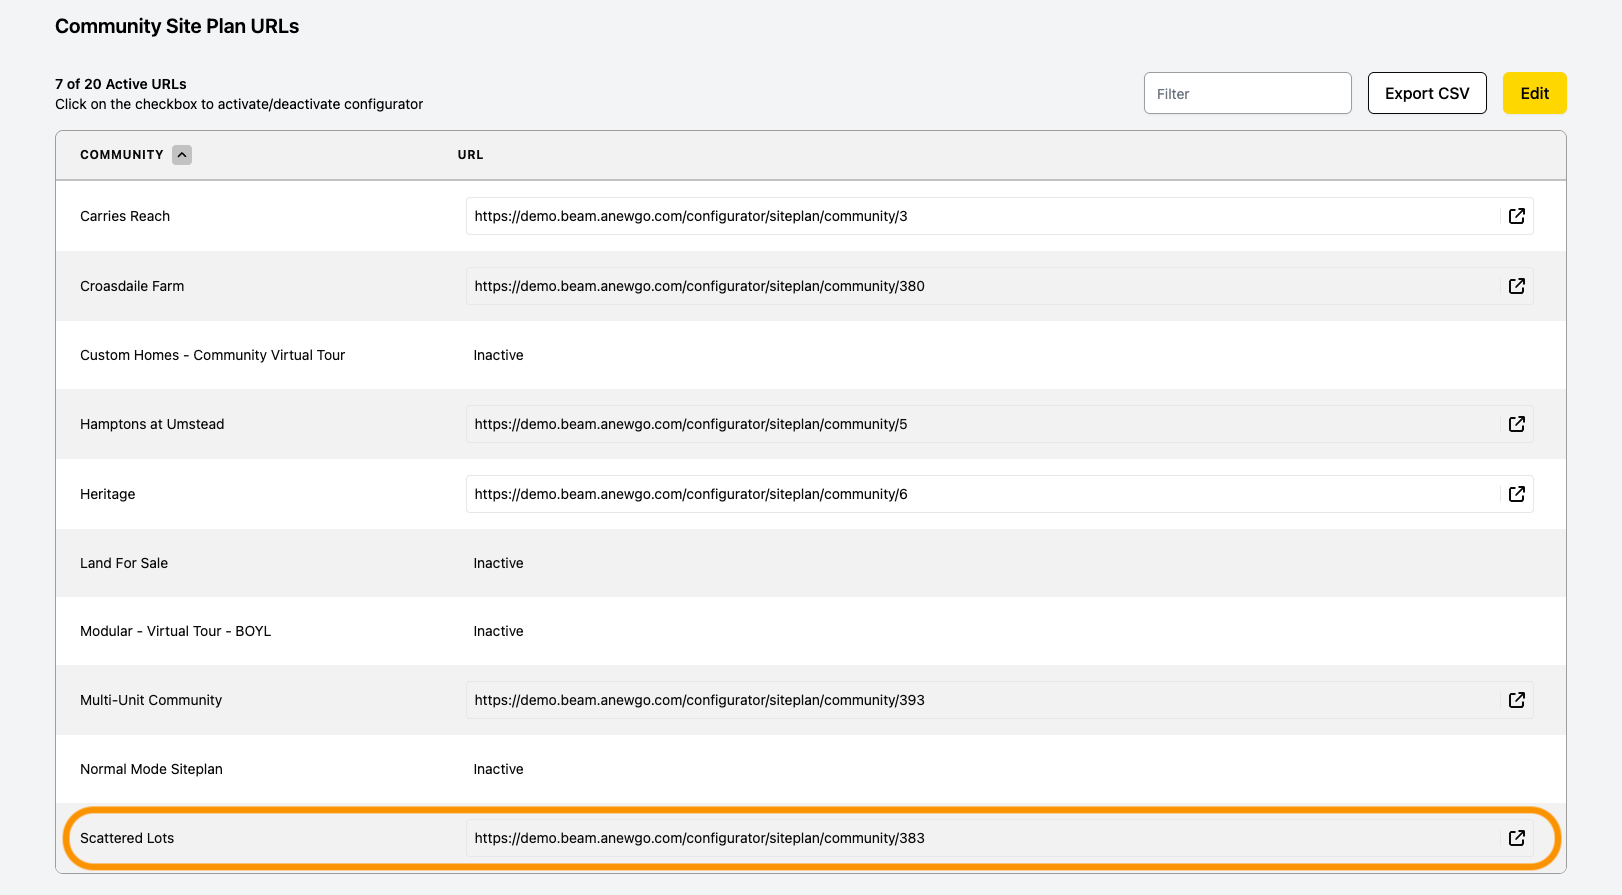
5. This example shows the Siteplan configurator links. Some are active and some are inactive. For active links, you can just copy and paste the link!
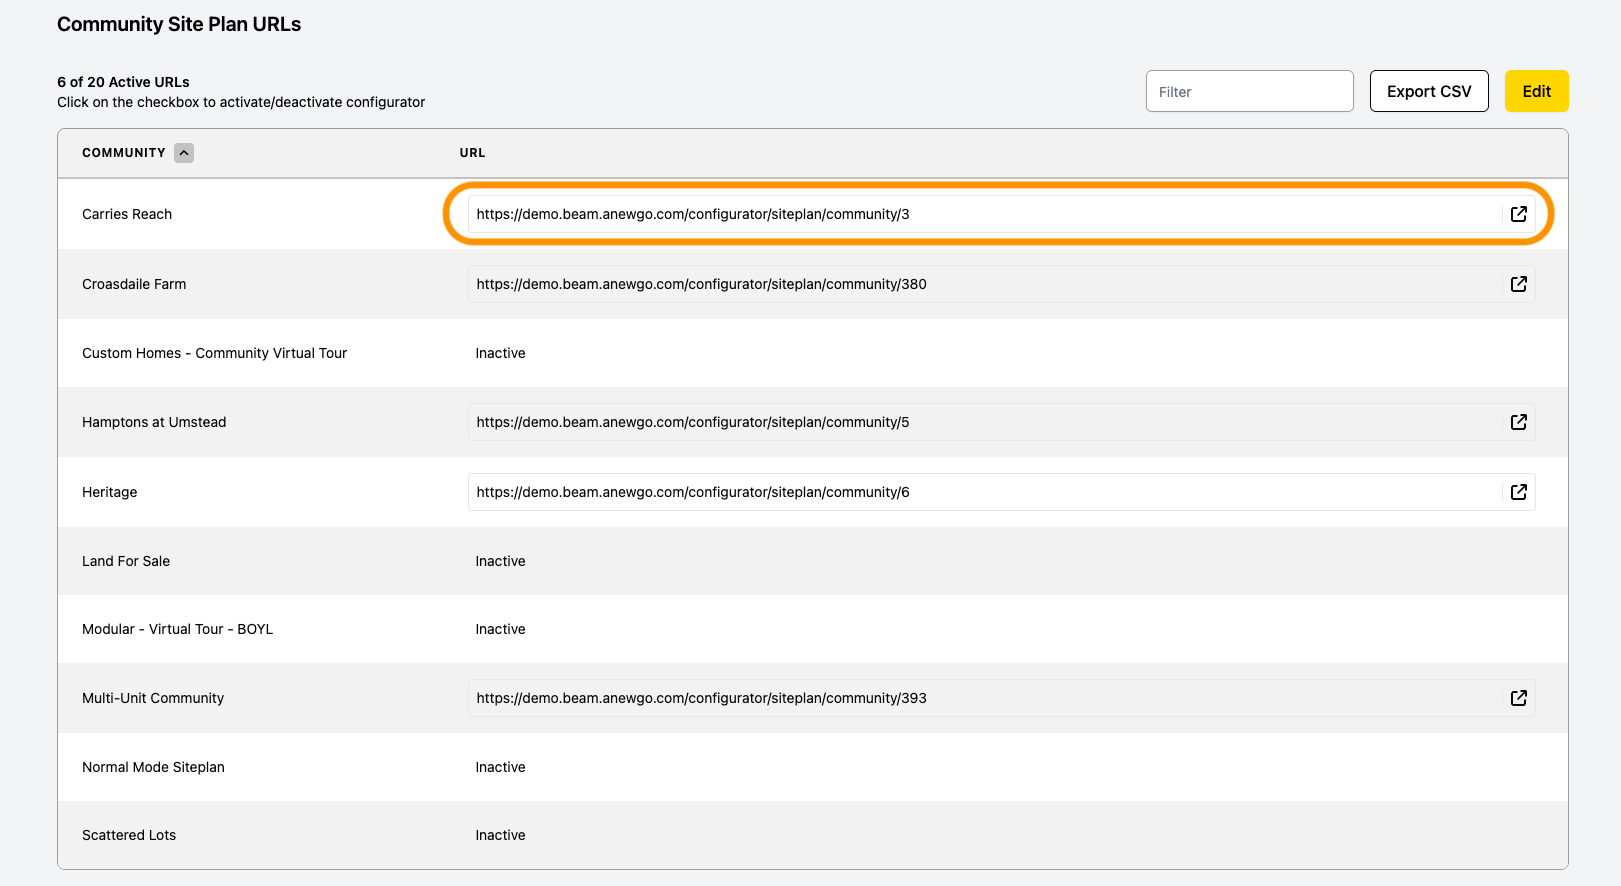
To make an inactive link active, click Edit
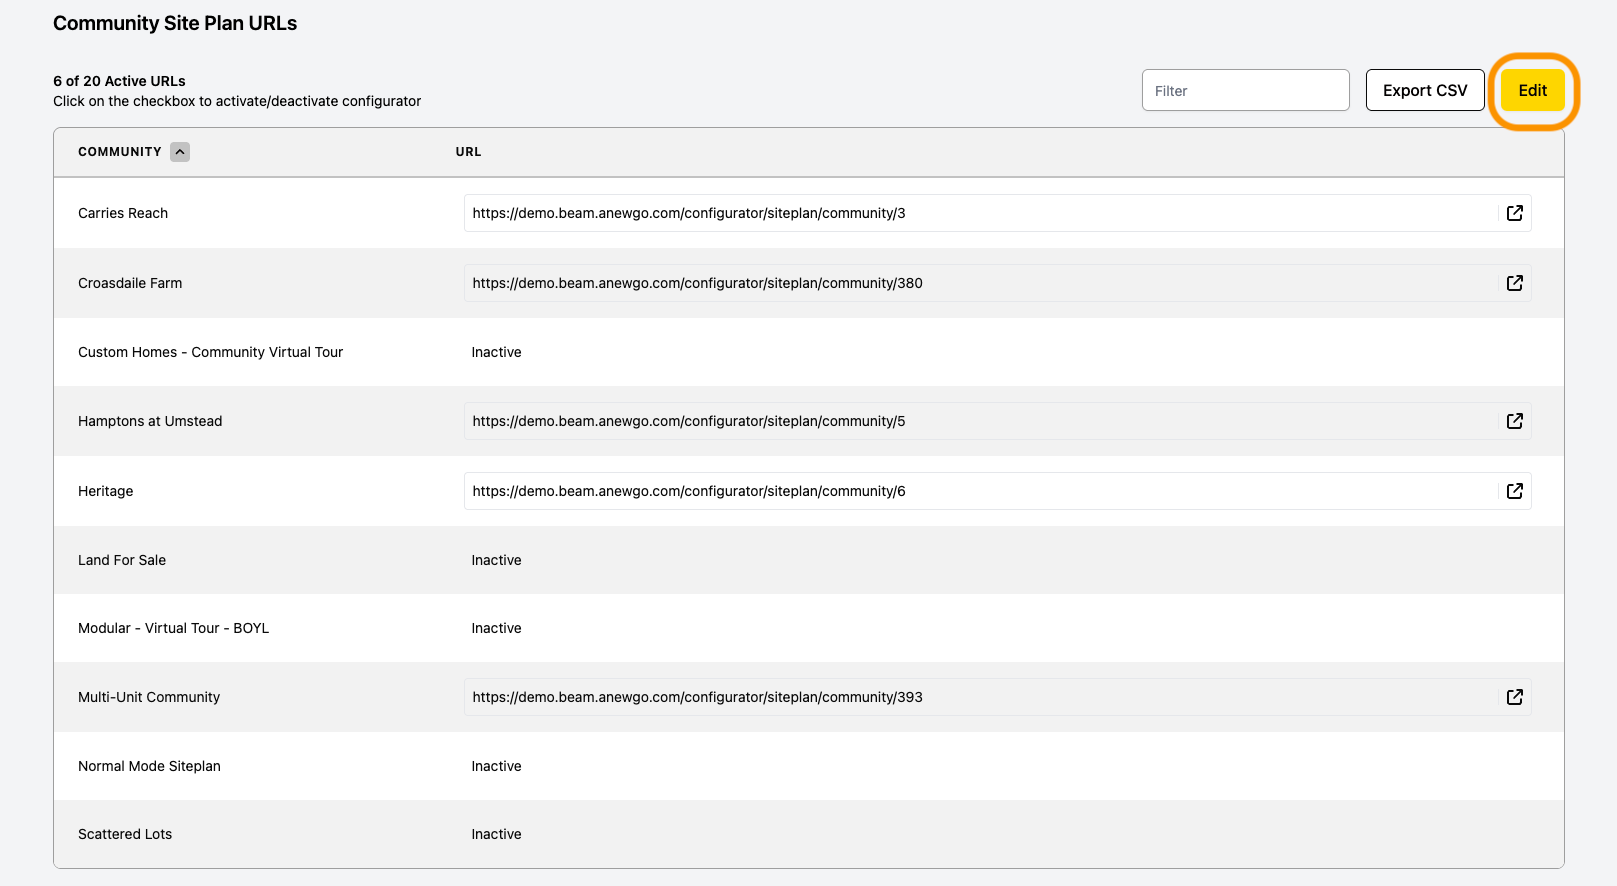
Click the URL box next to the community you want to make an active link for, then click Save
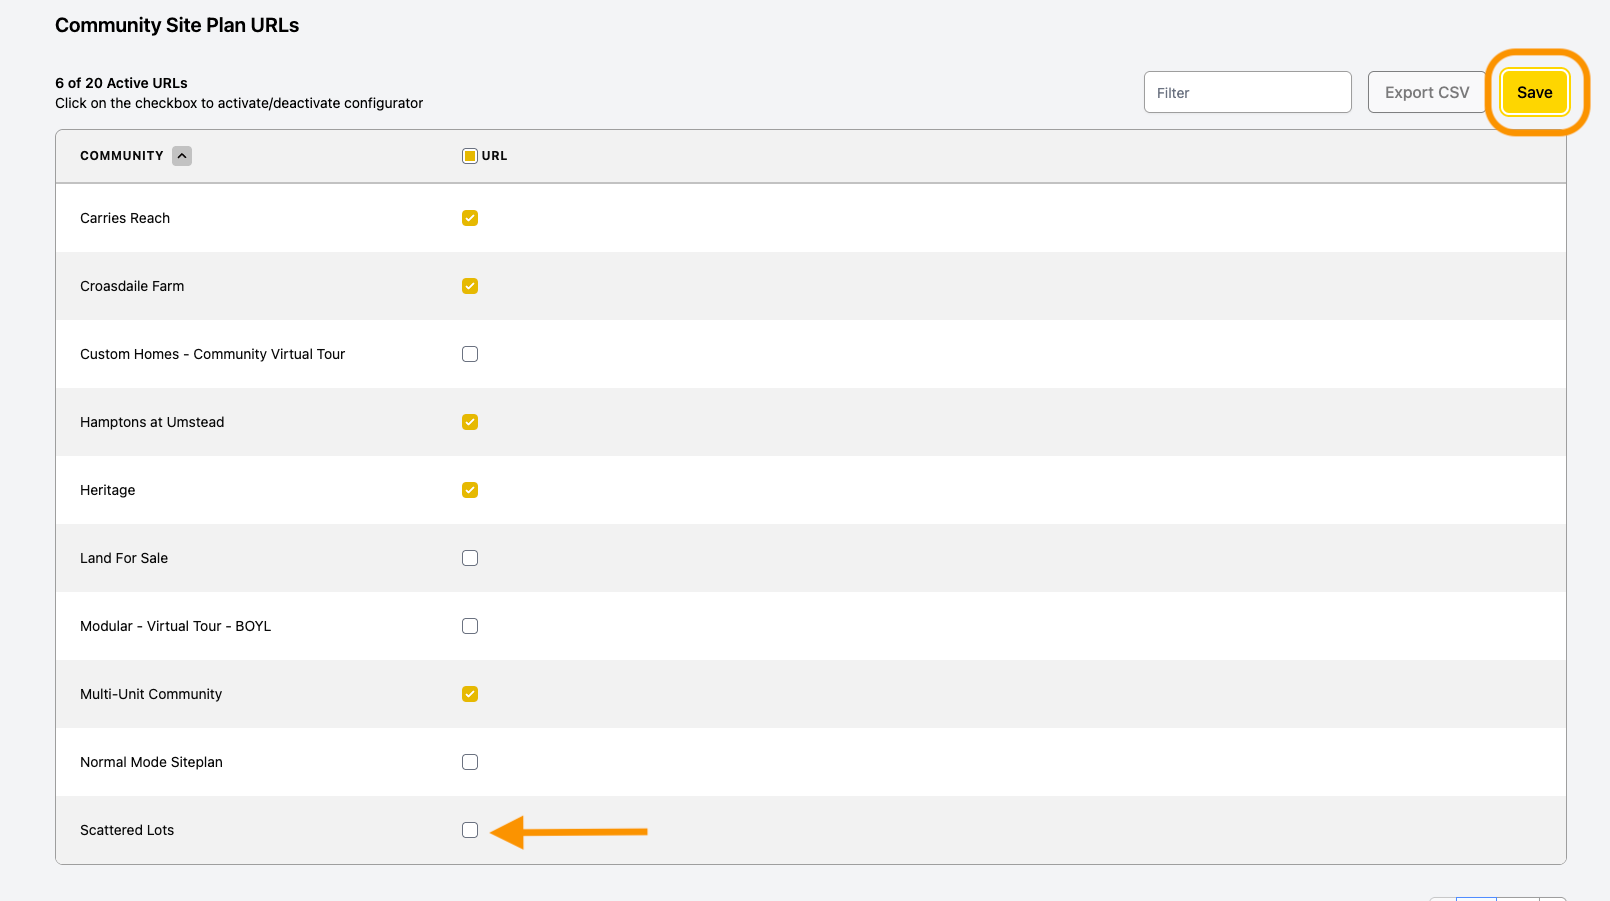
Now your link is active and can be copied!
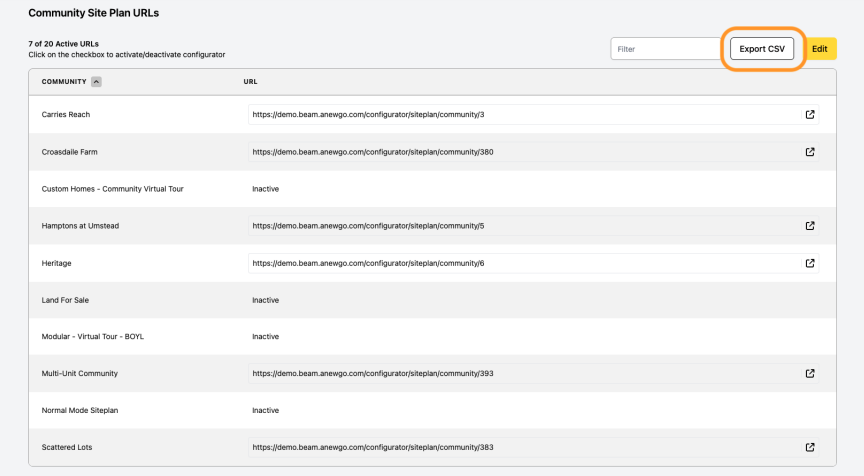
To download all of the links together in one document, click Export CSV
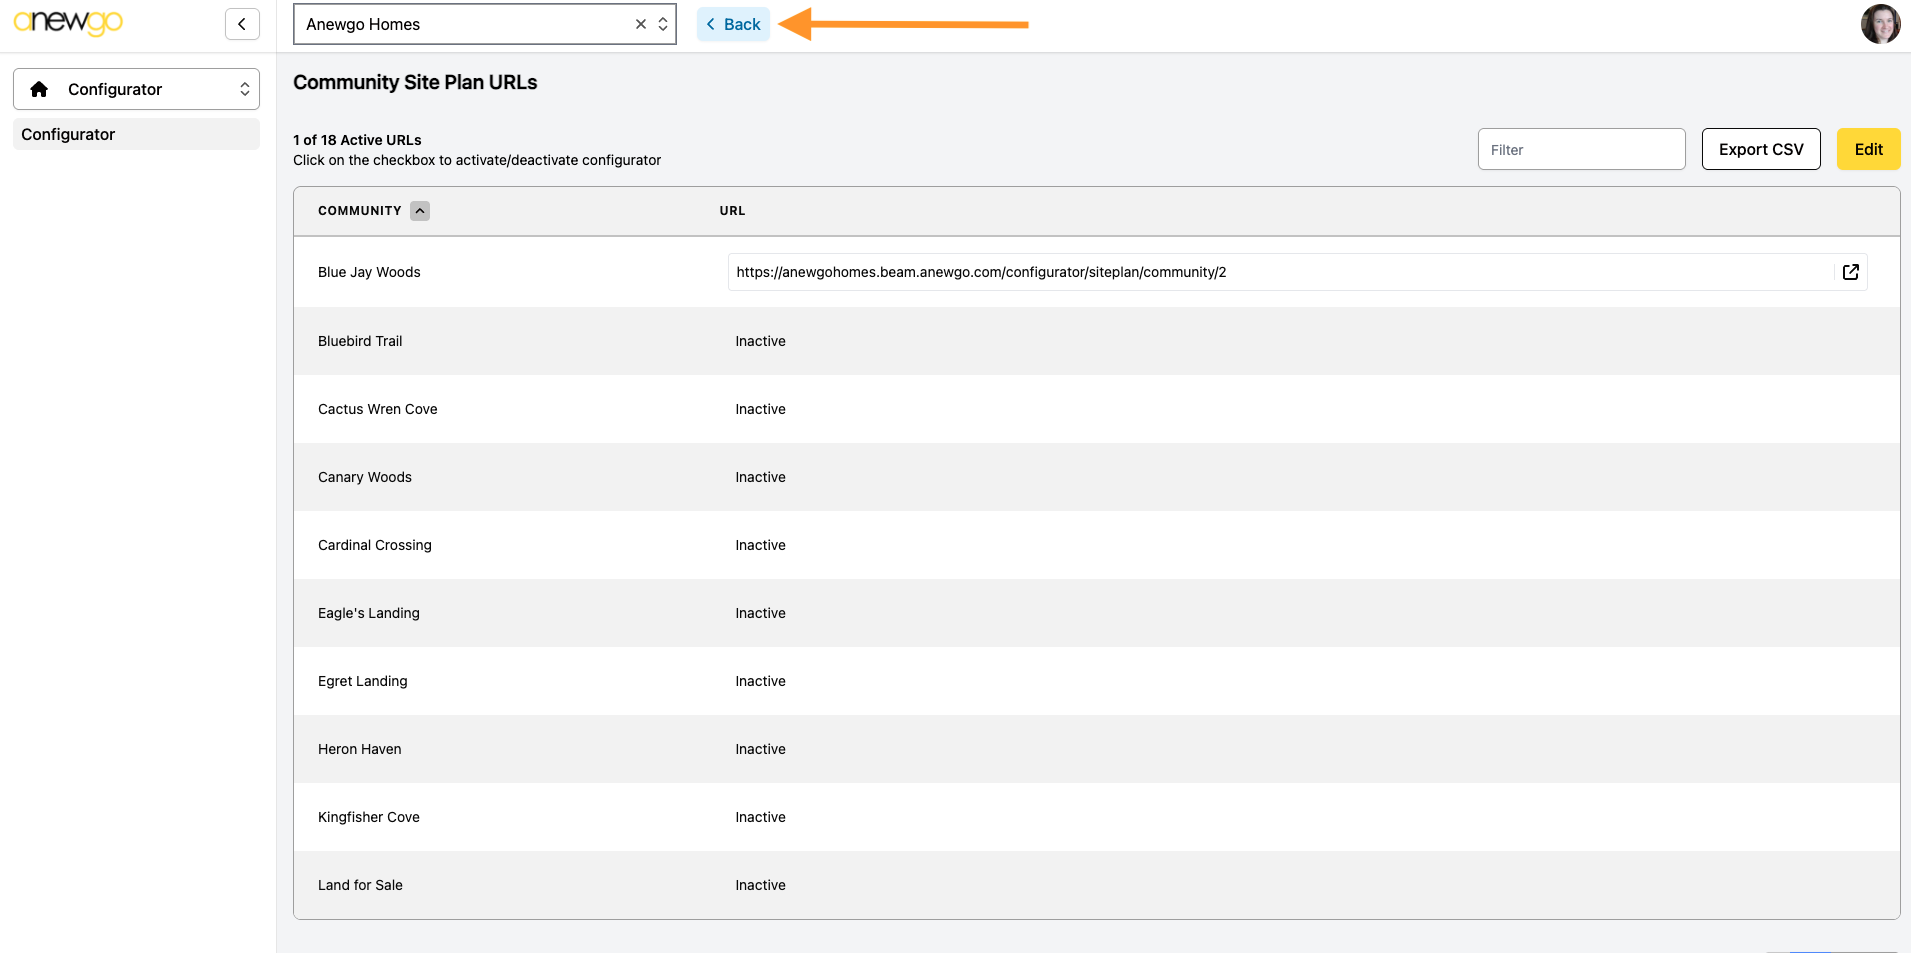
6. To go back to other configurators, click the Back button (or your browser back button)
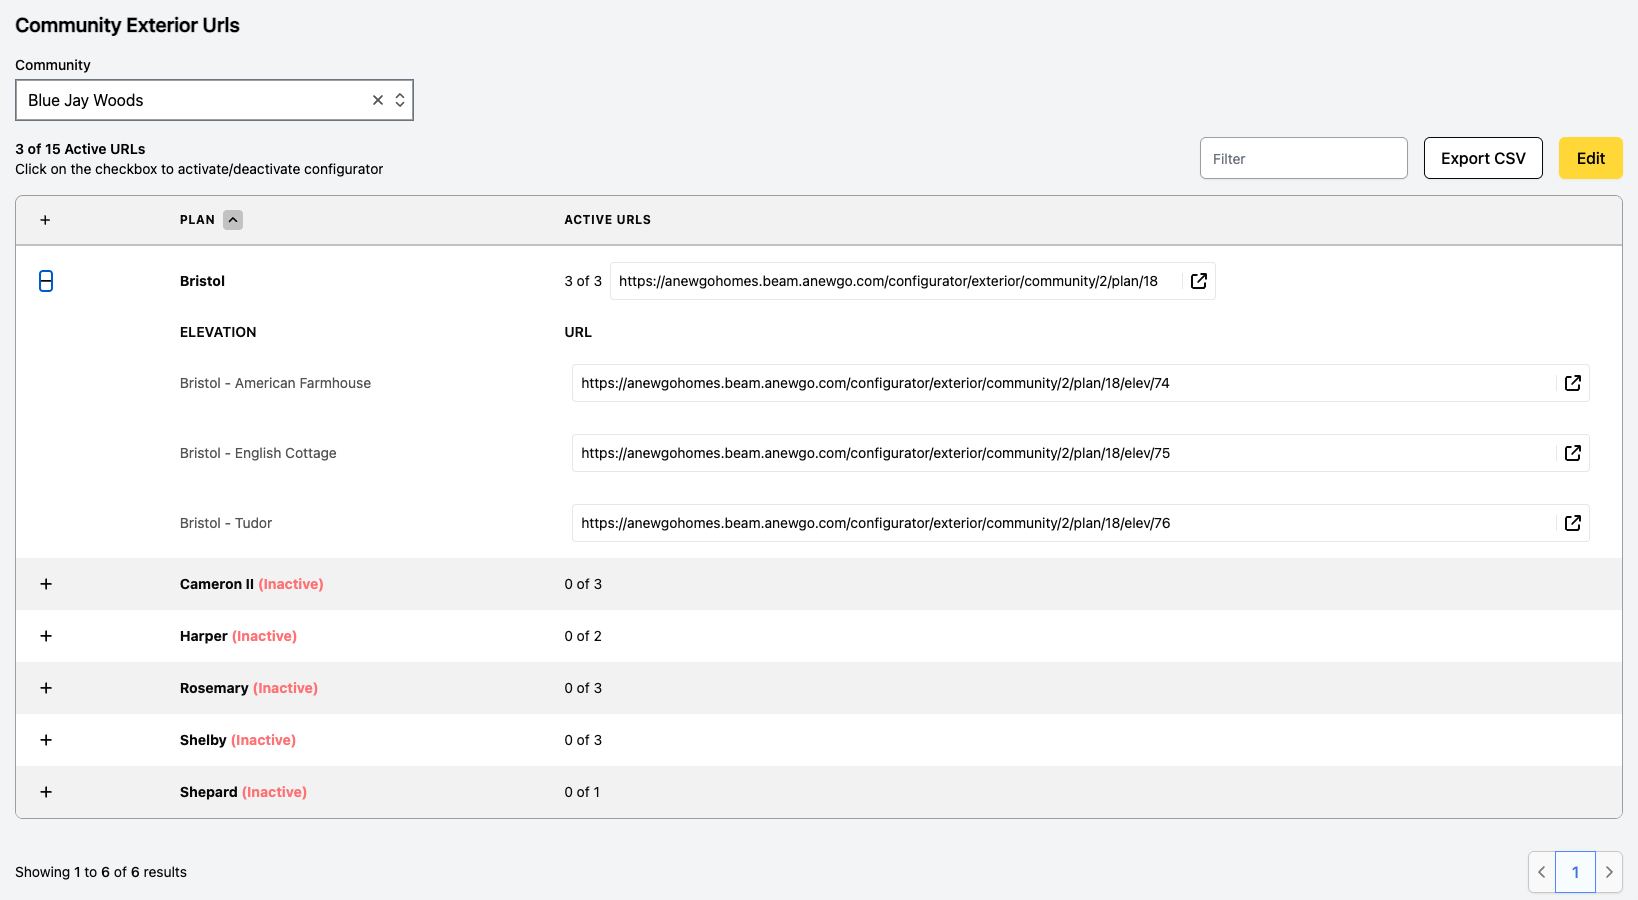
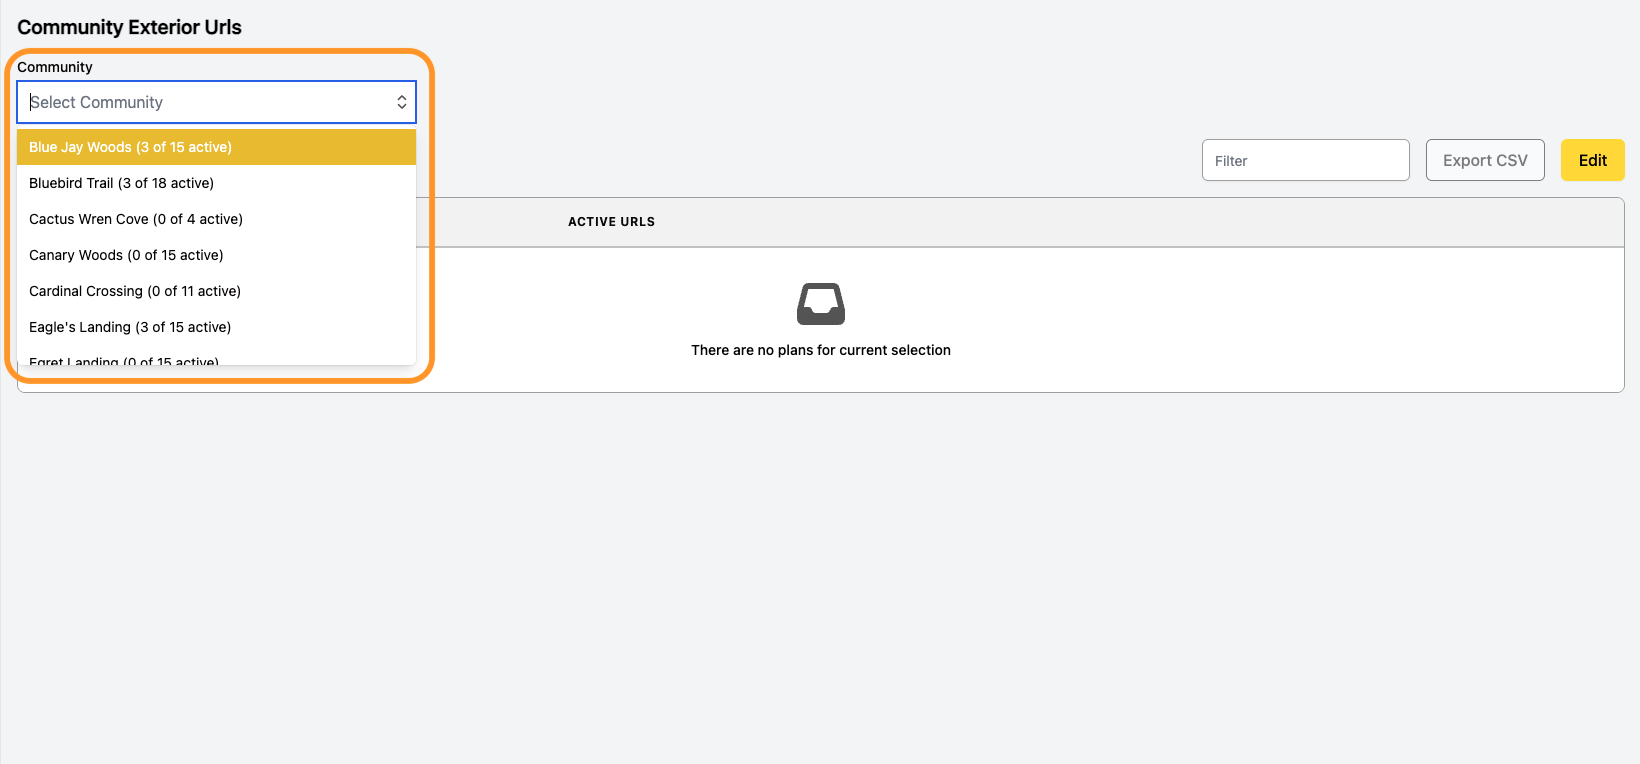
7. Floorplans & Exterior configurators have a few differences. First, you need to select the Community in order to see the plans.
You need to click the expand plus signs to see all elevations under a plan. Only 10 plans show in this list, so you may have multiple pages to click through to find the correct plan/elevation. You can also use a plan level link if needed – this will start by showing all elevations under a plan, so the user will need to select the elevation first to begin.
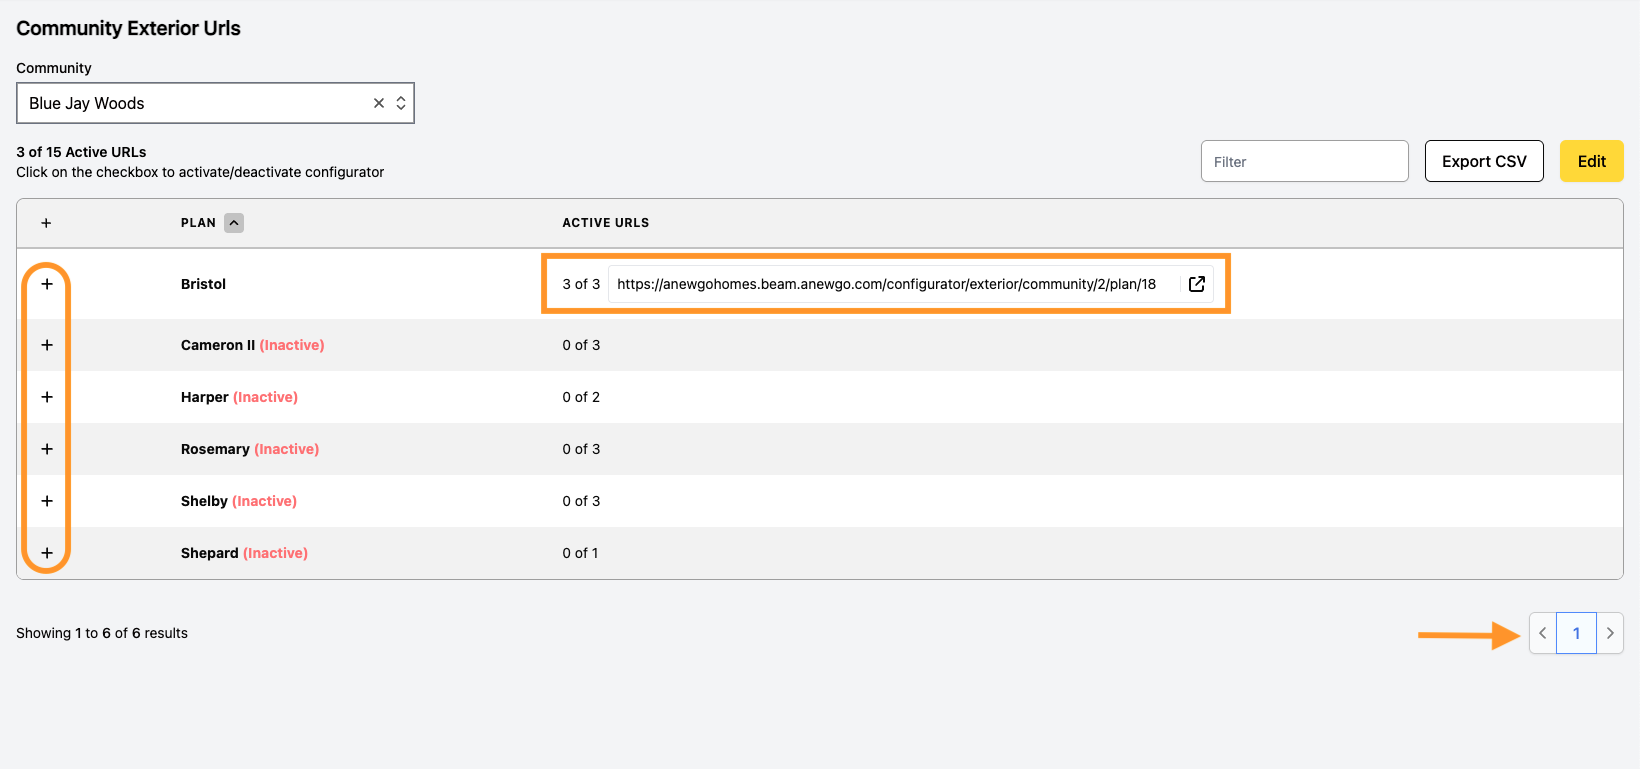
Everything else functions the same as the Siteplan configurator detailed above (Copy active links, Edit, Export CSV, etc.)