There are times when a floorplan option may be standard on a home in a specific community. The My Home App has the ability to set that up easily…
*Note: this will only work for separate floorplan options – not optional floors (i.e. basement, 2nd story, etc). Please contact your Account Manager if you would like an optional floor to be standard in a specific community.
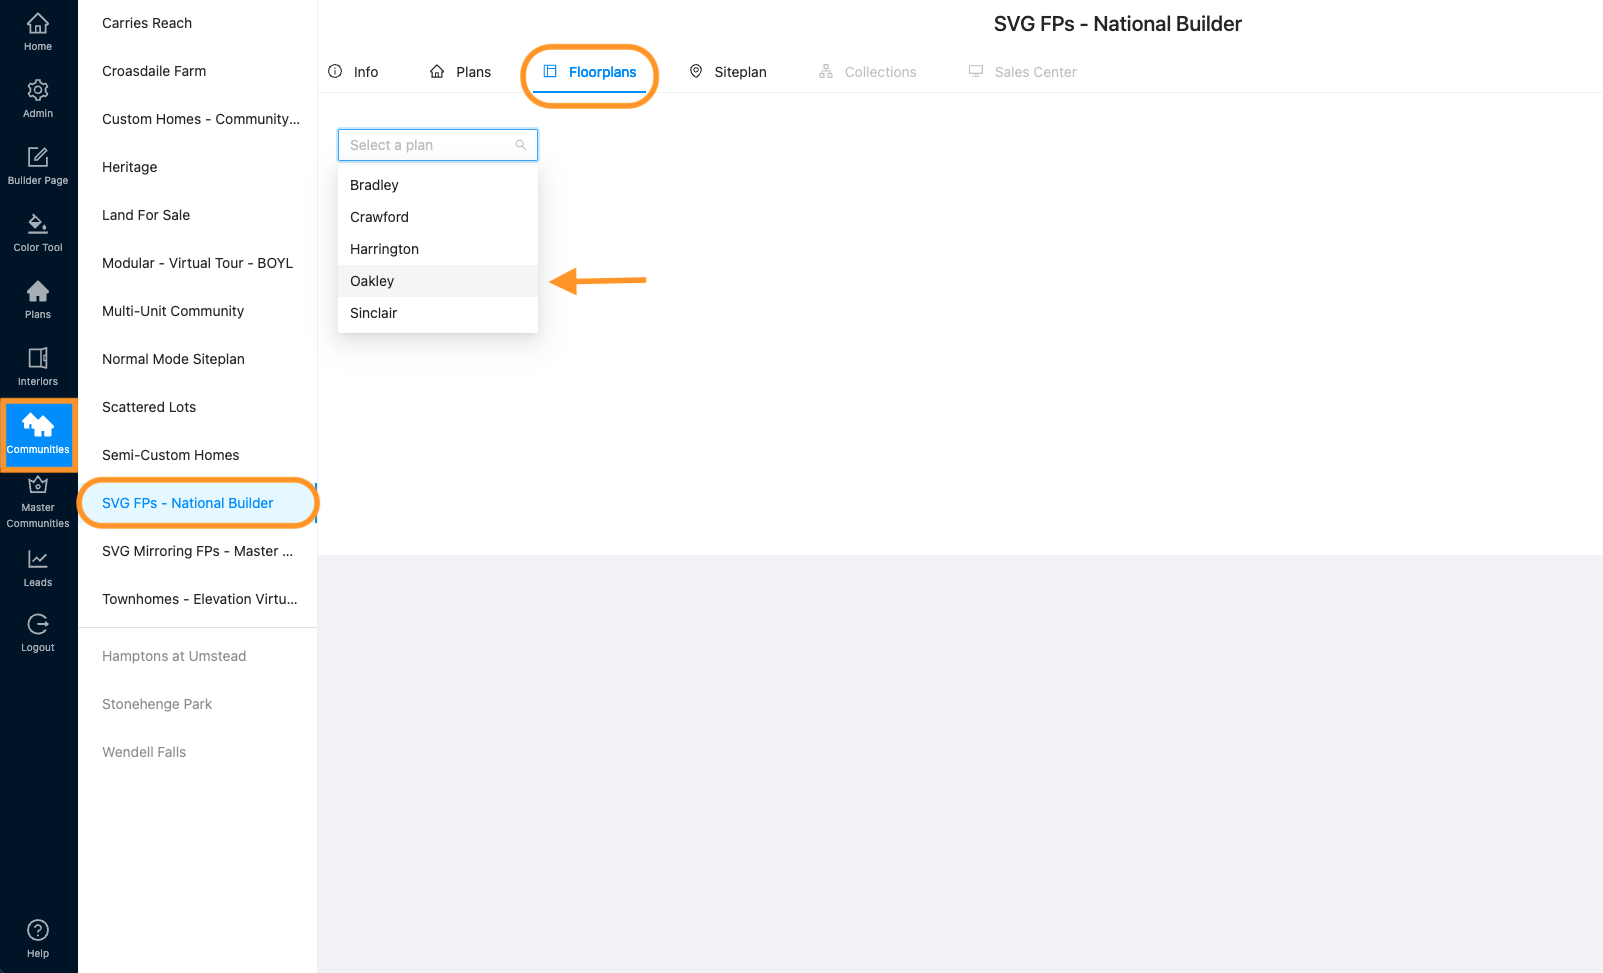
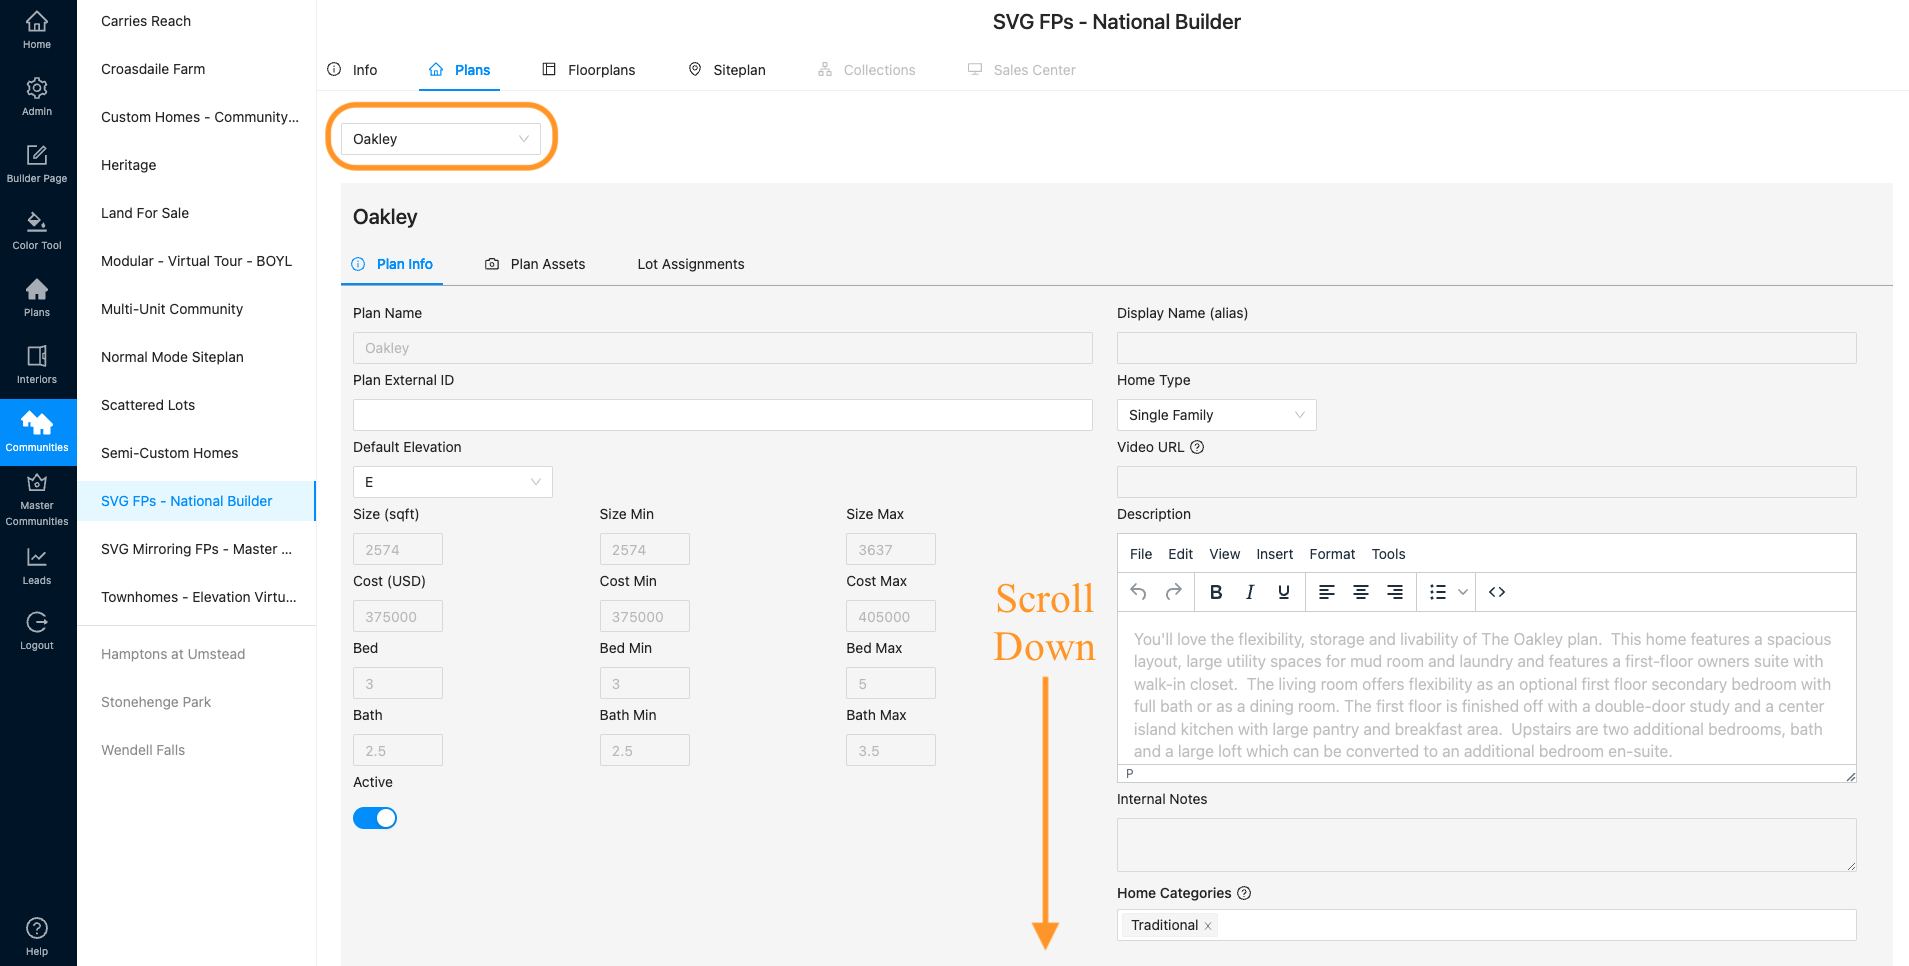
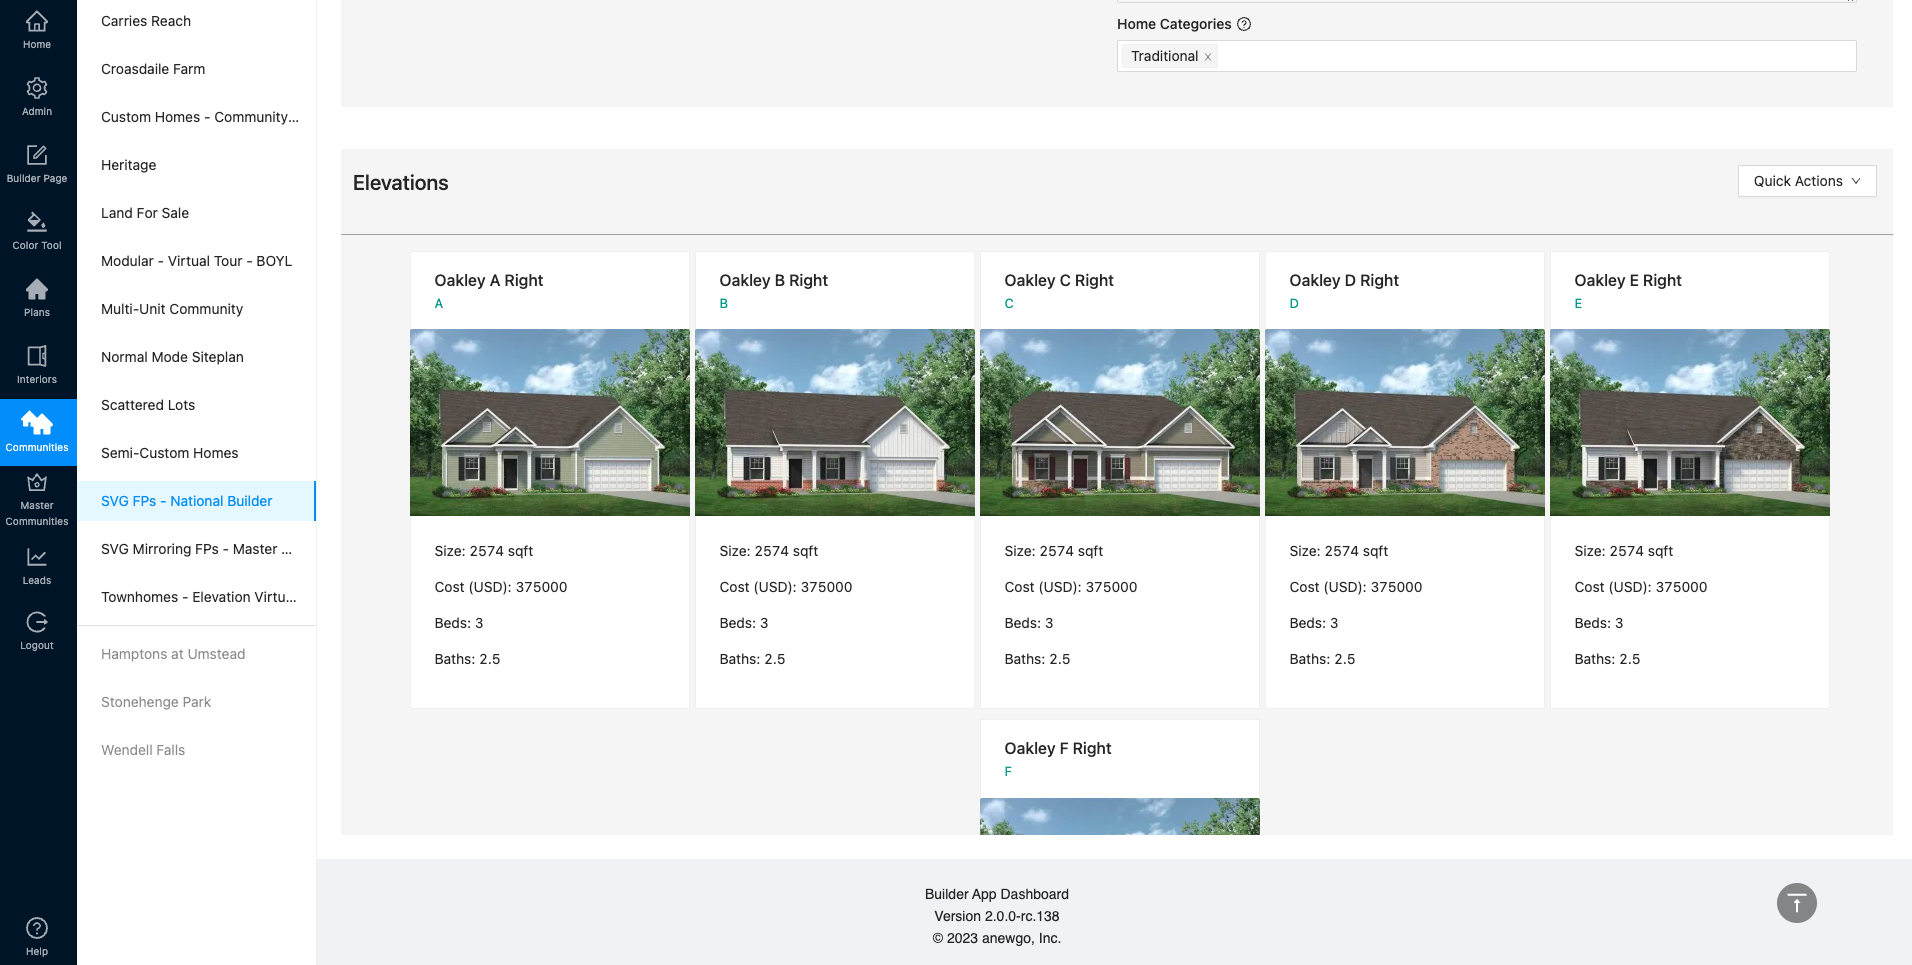
1. Navigate to Communities and select the community where you need to make the option standard. Then click “Floorplans” and select the plan that you need to update.
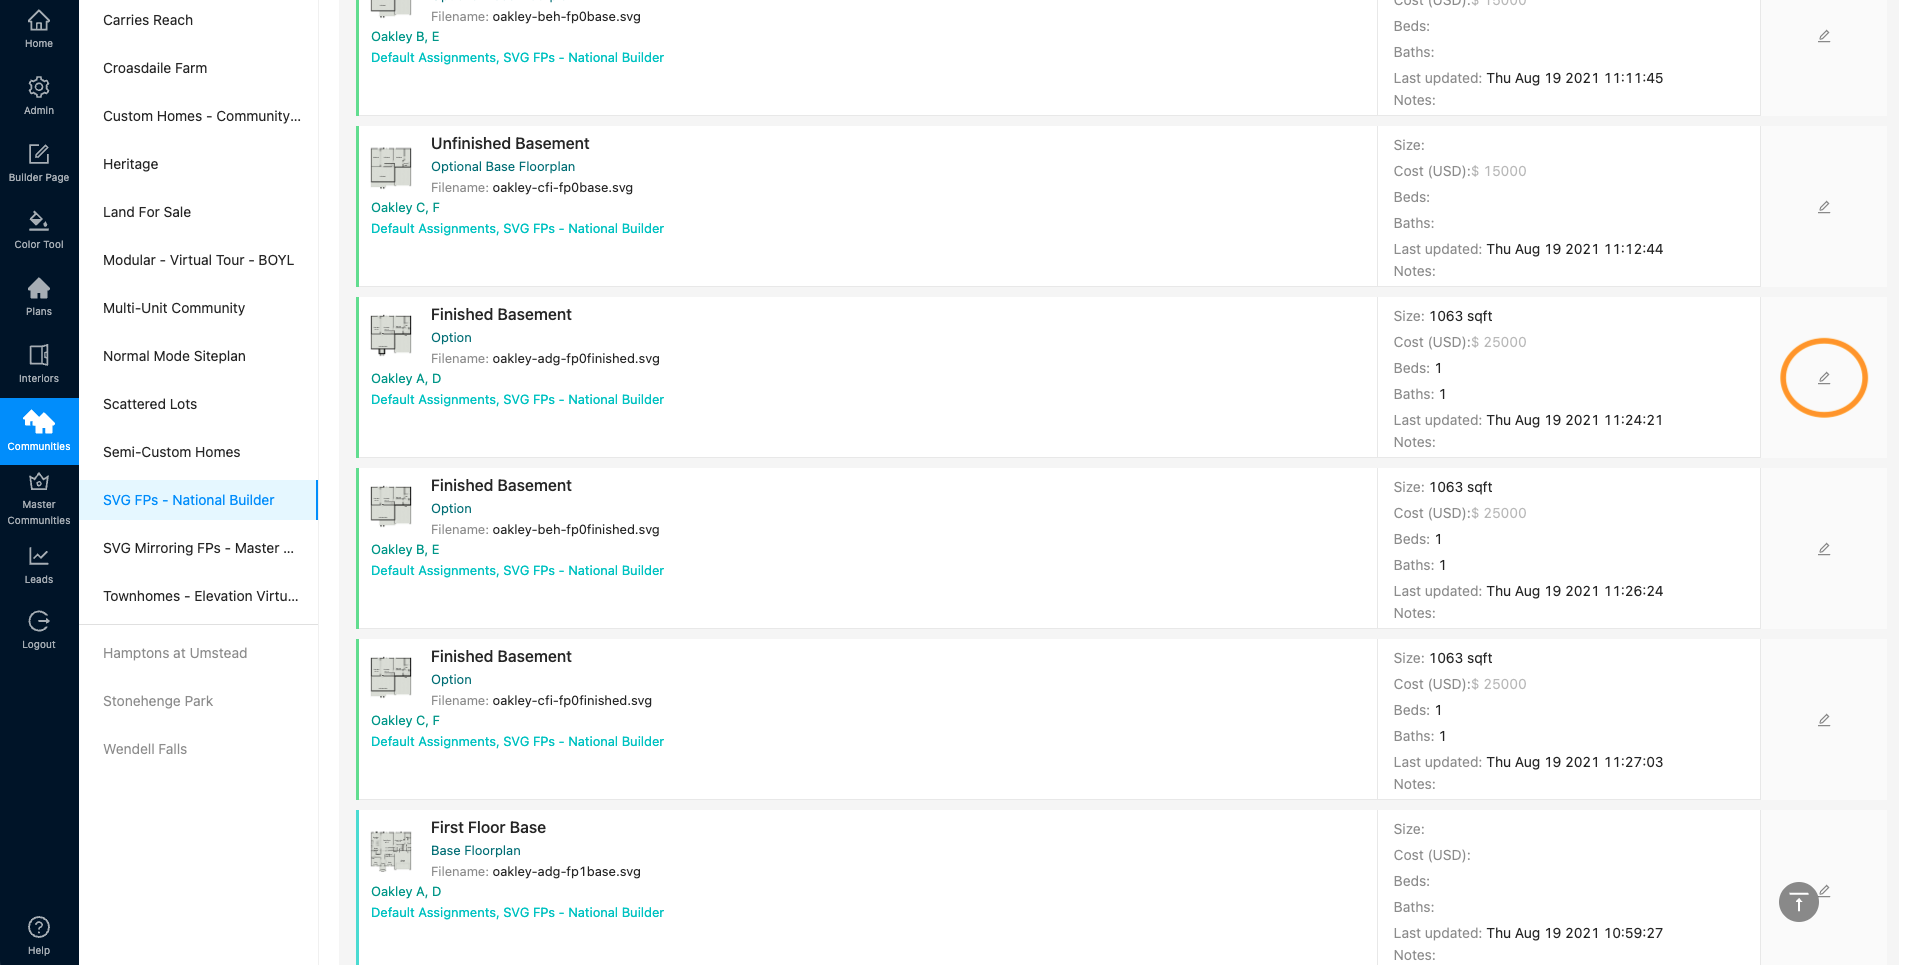
2. Scroll down to the option that you need to make standard and click the pencil icon (edit).
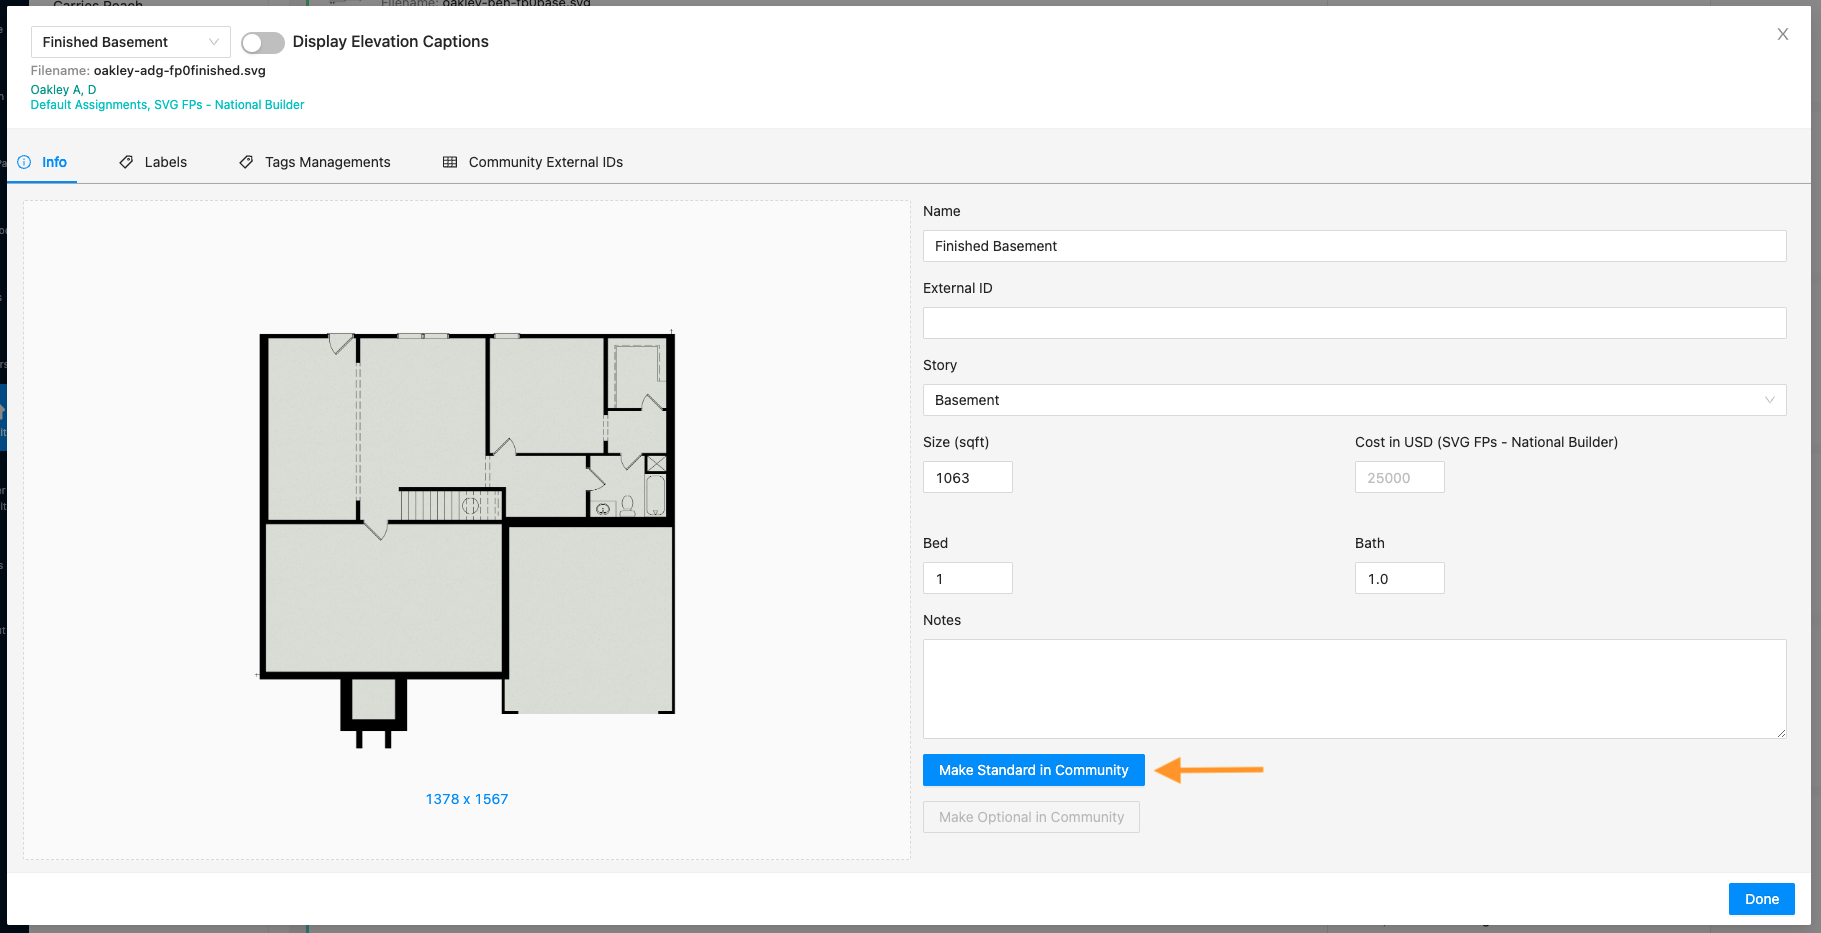
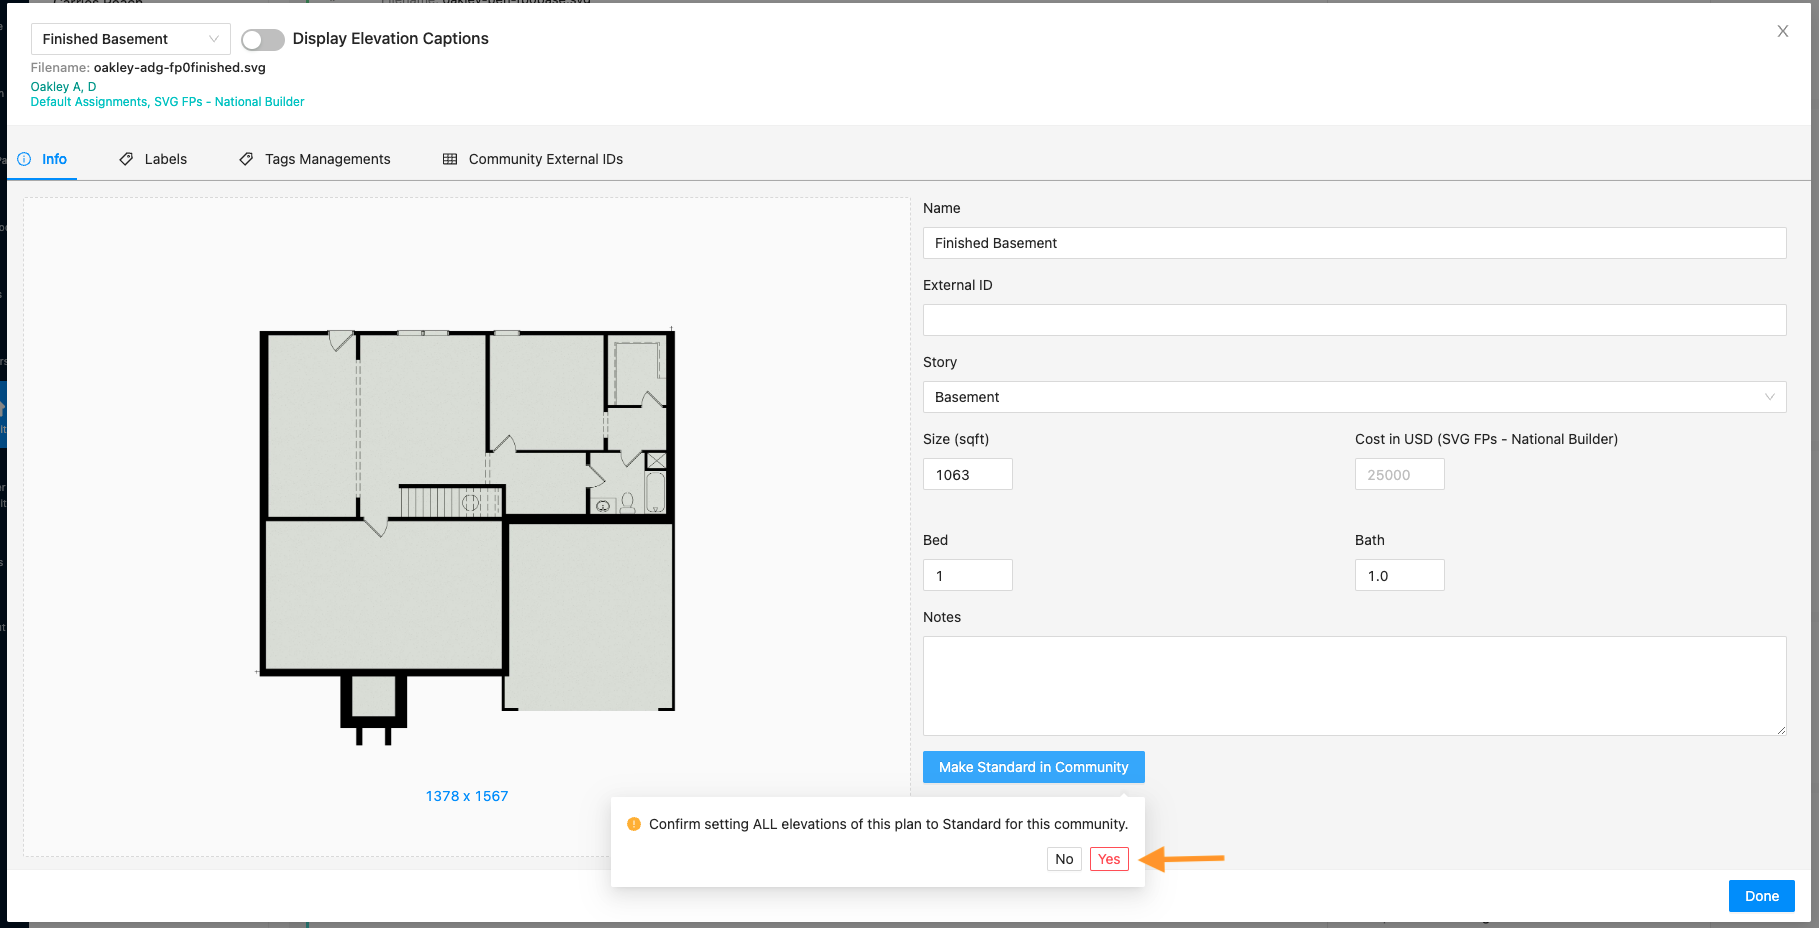
3. Click “Make Standard in Community” (Note: This example uses an SVG Floorplan so the floorplan text does not show in this particular edit window)
4. A confirmation box will pop up. Click “Yes”
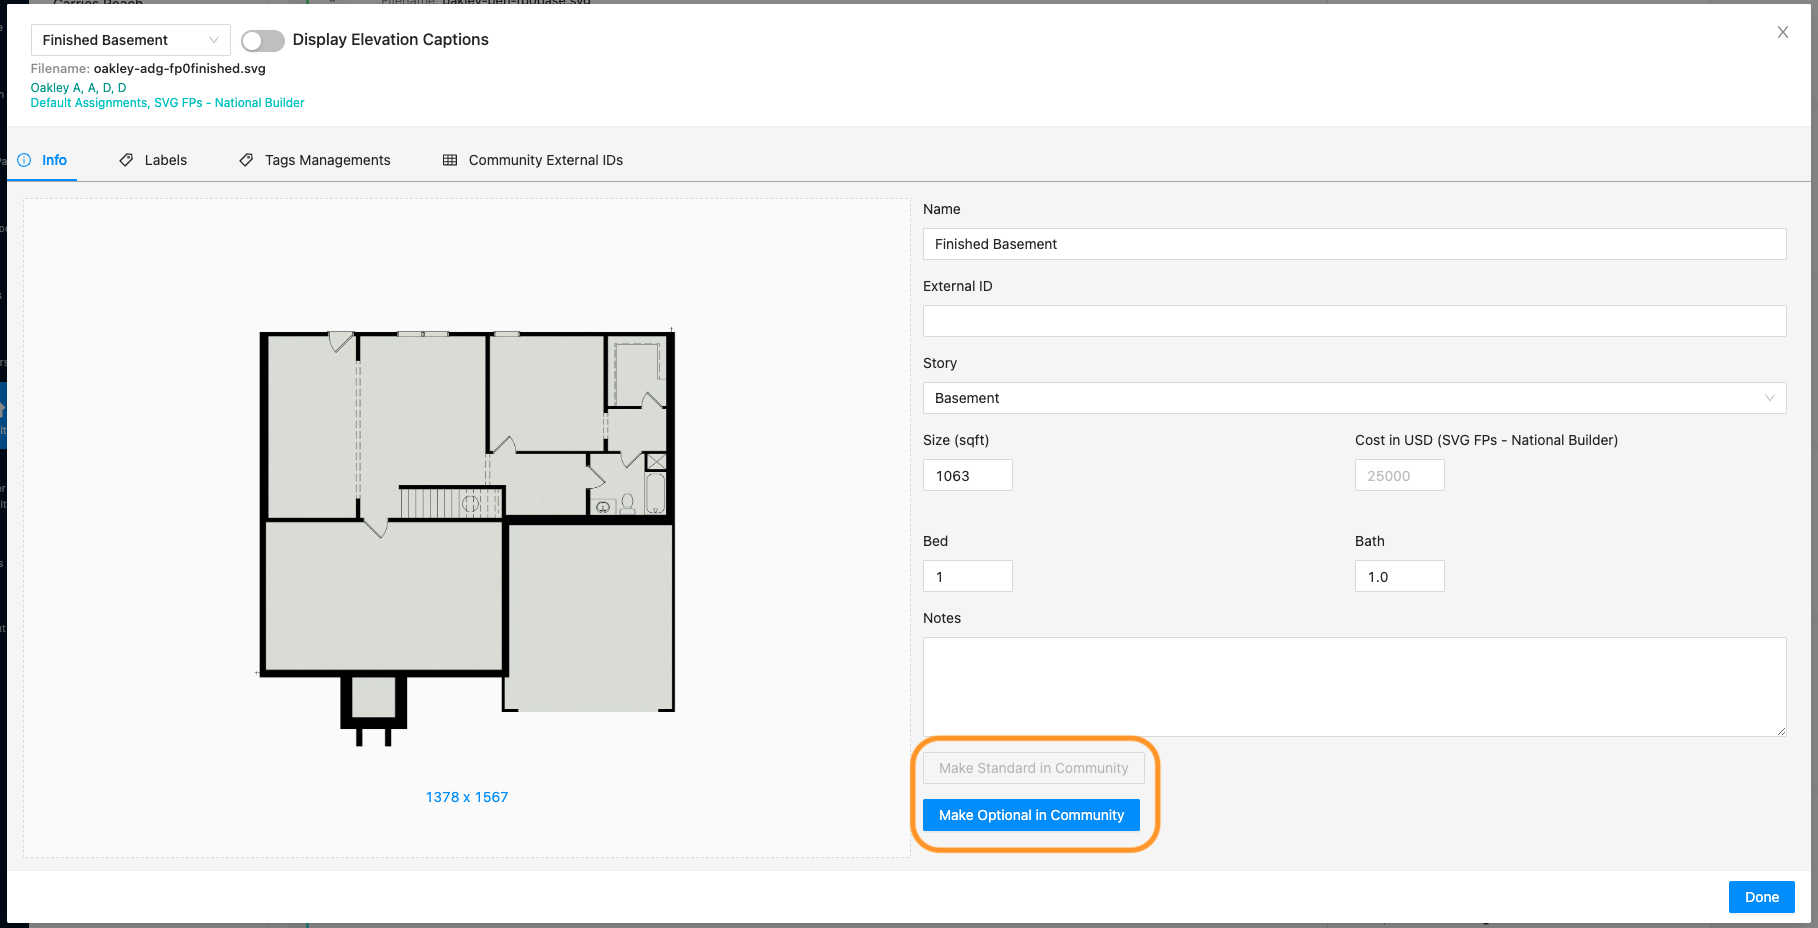
5. Now you will see the “Make Standard in Community” button gray out and the “Make Optional in Community” button is now blue. This is where you can reverse the steps and turn the option back to optional if needed.
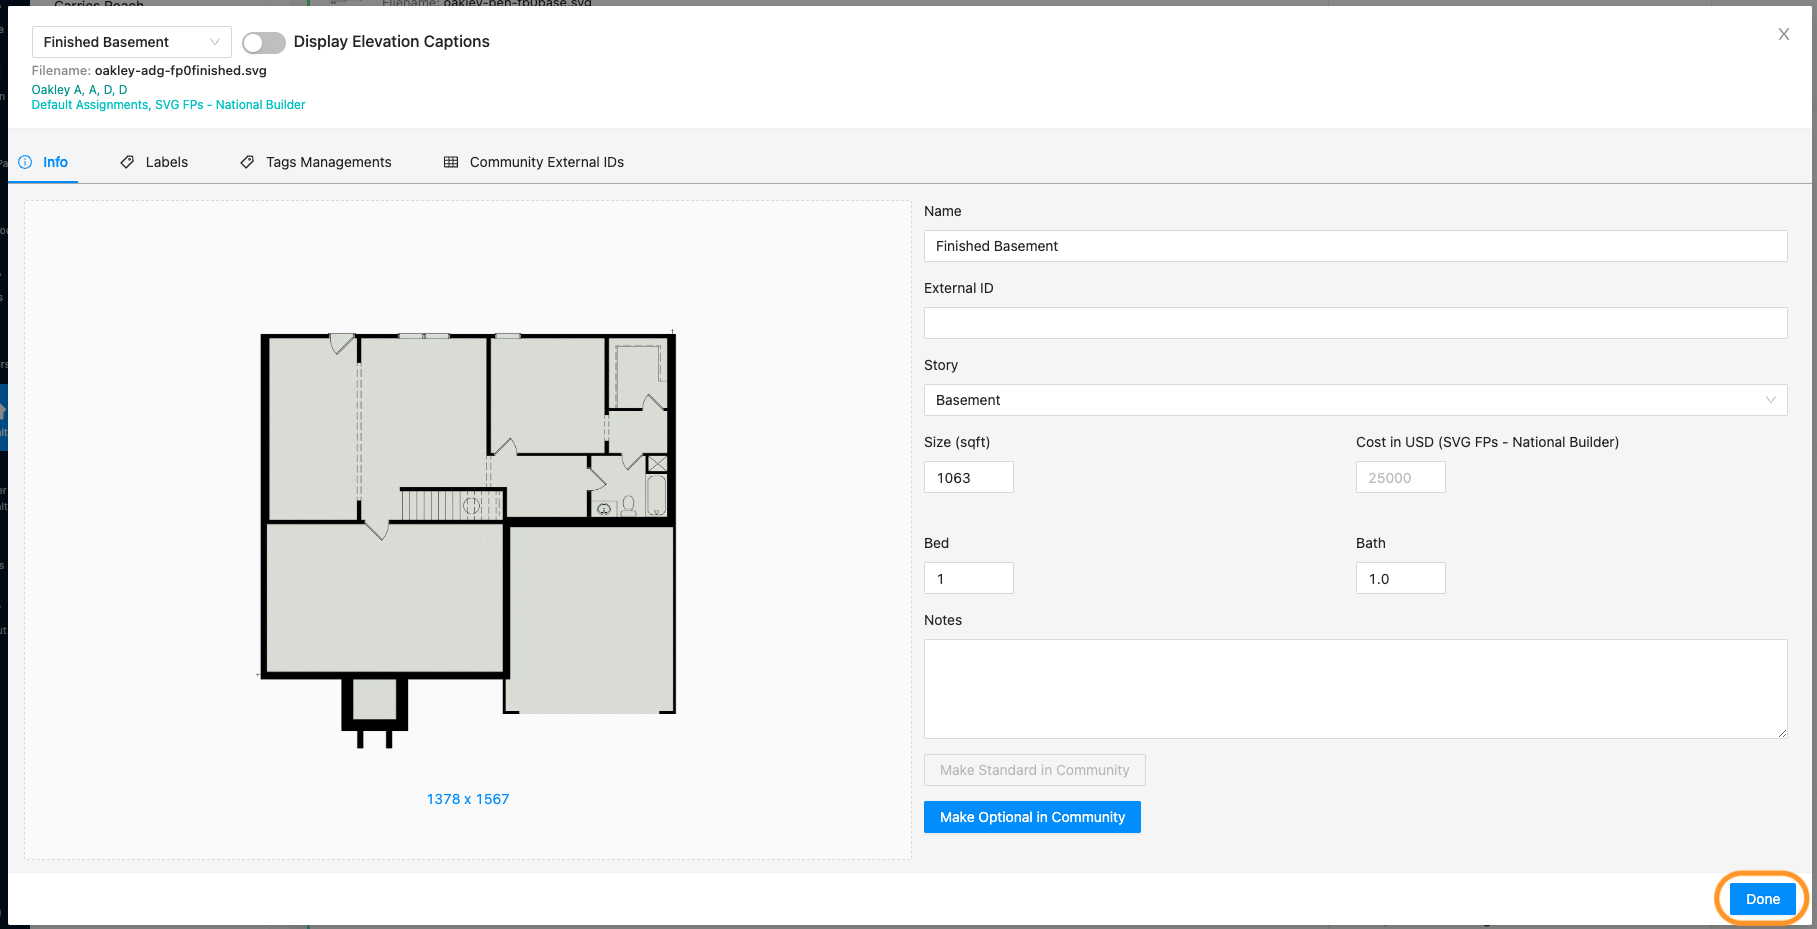
6. Click “Done” when complete.
7. Note: There may be multiple options for all of the elevations within one plan. Make sure you update all options as needed for each elevation.

*If the option does not adjust square footage or bed/bath counts, you are done! The option will now show as standard for the plan/elevations in this specific community!
If the option does adjust square footage or bed/bath counts, there is one more item to be done in order for the data to update correctly on the front end.
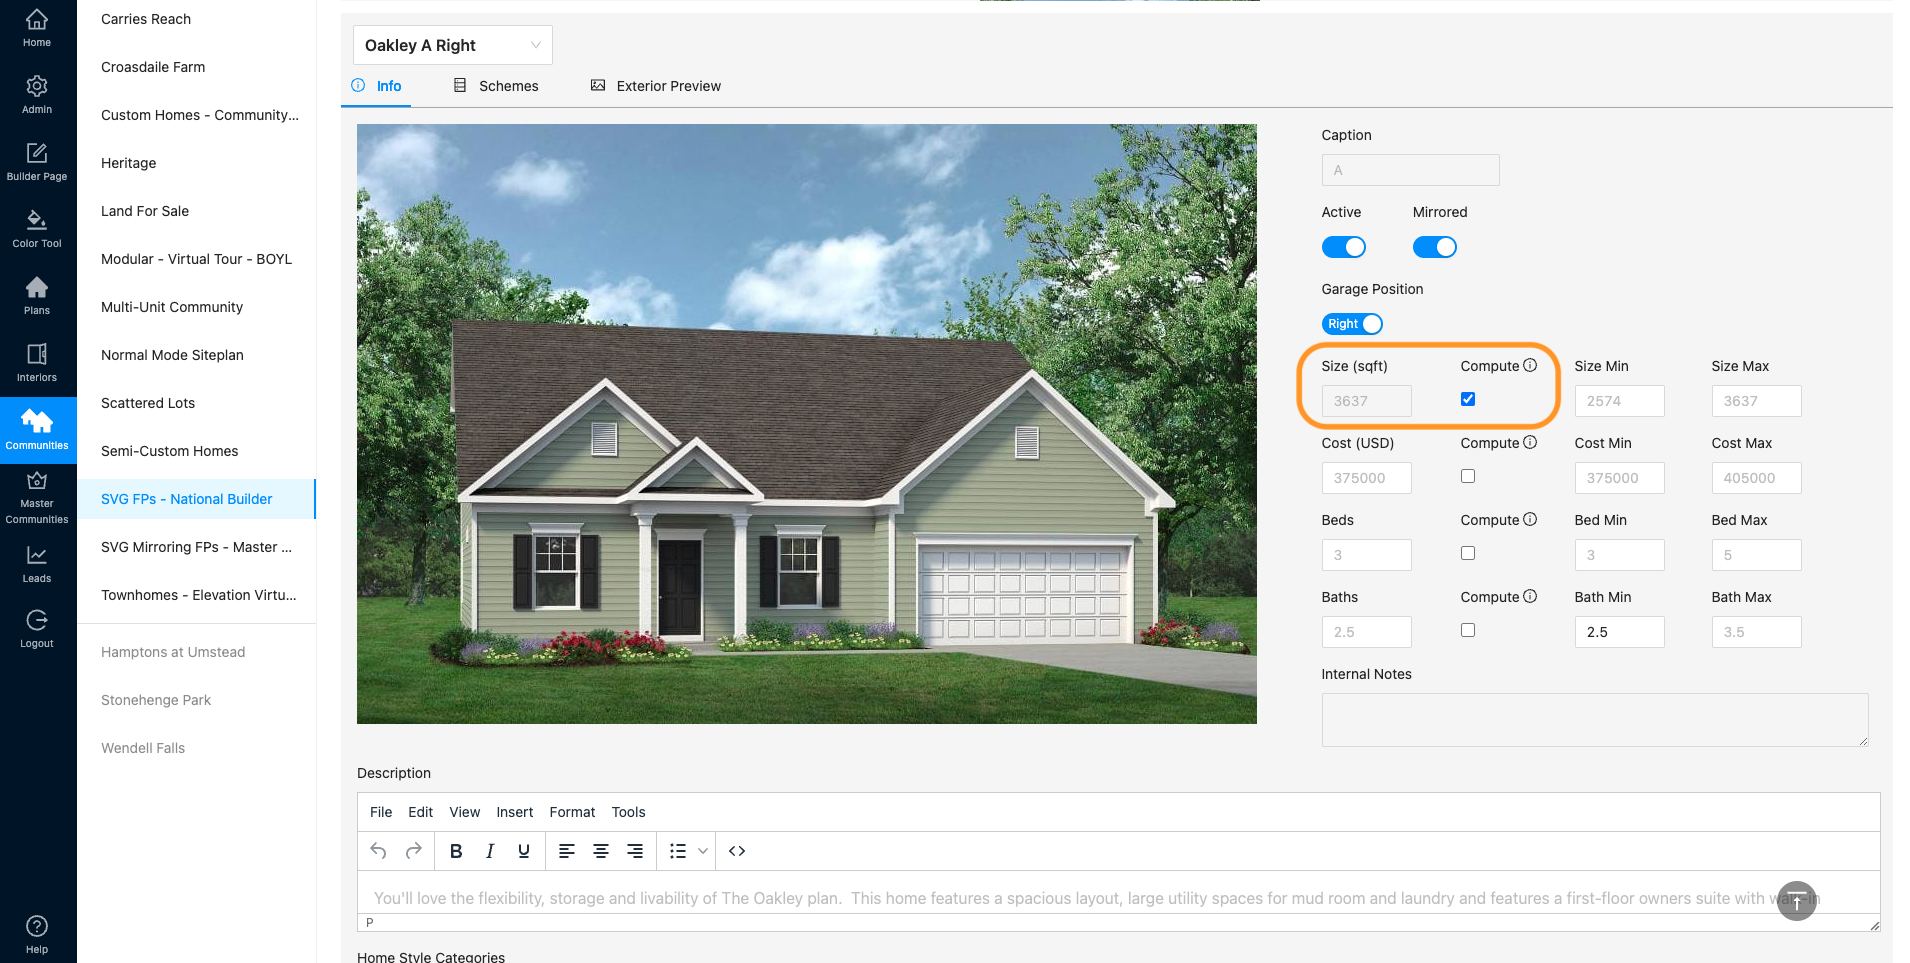
8. Navigate to the Plans tab above. The same plan should be selected, but if not, you can find the correct plan in the dropdown. Then scroll down to the elevations.
9. Select each elevation to see the specifications data fields.
10. Click “Compute” on each field needing to be updated (square footage, bed, bath, etc)
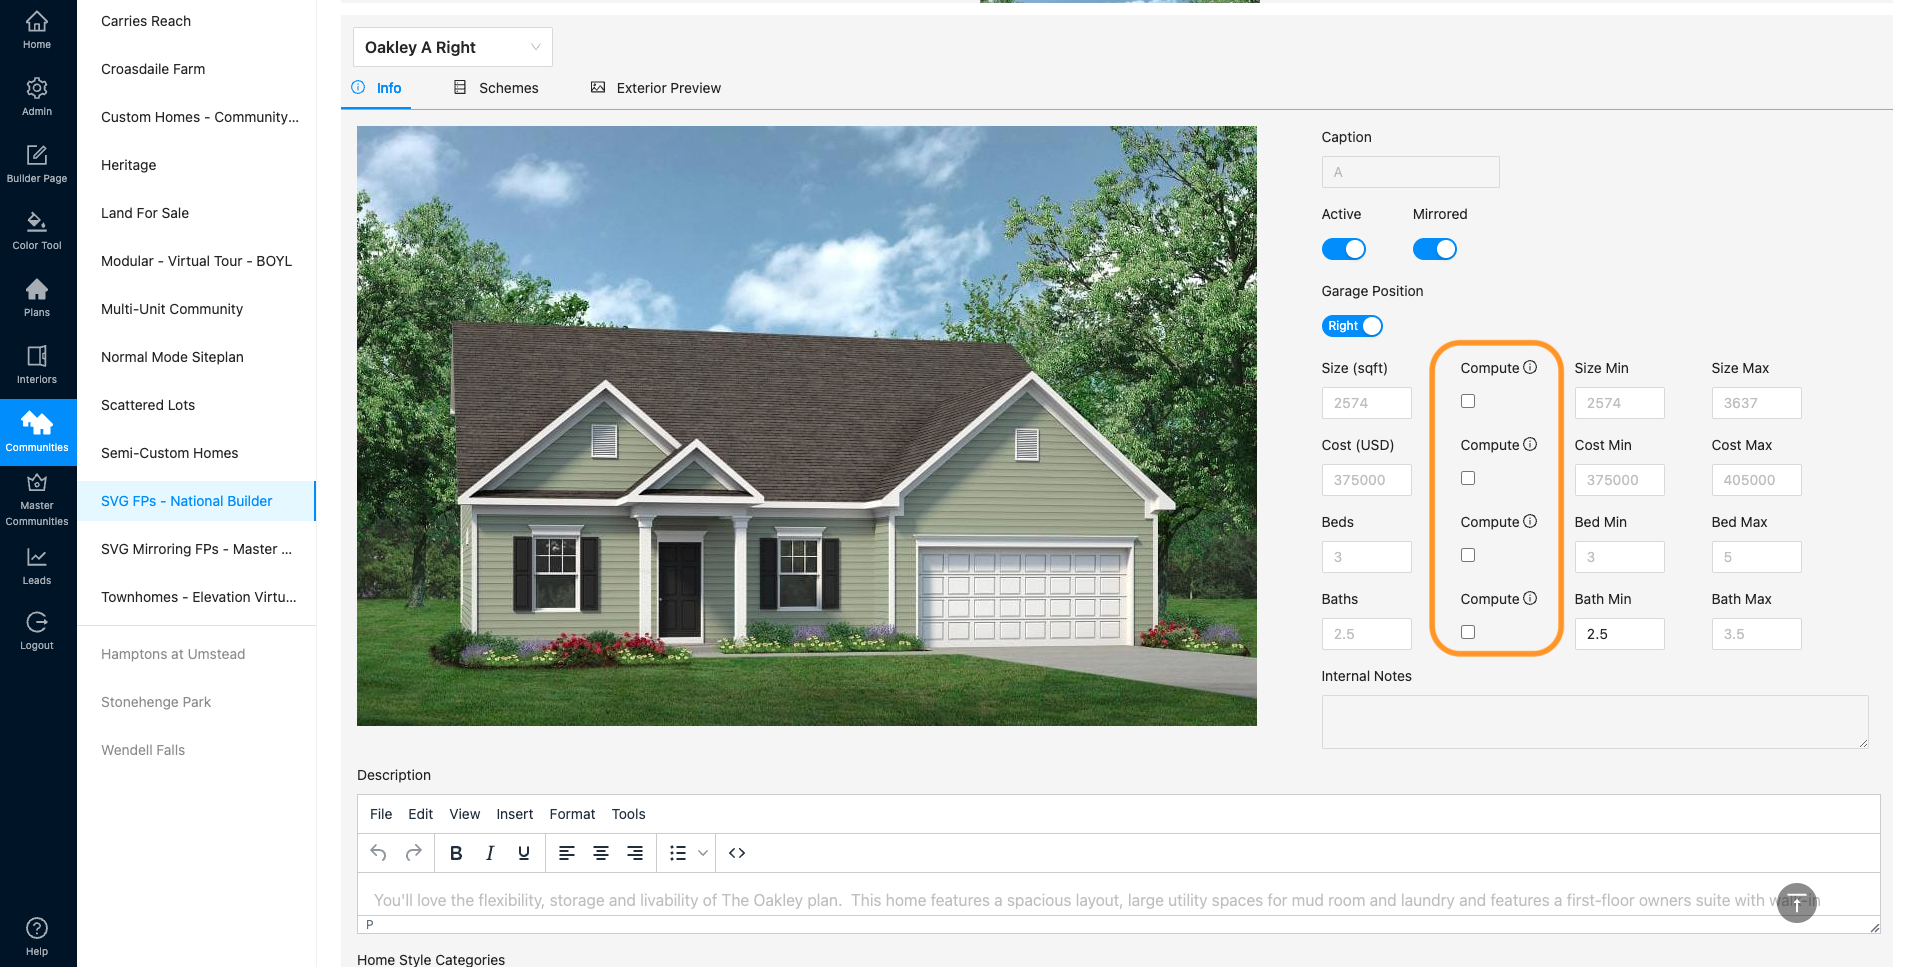
11. The data will now automatically show the correct number of the base plan data + the option you just made standard for this community.