Scalable Vector Graphics (SVG) is an Extensible Markup Language-based vector image format for two-dimensional graphics with support for interactivity and animation. SVG Floorplans and their corresponding exterior elevation rendering are able to be mirrored instantly with the click of a button. Here is how to set that up…
To check if your plan/elevations have been formatted for SVG:
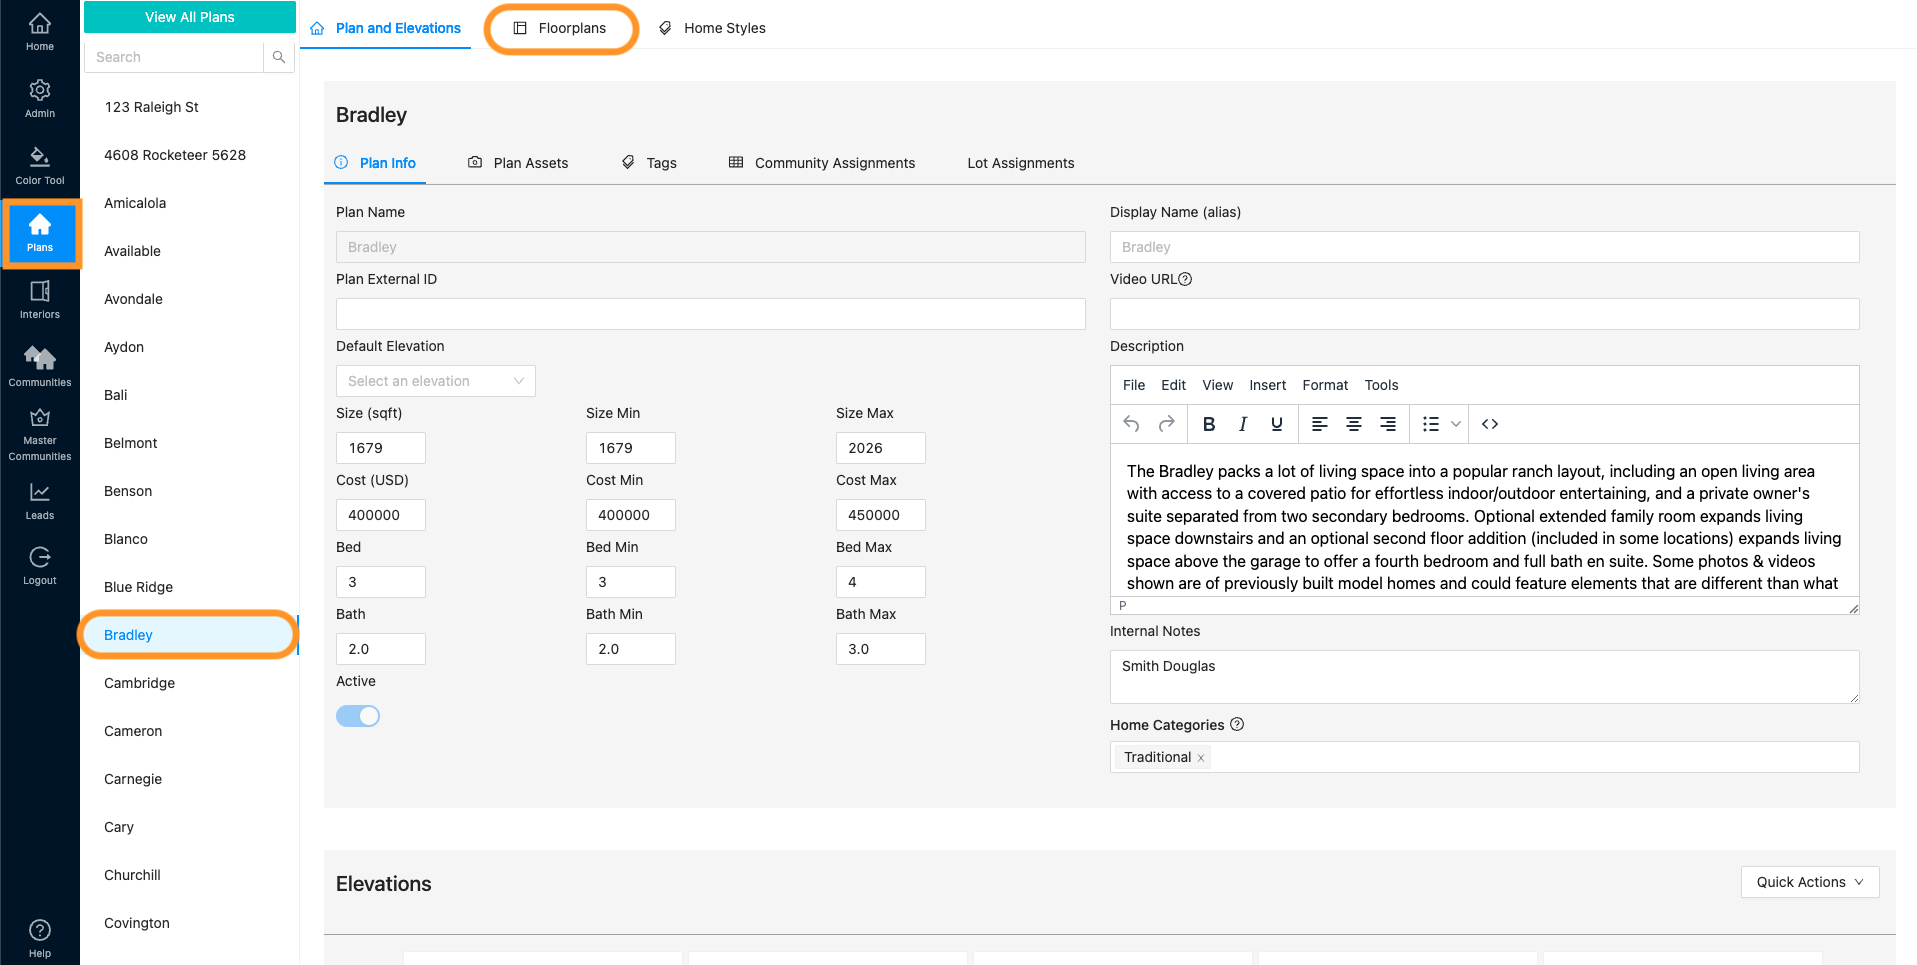
- Navigate to Plans and find the correct plan. Then click “Floorplans”
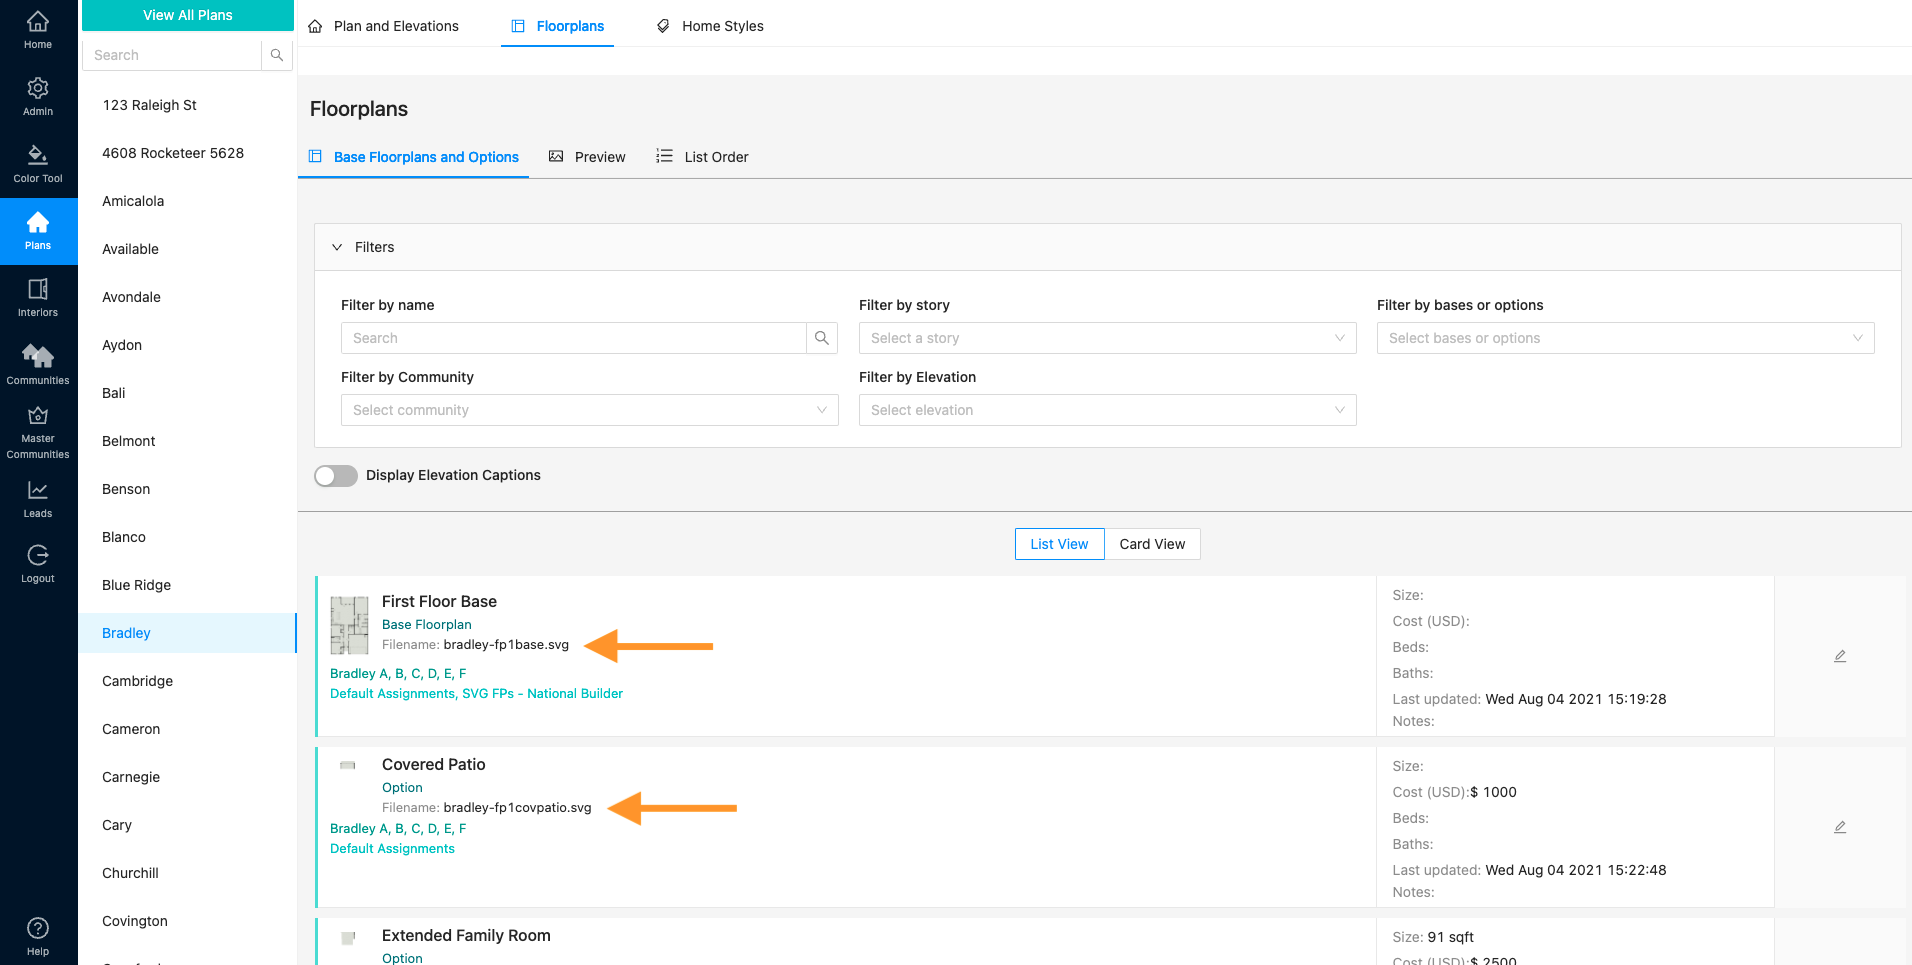
2. If you see the file format .svg then this plan and its elevations are SVG.
To set up mirroring and garage position at the elevation level:
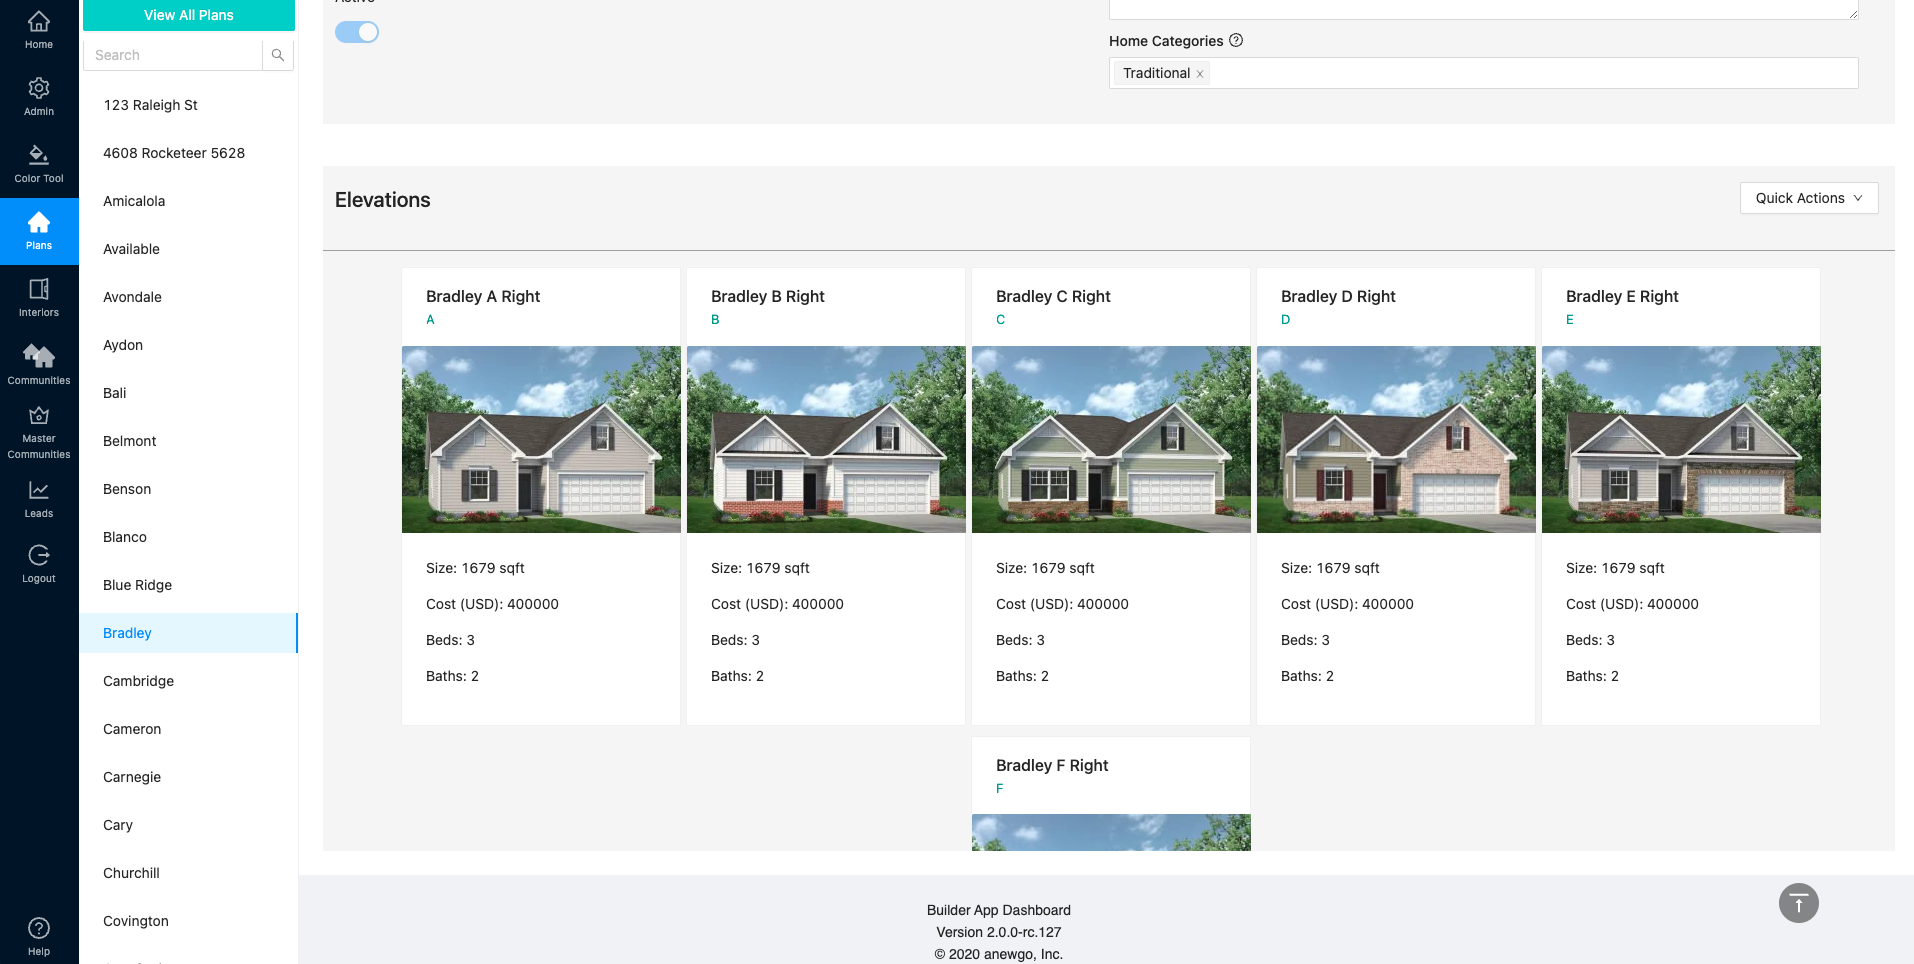
- Navigate to Plans and find the correct plan. Scroll down to see the elevations.
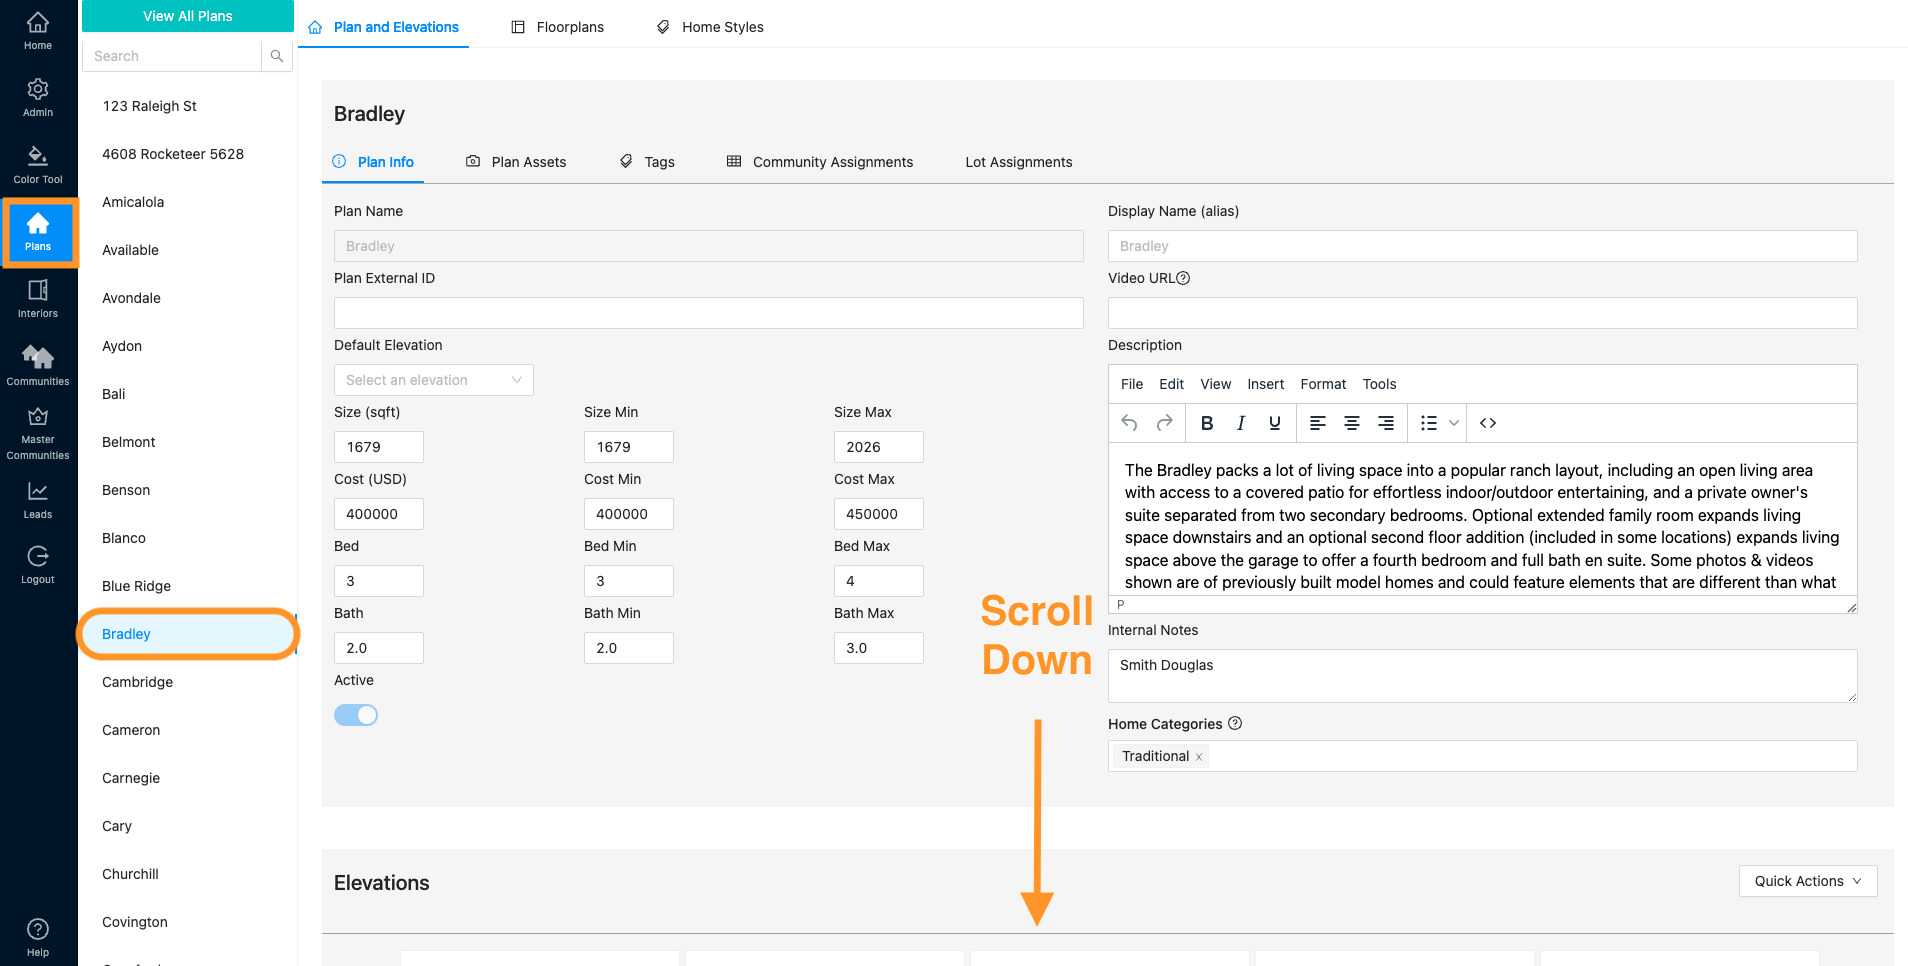
2. Click on the elevation you would like to set/edit the mirroring and garage position on.
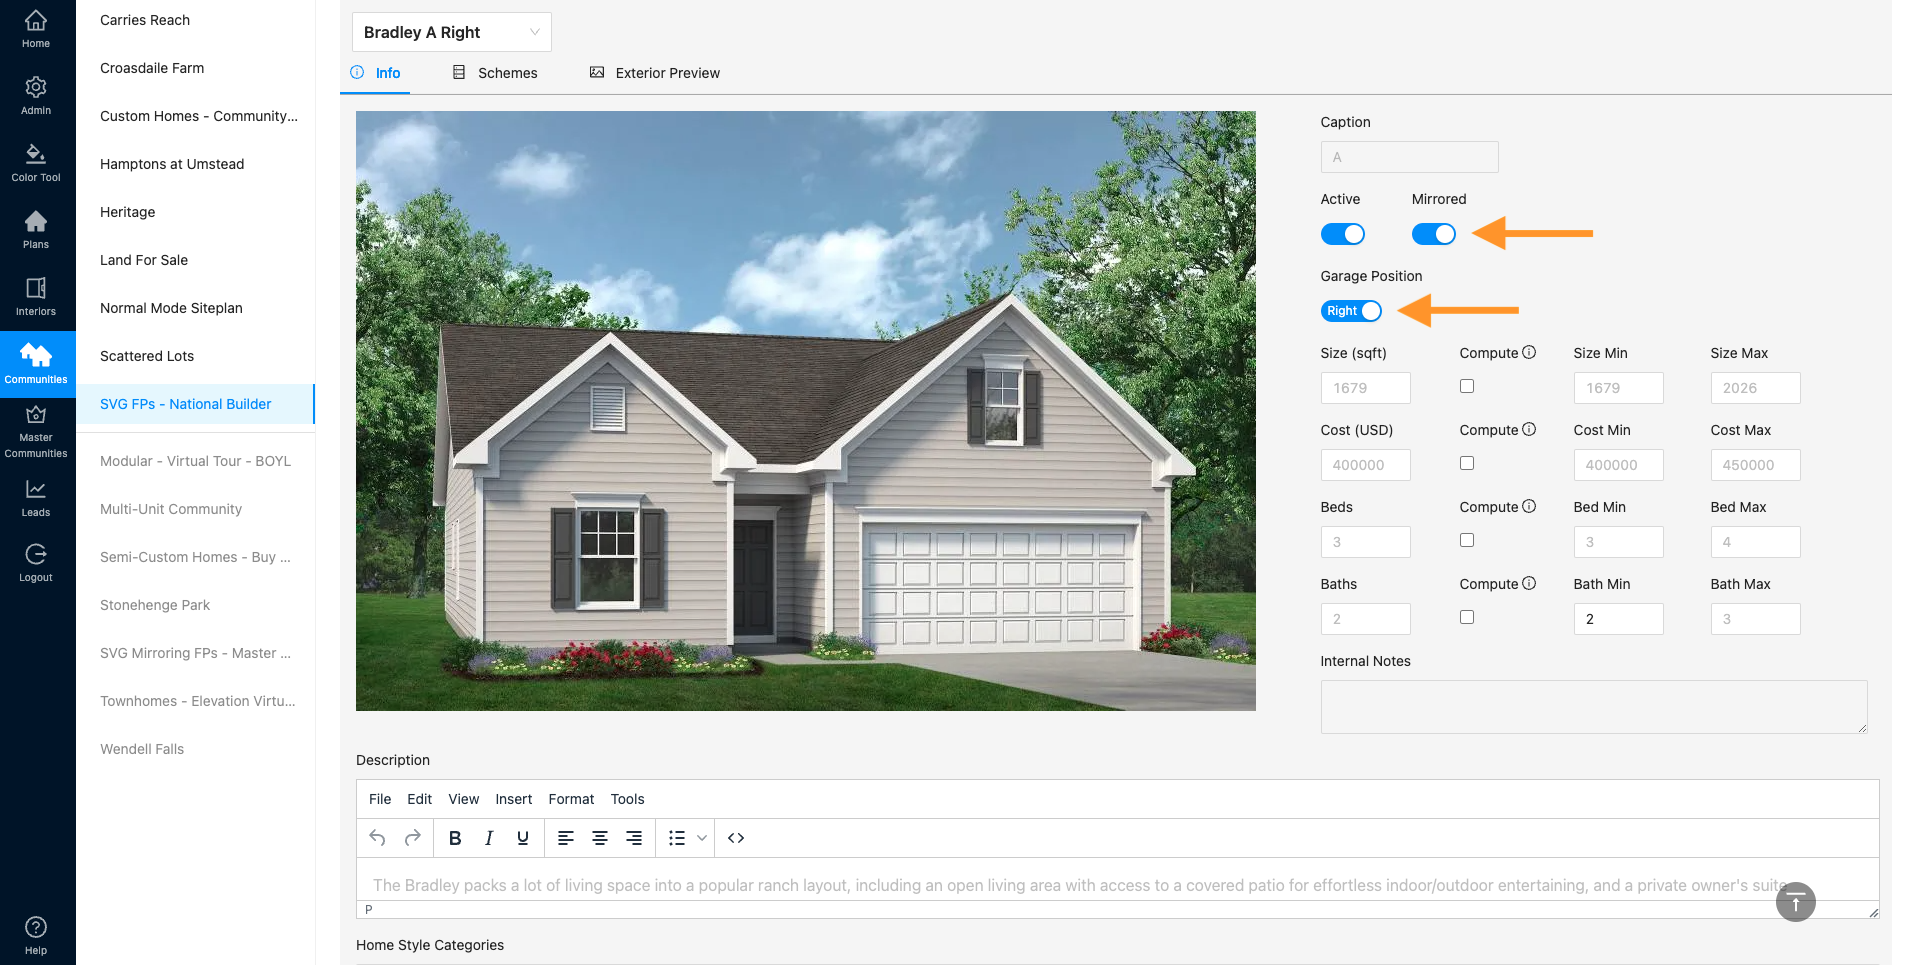
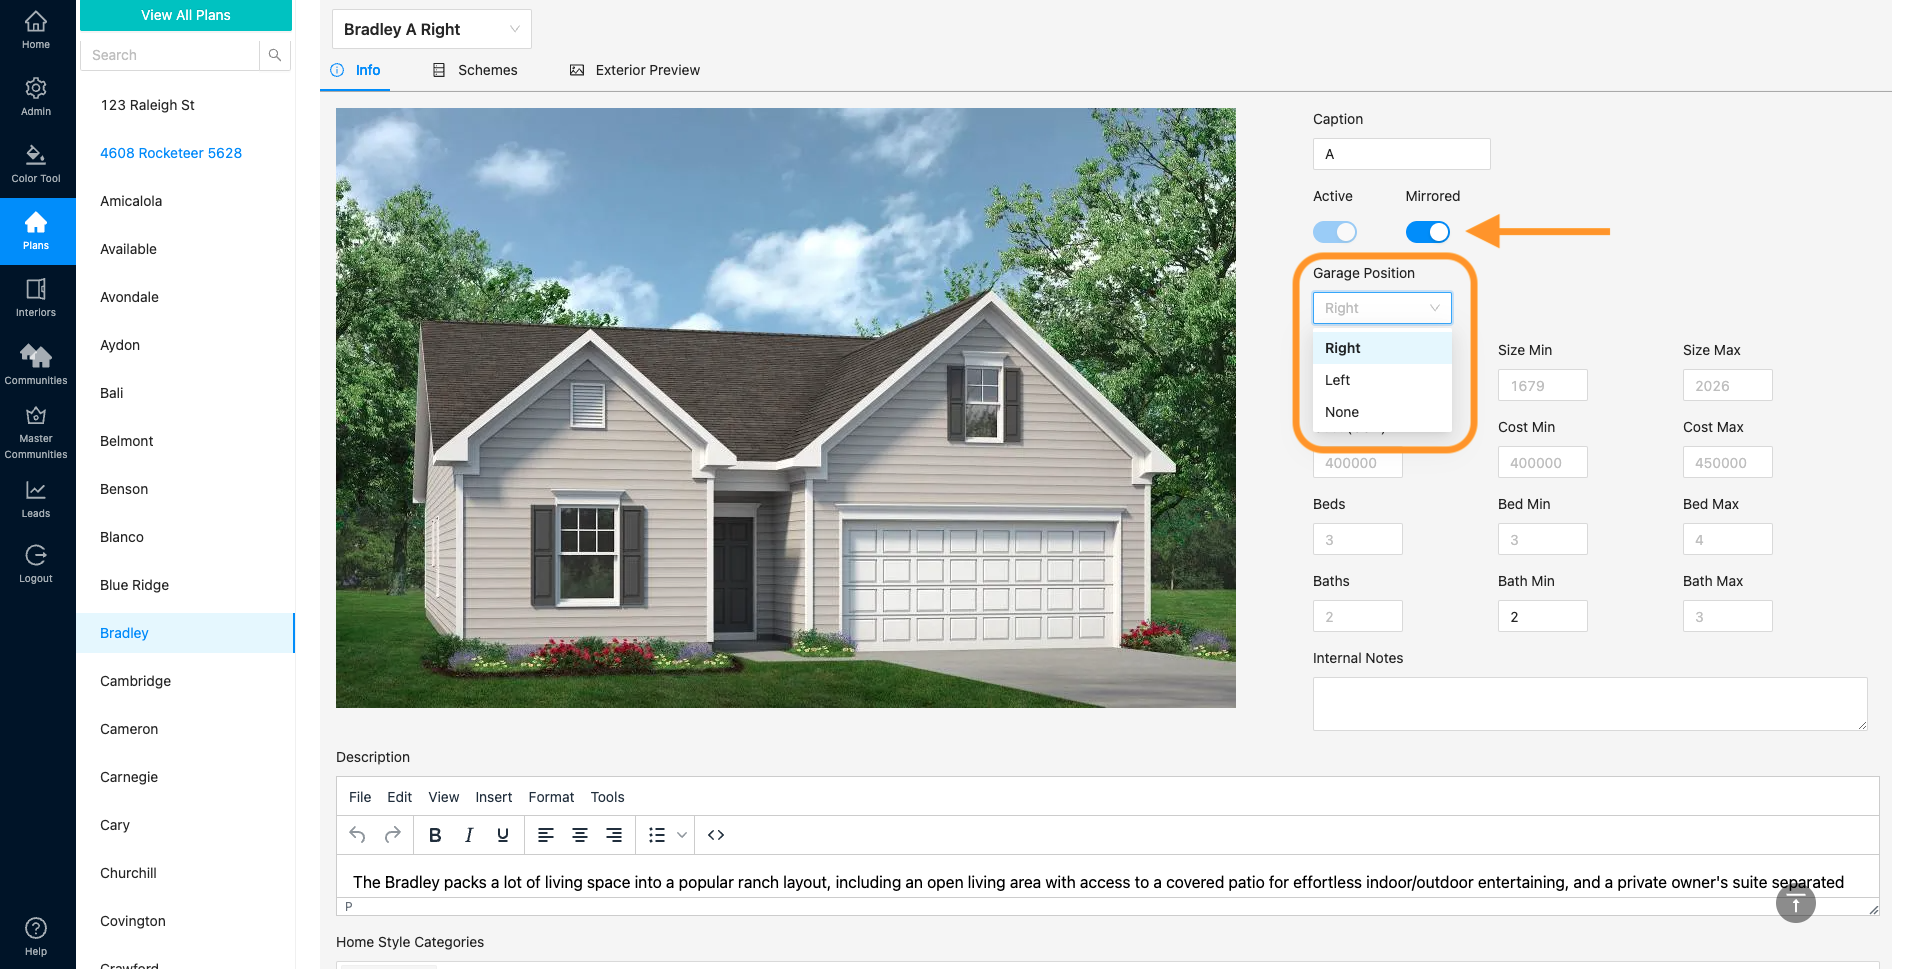
3. Under the elevations Info section, you can click the Mirror toggle to be active or inactive. You can also select the garage position via the drop down.
To set up mirroring and garage position via Community Assignments (this will be specific only to the community/communities where assignments are updated):
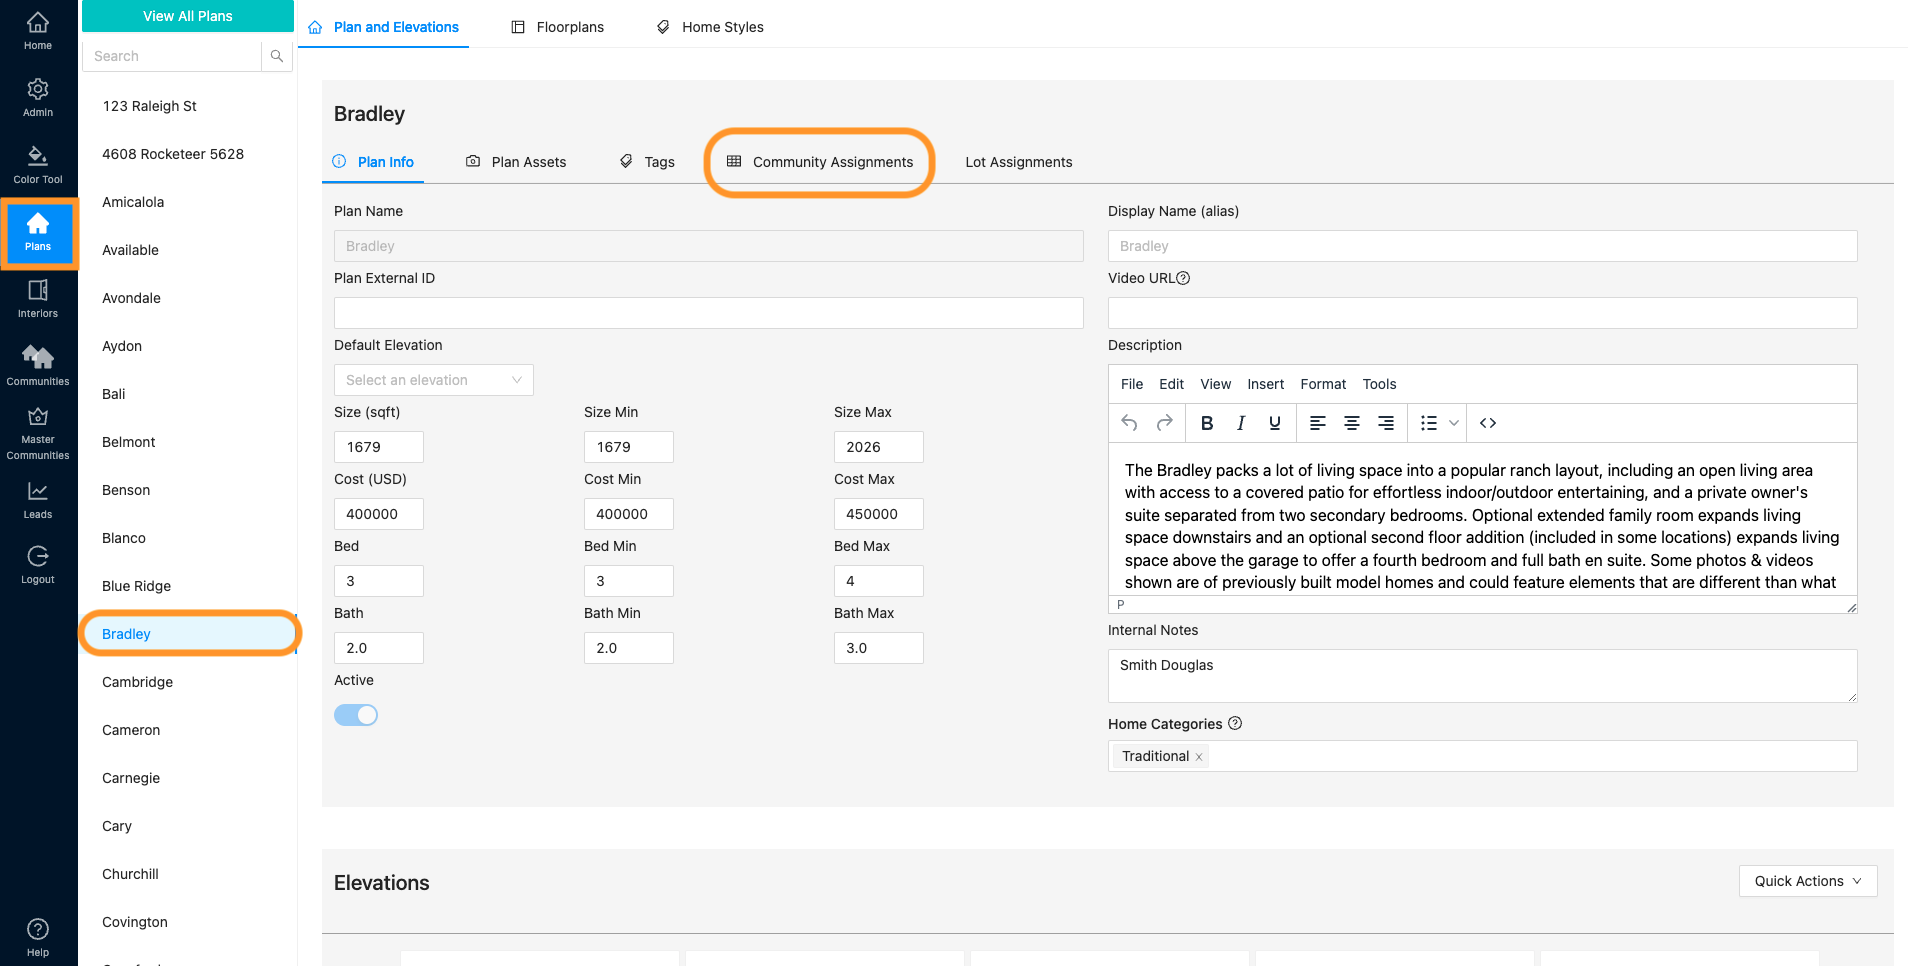
- Navigate to Plans and select the correct plan. Click “Community Assignments”
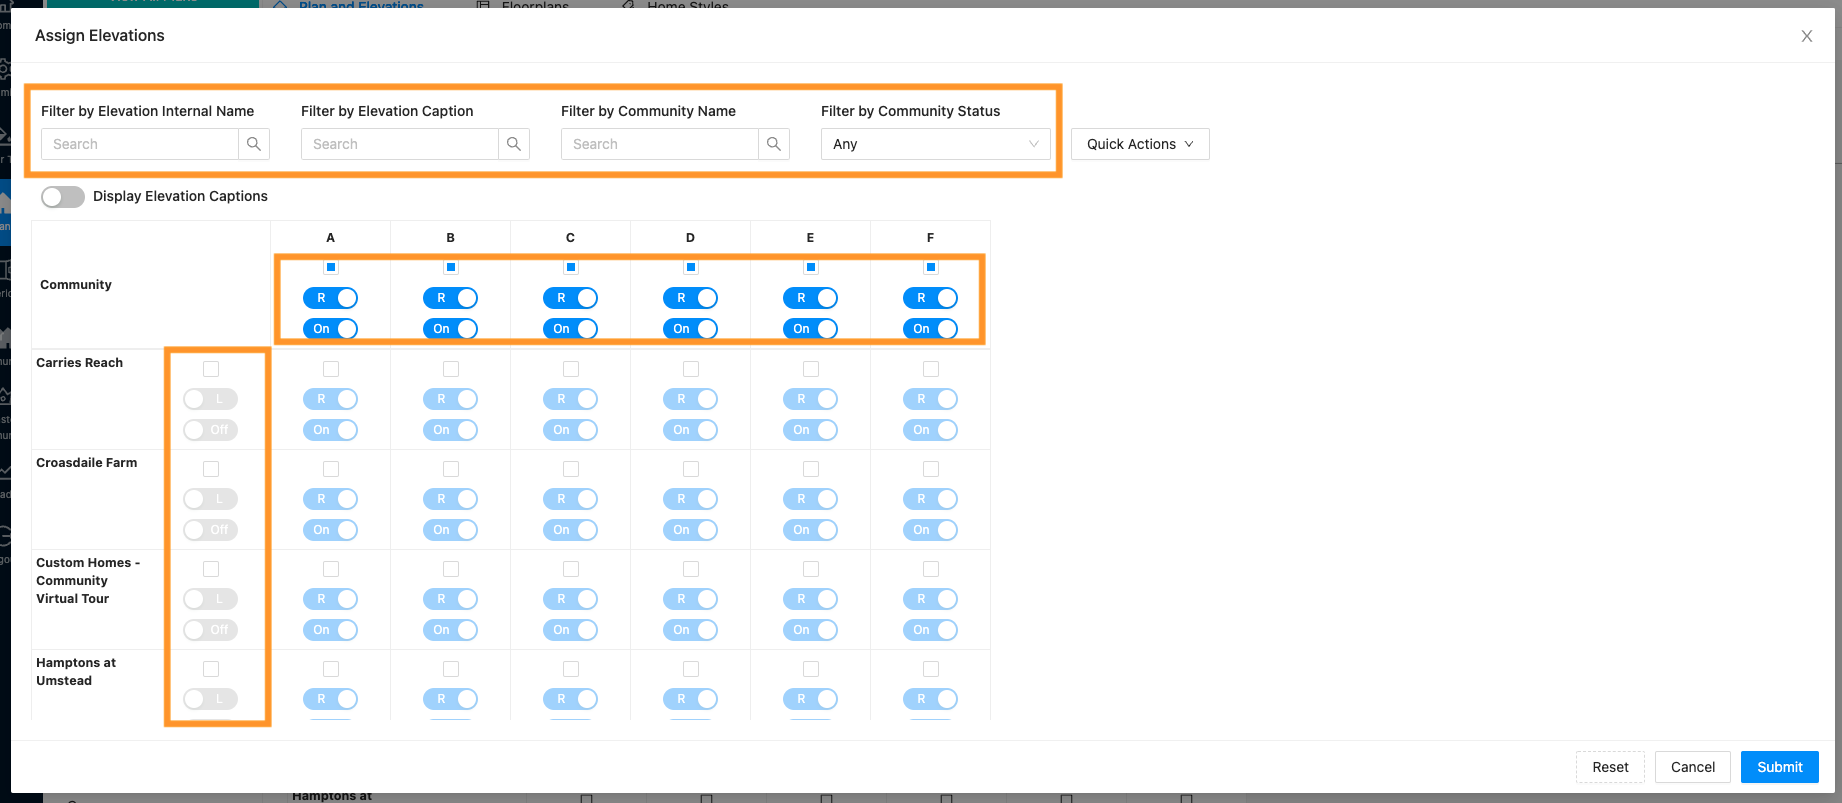
2. Click the blue “Assign Elevations” button to make updates.
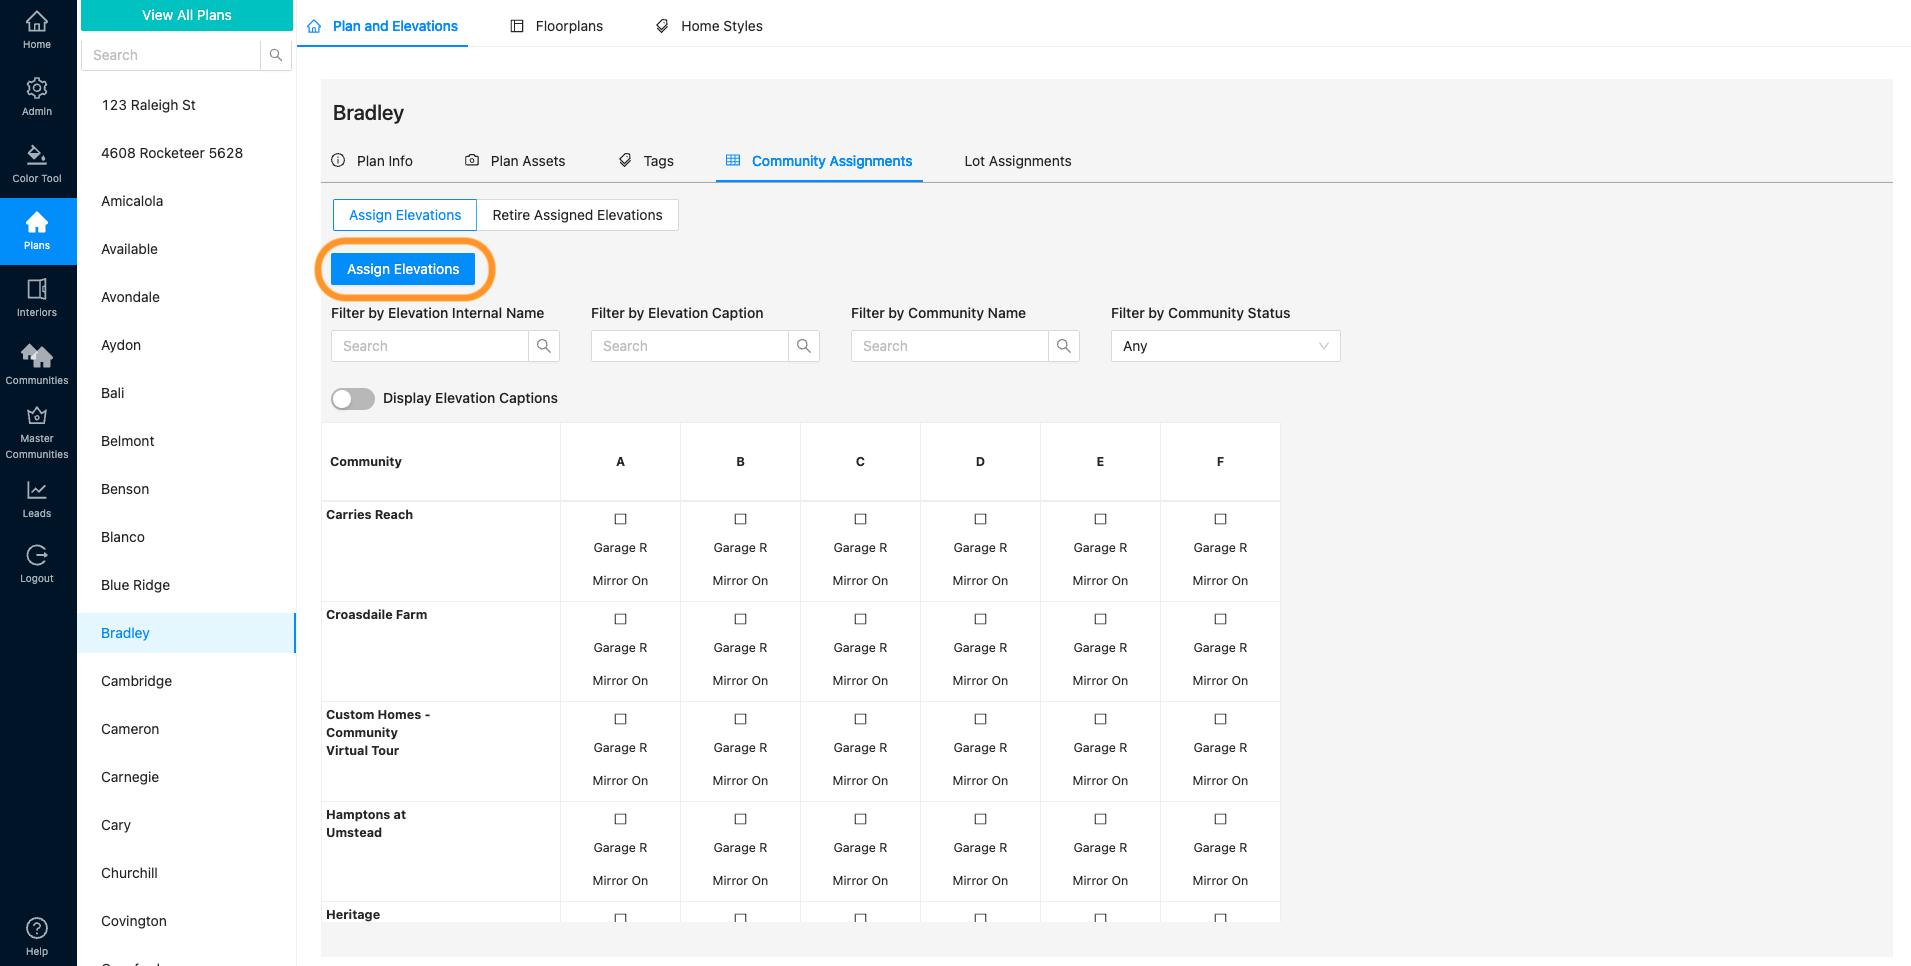
3. Here you can use the filters to narrow down your view. SVG plans will have the regular assignment checkbox to assign an elevation to a community, but there are also toggles to set mirroring and garage position for a specific community. The toggle sliders on the left (next to community names) and up top (under elevation names) function as “Select All” buttons.
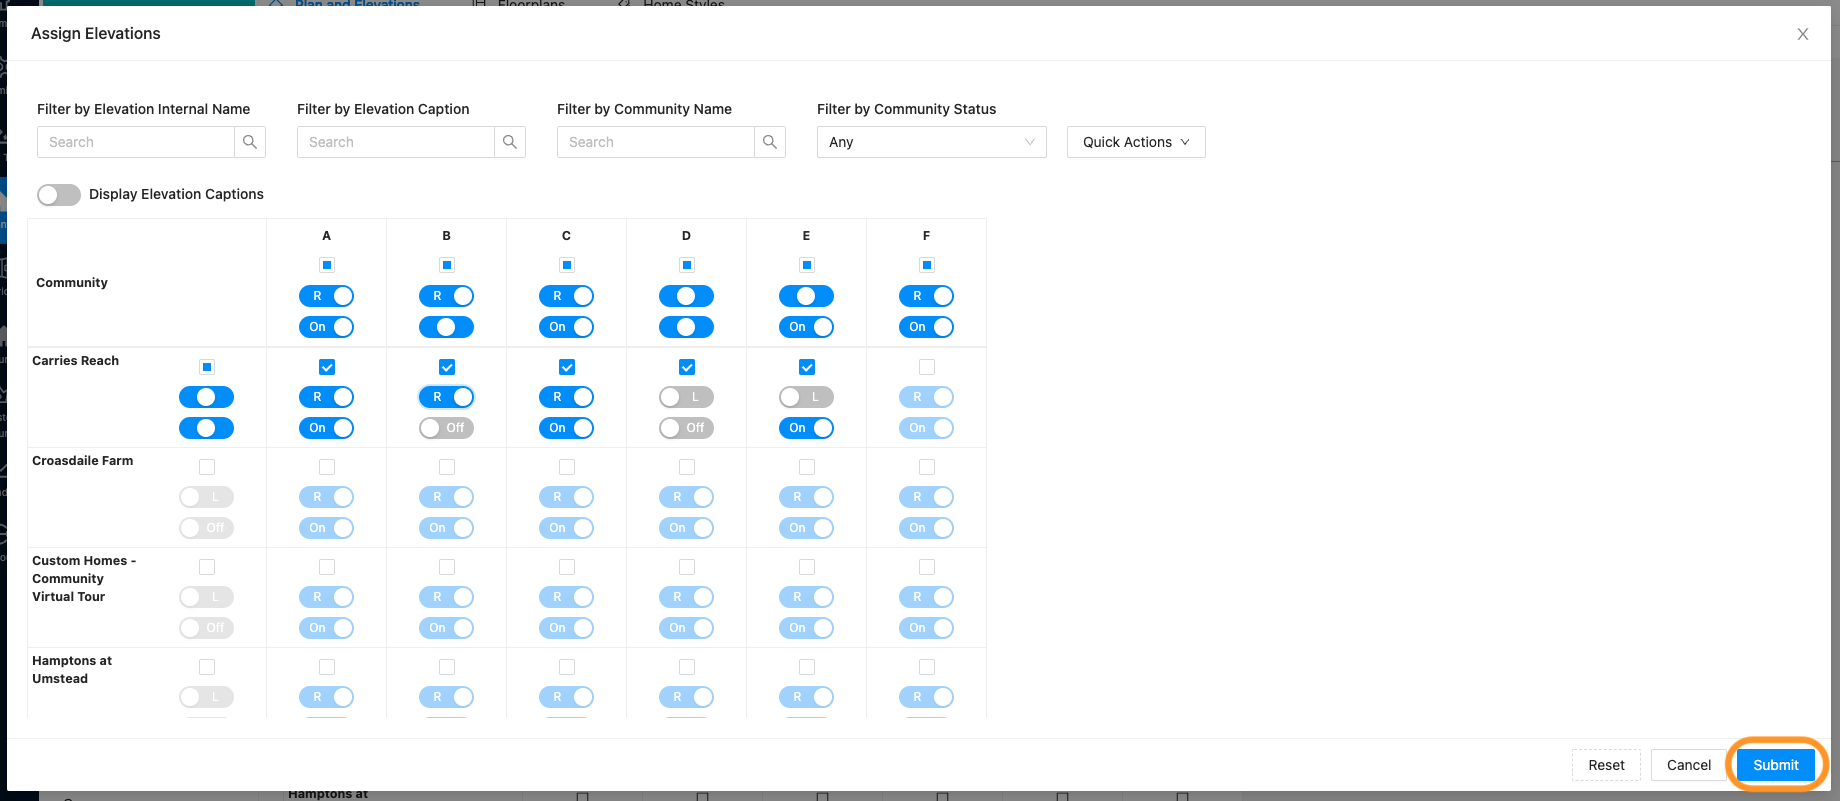
4. Now you can customize the mirroring and garage position for each elevation assigned to a community. Simply click the toggles until you are satisfied with the settings. Be sure to click “Submit” to save.
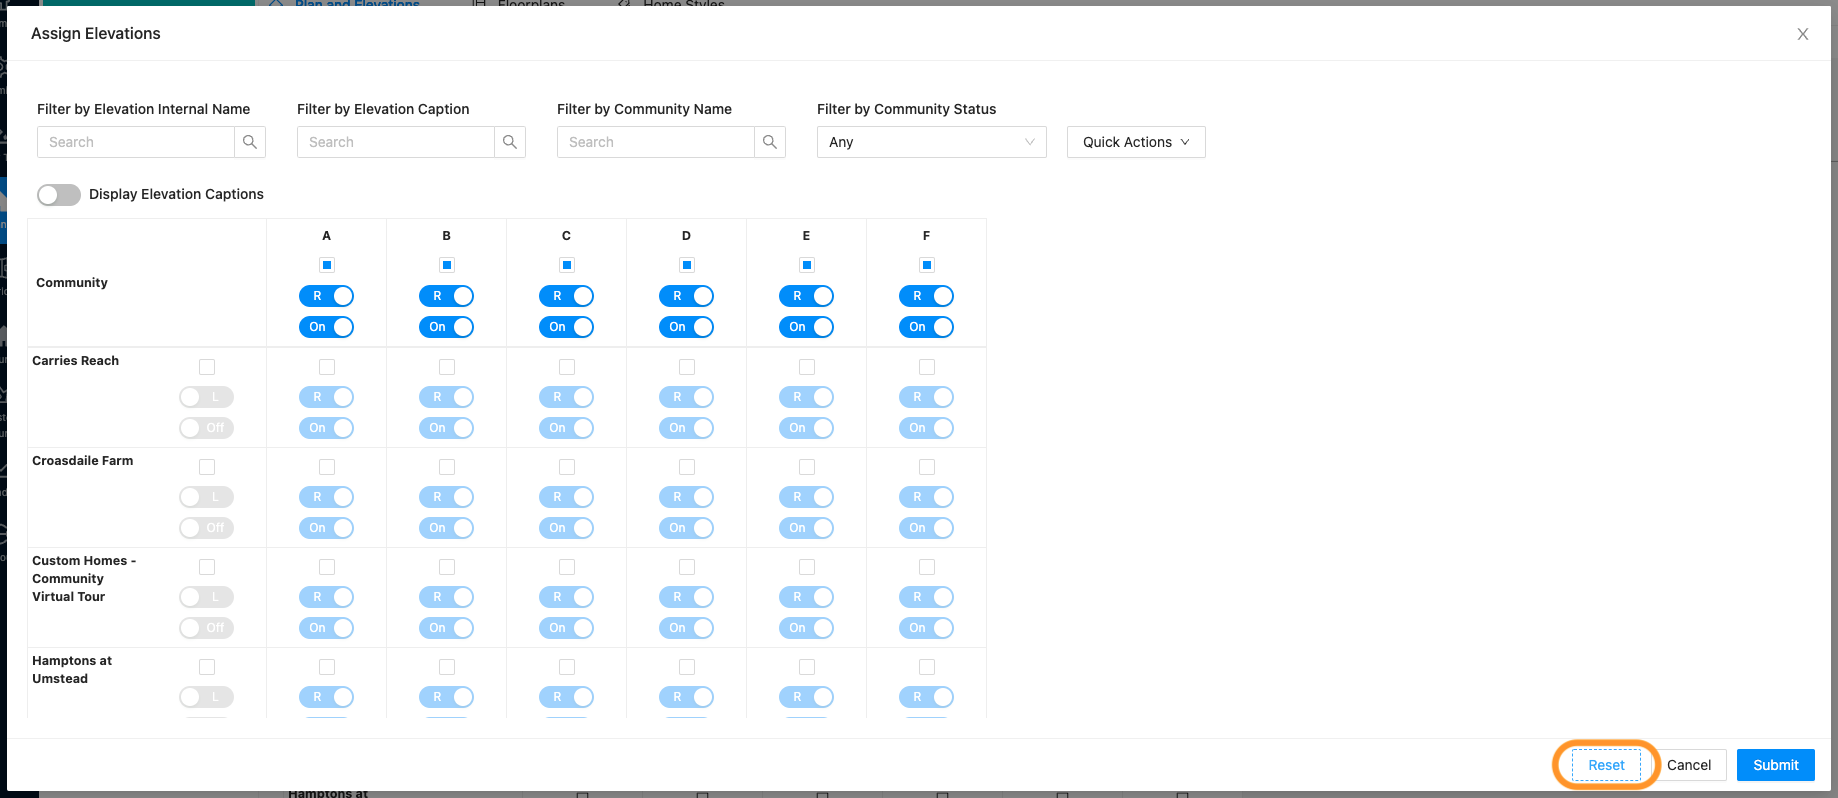
5. To undo any changes and go back to what the Assignments table reflected when you opened it, click “Reset”
To set up mirroring and garage position at the community level (this will be specific only to the community selected):
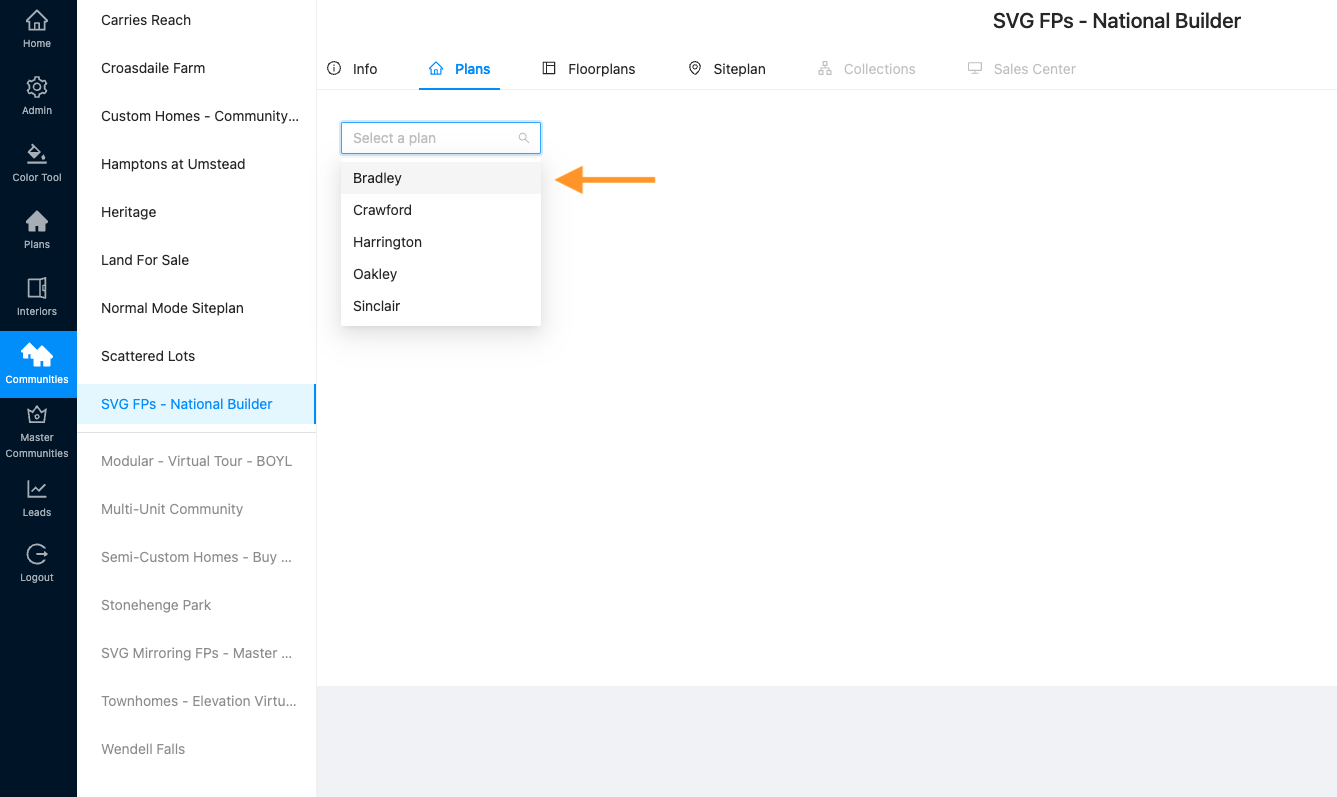
- Navigate to Communities and select the correct community. Then click “Plans”
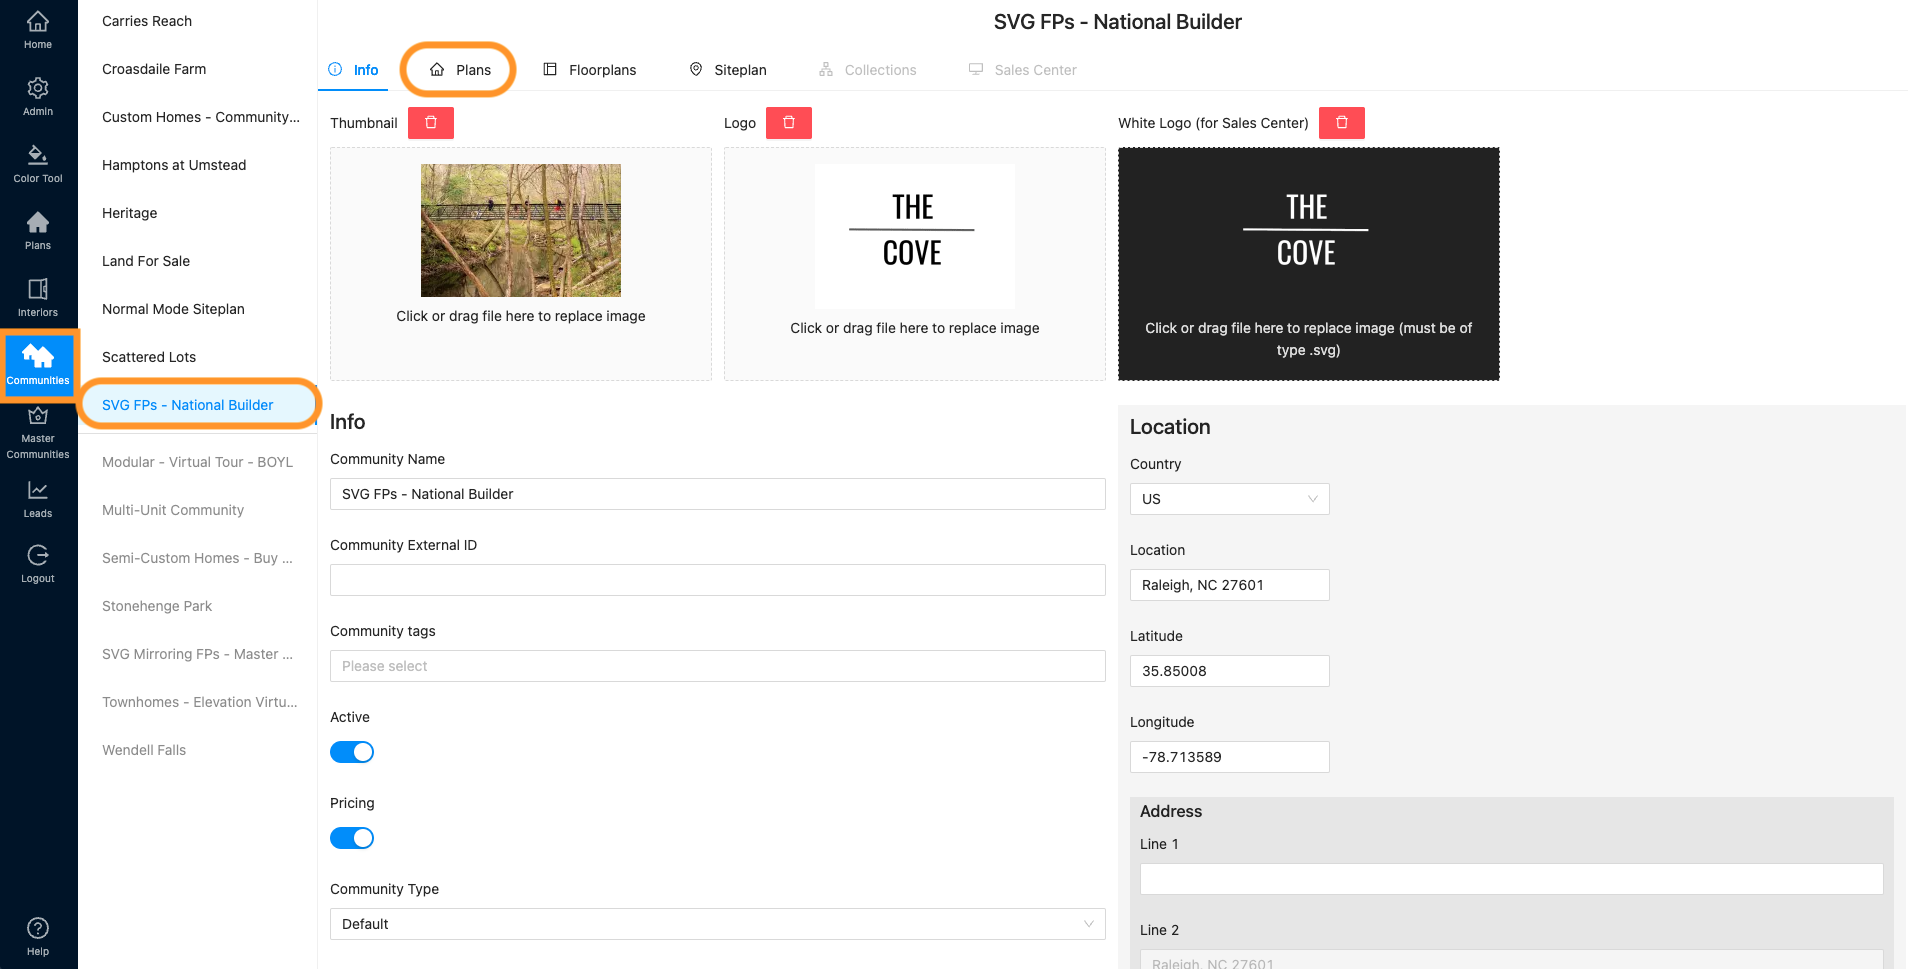
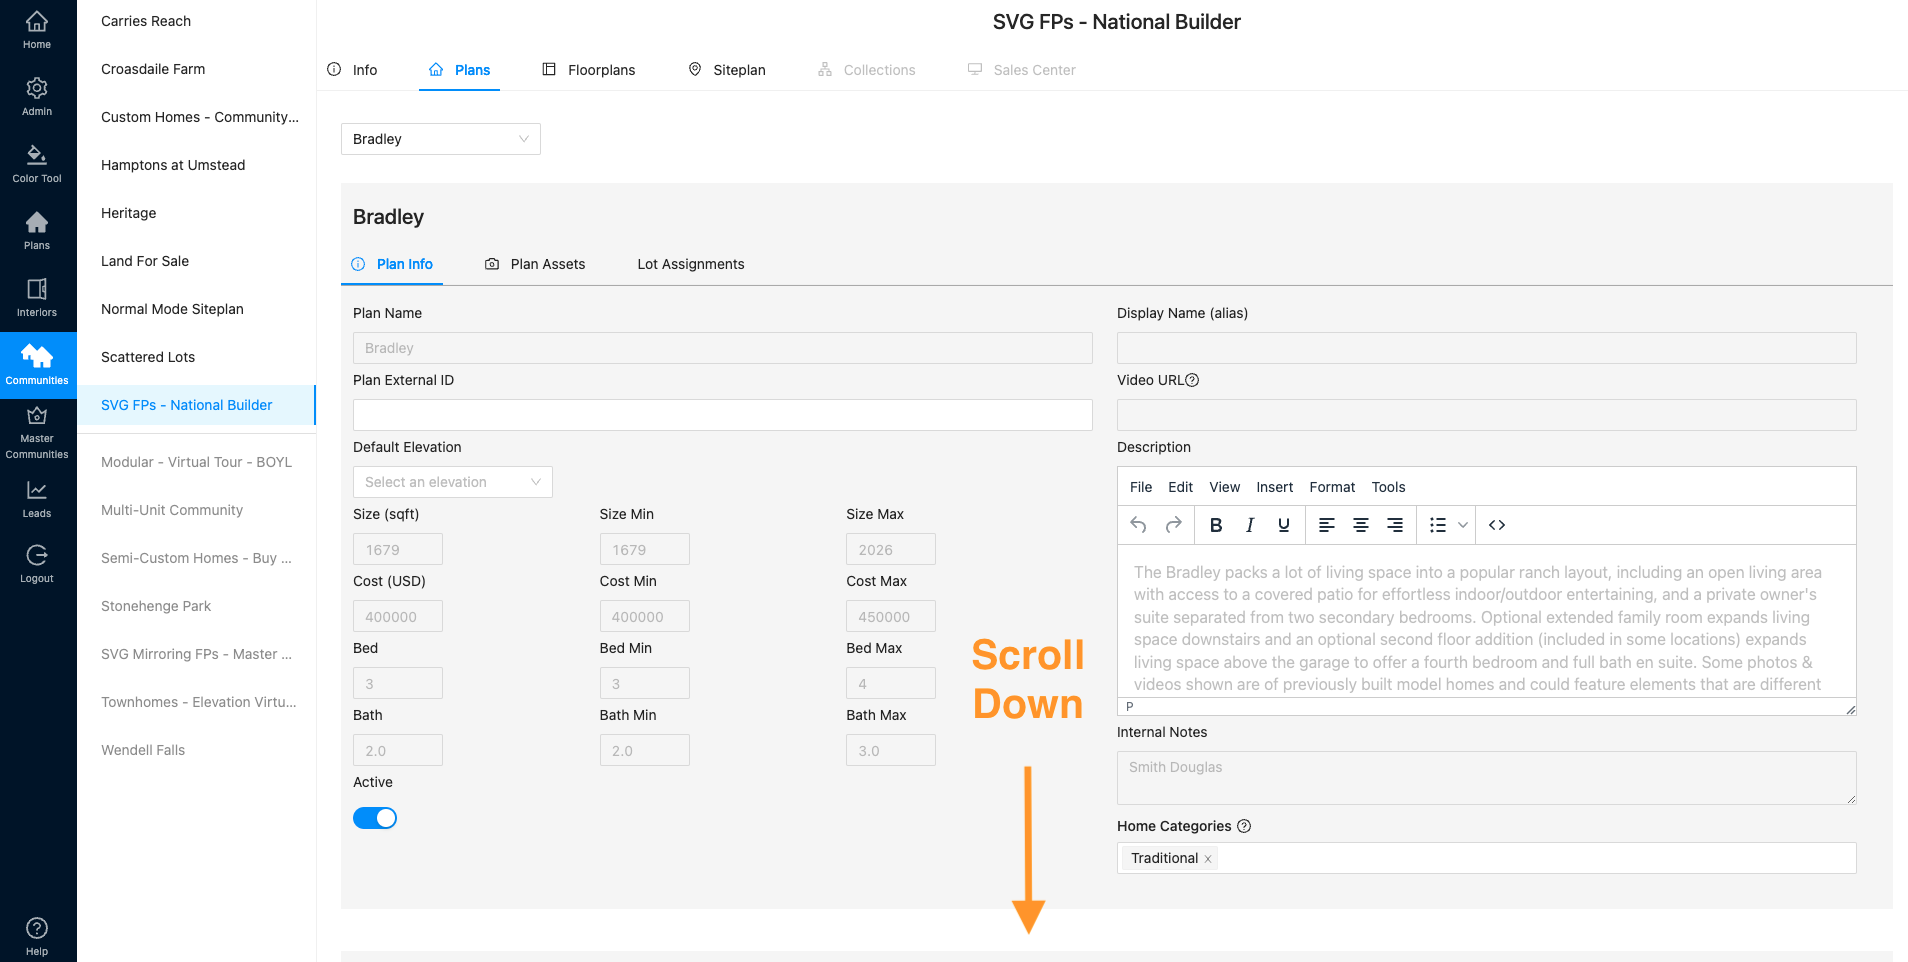
2. Select the correct plan from the dropdown menu.
3. Scroll down to select the correct elevation.
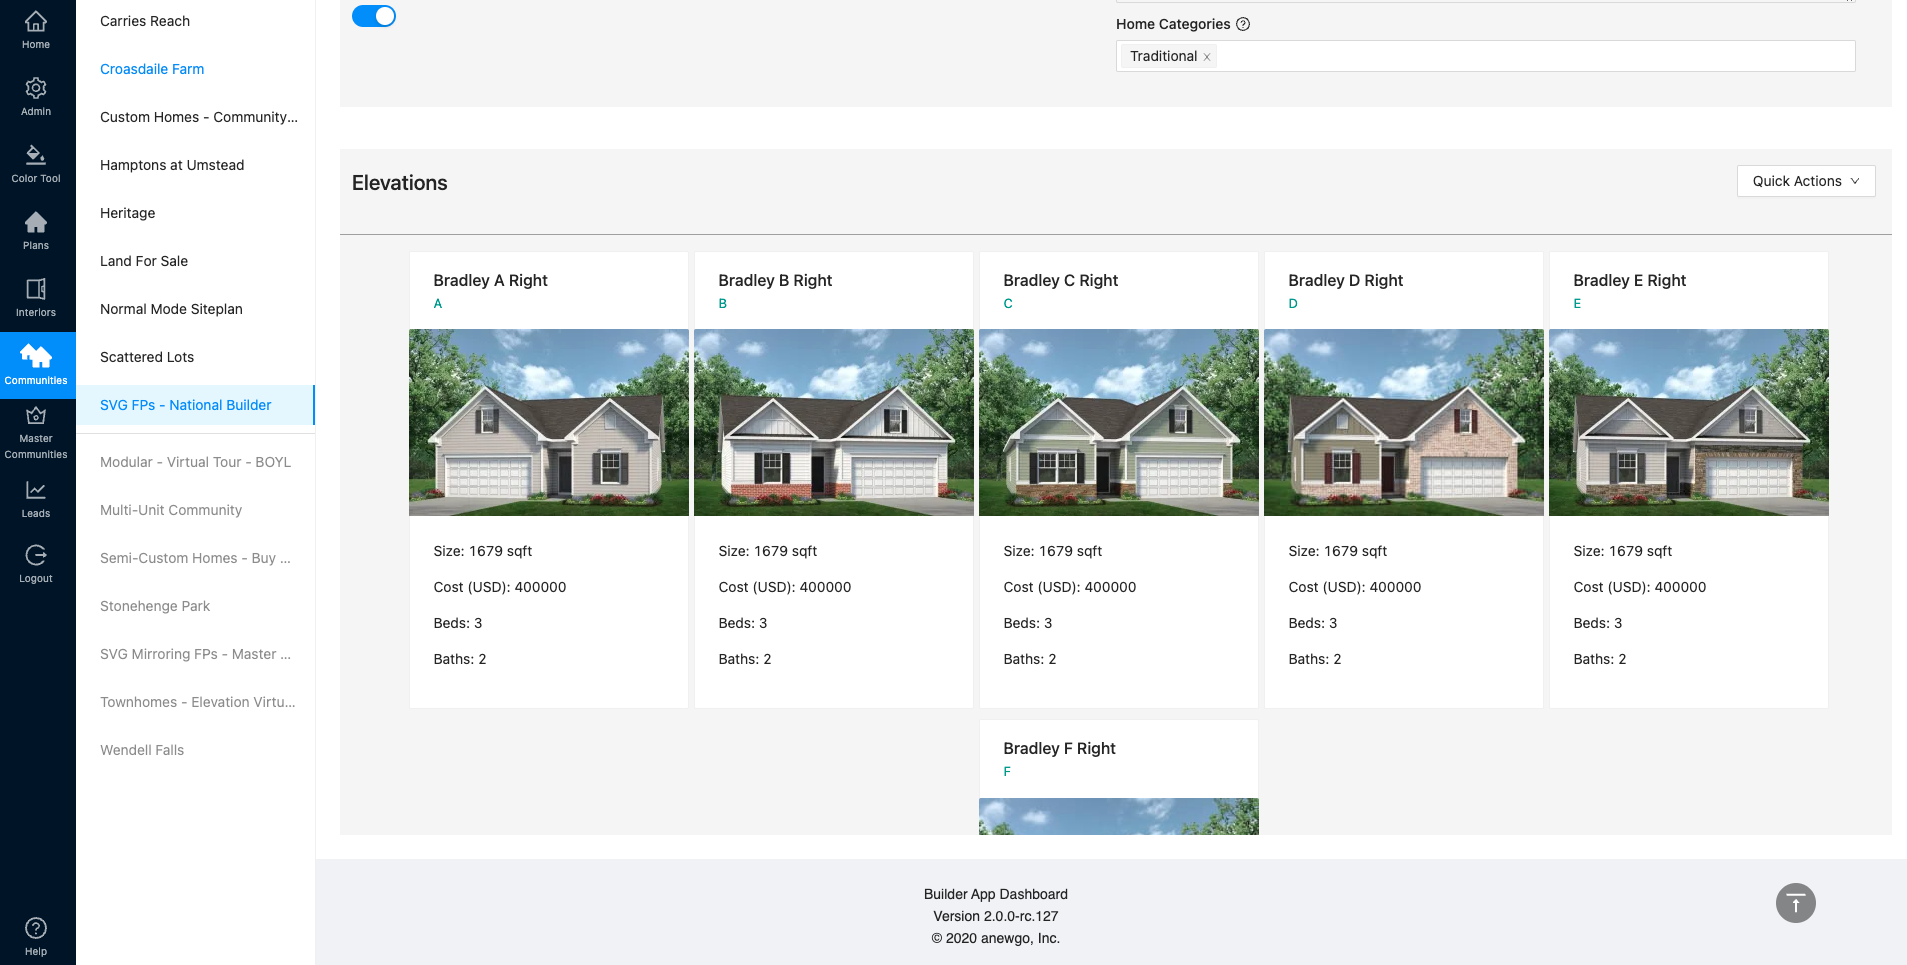
4. Here you can set/edit the mirroring and garage position for this particular elevation in this specific community.