Please note: the Sales Center App mentioned below is an additional cost/upgrade. Please contact your Account Manager for more details.
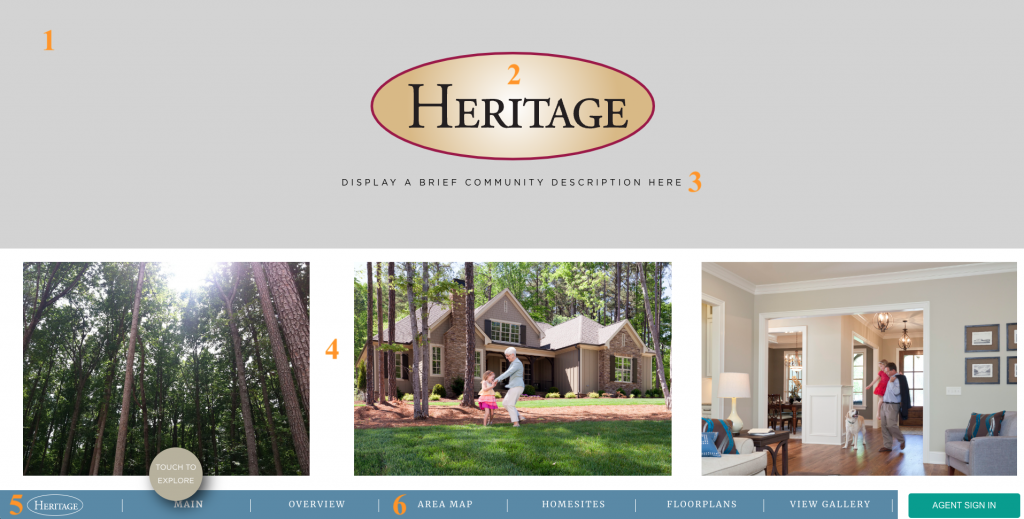
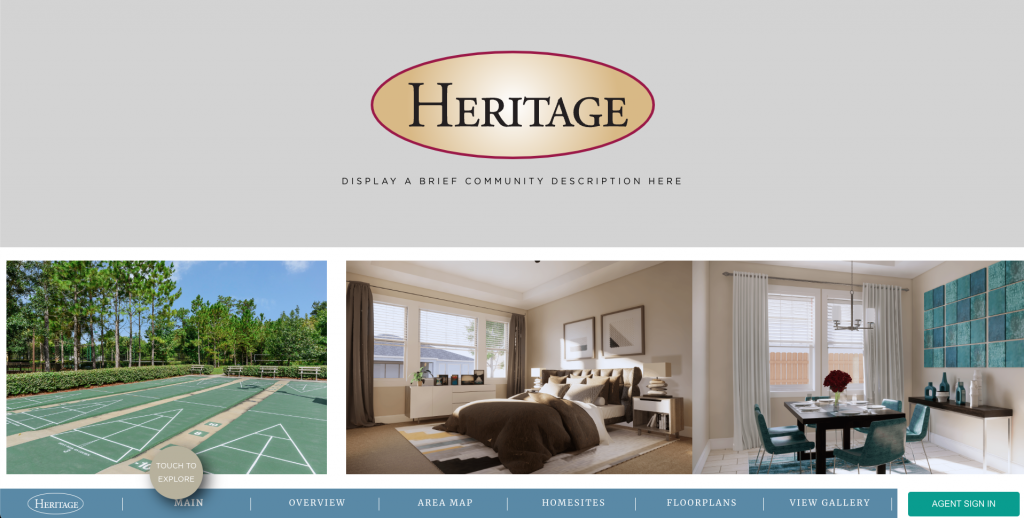
- The background color of this section is customizable. Please contact your Account Manager or kim@anewgo.com to let us know what you would like.
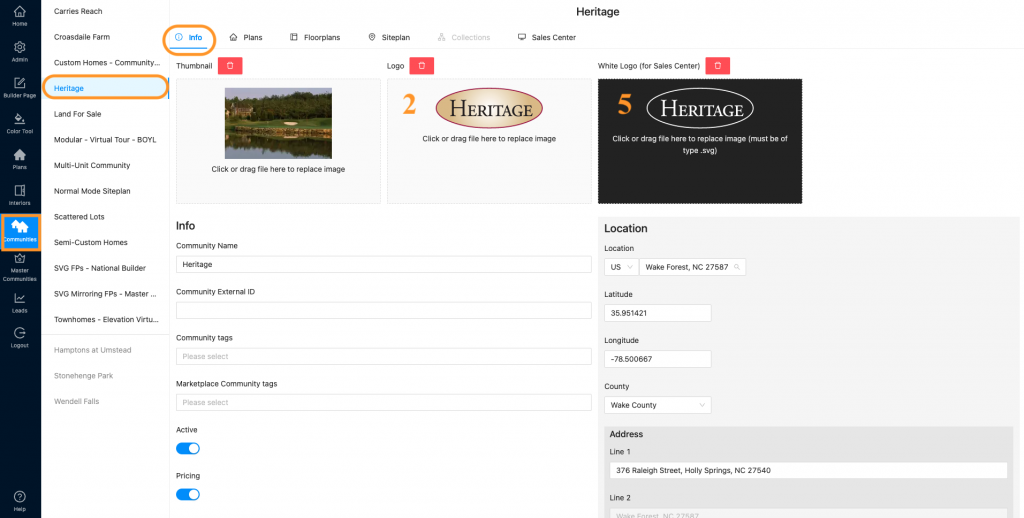
- The logos in areas 2 (Logo) & 5 (White Logo) can be uploaded on your backend dashboard in Communities > Info. Make sure the community you are working with is selected in the left hand column.
- The caption (area 3) can also be found on your backend dashboard in Communities > Info. Scroll down to the “Caption” box.
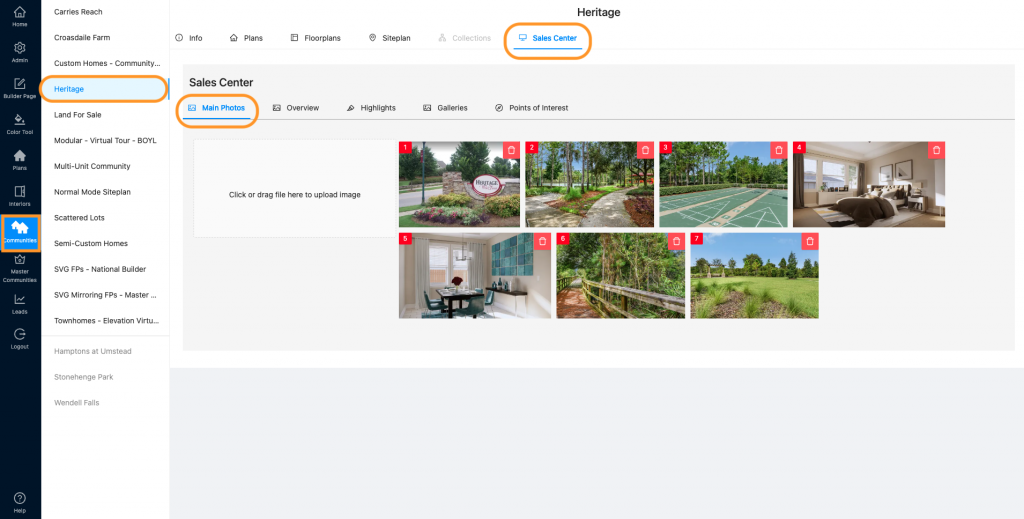
- The images appearing in section 4 are upload in Communities > Sales Center > Main Photos. If you add more than three, the images will scroll left to right at the bottom of the page. You can see how to edit Main Photos in more detail here.
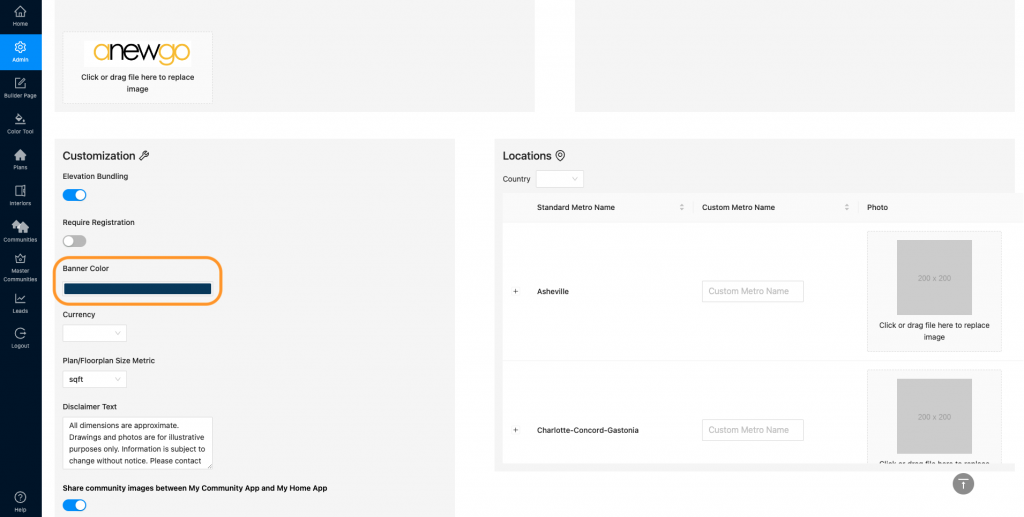
- The banner color in area 6 can be edited in your backend dashboard under the Admin tab. Scroll down until you see the “Banner Color” bar. Click on the bar to edit the color. Note: this will also affect the block colors in the brochure on the front end of your My Home App. See step 7 in this tutorial for more detail. This color can also be customized – please contact your Account Manager or kim@anewgo.com for more information.
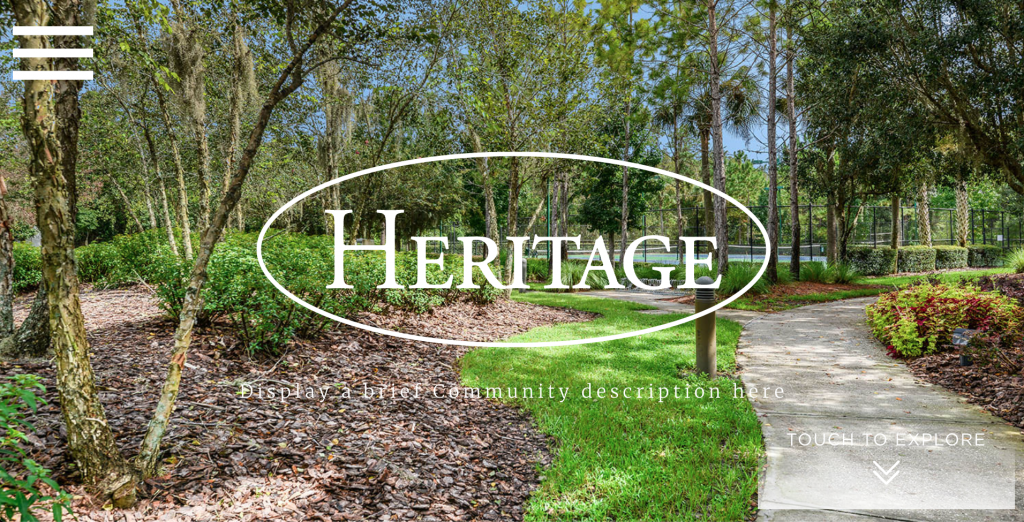
- There is also a splash intro page that can be customized. You can see it by clicking on the white logo in the lower left corner. The default settings will be a granite background with your white community logo. To customize, contact your Account Manager or kim@anewgo.com to add a slideshow of images or short video.
For more details on how to set up the other areas of your Sales Center – see the complete tutorial page here.
Note: We can import data from one completed kiosk to another one for the following sections: Photos, Overview Photos, Main Photos, Highlights, Galleries, and Points of Interest. Contact your Account Manager or kim@anewgo.com if you would like to do this.

