
- To edit basic plan information for your elevations, click on the “Plans” tab which will automatically bring you to “Plans and Elevations” & “Plan Info.” Make sure the plan you want to edit is selected in the plans column to the left.

- Here you can add/edit basic information. In this view, your changes will apply to each elevation in the bundle.

- You can also set ranges for square footage, cost, number of bedrooms, and number of bathrooms. If nothing is entered in these fields, the information to the left will be displayed as you can see in step 2.

- To make individual edits to each elevation, scroll down and select an elevation.

- Here you can add/edit options for each specific elevation. Note: Anything you add here will override what you have entered in the above “Plan Info” section. What you have entered in “Plan Info” auto-populates to these fields, but once you select a field and start typing, you can change it.

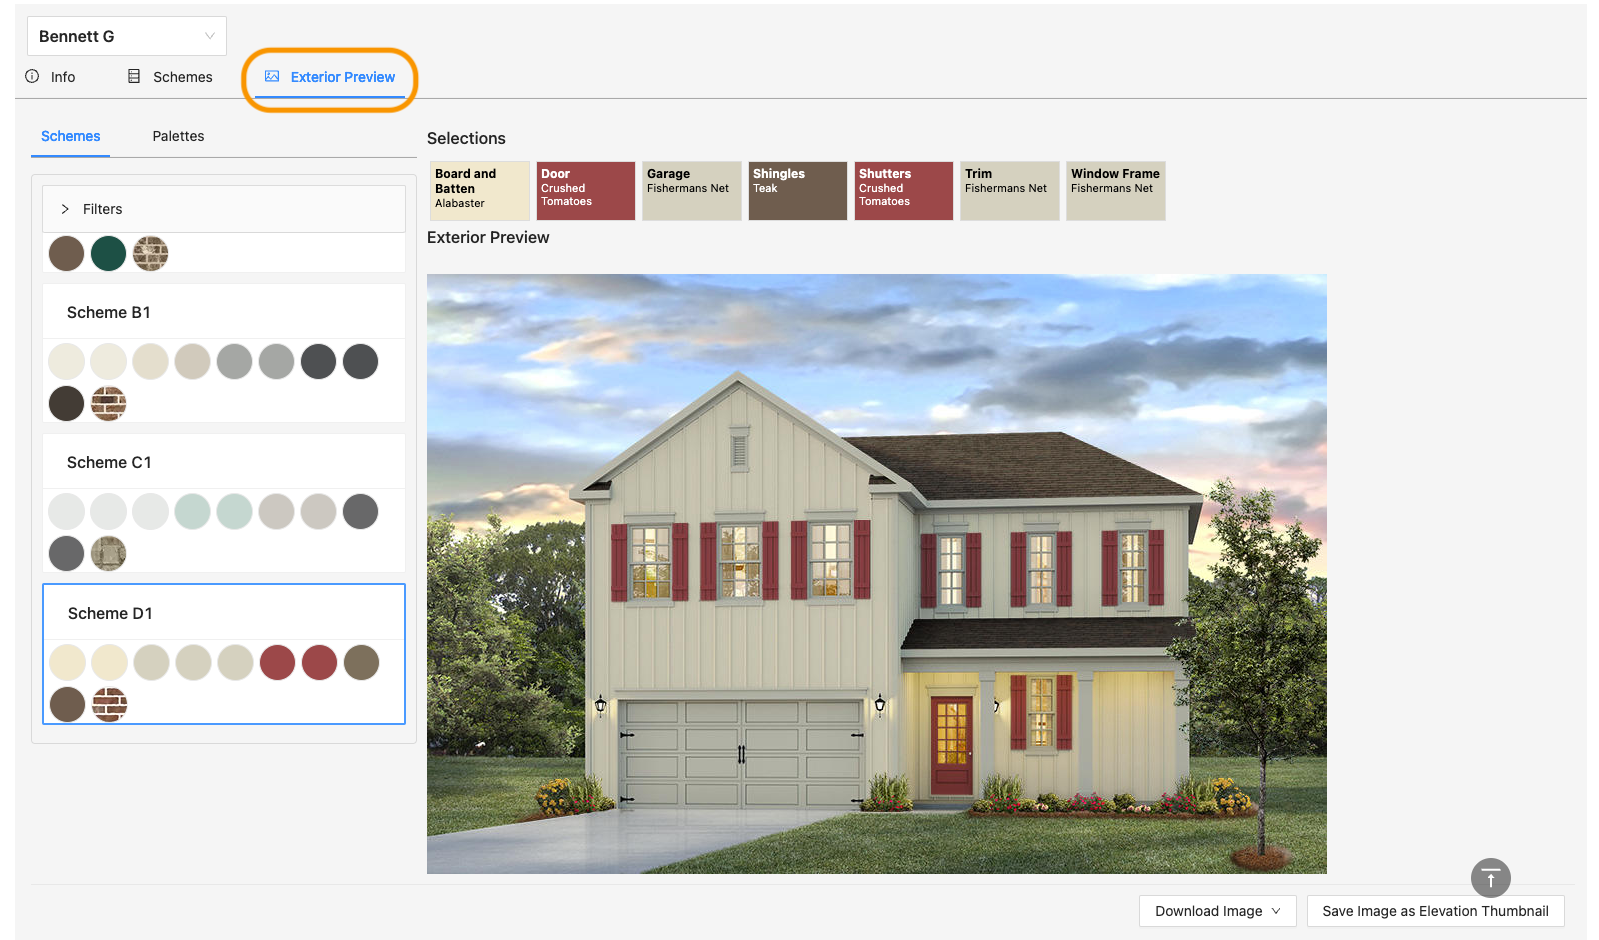
- You can edit your color scheme assignments for this elevation in the “Schemes” tab. You can also preview your scheme assignments on the elevation under “Exterior Preview.” You can find that tutorial here.

See here to make plan edits at the community level (which will override both the elevation and plan level). Also, you can find other tutorials on how to add photos and assign elevations to communities here.